Table of Contents
Advertisement
Quick Links
Advertisement
Table of Contents
Troubleshooting

Related Manuals for Rice Lake TS Series


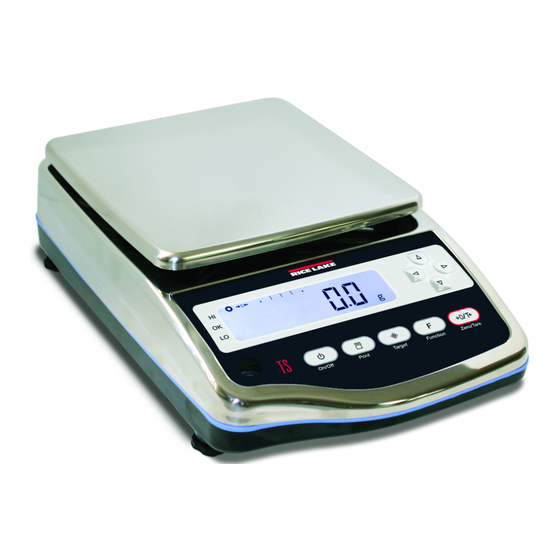
Summary of Contents for Rice Lake TS Series
- Page 1 Rice Lake TS Series Tuning Fork Stainless Steel Electronic Balance Operation Manual IMPORTANT • To ensure safe and proper use of the balance, please read this manual carefully. • After reading this manual, store it in a safe place near the balance, so you can review it as needed.
-
Page 3: Table Of Contents
ID No. Setting ..........59 1 7 B 3 .5 Measuring Specific Gravity ......32 2 8 B 5 .6 Improving the Stability of the Balance..... 62 4 6 B M easurement procedures for specific gravity ..33 RL-TS Series Operation Manual... - Page 4 4 0 B A ppendix 5 Conversion Table Units ....98 TS Series Limited Warranty ........ 99 © 2011 Rice Lake Weighing Systems. All rights reserved. Printed in the United States of America. Specifications subject to change without notice. July 2011...
-
Page 5: Safety Precautions
The following symbols give instructions that you need to follow: Indicates a “prohibited” action. Indicates a “mandatory” action that must be executed without fail. Indicates actions that require caution. To prevent danger to humans and damage to property, be sure to follow the following instructions: RL-TS Series Operation Manual... -
Page 6: 7 B A Ppendix
Use of other types of AC Doing so could result in an adapters may result in electrical shock, which heat generation, fire, or may cause an accident malfunction of the with injury or death. balance. RL-TS Series Operation Manual... -
Page 7: 8 B A Ppendix
To clean the unit To prevent breakage or of stains, use a piece of malfunction, place the dry cloth or cloth soaked sample to be measured in a small quantity of on the balance carefully. neutral detergent. RL-TS Series Operation Manual... -
Page 8: 9 B A Ppendix
When the balance is tilted, sample, the balance may an error may be caused, tip or move, preventing preventing accurate accurate measurements measurement from being from being conducted. conducted. Place the balance on a level surface. RL-TS Series Operation Manual... -
Page 9: 0 B A Ppendix
Do not use batteries that leak. Observe the precautions printed on the batteries or rechargeable batteries. Dispose of batteries in accordance with local regulations. RL-TS Series Operation Manual... -
Page 10: H Ow To Read This Manual
4 2 B In this manual, the following notation is used. The balance Refers to a TS series product. Measure Refers to measuring a sample by placing it on the pan. Other expressions such as “weigh” and “measure weight” may also be used. -
Page 11: How To Begin
Before your first use of the balance, be sure to read this chapter. This chapter includes: Checking Supplied Items Names and Functions of Component Parts Workings of Operation Keys How to Read Displayed Signs Assembling and Installing the Balance RL-TS Series Operation Manual... -
Page 12: Checking Supplied Items
In the unlikely event of problems such as missing or broken items, please contact the retailer from whom the balance was purchased or our Sales Office (See the Appendix at the end of this manual). TS main unit Pan base AC adapter RL-TS Series Operation Manual... -
Page 13: Names And Functions Of Component Parts
Connector cover AC adapter jack cap AC adapter jack Use to connect the power cord. Underfloor weigher hole cover (Rubber cap) For hanging measurement, use the underfloor weigher fixture option (Refer to “Measuring Specific Gravity” (P.28)). RL-TS Series Operation Manual... - Page 14 - When the buzzer option, the full-pack option, and the limit contact output option are used - Do not scratch or make a hole in the panel surface (display, operation keys). Water and dust may enter the unit. 10 RL-TS Series Operation Manual...
-
Page 15: Workings Of Operation Keys
- Continuously press and hold: Hold down the key for three seconds or longer. Pressing a key can sound the buzzer or change buzzer sound tones (Refer to “Appendix 1: Function Setting List” P. RL-TS Series Operation Manual 11... -
Page 16: How To See Displayed Signs
When this indicator blinks, the batteries are dead. Indicates that gross weight is being displayed. Indicates that data is being output. Indicates that the balance is in animal weighing mode. Lights up when a tare range is set. 12 RL-TS Series Operation Manual... - Page 17 (Upper) Indicates that a weight value is being held in animal weighing mode. The response speed in animal weighing mode is indicated with the position to which points. Fast = fine/Normal = middle/Slow = weak RL-TS Series Operation Manual 13...
-
Page 18: Assembling And Installing The Balance
Attach the pan. Place the pan on the pan base. Connect the power cord. Connect the jack provided on the rear of the main unit to a power receptacle using the AC adapter. 14 RL-TS Series Operation Manual... - Page 19 - After the air bubble in the level is within the circle, push the four corners of the balance to check that there is no play. RL-TS Series Operation Manual 15...
- Page 20 16 RL-TS Series Operation Manual...
-
Page 21: Basic Operation
This chapter includes: Powering On/Off the Balance and Checking Operation Weighing by Placing a Sample in a Container (Tare) Weighing an Added Sample Displaying the Sum of the Container and the Sample Function Setting Basics RL-TS Series Operation Manual 17... -
Page 22: Operation
- The bar graph is displayed in the display. This graph shows the current weighted state as a ratio to the weighing capacity. The closer to the right side of the bar, the closer the weight is to the weighing capacity. 18 RL-TS Series Operation Manual... -
Page 23: Weighing By Placing A Sample In A Container
The weight of only the sample is displayed. When a tare range is set, the weighable range is reduced by the weight of the Reference tare. Weighable range = original weighing capacity – pan weight RL-TS Series Operation Manual 19... -
Page 24: Weighing An Added Sample
The weight of the placed sample is displayed. Set the tare. Press the [Zero/Tare] key. The readout becomes zero (tare range setting). Place the additional sample. The weight of only the added sample is displayed. 20 RL-TS Series Operation Manual... -
Page 25: Sample
The sum weight of the container and the sample is displayed (gross readout). When a gross weight is displayed, “B/G” lights up. Pressing the [Function] key toggles the display between gross and net. [Function] key RL-TS Series Operation Manual 21... -
Page 26: Function Setting Basics
Example: By pressing the [Zero/Tare] key twice, select “2.SEL 2.” Save the setting. Press the [Target] key to complete the setting. The display returns to showing the sample’s normal weight. To cancel, press the [Print] key. 22 RL-TS Series Operation Manual... - Page 27 Function setting is possible with the direction keys. After switching to the function setting mode with step 1, use the direction (arrow) keys to change setting items and settings. To complete the setting, press the [Target] key. Reference RL-TS Series Operation Manual 23...
-
Page 28: Various Measuring Methods
This chapter includes: Weighing (Weighing Machine) Counting Parts Count Measuring Percentage Obtaining Weight Multiplied by Coefficient Measuring Specific Gravity Weighing an Animal Adding Multiple Measurements Evaluating “More” and “Less” (Limit Function) RL-TS Series Operation Manual 24... -
Page 29: Weighing (Weighing Machine)
) .) “1.SEt” is displayed. Select “Weighing Machine.” Press the [Zero/Tare] key several times to select “1.SEt 1.” Press the [Target] key. The setting is saved and the display returns to showing the sample’s normal weight. RL-TS Series Operation Manual 25... -
Page 30: 4 B 3 .2 Counting Parts Count
If the samples vary considerably in size or are lightweight, set a greater number of samples. Weigh the samples. Place the set number of samples on the pan and then press the [Function] key. The displayed sample quantity (Example: “on 10 Pcs”) blinks.” 26 RL-TS Series Operation Manual... -
Page 31: 9 B D Isplaying Average Sample Weight
Even when these indications are displayed, sampling is possible. In this case, however, counting accuracy is low. [L - Err] is displayed to indicate that the average sample weight is smaller than the weighable unit weight (Refer to “Appendix 4: Specifications” (P. ) ). RL-TS Series Operation Manual 27... -
Page 32: Measuring Percentage
[Function] key. The reference weight is saved. Weigh. The display indicates the percentage of the sample with respect to the reference sample weight. Pressing the [Function] key toggles the display between percentage weight and total weight. 28 RL-TS Series Operation Manual... -
Page 33: 5 B S Etting A Reference Weight By Entering A Value
3. Pressing the [Function] key selects the number and the next digit blinks. Set the reference weight by repeating steps 2 and 3. Pressing the [Print] key can cancel the setting. Save the value. Press the [Target] key to save the reference weight. RL-TS Series Operation Manual 29... - Page 34 Lower weight limit × 100 ≤ Reference weight The “L-Err” display indicates that the reference weight is below the lower weight limit where weighing is impossible. For more information on the weight limit in percentage weighing, refer to “Appendix 4: Specifications” (P. 30 RL-TS Series Operation Manual...
-
Page 35: Obtaining Weight Multiplied By Coefficient
Pressing the key toggles the number between 0 and 9, and decimal point. Pressing the [Function] key selects the number and the next digit blinks. Set the coefficient by repeating steps 2 and 3. Pressing the [Print] key can cancel the setting. RL-TS Series Operation Manual 31... - Page 36 The weight of the sample is multiplied by the coefficient, and the result is displayed. The increment of the minimum readability is automatically set to 1, 2, or 5 Reference depending on the entered coefficient. 1 7 B 32 RL-TS Series Operation Manual...
-
Page 37: Measuring Specific Gravity
Prepare the following equipment and sample: Using smaller size samples may result in inaccurate measurements. Use as large a sample as possible. To measure specific gravity correctly, set the water temperature. Measure the in-container Reference water temperature beforehand. RL-TS Series Operation Manual 33... -
Page 38: 8 B M Easurement
For a liquid medium other than water, set the density. The value set is held even after the power is turned off. The acceptable range of water temperature is 0 to 99.9°C. Pressing the [Print] key can cancel the setting. 34 RL-TS Series Operation Manual... - Page 39 After the weight display is stable, press the [Target] key. The measured specific gravity value is displayed. Do not allow the cage to touch the liquid container. Reference Press the [Target] key to return to showing the sample’s normal weight. RL-TS Series Operation Manual 35...
-
Page 40: 9 B U Sing A Liquid Medium Other Than Water
If any statistical calculation is made for the printer, the values in the second line shown in the figures below will be printed being prefixed by a serial number. Set language for printing by the function setting “E3.P.F.” (language for printing) (1 = English/2 = Japanese). Gravimeter measurement data output samples 36 RL-TS Series Operation Manual... - Page 41 RL-TS Series Operation Manual 37...
-
Page 42: Weighing An Animal
When automatic tare range setting is ON, a tare range is automatically set after the animal is removed and weight variations fit within a set range. When automatic tare range setting is OFF, a held value is displayed until the [Zero/Tare] key is pressed. 38 RL-TS Series Operation Manual... - Page 43 If the animal moves too much, the value may not be held. The measurement unit used in animal weighing is “g” only. In animal weighing, because stability detection ranges are wide, errors may occur compared to actual weight. 1 9 B RL-TS Series Operation Manual 39...
-
Page 44: Adding Multiple Measurements
Press the [Function] key. After “2.C.A d.” is displayed, press the [Zero/Tare] key to set the value. 1: Cumulate function 2: Net addition function Finish setting. Press the [Target] key. The addition function is set. 40 RL-TS Series Operation Manual... -
Page 45: 2 B W Eighing With Addition Function
The function setting “H. tA” can be used for turning ON/OFF the function to wait for stabilization upon additions (Refer to “Appendix 1: Function Setting List” (P. ) ). RL-TS Series Operation Manual 41... -
Page 46: Judging "Above" And "Below" (Limit Function)
Below the lower limit Set the function setting “・A.LG.” to “•” (2-point bar graph )(Refer to “Appendix 1: Function Setting List” ) ). Bar graph display is possible only for “two point setting.” 42 RL-TS Series Operation Manual... -
Page 47: Judgment Criteria And Limit Value Setting
- Before setting limit values, as required, adjust the zero-point or set a tare range. - If the limit value entries are not lined up in the order of magnitude, three “◄” will be lit. Enter the values again. RL-TS Series Operation Manual 43... -
Page 48: 3 B L Imit Function Setting
LO are judged). Set the judgment method. Press the [Function] key several times to select “24.tP.” Press the [Zero/Tare] key to select the judgment method. 1: Judge by absolute values. 2: Judge by deviation values. 44 RL-TS Series Operation Manual... -
Page 49: 4 B J Udging By Absolute Values
Weigh. Place a judgment target sample on the pan. The OK, LO, or HI result judged from the upper and lower limit values is displayed with the “◄” indication. RL-TS Series Operation Manual 45... - Page 50 Weigh. Place a judgment target sample on the pan. The OK, LO, or HI result judged from the upper and lower limit values is displayed with the “◄” indication. 46 RL-TS Series Operation Manual...
-
Page 51: 5 B J Udging By Deviation Values
Weigh. Place a judgment target sample on the pan. The OK, LO, or HI result judged from the upper and lower limit values is displayed with the “◄” indication. RL-TS Series Operation Manual 47... - Page 52 For the case of two point setting, “H.SEt” is displayed. Enter the upper limit value. Enter the upper limit value by using the same operation as with step 2. The judgment value is saved and then the balance goes back to normal display. 48 RL-TS Series Operation Manual...
- Page 53 Weigh. Place a judgment target sample on the pan. The OK, LO, or HI result judged from the upper and lower limit values is displayed with the “◄” indication. RL-TS Series Operation Manual 49...
-
Page 54: Adjusting The Scale
4.0 Adjusting the Scale Calibrate the balance using weights. This chapter includes: How to Calibrate Testing the Balance RL-TS Series Operation Manual 50... -
Page 55: How To Calibrate
The balance goes back to normal display. Start span adjustment. Keep holding down the [Function] key until “CAL” is displayed. <Press and hold> Start zero-point adjustment. Releasing the finger changes the display to the blinking of “on 0,” starting zero-point adjustment. RL-TS Series Operation Manual 51... - Page 56 - The “1 - Err” display indicates that you used a weight weighing less than 50% of the Reference weighing capacity. - The “2 - Err” display indicates that an error over 1.0% was detected, or the balance failed. For more information, refer to “Section 7-2: Troubleshooting” (P. 52 RL-TS Series Operation Manual...
-
Page 57: Testing The Balance
A weight error is as follows: Weight error = True value – Current weight When a weight error is more than “0”, the displayed weight is less than the actual weight. Press any key to return to normal display. RL-TS Series Operation Manual 53... -
Page 58: Function Setting
5.0 Function Setting Set the functions of the balance. This chapter includes: Using Two Expression Units by Switching Them Minimum Readability Setting Saving Container (Tare) Weight Power Setting ID No. Setting Improving the Stability of the Balance 54 RL-TS Series Operation Manual... -
Page 59: Them
Save the setting. Press the [Target] key. The balance goes back to normal display. How to switch between unit A and unit B Pressing the [Function] key during measurement switches between unit A and unit B. RL-TS Series Operation Manual 55... -
Page 60: Minimum Readability Setting
Minimum readability example Setting TS-220~820 TS-2200~8200 TS-15K value 0.01 0.00001 0.05 0.005 0.0001 0.05 0.001 0.02 0.00002 0.1 0.01 0.0002 0.002 0.05 0.00005 0.2 0.02 0.0005 0.005 0.0001 0.05 0.001 0.01 0.0002 0.002 0.02 56 RL-TS Series Operation Manual... -
Page 61: Saving Container (Tare) Weight
The balance goes back to normal display. Save the tare weight. Place the container (tare) to be saved for weight and then measure the tare. The saved tare weight is updated every time a tare range is set. RL-TS Series Operation Manual 57... -
Page 62: Power Setting
An object is placed on the pan, and display is not stable. The balance is operated on the AC adapter. To use the balance again after it is powered off, start from turning the power on. 58 RL-TS Series Operation Manual... -
Page 63: 7 B A Uto Backlight Off
- Function settings are set. Reference - An object is placed on the pan, and display is not stable. Placing an object on the pan or pressing any key turns the backlight on again automatically. 2 7 B RL-TS Series Operation Manual 59... -
Page 64: Id No. Setting
2. Select a character by pressing the [Zero/Tare] key. Pressing the key toggles between space, 0 to 9, A to F, and – (minus). 3. Pressing the [Function] key blinks the next digit. Set the ID number by repeating steps 2 and 3. 60 RL-TS Series Operation Manual... - Page 65 Save the ID number. Press the [Target] key. Display changes to “ ” Pressing the [Target] key again returns the balance to normal display. RL-TS Series Operation Manual 61...
-
Page 66: 8 B 5 .6 Improving The Stability Of The Balance
4.5.d. = Stability judgment 5.r.E.= Response speed b2.d.A = Minimum readability setting (A) b4.d.b = Minimum readability setting (B) Select a setting. Press the [Zero/Tare] key to select the setting values of each function (see the above table). 62 RL-TS Series Operation Manual... - Page 67 Save the setting. Press the [Target] key. The balance goes back to normal display. RL-TS Series Operation Manual 63...
-
Page 68: Input/Output To/From External Devices
Balance data can be output to a printer and be input and output to/from external devices via the RS-232C interface. This chapter includes: Outputting to a Printer Connecting to External Devices via RS-232C Interface Communication Data and Commands RL-TS Series Operation Manual 64... -
Page 69: Outputting To A Printer
Select “1” by pressing the [Zero/Tare] key. Press the [Function] key several times to select “E1.C.o.” Select “1” by pressing the [Zero/Tare] key. Save the setting. Press the [Target] key. The balance goes back to normal display. RL-TS Series Operation Manual 65... -
Page 70: Printing Measurement Results
- Pressing the [Print] key at any time during measurements prints result data. - After the measurement is completed, press and hold the [Print] key. The footer is printed. Do not press any keys on the printer during printing. 66 RL-TS Series Operation Manual... -
Page 71: Connecting To External Devices Via Rs-232C Interface
The RS-232C connector equipped on the balance has the following pin alignment: Pin number Signal name Input/Output Function & Remarks Input Receiving data Output Transmitting data Output HIGH (When the balance is powered ON) Signal ground EXT.TARE Input External tare range setting RL-TS Series Operation Manual 67... -
Page 72: 2 B S Ample Connection With A Pc
20 mA.) S ample connection with a PC 6 2 B Use the following examples as a guide to connect the balance to external devices using the cable. - Sample connection with a PC/AT compatible machine 68 RL-TS Series Operation Manual... -
Page 73: 3 B I Nterface Specifications
(“7 bit” can be specified only for the extended 7-digit numeric format.) Parity bit: 0/1 bit Stop bits: 2/1 bit (“1 bit” can be specified only for the extended 7-digit numeric format.) Parity bit None/Odd/Even RL-TS Series Operation Manual 69... -
Page 74: Communication Data And Commands
Press the [Zero/Tare] key to select a format. 1 = 6-digit numeric format 2 = 7-digit numeric format 3 = Extended 7-digit numeric format Save the setting. Press the [Target] key. The balance goes back to normal display. 70 RL-TS Series Operation Manual... -
Page 75: 7 B Data Format
- A space heading a numeric value SP (Space) - When numeric data does not contain decimal places, a space rather than a decimal point is output to the least significant digit. RL-TS Series Operation Manual 71... - Page 76 Indicates the judgment result when the limit function is used. Code Description Remarks Below (LO) 1- or 2-point scale Appropriate (OK) Above (HI) Cumulative value Data type Unit weight (SP) No judgment result or no data type specified Gross 72 RL-TS Series Operation Manual...
- Page 77 3000.1 g/No data type specified/Data stable (SP) (SP) +800.05 mom/Gross/Data unstable 250 pcs./Cumulative value/Data stable (SP) - 7-digit numeric format 3000.1 g/No data type specified/Data stable (SP) (SP) +800.05 mom/Gross/Data unstable 250 pcs./Cumulative value/Data stable (SP) RL-TS Series Operation Manual 73...
-
Page 78: 5 B I Nput Commands
Set tare range (adjust to zero-point). 01(CR)(LF) Set to continuous output. 08(CR)(LF) Output data (once immediately). Command form 8 1 B An input command consists of 4 characters including terminators (CR/LF). 8 2 B 74 RL-TS Series Operation Manual... - Page 79 - Commands O8 and O9 are used to request data from the balance. - Once executed, O0 to O7 commands are held. However, the status is reset to the function setting when the balance is turned on again. RL-TS Series Operation Manual 75...
-
Page 80: 6 B R Esponse
* If set to “[Cal] key disabled” (0) in the function setting “7.CA.,” a span adjustment and test command does not work. R esponse 6 6 B Upon receiving an input command, the balance sends out a response. 76 RL-TS Series Operation Manual... - Page 81 - Command error (when an errant command is received) - Numeric format error - Processing interrupted - Processing terminated abnormally - Other errors To switch between [“A00”/“Exx”] format and [ACK/NAK] format, use the function setting “67.R5.”. Reference 1: [“A00”/“Exx”] format 2: [ACK/NAK] format RL-TS Series Operation Manual 77...
-
Page 82: Troubleshooting
7.0 Troubleshooting This chapter describes troubleshooting including error messages and remedies. This chapter includes: Error Messages Troubleshooting Initializing Maintenance 78 RL-TS Series Operation Manual... -
Page 83: Error Messages
For span adjustment with an external weight, check adjustment with an external weight, or the that a correct weight is placed and that no objects other balance failed. than the weight are placed. Then, execute span adjustment again. RL-TS Series Operation Manual 79... - Page 84 The balance may be affected by an external influence initialization cannot be completed. such as wind and vibration. Relocate the balance by referring to the section “Do not use the balance in the following places” (P. v). 3 3 B 80 RL-TS Series Operation Manual...
-
Page 85: Troubleshooting
Take such as wind and vibration remedial actions or relocate the balance by during calibration. referring to the section “Do not use the balance in the following places” (P. v). Then calibrate again. RL-TS Series Operation Manual 81... - Page 86 Disable the auto power off function if it interferes with your use of the balance. 82 RL-TS Series Operation Manual...
-
Page 87: Initializing
The cable is disconnected or not Check for proper cable connection. properly connected. The current settings of the You can initialize the balance (“Section 7-3: balance are unknown. Initializing” (P. ) ). 3 4 B RL-TS Series Operation Manual 83... - Page 88 All function settings are initialized, discarding all data including ID numbers, limit values, data of parts counting, percentage weighing, unit converting, and gravimeter. Restoring the current status will be impossible. Before initializing the balance, record necessary function settings in a memo or otherwise. 84 RL-TS Series Operation Manual...
-
Page 89: Maintenance
Check that the power cap, the RS232 connector cap, and the battery case are tightly attached. Do not scratch the diaphragm and the bottom ventilation hole using a sharp object, hard brush, or other such hazardous tools. Diaphragm Bottom ventilation holes RL-TS Series Operation Manual 85... -
Page 90: Appendixes
Appendixes The appendixes provide data including each type of data for the balance. This chapter includes: Function Setting List Measurement Mode List Printing in Compliance with ISO/GLP/GMP Specifications 3 6 B RL-TS Series Operation Manual 86... - Page 91 Disabled results) Embed space (20H) Enabled (Measurement data in (Response A00, Exx Disabled compliance with GLP) commands) Enabled ACK, NAK (Language for English printing) Japanese (katakana) (Continued on next page.) RL-TS Series Operation Manual 87...
- Page 92 88 RL-TS Series Operation Manual...
- Page 93 RL-TS Series Operation Manual 89...
- Page 94 3 7 B 90 RL-TS Series Operation Manual...
-
Page 95: Measurement Mode List
Unit for weight fixed with g Animal Weight × × Holding function always weighing measuring enabled * For more information on unit A and unit B, refer to “Section 5-1: Using Two Expression Units by Switching Them” 3 8 B RL-TS Series Operation Manual 91... -
Page 96: Printing In Compliance With
Appendix 3 Printing in Compliance with ISO/GLP/GMP Span adjustment with external weight Span test with external weight 92 RL-TS Series Operation Manual... - Page 97 Measurement data: Header Measurement data: Footer The date and time shown in printing examples are printed only when the dedicated printer is used. RL-TS Series Operation Manual 93...
-
Page 98: Specifications
[Zero/Tare] key (Whether to wait for the balance to stabilize is selectable). Zero tracking Can be disabled by setting. Display when “o-ERR” is displayed when the weighing capacity is exceeded by 9 divisions. overloaded 94 RL-TS Series Operation Manual... - Page 99 RS232C). - Optional battery unit, limit contact output option, buzzer, and full-pack option cannot be used together. - The optional battery unit does not include batteries (use four AA batteries). 8 5 B RL-TS Series Operation Manual 95...
-
Page 100: 5 B Minimum Display By Unit Of Measurement
0.0005 0.0005 0.0005 0.0005 0.005 0.005 0.005 0.005 1600 2100 mom (momme) 0.005 0.005 0.005 0.005 0.05 0.05 0.05 0.05 (to) 0.001 0.001 0.001 0.001 0.01 0.01 0.01 0.01 * The view of the table 96 RL-TS Series Operation Manual... - Page 101 0.05 (lb) 0.005 (ozt) 0.05 9600 (dwt) Bottom right grain (Hong Kong) 0.05 (Singapore, Malaysia) 0.05 (Taiwan) 0.05 4000 mom (momme) 1200 (to) * The view of the table Upper cell: Capacity Lower cell: Readability RL-TS Series Operation Manual 97...
-
Page 102: Conversion Table Units
1 tl (HK) 577.61774 0.99020 0.99811 9.98107 3.20899 1 tl (SGP,Mal) 583.33333 1.00990 1.00798 10.07983 3.24074 1 tl (Taiwan) 578.71344 1.00190 0.99208 3.21507 1 mom 57.87134 0.10019 0.09921 0.32151 1 to 0.31162 0.30857 0.31103 3.11035 98 RL-TS Series Operation Manual... -
Page 103: Ts Series Limited Warranty
TS Series Limited Warranty Rice Lake Weighing Systems (RLWS) warrants that all RLWS equipment and systems manufactured and sold by RLWS and properly installed by an authorized RLWS Distributor or Original Equipment Manufacturer (OEM) will operate per written specifications as confirmed by the Distributor/OEM and accepted by RLWS. All systems and components are warranted against defects in materials and workmanship for five years.
Need help?
Do you have a question about the TS Series and is the answer not in the manual?
Questions and answers