Table of Contents
Advertisement
Advertisement
Table of Contents

Related Manuals for Rice Lake Digi DC-788


Summary of Contents for Rice Lake Digi DC-788
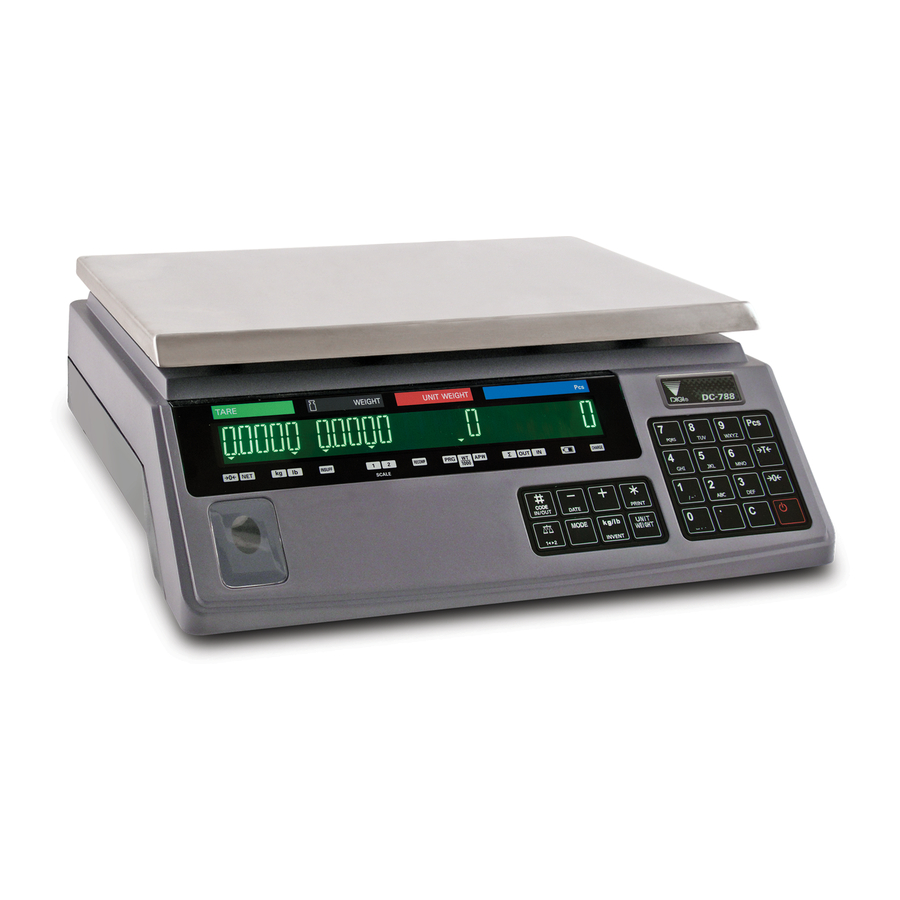
- Page 1 DC-788 Counting Scale Version 1.09 Counting Scale Operation Manual 91685...
-
Page 3: Table Of Contents
2.4 Powering Up the DC-788 ........ - Page 4 8.2 DC-788 Error Message List........
-
Page 5: Introduction
This manual contains operating procedures for the DC-788 counting scale and provides the user with all the information necessary for setup and operation. It is organized based on the procedures you will likely follow when setting up and using your counting scale. This manual applies to Version 1.09 of the DC-788 counting scale series. -
Page 6: Modes Of Operation
Table 1-2. DC-788 Display Specifications 1.3.2 Indicator Lamps Table 1-3 shows a list of the indicator lamps that the DC-788 uses to provide additional information about the value being displayed. The indicator lamps are illuminated when the specific function is being performed. Indicator Lamp... -
Page 7: Key Functions
Key Functions The DC-788 features many functions for managing inventory information and scale operation. Figure 1-2 shows the two key-sheet layouts and Table 1-4 lists the keys and key functions of the DC-788 keyboard and keypad. Figure 1-2. Key Sheet Layout Some keys have different functions depending on what mode or function you are in. - Page 8 Used to select between Scale 1 and Scale 2 if an external scale is connected. MODE key - Used to enter the programming mode from the weighing mode. Used to enter the command mode when using numeric commands. Table 1-4. DC-788 Key Functions DC-788 Operation Manual...
- Page 9 Used to convert the weighing units between kg and lb. Also used to toggle on and off whether inventory stored in memory is being affected by the current transaction. UNIT WEIGHT key - Used to set the unit weight and display all digits of the unit weight. Table 1-4. DC-788 Key Functions Introduction...
-
Page 10: Installation
3. Remove the bag protecting the scale and the protective film covering the front panel and platter. 4. Seat the stainless steel platter on the platter supports, with the four corner pins inserted into the corner rubber stops. For DC-788 scales with a 2 lb. capacity, the scale must first be unlocked using the following procedure. -
Page 11: Repacking
Powering Up the DC-788 The DC-788 can be operated either from an AC power source or with a rechargeable battery pack (DC power). The DC power allows the unit to be completely portable. Instructions for DC operation are contained in Section 2.4.2. -
Page 12: Dc Battery Pack Replacement/Installation
DC Battery Pack Replacement/Installation An optional DC battery pack (PN 88933) for the DC-788 is available and can be purchased from RLWS to ship with the scale or retrofit in the field. The rechargeable 6V 5.0 AH battery pack allows for up to 24 hours of scale use without an AC power supply. -
Page 13: Battery Charging
6. Attach the red lead to the positive (+) terminal of the new DC battery pack, and the black lead to the negative (-) terminal. Place new DC battery pack in battery compartment. 7. Replace the battery holding bracket and fasten it with its two screws. 8. -
Page 14: Setting The Date
Setting the Date Without a power supply, the DC-788 will reset the time and date. For units that do have battery power, the time and date can be supported for up to 20 days in the OFF status without any AC power supply. After 20 days the unit will reset itself. -
Page 15: Block Diagram Of Electrical Connections
Block Diagram of Electrical Connections The following block diagram illustrates the electrical connections. Physical Layout of Electrical Connections The following diagram illustrates the actual layout of electrical connections. Installation... -
Page 16: Configuration Settings
Configuring these specifications allow you to tailor the DC-788 to your specific applications. Setting the specifications allows you to modify the functionality of the DC-788. Use the tables in this section to view the options you can modify. - Page 17 Data length of RS-232C Parity of RS-232C 0: 1 bit (DEFAULT) 0: 7 bit 00: None (DEFAULT) 10: Even 1: 2 bit 1: 8 bit (DEFAULT) 01: Odd 11: Not used (SP1_STOP) (SP1_DLEN) (SP1_PAR) Table 3-1. DC-788 (141) Settings Configuration Settings...
- Page 18 Print When Pressing the + External Printer Print Format or - Key 0: No (DEFAULT) 000: Default Format (DEFAULT) 1: Yes 001: Customer Format 1 010: Customer Format 2 111: Customer Format 7 (SP1_PRTK) (*V1.09) (SP1PRINTER) Table 3-1. DC-788 (141) Settings DC-788 Operation Manual...
-
Page 19: Weight And Measurement Specifications (142 Settings)
(SP1_SPN) (v1.10) (SP1_MEXIST) (V1.10) 16 - 19 Not Used Table 3-1. DC-788 (141) Settings 3.1.2 Weight and Measurement Specifications (142 Settings) To make changes to the Weight and Measurement Specifications, the span switch must be on. (For instructions on how to turn the span switch on, see Section 4.0.) 1. - Page 20 Weight Decimal Point Position (Scale 2) 0: (DEFAULT) 000: No Decimal Point 001: 1st Digit (0000.0) (DEFAULT) 010: 2nd Digit (000.00) 011: 3rd Digit (00.000) 100: 4th Digit (0.0000) (SPWPT1) Table 3-2. DC-788 Weight and Measurement Specifications DC-788 Operation Manual...
- Page 21 Display Synchronization (+ key Style only) 0: 0: Allow (DEFAULT) 0: Allow (DEFAULT) 0: Allow (DEFAULT) 0: “Total” (DEFAULT) 1: Inhibit 1: Inhibit 1: Inhibit 1: “Add” (SP_ACC) (SP_ANO) (SP_WDS) (SP_ADS) Table 3-2. DC-788 Weight and Measurement Specifications Configuration Settings...
- Page 22 Scale same as the units on Scale 2 (See SPEC 35, Bit 2) 1 (See SPEC 35, Bit 3) Table 3-2. DC-788 Weight and Measurement Specifications DC-788 Operation Manual...
-
Page 23: Calibration
You can exit the Maintenance Mode and return to the Weighing Mode at any time by pressing the key. If you have a remote scale attached to the DC-788, you must first set the SPECs for that remote scale before beginning the calibration process. - Page 24 Then the display will return to the weighing mode with the calibrated weight showing in the Weight window.. 9. To exit the Maintenance Mode and save your calibration, power down your DC-788 scale. To exit the Maintenance Mode and return to the Weighing Mode without saving your calibration, press the TARE key.
-
Page 25: Scale Operations
Counting Mode and TEP (Teraoka Error Prediction) Mode. Regular Counting Mode offers you the same ultra-high-precision that all DIGI products are noted for. When you have high-value items, TEP Mode walks you through a more extensive sampling process from which the scale calculates and displays the number of parts that can be counted at a time with no counting error. -
Page 26: Weight Unit Switching
1. Place the container, box or item to be tared on the platform and press the TARE key. The weight display should show 0, the Net annunicator will illuminate and the tare weight will appear in the Tare display. DC-788 Operation Manual... -
Page 27: Tare Override
Scale 1 to Scale 2 or is cleared when you transfer scales. SPC 14, Bit 1 - AUTO SCALE SWITCHING, sets . When you have a procedure that involves sampling an item’s unit weight on the DC-788’s built-in platform and then want to go immediately to weighing and counting boxes or bins on a floor scale or other external scale, set SPC 14 to 1: YES. -
Page 28: Unit Weight Operation By Key Entry
A Lot Number which is not associated with a specific item code can also be set temporarily in the Weighing Mode. If the DC-788 is connected to an external printer or PC, this Lot Number will appear on labels and receipts or be output to the PC as part of the data string. -
Page 29: Operations Without Recalling An Item Code
Note: If the DC-788 is connected to a printer or PC, the data will be printed or outputted each time the + (plus), - (minus) or * PRINT keys are pressed. If SPC 32, Bit 3 - Exit From Accumulation Mode After 15 Sec Time Out is set to 0: Allow, the display will return to the weighing mode automatically after 15 seconds. - Page 30 14. Press the * PRINT key to clear the accumulation register. The Memory indicator ∑ will no longer be lit. If the DC-788 is connected to a printer or a PC, the total accumulation data will be printed or output.
-
Page 31: Setting A Temporary Lot Number, Part Number Or Part Name - Without Recalling An Item Code
If a printer or PC is connected to the DC-788, pressing the * PRINT key will print a label to put on the bin showing the new, lower, total quantity or output the data to the PC. -
Page 32: Using Item Codes In Weighing Mode
The DC-788 is a self-contained inventory control system, capable of tracking movement of up to 100 items. In order to track the inventory of an item, it must first have been programmed into the DC-788’s memory. The following procedure is used to add inventory to and remove inventory from an Item Code’s memory using the In and Out functions. - Page 33 The Memory indicator ∑ will no longer be illuminated. If an external printer or PC are connected to the DC-788, pressing the * PRINT key will print or output the data. 10. To view the updated inventory total, press the SCALE key until the scale displays INVENT. To exit the inventory display, press the TARE key to exit to the Weighing Mode or continue to press the SCALE key until you cycle back to the Weighing Mode.
-
Page 34: Tare Override
5. You may now either place the product on the platter for weighing and counting or press the CLEAR key to return to the stand-by screen. If an external printer is connected to the DC-788, you can print a receipt or a label for the product by pressing the * PRINT key while the product is still on the platter. -
Page 35: Scale Programming
Scale Programming The DC-788 can store information for the parts you count most frequently, eliminating the need for re-entering data during parts counting. With each Item Code you can specify a Tare Weight, Unit Weight, Part Number, Part Name, Lot Number, Inventory Quantity and Setpoint Value. With up to 100 item code numbers able to be programmed into your DC-788 counting scale, the unit can act as a stand-alone inventory system. -
Page 36: Review The Item Code Numbers Programmed In Memory
Review the Item Code Numbers Programmed in Memory To see what Item Codes are currently programmed in the DC-788’s memory, press the MODE key twice to enter the Programming Mode. Then press the CODE/IN-OUT key to show the first Item Code number in memory. - Page 37 display will show the field that the data is being entered for. Once the display of this character clears, the scale is ready to accept your next ASCII code. NOTE: If you enter an Item Code that has already been stored in memory, the scale will ask you if you want to clear the stored CLEAR data associated with that Item Code.
-
Page 38: Program Item Code, Tare Weight, Unit Weight, Inventory, Part Number, Part Name, Lot Number
Program a General Setpoint You can program the DC-788 with a setpoint that will be enabled either when no Item Code is called up or when an Item Code is called up from memory that has no setpoint already associated with it in programming. -
Page 39: Resetting The Sequence Number To Zero
Resetting the Sequence Number to Zero The DC-788 has the ability to increment a sequence number every time a transaction is printed by pressing the + (Plus), - (Minus), or * PRINT keys. The sequence number can be reset to zero by carrying out the following procedure: 1. -
Page 40: Change The Lot Number Temporarily
Mode without saving the change. Delete Item Memory The DC-788 offers you options to delete all items in memory, the values in one field across all items, or individual fields associated with a specific Item Code. 6.8.1 Delete All Item Codes in Memory The following procedure describes the steps used to delete ALL information stored within each Item Code (tare weight, unit weight, inventory quantity, part number, part name, lot number and setpoints). -
Page 41: Delete All Inventory Values From Memory
If you have entered an existing Item Code, the display will ask you to confirm that you want to delete. Press the CLEAR key to delete this Item Code and all of its data, or press the MODE key to cancel the deletion. -
Page 42: Delete All Tare Weight Values From Memory
2. Press the REZERO key once. The display will show all 8’s briefly, then return to the Programming screen. 3. Hold the REZERO key while entering [.] [.] [4] The display will ask you to confirm that you want to DC-788 Operation Manual... -
Page 43: Delete All Setpoint Data In Memory
delete. 4. Press the CLEAR key to delete all part numbers in memory, or press the MODE key to cancel the deletion. If you pressed the CLEAR key, the part numbers will be deleted and the scale will return to the Programming Mode screen. - Page 44 4. Press the CLEAR key to delete all part names in memory, or press the MODE key to cancel the deletion. If you pressed the CLEAR key, the part names will be deleted and the scale will return to the Programming Mode screen. 5. To return to the Weighing Mode, press the MODE key once. DC-788 Operation Manual...
-
Page 45: External Devices: Printers, Pcs And Scales
External Devices: Printers, PCs and Scales The DC-788 Counting Scale is equipped with an RS-232C port that allows the scale to communicate with either an external printer or a PC. SPC 05, Bit 3 and Bit 2-Function of RS-232C Interface must be set to 00: PC or 01: Printer for communication to take place (For instructions on how to program Customer specifications, see Section 3.1.1.). -
Page 46: Epson Tm-U210 And Tm-U290, Star Sp2320 And Sp298
SPC13, Bits 2, 1, and 0 - External Printer Print Format. When SPC13 is set to 000: Default Format, the DC-788 downloads the default format to the printer during power up. This default label format is named “L0”. - Page 47 Zebra LP2844 Default Total Label While Recalling an Item Code Prints when recalling an Item Code from memory and accumulating, then printing by pressing the * PRINT key. Figure 7-2. Zebra Default Total Label Sample Zebra LP2844 Default Label When Not Recalling an Item Code Prints when accumulating without recalling an Item Code from memory, then pressing the...
-
Page 48: Epson Tmu200 Or Star Sp2320 Tape Printer
Section 7.2.4. See Figure 7-4 for a sample of the format. 7.2.6 DIGI TVP1000 Barcode Printer Set SPC09 to 0101. This barcode printer has the same options and label formats as the Zebra LP2844. See Figure 7.2.3 above for the label format examples. -
Page 49: Connecting To A Pc
Setting the Scale Specifications for Communication to a PC The DC-788’s RS-232C port can be used to connect the scale to a PC and output the data string to the computer. The following specifications must be set for the data transfer to take place: (for more information on setting specifications, see Figure 3.1.1) - Page 50 7.3.2.7 Standard Manual Data Transmission Set SPC08-RS232C PC Protocol to 0010: Standard Manual Type. The communication between the DC-788 and the computer flows as follows: Figure 7-8. Standard Manual Data Transmission Flowchart DC-788 Operation Manual...
- Page 51 7.3.2.9 Standard Command Data Transmission Set SPC08-RS232C PC Protocol to 0011: Standard Command Type. The communication between the DC-788 and the computer flows as follows: Figure 7-10. Standard Command Data Transmission Flowchart External Devices: Printers, PCs and Scales...
-
Page 52: Pin Assignments
7.3.3 Pin Assignments The DC-788 counting scale is connected to a PC using a 9 pin D-SUB connectors configured as follows: Inside the DC-788 DC-788 Plug Side PC Side CN6 (5 pins) CN6 (5 pins) If handshaking is not required for your RS-232 communication with the computer, the RTS and CTS do not need to be connected in the cable and SPC06, Bit 3 - RTS/CTS Handshaking of RS-232C can be set to 1: Off. -
Page 53: Rs-232C Data Transmission Formats
Acknowledge Unacknowledge Table 7-2. RS-232C Codes, Headers, Fields and Commands 7.3.5 RS-232C Data Transmission Formats The basic data transmission string format output by the DC-788 is as follows (with a more detailed discussion of each element below): Status Weight Header ID Code .. - Page 54 Tare Weight = 1.200 Unit Weight = 1.5000 (kg/1000 pcs) Quantity = 2304 Weight Status = Stable (with header codes and without additional parity) The data transmission will be as follows: Status Flag: 0x42 Weight Condition Flag: 0x42 DC-788 Operation Manual...
-
Page 55: Remote Scale Channel
0x30 0x0d 0x32 0x20 0x20 0x20 0x22 0x23 0x20 0x20 0x0d 0x0a Remote Scale Channel The Remote Scale Channel connector is on the back of the DC-788 housing. Figure 7-11. Remote Scale Channel Connector External Devices: Printers, PCs and Scales... -
Page 56: Setting The Specifications For Scale 2
Setting the Specifications for Scale 2 A scale connected to the Remote Scale Channel will be recognized by the DC-788 as Scale 2. The specifications that need to be set to configure the communication with the second scale are as follows: •... -
Page 57: Remote Platforms Available
17" x 21" (DIGI S-TL Platform) 1500.0 lbs 24" x 28" (DIGI S-UL Platform) 2500.0 lbs 36" x 36” or 48" x 48" (DIGI Summit 3000 Platform) 5000.0 lbs 48" x 48" (DIGI Summit 3000 Platform) 10000.0 lbs 48" x 48" or 60" x 60" (DIGI Summit 3000 Platform) 25000.0 lbs... -
Page 58: Appendix
DC-788 Error Message List The DC-788’s alphanumeric display allows for detailed error messages. Use Table 8-1 below to find the error message, possible causes for the error and ways to correct the problem. If these suggestions fail to correct the situation, please contact your DIGI dealer for assistance. -
Page 59: Ascii Code Table
When the current total overflows the register Clear the current total. When the unit weight is insufficient to display. Set the DC-788 to WT/1000 mode in SPEC 141 or press any key to continue. Table 8-1. DC-788 Error Message List... - Page 60 š º Ú ú › » Û û < œ ¼ Ü ü ½ Ý ý > ž ¾ Þ þ Ÿ ¿ ß ÿ Table 8-2. ASCII Code Table for Data Entry of Item Code Data DC-788 Operation Manual...
-
Page 61: Dc-788 Limited Warranty
DC-788 Limited Warranty Rice Lake Weighing Systems (RLWS) warrants that all RLWS equipment and systems properly installed by a Distributor or Original Equipment Manufacturer (OEM) will operate per written specifications as confirmed by the Distributor/OEM and accepted by RLWS. All systems and components are warranted against defects in materials and workmanship for one year.
Need help?
Do you have a question about the Digi DC-788 and is the answer not in the manual?
Questions and answers