Table of Contents
Advertisement
Quick Links
Advertisement
Table of Contents

Related Manuals for Horizon Hobby Cessna 150 Aerobat 250 ARF


Summary of Contents for Horizon Hobby Cessna 150 Aerobat 250 ARF
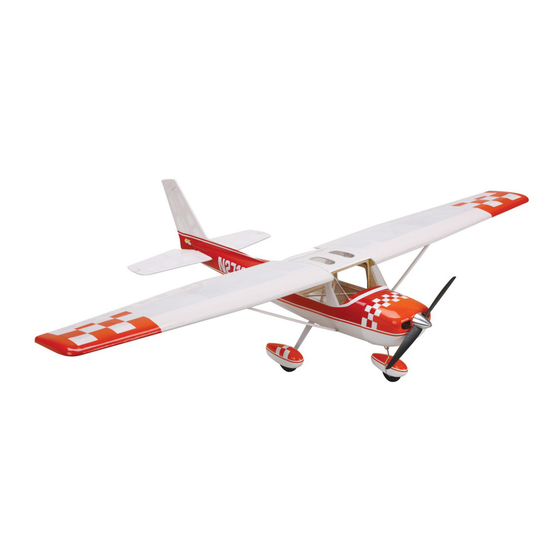
- Page 1 Cessna 150 Aerobat 250 ARF Assembly Manual...
-
Page 2: Notice
Model Aeronautics) approved flying sites. Consult local product, personal property and cause serious injury. Safety can never be taken lightly. laws and ordinances before choosing a location to fly your aircraft. • Do not fly near power lines. E-flite Cessna 150 Aerobat 250 ARF Assembly Manual... -
Page 3: Table Of Contents
Limited Warranty ............ 30 Warranty Services ..........30 Compliance Information for the European Union ..31 Academy of Model Aeronautics National Model Aircraft Safety Code ....32 Building and Flying Notes ......... 33–34 E-flite Cessna 150 Aerobat 250 ARF Assembly Manual... -
Page 4: Contents Of Kit/Parts Layout
EFLB4302SJ 430mAh 2S 7.4V 20C Li-Po, ParkLite, White HANU0801 Balancing stand (optional) 20AWG Adhesives GWSEP7035B 7 x 3.5 Direct Drive Propeller Medium CA PAAPT02 Thin CA PAAPT08 Threadlock PAAPT42 Canopy Glue PAAPT56 E-flite Cessna 150 Aerobat 250 ARF Assembly Manual... -
Page 5: Before Starting Assembly
When referencing directions (up, down, left, right, top and bottom), take note that these are in relationship to the pilot sitting in the cockpit of the aircraft unless noted otherwise. E-flite Cessna 150 Aerobat 250 ARF Assembly Manual... - Page 6 Use care not to get the wing using care not to damage the internal glue under the servo. structure. Once the lead is routed through the wing, remove the string from the lead. E-flite Cessna 150 Aerobat 250 ARF Assembly Manual...
- Page 7 Remove the screw before moving to the next step. plate is facing forward. 10. Place the servo cover in position on the wing. Use a pencil to mark the locations for the four mounting screws. E-flite Cessna 150 Aerobat 250 ARF Assembly Manual...
-
Page 8: Rudder And Elevator Servo Installation
17. Repeat steps 2 through 16 to install the remaining aileron servo. 18. Check to make sure the radio system has been turned off before proceeding. E-flite Cessna 150 Aerobat 250 ARF Assembly Manual... - Page 9 E-flite Cessna 150 Aerobat 250 ARF Assembly Manual...
-
Page 10: Landing Gear Installation
Do not use thin CA for this step as it can wick through the nut and glue the connector to the arm. Make sure that the connector still rotates freely in the arm after the glue is cured. E-flite Cessna 150 Aerobat 250 ARF Assembly Manual... - Page 11 9. Place the nose gear back into position and tighten the screw in the steering arm using a 1.5mm hex wrench. E-flite Cessna 150 Aerobat 250 ARF Assembly Manual...
- Page 12 15. Slide a 2mm washer on the screw, then thread a 2mm nut on the screw. Leave a gap of roughly 1/8-inch (3mm) between the gear and washer (as shown) so the wheel pant can fit between the washer and gear. E-flite Cessna 150 Aerobat 250 ARF Assembly Manual...
- Page 13 1.5mm hex wrench to position the wheel collar so the wheel can rotate without any binding. Always use threadlock on metal-to-metal fasteners to prevent them from vibrating loose. E-flite Cessna 150 Aerobat 250 ARF Assembly Manual...
-
Page 14: Motor And Speed Control Installation
Remove to prevent them from vibrating loose. the screw before moving to the next step. 3a. (Park 250) Attach the mount to the motor using a 1.5mm flat blade screwdriver. E-flite Cessna 150 Aerobat 250 ARF Assembly Manual... -
Page 15: Receiver Installation
2. Plug the rudder and elevator servos into the correct ports of the receiver. Plug the speed control into the adapter that is plugged into the throttle port. E-flite Cessna 150 Aerobat 250 ARF Assembly Manual... -
Page 16: Horizontal Stabilizer Installation
aileron servo extension. 2. Slide the carbon fiber wing tube into the fuselage. Connect the aileron extension to the extension in the fuselage. Guide the aileron extension into the wing. E-flite Cessna 150 Aerobat 250 ARF Assembly Manual... - Page 17 If the have been pre-glued into the elevator, so check alignment is off, lightly sand the stabilizer saddle to them, but do not attempt to remove them. correct the alignment. E-flite Cessna 150 Aerobat 250 ARF Assembly Manual...
- Page 18 We also recommend using a hot knife to melt through the covering to help reduce the chance of damaging the underlying wood. E-flite Cessna 150 Aerobat 250 ARF Assembly Manual...
-
Page 19: Vertical Stabilizer Installation
16. Saturate each hinge with thin CA. Apply CA to both the top and bottom of the hinge. Allow the CA to fully cure before proceeding. 19. Remove the wing from the fuselage at this time. E-flite Cessna 150 Aerobat 250 ARF Assembly Manual... - Page 20 #11 blade to trim the covering below the lines drawn in the previous step by 1/16- inch (1.5mm). Remove the covering, exposing the bare wood. The lines can be removed using a paper towel and rubbing alcohol. E-flite Cessna 150 Aerobat 250 ARF Assembly Manual...
-
Page 21: Rudder, Elevator And Nose Gear Linkage Installation
There should be a small amount of play between the arm and the connector and the connector should be able to rotate freely on the arm. E-flite Cessna 150 Aerobat 250 ARF Assembly Manual... - Page 22 1/2-inch (13mm) from the center of elevator servo. the horn. E-flite Cessna 150 Aerobat 250 ARF Assembly Manual...
-
Page 23: Windscreen, Wing And Wing Strut Installation
Use a nylon pushrod keeper to secure the pushrod to the rudder control horn. 14. Check to make sure the radio system has been turned off before proceeding. E-flite Cessna 150 Aerobat 250 ARF Assembly Manual... - Page 24 The wing panel will fit tight against the fuselage as shown. 7. Slide the strut in the fitting at the wing. 8. Repeat steps 6 and 7 to install the remaining wing strut. E-flite Cessna 150 Aerobat 250 ARF Assembly Manual...
-
Page 25: Motor Battery, Cowl, Propeller And Spinner Installation
5. Slide the cowling on the fuselage. The pins in the cowling will position the cowl and the magnets will hold the cowl to the fuselage. E-flite Cessna 150 Aerobat 250 ARF Assembly Manual... - Page 26 If it does, loosen the nut, move the assembly forward, then 10. Replace the battery hatch cover back on re-tighten the nut. the fuselage. E-flite Cessna 150 Aerobat 250 ARF Assembly Manual...
-
Page 27: Decal Installation
CG on the bottom of the wing position if it is removed from your model. with a felt-tipped pen. After the first flights, the CG position can be adjusted for your personal preference. E-flite Cessna 150 Aerobat 250 ARF Assembly Manual... -
Page 28: Control Throws
Down: 9/32-inch 7mm keep the servos from moving to their endpoints Elevator until the transmitter and receiver connect. High Rate 5/8-inch 16mm Down: 5/8-inch 16mm Low Rate 15/32-inch 12mm Down: 15/32-inch 12mm E-flite Cessna 150 Aerobat 250 ARF Assembly Manual... -
Page 29: Range Test Your Radio
6. Check that all trim levers are in the proper location. 7. All servo pigtails and switch harness plugs should be secured in the receiver. Make sure the switch harness moves freely in both directions. E-flite Cessna 150 Aerobat 250 ARF Assembly Manual... -
Page 30: Limited Warranty
Notice: Do not ship Lipo batteries to horizon. If you THIS WARRANTY IS THE PURCHASER’S SOLE AND have any issue with a Lipo battery, please contact EXCLUSIVE REMEDY. the appropriate horizon product Support office. E-flite Cessna 150 Aerobat 250 ARF Assembly Manual... -
Page 31: Compliance Information For The European Union
Horizon Service Center 4105 Fieldstone Rd Champaign, Illinois 61822 USA productsupport@horizonhobby.com 877-504-0233 Online Repair Request visit: www.horizonhobby.com/service (All other products) Horizon Product Support 4105 Fieldstone Rd Champaign, Illinois 61822 USA productsupport@horizonhobby.com 877-504-0233 E-flite Cessna 150 Aerobat 250 ARF Assembly Manual... -
Page 32: Academy Of Model Aeronautics National Model Aircraft Safety Code
(h) Not operate model aircraft while under the repaired model aircraft. outlined in AMA Document #550. influence of alcohol or while using any drug which could adversely affect the pilot’s ability to safely control the model. E-flite Cessna 150 Aerobat 250 ARF Assembly Manual... -
Page 33: Building And Flying Notes
50 feet to any above-ground electric utility lines. 5. The flying area must be clear of all nonessential participants and spectators before the engine is started. E-flite Cessna 150 Aerobat 250 ARF Assembly Manual... -
Page 34: Building And Flying Notes
Building and Flying Notes E-flite Cessna 150 Aerobat 250 ARF Assembly Manual... - Page 35 E-flite Cessna 150 Aerobat 250 ARF Assembly Manual...
- Page 36 The Spektrum trademark is used with permission of Bachmann Industries, Inc. Cessna and Cessna 150 are trademarks or registered trademarks of Textron Innovations, Inc. and are used under license by Horizon Hobby, Inc. All other trademarks, service marks and logos are the property of their respective owners.
Need help?
Do you have a question about the Cessna 150 Aerobat 250 ARF and is the answer not in the manual?
Questions and answers