Table of Contents
Advertisement
Quick Links
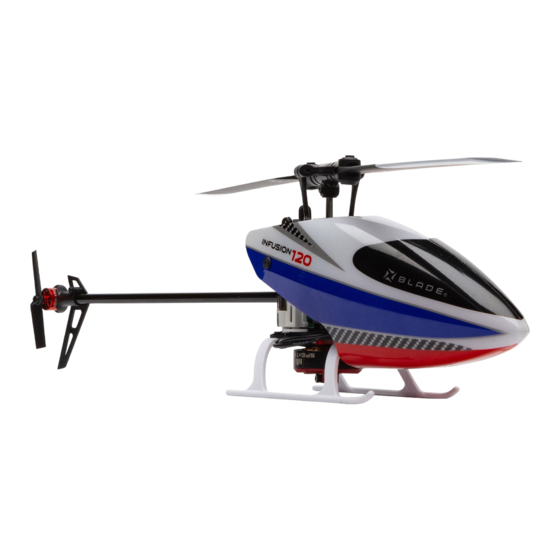
Infusion 120
BLH6950
Instruction Manual
Bedienungsanleitung
Manuel d'utilisation
Manuale di Istruzioni
Scan the QR code and select the Manuals and Support quick links from the
product page for the most up-to-date manual information.
Scannen Sie den QR-Code und wählen Sie auf der Produktseite die Quicklinks
Handbücher und Unterstützung, um die aktuellsten Informationen zu Handbücher.
Scannez le code QR et sélectionnez les liens rapides Manuals and Support sur la
page du produit pour obtenir les informations les plus récentes sur le manuel.
Scannerizzare il codice QR e selezionare i Link veloci Manuali e Supporto dalla
pagina del prodotto per le informazioni manuali più aggiornate.
223044.1 Updated 11/22
Advertisement
Table of Contents

Subscribe to Our Youtube Channel
Related Manuals for Horizon Hobby BLADE Infusion 120


Summary of Contents for Horizon Hobby BLADE Infusion 120
- Page 1 Infusion 120 BLH6950 Instruction Manual Bedienungsanleitung Manuel d’utilisation Manuale di Istruzioni Scan the QR code and select the Manuals and Support quick links from the product page for the most up-to-date manual information. Scannen Sie den QR-Code und wählen Sie auf der Produktseite die Quicklinks Handbücher und Unterstützung, um die aktuellsten Informationen zu Handbücher.
- Page 2 This product is not intended for use by children without direct adult supervision. Do not use with incompatible components or alter this product in any way outside of the instructions provided by Horizon Hobby, LLC. This manual contains instructions for safety, operation and maintenance.
-
Page 3: Table Of Contents
Main Rotor Diameter 298mm 308mm Height 95mm Tail Rotor Diameter 49mm Flying Weight 123g Components BLH6950 Blade Infusion 120 Included Airframe Main Motor Installed 2305 - 1300Kv Brushless (SPMXHM1015) Tail Motor 0803 - 12000Kv Brushless (SPMXHM1020) Installed Receiver/Flight Control/ESC Installed... -
Page 4: First Flight Preparation
First Flight Preparation Flying Checklist ❏ Remove and inspect contents ❏ Always turn the transmitter on first ❏ Begin charging the flight battery ❏ Plug the flight battery into the lead from the ESC ❏ Program your computer transmitter ❏ Allow the receiver and ESC to initialize and arm properly ❏... -
Page 5: Installing The Flight Battery
Installing the Flight Battery 4, 5 1. Lower the throttle stick to the lowest position. CAUTION: Always disconnect the Li-Po battery from the aircraft when not flying to avoid 2. Power ON the transmitter. over-discharging the battery. Batteries discharged to a 3. -
Page 6: Transmitter And Receiver Binding
Smart Throttle The flight controller included with this helicopter is Smart To configure RPM and Battery Infomation: compatible. Smart telemetry can send battery data to your 1. Select the Telemetry menu from the Function List (DX, NX transmitter. An update for your transmitter may be required series radios) or Model Setup (iX series radios) for Smart features. -
Page 7: Safe Technology
Technology There are three flight modes programmed into the flight SAFE technology delivers: controller on this aircraft. The pilot can choose the level of • Flight envelope protection you can select with the flight mode stabilization needed to suit their skills and flying style. When switch. -
Page 8: Throttle Hold
Throttle Hold Throttle hold is used to prevent the motor from powering on helicopter is out of control, in danger of crashing, or both. inadvertently. For safety, turn throttle hold ON any time you The blades will continue to spin briefly when throttle hold is need to touch the helicopter or check the direction controls. -
Page 9: Understanding The Primary Flight Controls
Understanding the Primary Flight Controls If you are not familiar with the controls of your aircraft, take a few minutes to familiarize yourself with them before attempting your first flight. Collective Left Side View Left Side View Descend Climb Throttle up Throttle down Rudder Nose Yaws Left... -
Page 10: Flying The Infusion 120
Flying the Infusion 120 Hovering Consult your local laws and ordinances before choosing a location to fly your aircraft. Making small corrections on the transmitter, try to hold the We recommend flying your aircraft outside in calm winds or helicopter in one spot. If flying in calm winds, the model inside a large gymnasium. - Page 11 Advanced Tuning (Forward Programming) Applies to forward programming capable Spektrum Transmitters including DX6e, DX8e, DX6G2, DX7G2, DX8G2, DX9, iX12, DX18, iX20, DX20, NX6, NX8, NX10 The Infusion 120 default settings are appropriate for most users. We recommend flying with the default parameters before making any adjustments.
- Page 12 Applies to Spektrum transmitters not capable of forward programing including DX6i, DX6e, DX7s DX8, and DX8e Your Blade Infusion 120 was setup at the factory and test flown. The servo adjustment steps are usually only necessary in special circumstances, such as after a crash or if a servo or linkage is replaced.
-
Page 13: Trim Flight
Calibration Procedure (Non-Forward Programming) If the Blade Infusion 120 is experiencing drift issues after completing the trim flight procedure located at www.bladehelis.com, perform the following calibration. The calibration procedure may also be needed following crash repairs. -
Page 14: Post-Flight Inspection And Maintenance Checklist
Post-Flight Inspection and Maintenance Checklist √ Make sure the plastic ball link holds the control ball, but is not tight (binding) on the ball. When a link is too Ball Links loose on the ball, it can separate from the ball during flight and cause a crash. Replace worn ball links before they fail. - Page 15 Problem Possible Cause Solution The bind plug was not removed Disconnect the flight battery, remove the bind plug from from the receiver after binding the receiver and reconnect the flight battery. Less than a 5-second wait between first powering on the Leave the transmitter powered on.
-
Page 16: Exploded View
Exploded View... -
Page 17: Parts Listings
HORIZON SHALL NOT BE LIABLE FOR SPECIAL, INDIRECT, INCIDENTAL OR CONSEQUENTIAL DAMAGES, LOSS OF Horizon Hobby, LLC, (Horizon) warrants to the original purchaser PROFITS OR PRODUCTION OR COMMERCIAL LOSS IN ANY that the product purchased (the “Product”) will be free from WAY, REGARDLESS OF WHETHER SUCH CLAIM IS BASED IN defects in materials and workmanship at the date of purchase. -
Page 18: Warranty And Service Contact Information
European Hanskampring 9 Union D 22885 Barsbüttel, Germany Sales: Horizon Hobby GmbH +49 (0) 4121 2655 100 FCC Information Contains FCC ID: BRWWACO1T This equipment complies with FCC and IC radiation exposure limits set forth for an uncontrolled environment. This equipment should be installed and operated with minimum distance 20cm between the radiator and/or antenna and your body (excluding fingers, hands, wrists, ankles and feet). -
Page 19: Ic Information
This appliance is labeled in accordance with BLH Infusion 120 BNF (BLH6950); Hereby, European Directive 2012/19/EU concerning waste Horizon Hobby, LLC declares that the device is of electrical and electronic equipment (WEEE). This in compliance with the following: EU Radio Equipment Directive... - Page 20 Blade, the Blade logo, E-flite, BNF, the BNF logo, DSM, DSM2, DSMX, SAFE, the SAFE logo, Spektrum AirWare and ModelMatch are trademarks or registered trademarks of Horizon Hobby, LLC. The Spektrum trademark is used with permission of Bachmann Industries, Inc.
Need help?
Do you have a question about the BLADE Infusion 120 and is the answer not in the manual?
Questions and answers