
Related Manuals for Logik L9DUALM12


Summary of Contents for Logik L9DUALM12
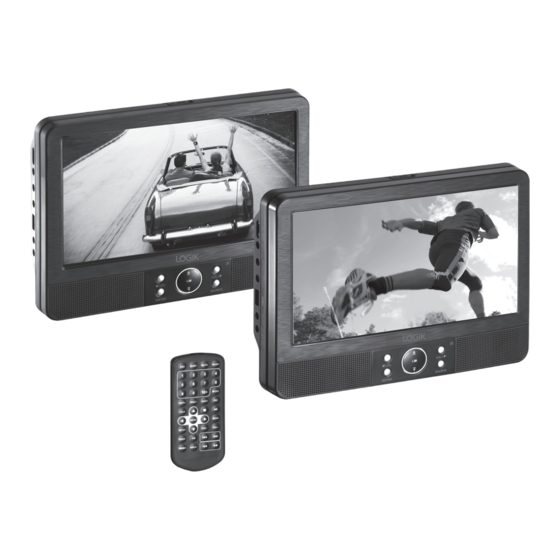
- Page 1 9” Dual Portable DVD Player Instruction Manual L9DUALM12 L9DUALM12_IB_121109_Michelle.indd 1 09/11/2012 11:05 AM...
- Page 2 L9DUALM12_IB_121109_Michelle.indd 2 09/11/2012 11:05 AM...
-
Page 3: Table Of Contents
Contents Unpacking ........................5 Product Overview ......................6 Front View ..............................6 Top View ..............................7 Left Side View ............................7 Rear View ...............................7 Remote Control ......................8 Removing the Insulating Strips from the Remote Controls ........10 Battery Replacement for the Remote Control ..............10 Remote Control Operation Range ................11 In-Car Use ........................ - Page 4 Stop Playback ............................ 21 Previous and Next..........................21 Fast Reverse and Fast Forward ....................21 Repeat Mode ............................. 22 Slow ..............................22 Angle Selection ..........................22 Audio Channel ..........................22 Subtitle Language ........................... 22 Info ................................ 23 Programmable Memory ........................ 23 Zoom Selection ..........................
-
Page 5: Unpacking
Thank you for purchasing your new Logik Portable DVD Player. We recommend that you spend some time reading this instruction manual so that you fully understand all the operational features it offers. You will also find some hints and tips to help you resolve any issues. -
Page 6: Product Overview
Product Overview Front View VOL- VOL+ ENTER SOURCE LCD Display Battery Indicator • Indicator lights up red to when Speakers changing. VOL – Button • Indicator light winks off when the • Increases the volume. battery is fully charged. • Navigates left on a menu screen and VOL + Button adjust certain settings. -
Page 7: Top View
Top View SD/MS/MMC OPEN SD/MMC/MS Memory Card Slot OPEN Latch Opens the disc door. Left Side View AV OUT COAXIAL DC OUT DC IN 9-12V ON / OFF Switch USB Slot Earphones Socket DC OUT Socket AV OUT Socket DC IN 9~12V Socket COAXIAL Socket Rear View Stand... -
Page 8: Remote Control
Remote Control STEP Button Advances frame by frame in DVD mode. SEARCH Button STEP SEARCH MUTE SOURCE Searches and starts playback from a selected point on the disc. 0-9, 10+ Number Buttons Selects and goes to or locates a title / chapter / track or specific time. - Page 9 SOURCE Button Selects an input source: DVD / USB / Memory Card. STEP SEARCH MUTE SOURCE MUTE Button Mutes or restores your DVD sound output. DISPLAY Button Displays the playtime and show status DISPLAY information on the screen. MENU Button ANGLE AUDIO MENU...
-
Page 10: Removing The Insulating Strips From The Remote Controls
Removing the Insulating Strips from the Remote Controls Remove the insulating mylar strips from the batteries if the batteries are being used for the first time. The plastic strip tabs are located at the bottom rear side of the remote controls. Battery Replacement for the Remote Control The remote control requires a CR2025, 3V Lithium battery. -
Page 11: Remote Control Operation Range
• Do not dispose of the used battery as domestic waste. Dispose of it in accordance with the local regulations. • Small button cell batteries such as the one used in the remote control are easily swallowed by young children and this is dangerous. Keep loose button cells away from young children and make sure that the battery holder tray is secure in the remote control. -
Page 12: In-Car Use
In-Car Use Using the DVD Players A and B Together (in-car use) To playback on both DVD players A and B together, use the car power adapter (included) to connect both units to the car’s cigarette lighter socket. The included 12V car power adapter is designed for use with vehicles that have a 12V negative ground electrical system. -
Page 13: Mounting The Dvd In A Car
Mounting the DVD in a Car Use the supplied mounting kit to install the DVD players on the back of the vehicle’s headrests. Align the angled support’s bolt to the screw hole on the back of the DVD unit. Turn the bolt clockwise and secure the support. -
Page 14: Installation Guide
Grip the DVD firmly with both hands and slot the angled support firmly into the support bar. It will click. Ensure the entire unit is secure. Adjust the angle of the DVD unit, then secure by tightening the bolt on the right. To remove the DVD from the horizontal support bar, support the DVD unit with one hand. -
Page 15: Using The Dvd Players A And B Indoors
Using the DVD Players A and B Indoors Using the Mains Adapter (for indoor use) The mains adapter (DC9V, 2A output) supplied is for using and recharging the DVD players A or B separately. To recharge the DVD Players separately, one more adapter is needed and sold separately. Please contact Partmaster to order the adapter. -
Page 16: Connections
Connections Connecting a TV (for the DVD Player Only) If your TV has Audio/Video inputs, you can connect the DVD player to your TV using a standard AV cable (included). DVD player left side 3.5mm to RCA AV Cable (included) To AV OUT socket Watching a DVD on your TV... -
Page 17: Connecting To A Multi-Channel Audio Receiver
Listening on an External Audio Device Connect the DVD player to the left/right Audio In sockets on the audio device using the included 3.5mm to RCA AV Cable (included). Turn on your audio device and follow the instructions provided with it to select the AUDIO IN function. -
Page 18: Using The Stand For Indoor Use
Using The Stand For Indoor Use You can stand the DVD player up on a desk or table using the stand on the bottom. DVD player left side Using a USB Device or and SD/MS/MMC Card General Operation You can play or view picture files (JPEG) or music files (MP3) from a USB device or SD/MS/MMC card. -
Page 19: Compatible Disc Types
Compatible Disc Types Disc Types Disc Logo Recorded Content DVD-VIDEO (Digital Versatile Disc) AUDIO + VIDEO DVD±RW (Audio/Video format or JPEG files) AUDIO (MP3) + JPEG DVD+ReWritable DVD±R (DVD Recordable - Audio/Video format AUDIO (MP3) + JPEG or JPEG files) CD-R (CD Recordable - Audio/Video format or AUDIO (MP3) + JPEG JPEG files) -
Page 20: Turning On The Dvd Player
Turning On the DVD Player Slide the ON/OFF switch to ON position on the left panel to turn the DVD player on. The LOGIK DVD logo (start-up picture) will appear on the screen and the unit will start loading the disc automatically (if available). -
Page 21: Dvd Playback On Both Dvd Players
DVD Playback on Both DVD Players To playback DVD movies on both DVD Player A and DVD Player B, two DVDs are required. One DVD must be inserted in DVD Player A, and one DVD must be inserted in DVD Player B. It is recommended that the DVD Player being viewed is directly connected to the mains. -
Page 22: Repeat Mode
Repeat Mode Press the REPEAT button on the remote control repeatedly to select different repeat modes. Menu DVD Description CD Description First Press Repeat Chapter Repeat Track Second Press Repeat Title Repeat All Third Press Repeat All Repeat off Forth Press Repeat off –... -
Page 23: Info
Info You can view the disc information (such as current title / chapter / track number, total playing time or remaining time on the disc) without interrupting the disc playback. During playback, press the DISPLAY button on the remote control to display the available disc information on operation status. - Page 24 Press the buttons to select the following options and then press the buttons to change the setting. TV DISPLAY To select the aspect ratio of the playback picture. 4:3 PANSCAN If you have a conventional TV and want both sides of the wide picture to be trimmed or formatted to fit your TV screen.
-
Page 25: Customising The Audio Settings
Customising the Audio Settings Press the SETUP button to display the setup menu. - - AUDIO SETUP PAGE - - buttons to select AUDIO Press the DOWNMINX LT/RT SETUP PAGE. DIGITAL OUTPUT SPDIF/OFF STEREO DOLBY DIGITAL DUAL MONO SPDIF/RAW DYNAMIC SPDIF/PCM L-MONO R-MONO... -
Page 26: Customising The Video Settings
Customising the Video Settings Press the SETUP button to display the setup menu. - - VIDEO SETUP PAGE - - buttons to select VIDEO Press the BRIGHTNESS SETUP PAGE. CONTRAST COLOUR GOTO VIDEO SETUP PAGE Press the buttons to select the following options and then press the buttons to change the setting. - Page 27 AUDIO Allows you to choose the preferred audio language of your disc. If the preferred language is not available on the disc, the DVD player will automatically use the DVD disc’s default language. SUBTITLE Allows you to choose the preferred subtitle language of your disc. If the preferred language is not available on the disc, the DVD player will automatically use the DVD disc’s default language.
-
Page 28: Customising The Password Settings
Customising the Password Settings Press the SETUP button to display the setup menu. - - PASSWORD SETUP PAGE - - buttons to select PASSWORD Press the PASSWORD MODE SETUP PAGE. PASSWORD GOTO PASSWORD SETUP PAGE Press the buttons to select the following options and then press the buttons to change the setting. -
Page 29: Maintenance
Maintenance Cleaning the Unit Ensure the unit is fully unplugged from the mains socket before cleaning. • To clean the unit, wipe the case with a slightly moist, lint-free cloth. • Do not use any cleaning fluids containing alcohol, ammonia or abrasives. •... -
Page 30: Hints And Tips
Hints and Tips If a problem does occur, it may often be due to something very minor. The following table contains various tips. Symptom Cause / Solution No power. • Ensure the car power adapter or the mains adapter is connected. •... - Page 31 Symptom Cause / Solution The disc does not • There is no disc inside the unit (“NO DISC” appears on the display). play. • Insert the disc correctly with the label side facing up. • Clean the disc. • A non-valid disc has been inserted, or the disc region number does not match the region number of the unit.
-
Page 32: Specifications
Specifications Model L9DUALM12 Disc Format DVD, CD, CD-R, CD-RW, JPEG Picture CD Laser Semiconductor laser, wavelength 650 nm Video System LCD Screen 9” Wide-Screen Active-Matrix TFT Type Video Decompression MPEG-2 Audio: Audio Characteristic 2-Channel Analogue Dolby Digital Decoding Speaker 2 Built-in stereo speaker... -
Page 33: Safety Warnings
Safety Warnings • Read all the instructions carefully before using • To prevent the risk of electric shock or fire hazard the unit and keep them for future reference. due to overheating, ensure that curtains and other materials do not obstruct the ventilation • Retain the manual. - Page 34 • Batteries used in the remote control for this unit CAUTION are easily swallowed by young children and this RISK OF ELECTRIC SHOCK is dangerous. DO NOT OPEN • Keep loose batteries away from young children The lightning flash with arrowhead symbol, within an equilateral triangle, is and make sure that the battery holder tray is intended to alert the user to the presence...
- Page 35 Visit Partmaster.co.uk today for the easiest way to buy electrical spares and accessories. With over 1 million spares and accessories available we can deliver direct to your door the very next day. Visit www.partmaster.co.uk or call 0844 800 3456 (UK customers only) Calls charged at National Rate. Rovi Proprietary Rights This item incorporates copy protection technology that is protected by U.S.
- Page 36 L9DUALM12_IB_121109_Michelle.indd 36 09/11/2012 11:05 AM...
- Page 37 L9DUALM12_IB_121109_Michelle.indd 37 09/11/2012 11:05 AM...
- Page 38 L9DUALM12_IB_121109_Michelle.indd 38 09/11/2012 11:05 AM...
- Page 39 L9DUALM12_IB_121109_Michelle.indd 39 09/11/2012 11:05 AM...
- Page 40 L9DUALM12_IB_121109_Michelle.indd 40 09/11/2012 11:05 AM...
Need help?
Do you have a question about the L9DUALM12 and is the answer not in the manual?
Questions and answers