Table of Contents
Advertisement
Quick Links
Advertisement
Table of Contents

Related Manuals for Logik L12PDVD14


Summary of Contents for Logik L12PDVD14
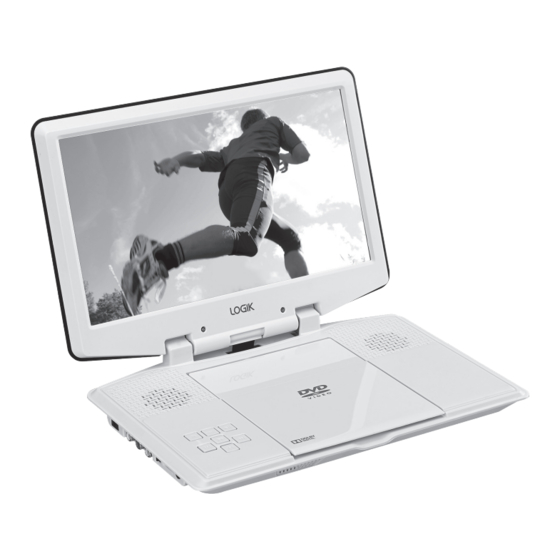
- Page 1 Instruction Manual 12” Portable DVD Player L12PDVD14...
-
Page 2: Table Of Contents
Contents Safety Warnings ..........................4 Unpacking ............................6 Product Overview ..........................7 Remote Control ..........................8 Removing the Insulating Strip from the Remote Control ............9 Battery Replacement for the Remote Control ..................9 Remote Control Operation Range ....................10 Mounting the DVD Player in a Car ........................11 Power Supply ..........................13 Mains Power (for indoor use) ..........................13 Using the Car Power Adapter (for in-car use) .....................14... - Page 3 Subtitle Language ..............................22 Info .....................................22 Menu ..................................23 Adjusting the LCD Screen ..........................23 All Repeat .................................23 A–B Repeat ................................23 DVD Programmable Memory .....................24 JPEG Disc Playback ........................25 Customising the Language Settings ..................25 Customising the Video Settings ....................26 Customising the System Settings ....................27 Maintenance ..........................29 Cleaning the Unit ..............................29 Handling Discs ...............................29...
-
Page 4: Safety Warnings
Safety Warnings • Read all the instructions carefully before • A minimum distance of 5 cm around the using the unit and keep them for future unit should be maintained to allow for reference. sufficient ventilation. • Retain the manual. If you pass the unit • Do not install or place this unit in a onto a third party make sure to include this bookcase, built-in cabinet or in another... - Page 5 Batteries Service • Batteries used in the unit are easily • To reduce the risk of electric shock, do not swallowed by young children and this is remove screws. The unit does not contain dangerous. any user-serviceable parts. Please leave all maintenance work to qualified personnel.
-
Page 6: Unpacking
Thank you for purchasing your new Logik DVD Player. We recommend that you spend some time reading this instruction manual in order that you fully understand all the operational features it offers. You will also find some hints and tips to help you resolve any issues. -
Page 7: Product Overview
Product Overview 5 6 7 1. LCD screen Button • Start or resume playback. 2. Disc Door • Press once to pause playback. 3. DC IN 9V~12V Socket 12. MENU Button 4. AUDIO OUT (L / R) and VIDEO OUT Enter or exit the DVD main menu. -
Page 8: Remote Control
Remote Control 1. VIDEO MODE Button Adjust brightness, screen size and contrast of the LCD screen. 2. PREV Button Skip backwards to the previous chapter/ track/title. 3. SEARCH Button Press to fast backwards playback at 4-level speed (2x, 4x, 8x, 16x). 4. -
Page 9: Removing The Insulating Strip From The Remote Control
Removing the Insulating Strip from the Remote Control Remove the insulating mylar strip from the battery if the battery is being used for the first time. It is located at the bottom back side of the remote control. Battery Replacement for the Remote Control The remote control requires a CR2025, 3V Lithium battery. -
Page 10: Remote Control Operation Range
Handling the Battery • Improper or incorrect use of batteries may cause corrosion or battery leakage, which could cause fire, personal injury or damage to property. • Install the battery correctly by following the polarity (+ and –) indications in the battery compartment. -
Page 11: Mounting The Dvd Player In A Car
Mounting the DVD Player in a Car Use the supplied Carry Bag, Strap A and Strap B to install the DVD players on the back of the vehicle’s headrest. 1. Place the unit into the Carry Bag as shown below After the unit is placed into the Carry Bag as shown above or the LCD Screen is adjusted to 180°, you can only use the control panel on the player to operate the unit. - Page 12 4. Attach the Carry Bag with Strap B to the car seat. Strap B 5. After the Carry Bag is securely attached to the car seat, connect the Car Power Adapter as shown below. • This unit should never be used by the vehicle’s driver or left unsecured in the vehicle while driving.
-
Page 13: Power Supply
Power Supply Mains Power (for indoor use) • Connect the Mains Adapter to a mains supply of 100-240 Volt AC. Make sure that the adapter is fully plugged into the mains socket. The unit is now connected with a power source and ready to use. -
Page 14: Using The Car Power Adapter (For In-Car Use)
Using the Car Power Adapter (for in-car use) Connect the 12V Car Power Adapter (included) to the Cigarette Lighter Socket of the vehicles with a 12V negative ground electrical system. To DC IN DVD player left side 9V-12V Socket To Cigarette Lighter Socket • Disconnect the car power adapter when not in use. -
Page 15: Using The Built-In Battery
Using the Built-in Battery Charge the built-in battery before using it for the first time. Slide the /STANDBY/ON Switch to position. Use the Mains Adapter to connect the mains socket. While the unit is charging, the LED Indicator lights up red. The normal charging time should be 2-3.5 hours. The charging light will go out when the built-in battery is fully charged. -
Page 16: Auto Sleep Mode
Auto Sleep Mode When the unit is not in use after about 6 minutes, a screen saver will show on the LED Screen. If the unit is not used for a further 10 minutes, the unit will enter auto sleep mode with a one minute countdown. -
Page 17: Connecting A Stereo Receiver Or Amplifier
Connecting a Stereo Receiver or Amplifier Connect the DVD player to a stereo receiver or amplifier with a RCA stereo audio cable (not included). DVD player left side Stereo Receiver / Amplifier RCA stereo audio cable (not included) Listening with an External Audio Device After connecting the DVD player to the audio device, Turn on your audio device and follow the instructions provided with it to select the AUDIO IN function. -
Page 18: Sound System
Sound System Dolby Digital Dolby Digital is a technology developed by Dolby Laboratories. Soundtracks encoded in Dolby Digital can reproduce from one to 5.1 discrete channels of excellent quality audio. The unit automatically recognizes the Dolby Digital bitstream and provides a downmix suitable for two-channel listening. -
Page 19: Region Code
ON position on the left panel to turn the DVD player on. The LED Indicator lights up green. 2. The LOGIK DVD logo (start-up picture) will appear on the screen and the unit will start loading the disc automatically (if available). -
Page 20: Playback Pausing
5. Press on the unit or / / on the remote control to highlight your desired title in the main menu. Press on the unit or ENTER on the remote control to confirm; During DVD playback, press GOTO and then / to highlight Title. Input available title by pressing 0-9 on the remote control. -
Page 21: Locating A Specific Title / Chapter (For Dvd)
• While fast forwards or fast backwards, playback sound is muted and subtitles is not available. • The fast forwards / fast backwards speed may differ from different disc. Locating a Specific Title / Chapter (for DVD) 1. During playback, press GOTO repeatedly on the remote control to display the disc information text line for Title / Chapter / Time. -
Page 22: Angle Selection
Angle Selection Some DVDs contain scenes which have been shot from a number of different angles. For these discs, the same scene can be viewed from each of these different angles. 1. While you are playing a DVD with different angles recorded, press ANGLE on the Sequence of angle shots remote control to view the number of... -
Page 23: Menu
Menu Press MENU to return to the DVD main menu. Adjusting the LCD Screen While DVD playback, you can adjust the Brightness, Contrast and Screen Size of the LCD Screen. 1. Press VIDEO MODE on the remote control. 2. Press to select Brightness, Contrast and Screen Size. 3. -
Page 24: Dvd Programmable Memory
DVD Programmable Memory You can combine your favourite titles/chapters and play them in the order of your choice. 1. During the DVD playback, press MEMORY M on the remote control and the following display will appear. Clear: Delete all the input programs. Tt:01ch:05 Tt: ch: Tt: ch:... -
Page 25: Jpeg Disc Playback
JPEG Disc Playback When a JPEG disc is inserted into the DVD player, 00:00 00:00 the slide show will be automatically start. Press 001/035 on the unit or STOP on the remote control to enter the navigation menu. DSCN0281 DSCN0282 Some JPEG disc cannot slide show automatically. -
Page 26: Customising The Video Settings
on the unit or or ENTER on the remote control to enter your selected 4. Press item. Press on the unit or on the remote control to select your preferred setting. on the unit or ENTER on the remote control to confirm and return to the 5. -
Page 27: Customising The System Settings
Customising the System Settings 1. Ensure that the DVD player is in stop mode. Language Video System - - System Menu - - 2. Press MENU on the unit or SETUP on the TV Display Wide remote control to display the setup menu. TV Type Parental 3. - Page 28 Parental This feature allows you to block disc playback with specific ratings. The rating levels are from 1 to 8 and are country-dependent. You can prohibit the playing of certain discs that are not suitable for your children, or you can have certain discs played with alternative scenes.
-
Page 29: Maintenance
Maintenance Cleaning the Unit Ensure to unplug the unit from the mains socket before cleaning. • To clean the unit, wipe the case with a slightly moist, lint-free cloth. • Do not use any cleaning fluids containing alcohol, ammonia or abrasives. •... -
Page 30: Hints And Tips
Hints and Tips If a problem does occur, it may often be due to something very minor. The following table contains various tips. Symptom Cause / Solution No power. • Ensure the car power adapter or the mains adapter is connected. • Make sure that the unit is turned on. -
Page 31: Specifications
DVD player may not be operating properly due to lightning, remote control) is static electricity or some other external factor.) effective. Specifications Model L12PDVD14 Power Mains Adapter Input: AC 100-240V~ 50/60Hz 0.4A Output: DC 9V 1.0A Car Cigarette Lighter Adapter... - Page 32 For more information, please contact the local authority or your retailer where you purchased the product. All trademarks are the property of their respective owners and all rights are acknowledged. DSG Retail Ltd. (co. no. 504877) Maylands Avenue, Hemel Hempstead, Herts., HP2 7TG, UK IB-L12PDVD14-140509V2 811-261291W041...
Need help?
Do you have a question about the L12PDVD14 and is the answer not in the manual?
Questions and answers