Table of Contents
Advertisement
U16, U24 and U32
Professional Audio Mixing Consoles
Operator Manual
MUSIC Group Research UK Limited,
Klark Industrial Park,
Walter Nash Road,
Kidderminster.
Worcestershire.
DY11 7HJ.
England.
Tel: +44 1562 741515
Fax: +44 1562 745371
Email: mkt.info@music-group.com
Website: www.midasconsoles.com
VeniceU — Operator Manual
DOC02-VENICEU Issue B — September 2012
© MUSIC Group IP Limited
© 2012 MUSIC Group IP Ltd. Technical specifications and appearances are subject to change without notice and accuracy is not
guaranteed. MIDAS and KLARK TEKNIK are part of the MUSIC Group (music-group.com).
Advertisement
Table of Contents
Troubleshooting

Related Manuals for Midas VeniceU16


Summary of Contents for Midas VeniceU16
- Page 1 DOC02-VENICEU Issue B — September 2012 © MUSIC Group IP Limited © 2012 MUSIC Group IP Ltd. Technical specifications and appearances are subject to change without notice and accuracy is not guaranteed. MIDAS and KLARK TEKNIK are part of the MUSIC Group (music-group.com).
-
Page 3: Important Safety Instructions
Do not install near any heat sources such relies either wholly or in part upon any description, Please do remember to register your new Midas as radiators, heat registers, stoves, or other photograph or statement contained herein. -
Page 4: Limitation Of Liability
If your country is not the buyer's statutory rights as a consumer in any • improper handling, neglect or failure to listed please contact the “United Kingdom (Midas/ way. operate the unit in compliance with the KT main office)” located under “Service instructions given in Midas user or service 2. -
Page 5: Other Important Information
Malfunction. Should your MUSIC Group Authorized Reseller not be located in your vicinity, you may contact the MUSIC Group Authorized Fulfiller for your country at www.midasconsoles.com. If your country is not listed please contact the “United Kingdom (Midas/KT main office)” located under “Service Service/Repairs”... - Page 6 VeniceU MUSIC Group IP Limited...
-
Page 7: Table Of Contents
Contents Important safety instructions ....... . iii Other important information ........v Chapter 1 Introduction . - Page 8 viii Contents EQ ..........41 Monitors .
- Page 9 Contents The effect of EQ ........88 Dynamic processing .
- Page 10 Contents VeniceU Operator Manual...
-
Page 11: Chapter 1: Introduction
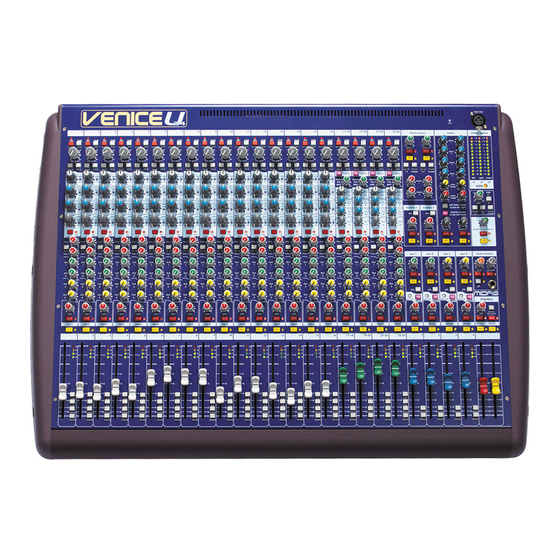
Midas has total confidence in the quality and reliability of this product. To back this up, this product comes with the standard Midas three year warranty. - Page 12 Chapter 1: Introduction a flexible bus structure that lets the engineer configure the console for different applications. The VeniceU consoles (U16 left, U24 top and U32 bottom) All variants include four multifunction input channels for use on various sources. These share single control knobs and have slightly different functionality as compared to the mono channels.
-
Page 13: Key Features
The VeniceU consoles include the following key features: • Sizes — available in 16, 24 and 32 input channel frame sizes. • Midas mic preamps — 12/20/28 overload-tolerant Midas mic preamps (the last four being on four stereo modules), which accept +32dBu. -
Page 14: Control Surface
• Lamps — socket(s) for fitting lamps. • Playback/record I/Os — input/output sockets for playback and recording. • Warranty — standard Midas 3-year warranty. Control surface The surface of the VeniceU can be divided into the following main vertical sections. - Page 15 Control surface Item Description See Chapter 5 "Mono Input Channel" on page 37 See Chapter 6 "Multifunction Input Channel" on page 47 See Chapter 7 "Output Section" on page 57 VeniceU Operator Manual...
-
Page 16: Rear Panel
Chapter 1: Introduction Rear panel The VeniceU has a rear panel that houses the following. Rear panels of the VeniceU consoles showing the main areas Item Description See “Master outputs (mono and stereo)” on page 69. See “Stereo returns” on page 66, “Groups” on page 61, “Matrices” on page 64, “Monitors”... -
Page 17: External Connections
External connections Rear panel of the VeniceU16 showing the main connector sections Inserts and returns. Mono input channel (insert, direct out, line in and mic in). Multifunction input channel (insert, direct out, line in left (mono) and right, and mic in). -
Page 18: Signal Flow
Chapter 1: Introduction Connection(s) Description Notes All primary outputs Balanced XLR connectors, Master channels 50R source Aux, group, matrix, monitor and local (monitor) buses All secondary outputs Balanced Jack connectors, Mono channels (direct outs) 50R source Headphone outputs Jack connectors, 10R local monitor section of source (nominal +10dB) outputs (control surface) - Page 19 Signal flow The following table shows the signal flow in detail. Signal Sourced from Routed to Mono Balanced XLR mic/line Buses, insert Jack, direct input or balanced Jack line output Jack input (common gain control with above) or insert return Stereo Balanced XLR mic/line Insert Jack (mic input...
-
Page 20: Mix Matrix
Chapter 1: Introduction Mix matrix Ultimately, the mix matrix defines the capability of each VeniceU. It follows the console layout, where inputs run vertically and buses run horizontally. A mix matrix is usually defined as the number of buses and the quantity of simultaneously-mixable inputs there are per bus. -
Page 21: Service And Support
U16 and U24 models unless stated otherwise. Service and support We provide superb levels of support and service to give users confidence in Midas products. For more information, please contact your local distributor or Midas at the address shown in the front of this manual. - Page 22 Chapter 1: Introduction VeniceU Operator Manual...
-
Page 23: Chapter 2: Getting Started
Chapter 2: Getting Started This chapter shows you how to prepare the VeniceU for operation, which includes: • Installation • Connecting up • Setting up • Powering up Before installing, setting up or operating this equipment make sure you have read and fully understand all of the “IMPORTANT SAFETY INSTRUCTIONS”... -
Page 24: Electric Fields
Chapter 2: Getting Started Electric fields Should this product be used in an electromagnetic field that is amplitude modulated by an audio frequency signal (20Hz to 20kHz), the signal to noise ratio may be degraded. Degradation of up to 60dB at a frequency corresponding to the modulation signal may be experienced under extreme conditions (3V/m, 90% modulation). -
Page 25: Connecting To Balanced/Unbalanced Equipment
Connecting up Connecting to balanced/unbalanced equipment The inserts of the VeniceU are unbalanced. Ideally, you will be connecting the inserts to balanced equipment to help avoid noise problems due to grounding. Input and output sockets on rear of external device Male XLR Send 1/4”... -
Page 26: Other Connections
Chapter 2: Getting Started Other connections The section gives details of the other VeniceU interconnections. Description Example of plug or Pinouts Example of socket device 4-pin, male XLR 1 = N/A chassis connector(s) 2 = N/A on the rear panel for 3 = ground connecting 12V/5W 4 = 12V... -
Page 27: Switching The Veniceu On/Off
Switching the VeniceU on/off Switching the VeniceU on/off Switch the VeniceU on/off via the mains switch on the rear panel. Mains power supply input on the rear panel. Mains on/off switch. Mains power supply socket (IEC connector). VeniceU Operator Manual... - Page 28 Chapter 2: Getting Started VeniceU Operator Manual...
-
Page 29: Chapter 3: Using The Veniceu With Usb
Chapter 3: Using The VeniceU With This chapter shows you how to prepare your PC/Mac® for USB operation. The VeniceU console has been tested and verified for USB use with the following computer operating systems: a PC running Windows® 7 and a Mac running OS® X (version 10.7 or later). However, we cannot guarantee correct USB operation on any other computer operating system. - Page 30 Chapter 3: Using The VeniceU With USB In the User Account Control dialog box, click Yes. In the “Welcome ...” screen of the Setup dialog box, click Next. In the “Choose Install Location” screen of the Setup dialog box, choose the destination of the USB driver and click Install.
-
Page 31: Using The Archwave Usb Driver Control Panel
Windows 7 operating system The installation procedure should continue. After the installation has been completed successfully, click Next. In the “Completing ...” screen of the Setup dialog box, click Finish. The Archwave icon should appear in the task bar at the lower-right corner of the screen. - Page 32 Chapter 3: Using The VeniceU With USB Archwave USB Driver Control Panel window Item Element File menu. Contains the Close and Quit commands. Selecting Close hides the application in your desktop’s taskbar. Selecting Quit closes the application. Info menu. Contains the About Control Panel command, which opens the About Control Panel dialog box that gives you information on the application.
- Page 33 Windows 7 operating system Devices option The Devices option lets you manage your audio system USB devices. Item Element List of connected devices, showing the device name and serial number of each. Up and Down buttons. These buttons change the position of a device in the list of connected devices by moving it up/down one place at a time.
- Page 34 Chapter 3: Using The VeniceU With USB Input Channels option The Input Channels option lists all of the input channels (also known as active input channels) in your audio system. Item Element List of input channels. Include device name in ASIO display name check box. When this check box is selected, device names are included in the ASIO display name column.
- Page 35 Windows 7 operating system Output Channels option The Output Channels option lists all of the output channels (also known as active output channels) in your audio system. Item Element List of output channels. Include device name in ASIO display name check box. When this check box is selected, device names are included in the ASIO display name column.
- Page 36 Chapter 3: Using The VeniceU With USB Synchronisation option The Synchronisation option lets you choose the sample rate frequency and clock source. Item Element Sampling Rate Selection Mode frame, lets you set the sampling rate automatically or manually. Click the Automatic Mode option button to let the system set the sampling rate or click the Manual Mode option button if you want to set the sampling rate yourself.
- Page 37 Windows 7 operating system Settings option The Settings option lets you select the buffer sizes that your PC will use for your recording software. Select buffer size according to your equipment, remembering that if it is too small you will suffer audio clicks and pops, and if it is too large there will be audible delays (latency).
- Page 38 Chapter 3: Using The VeniceU With USB Streams option The Streams option shows the audio and sync I/O connections for each connected device. VeniceU Operator Manual...
-
Page 39: Mac Operating System
Mac operating system Mac operating system USB, when used with a Mac running OS® X (version 10.7 or later), is a ‘plug and play’ device. So, unlike on a PC running Windows® 7, there is no need to install a USB device driver. - Page 40 Chapter 3: Using The VeniceU With USB The Audio option lets you configure your audio system USB devices. For full information on this panel and all recording related information, refer to the Reason Operator Manual. Audio option window >> To open the Audio option window In the Reason menu, click the Preferences command.
-
Page 41: Updating The Veniceu Firmware
Updating the VeniceU firmware Updating the VeniceU firmware The latest version of the USB firmware for the VeniceU will be available on the Midas website (address is on the front cover of this manual). >> To update the VeniceU with the latest firmware The following procedure is based on a PC running Windows®... -
Page 42: Troubleshooting Usb Operation
Yes. The installation will begin. If the upgrade was successful, you should see the following Midas Firmware Upgrade dialog box. Click Troubleshooting USB operation This section may help you overcome any problems that may arise when using USB with your audio system. -
Page 43: No Devices Found
Troubleshooting USB operation No devices found If no devices appear in the driver control panel, it means that the PC/Mac cannot detect a device. Do one of the following: • Connect the VeniceU to your PC/Mac. • If the VeniceU is already connected to your PC/Mac, check that the connections are good. - Page 44 Chapter 3: Using The VeniceU With USB VeniceU Operator Manual...
-
Page 45: Chapter 4: Working With The Console
Chapter 4: Working With The Console The following chapters give a description of the controls on the console surface and include useful operating information. • Chapter 5 "Mono Input Channel" on page 37 • Chapter 6 "Multifunction Input Channel" on page 47 •... - Page 46 Chapter 4: Working With The Console VeniceU Operator Manual...
-
Page 47: Chapter 5: Mono Input Channel
Chapter 5: Mono Input Channel This chapter details the mono input channels (8/16/24) of the VeniceU. It describes the sections of each channel on the control surface and the related connectors on the rear panel. Mono input channels on the control surface (U32 shown) Although the actual number of mono input channels on your VeniceU will depend upon your choice of frame, their function remains the same. -
Page 48: Overview Of The Mono Input Channel
Chapter 5: Mono Input Channel Overview of the mono input channel Each mono channel has an XLR input that can be used for mic or line level signals up to +32dBu. An additional 1/4” inch TRS Jack socket, provides an input for line level signals that require protection against accidental 48-volt connection. -
Page 49: Rear Panel
Rear panel Rear panel The VeniceU channel inputs are located on the rear panel of the console and each channel comprises the following. Mono input channel connectors Item Description insert connector Insert point on a single 1/4” TRS Jack socket. This is unbalanced and requires a conventionally-wired insert lead. -
Page 50: Gain
Chapter 5: Mono Input Channel Gain This section lets you adjust the level of the mic input signal, switch on 48 volts phantom power for the mic, attenuate the input signal by 20dB, invert the mic polarity and enable the high pass filter on the mic input. Mic gain section of the mono input channels Item Description... - Page 51 Each mono input channel of the VeniceU has a four-band, swept EQ, allowing tonal control over the input signal. EQ section of the mono input channels Item Description Treble gain/freq control knob This dual-concentric control knob adjusts the gain/frequency of the treble EQ: •...
-
Page 52: Monitors
Chapter 5: Mono Input Channel Item Description Bass gain/freq control knob This dual-concentric control knob adjusts the gain/frequency of the bass EQ: • gain The top control knob adjusts the gain of the bass band, which is continuously variable from -15dB to +15dB with a centre detent of 0dB. •... -
Page 53: Auxes
Auxes Auxes The VeniceU has four aux sends per input channel, which can be used for effects sends, monitors or as extra assignable outputs from the console. Each aux has a control knob that gives continuous adjustment of the level sent from the input channel to the aux buses, in the range (infinity/off) to +6dB. -
Page 54: Pan, Mute And Solo
Chapter 5: Mono Input Channel Pan, mute and solo The VeniceU has pan, mute and solo per mono input channel. Pan, mute and solo sections of the mono input channels Item Description pan control knob The pan control allows the channel signal to be positioned in a stereo field when routed to the stereo bus, or when group sends are configured to be stereo. -
Page 55: Fader, Routing And Meter
Fader, routing and meter Fader, routing and meter The VeniceU is a flexible mixing console with four group buses, plus stereo and mono, with a 100 mm fader and a four-LED signal meter per mono input channel. Fader section of the mono input channels Item Description LED meter These four LEDs comprise the input channel meter, which lets... -
Page 56: Meter
Chapter 5: Mono Input Channel Meter The meter is especially useful when setting the microphone gain of a channel. Also, as the meter is post-EQ, it is possible to see the effect that the channel equalisation has upon the level. It may be necessary to turn the input gain down when excessive EQ is used to prevent the channel from overloading. -
Page 57: Chapter 6: Multifunction Input Channel
Chapter 6: Multifunction Input Channel This chapter details the multifunction input channels of the VeniceU. It describes the sections of each multifunction channel on the control surface and the related connectors on the rear panel. Multifunction input channels on the control surface All types of VeniceU have four multifunction input channels. -
Page 58: Overview Of The Multifunction Input Channel
Chapter 6: Multifunction Input Channel Overview of the multifunction input channel The VeniceU multifunction channel (shown right) is equipped with an XLR input, which are used for mic/line level signals up to +32dBu. Two 1/4” TRS Jack sockets provide inputs for line level signals that require protection against accidental 48-volt connection. -
Page 59: Rear Panel
Rear panel Rear panel The VeniceU channel inputs are located on the rear panel of the console. Multifunction input channel connectors Item Description insert Insert point on a single 1/4” TRS Jack socket. This is unbalanced and requires a conventionally-wired insert lead. direct out Direct output on a single, balanced 1/4”... -
Page 60: Gain (Mic Inputs)
Chapter 6: Multifunction Input Channel Gain (mic inputs) This section has the same functionality as the gain section of the mono input channels except for the following. For full details, see “Gain” on page 40. • 20dB pad switch On multifunction input channels the pad switch has no effect upon the left and right line levels. -
Page 61: Stereo Line Inputs
Stereo line inputs Stereo line inputs The stereo line gain control knob adjusts level of the stereo line input signal, which is continuously variable from (infinity/off) to +20dB with a centre detent at 0dB, thus allowing low level line signals to be trimmed to obtain the optimal signal level. Stereo line gain control of the multifunction input channels Each multifunction input channel of the VeniceU has a four-band, fixed EQ (treble and bass shelving EQ and hi and lo mid EQ stages), allowing tonal control over the input... -
Page 62: Monitors
Chapter 6: Multifunction Input Channel Item Description Bass control knob The bass shelving EQ gain is continuously variable from -15dB to +15dB, with the shelf frequency set to 75Hz. EQ switch and red LED The EQ switch enables the EQ. With EQ disabled, adjustment of the EQ controls has no effect. -
Page 63: Balance, Mute And Solo
Balance, mute and solo Balance, mute and solo The VeniceU has balance, mute and solo on every multifunction input channel. Balance, mute and solo sections of the multifunction input channels Item Description bal control knob This stereo line input balance control allows continuous reciprocal adjustment of the channel’s stereo image. -
Page 64: Fader, Routing And Meter
Chapter 6: Multifunction Input Channel Fader, routing and meter The VeniceU fader section has the following functions. Fader section of the multifunction input channels Item Description LED meter These LEDs comprise the multifunction input channel meter, which lets you monitor the input signal without having to use the PFL. The meter will display the higher of the two signals (left or right). -
Page 65: Meter
Fader, routing and meter Meter The meter is especially useful when setting the microphone gain of a channel. Also, as the meter is post-EQ, it is possible to see the effect that the channel equalisation has upon the level. It may be necessary to turn the input gain down when excessive EQ is used to prevent the channel from overloading. - Page 66 Chapter 6: Multifunction Input Channel VeniceU Operator Manual...
-
Page 67: Chapter 7: Output Section
Chapter 7: Output Section This chapter deals with the output section of the VeniceU. It describes the control surface and the related connectors on the rear panel. Output section of the control surface The output section comprises the following main areas: •... -
Page 68: Rear Panel
Chapter 7: Output Section Rear panel The main outputs of the VeniceU are located on the rear of the console. Output connections on rear panel VeniceU Operator Manual... -
Page 69: Overview Of The Outputs Section
Overview of the outputs section Overview of the outputs section The outputs section comprises the following main areas. Item Description See “Matrices” on page 64. See “Master outputs (mono and stereo)” on page 69. See “Talkback” on page 71. See “Playback and recording” on page 72. -
Page 70: Output Module Notes
Chapter 7: Output Section Output module notes Before looking at the function of the output section of the console, it is essential that you are comfortable with a few of the console’s features that affect groups, matrices and auxes. Rather than discuss these features in each section (although they will be repeated there), an understanding of their function in a more general context is desirable. -
Page 71: Groups
Groups Groups Each of the four group buses has an output and an insert. Group connectors on rear panel Item Description Group insert sockets Each group has an insert point via a single 1/4” TRS Jack socket. Group output sockets Each group has an output via a male XLR chassis connector. -
Page 72: Usb
Chapter 7: Output Section Item Description Meter LEDs These LEDs comprise the group meter, which lets you monitor the input signal without having to use the PFL. Fader The group fader allows for continuous adjustment of the channel level from (infinity/off) to +10dB. - Page 73 USB sections on the control surface Item Description usb in switch This latching switch inserts the USB return to the channel, muting the mic and line inputs. usb c/o This latching switch flips the aux USB output to group output. override masters to usb with matrix switch This latching switch overrides the stereo master USB output with the matrix 1-2 output.
-
Page 74: Matrices
Chapter 7: Output Section Matrices There is an output connector and insert connector on the rear panel for both matrix outputs. Two matrix inserts and two matrix outputs on the rear panel USB output is available for the matrix outputs by overriding the relevant multifunction input channel 29-30. - Page 75 Matrices Item Description group 1 to group 4 control knobs Each of the groups (1-4) has its own individual matrix send level, which is continuously variable from (infinity/off) to +6dB. Unity (0dB) is also marked on the scale, allowing the signal to be routed to the matrix without any attenuation or gain. Alternatively, the auxiliaries can be routed to the matrix by pressing the aux c/o switch (see “Group-aux changeover”...
-
Page 76: Stereo Returns
Chapter 7: Output Section Stereo returns There are two stereo returns that route to masters, certain groups and the two monitor buses. Stereo returns 1 and 2 on the rear panel. Each return has left and right TRS 1/4” TRS Jack sockets. -
Page 77: Monitors
Monitors Monitors There is an output connector and insert connector on the rear panel for both monitor bus outputs. Two monitor inserts and two monitor outputs on rear panel Monitor channels (1 and 2) Item Description pre switch This is the bus master pre-fader switch. monitor control knob This output level control gives continuous adjustment of the monitor output signal from +10dB to... -
Page 78: Auxes
Chapter 7: Output Section Auxes There are four independent aux outputs on the rear panel. Four aux XLR outputs on the rear panel Each aux output is controlled by a discrete section on the control surface. Auxes on the control surface Item Description Control knob Adjusts the aux master level. -
Page 79: Master Outputs (Mono And Stereo)
Master outputs (mono and stereo) Table 2: Typical uses of auxiliaries Application Pre-/Post-fade Reason Stage monitors Pre-fade (post-EQ) The level in the monitor stays constant, so that the engineer can change the FOH level without affecting the performer. Effects sends Post-fade The level sent to the effects is proportional to the fader level, so... - Page 80 Chapter 7: Output Section Master outputs sections on the control surface Item Description stereo to mono switch When this switch is on, a sum of the stereo left and right signals are routed to the mono signal bus (post-mute and post-fader, and post-insert points).
-
Page 81: Talkback
Talkback Talkback The VeniceU provides a talkback mic that can be routed to a number of the console’s outputs. Talk mic section on the control surface Item Description on switch and green LED When on (button fully in), the talk mic input is enabled and routed to the talk bus, in which case both local monitor outputs are attenuated by 20dB to help prevent feedback. -
Page 82: Playback And Recording
Chapter 7: Output Section Playback and recording The following four connectors on the rear panel provide discrete analogue inputs and outputs for audio playback and recording, respectively. Playback/record sockets on the rear panel Playback The two in (right and left) connectors let you connect an analogue device, such as an MP3 device or tape recorder, to play back recorded audio material via the console. -
Page 83: Local Monitor And Phones
Local monitor and phones Local monitor and phones There are two local monitor outputs on the rear panel for providing a signal for monitor speakers. Local monitor outputs on the rear panel A local monitor section on the control surface lets you connect headphones for local monitoring and adjust their signal level, and also the signal level of the local monitor outputs. -
Page 84: Lamps
Chapter 7: Output Section Lamps There are sockets towards the top of the console’s rear panel for connecting 12V desk lamps. They accept 4-pin female XLR connectors. The power rating of 5W is the maximum rating per output and must not be exceeded. Position of the lamp sockets on the VeniceUs VeniceU Operator Manual... -
Page 85: Appendix A Functional Block Diagrams
Appendix A: Functional Block Diagrams This chapter contains the VeniceU signal path diagrams. VeniceU Operator Manual... -
Page 86: Mono Input Module
Appendix A: Functional Block Diagrams Mono input module VeniceU Operator Manual... - Page 87 Mono input module VeniceU Operator Manual...
-
Page 88: Stereo Input Module
Appendix A: Functional Block Diagrams Stereo input module VeniceU Operator Manual... - Page 89 Stereo input module VeniceU Operator Manual...
-
Page 90: Master And Monitor Modules
Appendix A: Functional Block Diagrams Master and monitor modules VeniceU Operator Manual... - Page 91 Master and monitor modules VeniceU Operator Manual...
- Page 92 Appendix A: Functional Block Diagrams VeniceU Operator Manual...
-
Page 93: Appendix B Technical Specification
This appendix provides the full technical specification for the VeniceU series of mixing consoles. Due to a policy of continual improvement, Midas reserves the right to alter the function or specification at any time without notice. Table 3: VeniceU technical specifications... - Page 94 Appendix B: Technical Specification Table 4: VeniceU performance specifications Input impedance 2k balanced Line 10k balanced Input gain Continuously variable from 10dB to 60dB Line mono channel Continuously variable from 0dB to 50dB Line stereo channel Continuously variable from minus infinity to +20dB Line level inputs Maximum input level +11dBu...
-
Page 95: Dimensions
Dimensions Nominal signal level -60dBu to +10dBu Line 0dBu Equaliser mono channel Treble shelf 15dB boost/cut Treble frequency 2kHz to 20kHz Hi mid 15dB boost/cut Hi mid frequency 400Hz to 8kHz Hi mid bandwidth Fixed at 1 Octave Lo mid bandwidth Fixed at 1 Octave Lo mid 15dB boost/cut... - Page 96 Appendix B: Technical Specification 263 (10.4”) 20° VeniceU16 = 552 (21.7”) VeniceU24 = 760 (29.9”) VeniceU32 = 960 (37.8”) 89 (3.5”) 578 (22.7”) External dimensions of the U16, U24 and U32 consoles. Dimensions are in millimetres (inches). VeniceU Operator Manual...
-
Page 97: Appendix C Application Notes
Appendix C: Application Notes This appendix provides application notes as a guide to help you with VeniceU console operation. With its flexible routing and functionality, the VeniceU was designed with real-world sound engineers in mind, working in the real world. So, for engineers that haven’t got a great deal of experience in live sound engineering, the following subsections may provide a few helpful guidelines. -
Page 98: The Effect Of Eq
Appendix C: Application Notes channels will receive the same signal at the same time so, typically, when 16 channels are summed together a gain of around 5dB to 8dB will be seen. It is important to leave some headroom in the summing amplifiers so that they do not overload, should the sum exceed the maximum level. -
Page 99: Unity Gain
Unity Gain Unity Gain Unity gain is a gain of 1, that is, no gain or attenuation is applied to a signal. If a signal entered a mono line level input of the VeniceU at 0dBu and the gain was set to +10dB (an internal 10dB attenuation sets the net gain to 0dB), then the signal was routed to each output at 0dB, the channel fader was set to 0dB and each output fader was set to 0dB, the output should be 0dBu (or unity). -
Page 100: Routing
Appendix C: Application Notes There are a number of solutions to this problem: • Reduce the amplifier’s input attenuators to a level where the amplifier and console clip at the same point. For example, the input sensitivity is 0dBu, setting the input attenuator on the amplifier to -21dB would mean that the console would clip at the same time as the amplifier. -
Page 101: Mon Mode
Routing The submix is now set up. The group level can be used to control the overall level of the channels (retaining their relative levels), mute the submix output or solo the submix signal. Note: Muting the submix is not the same as muting the channels. Aux sends and other group sends will remain active. - Page 102 Appendix C: Application Notes VeniceU Operator Manual...
-
Page 103: Appendix D Crib Sheets
Appendix D: Crib Sheets This appendix provides you with a template each for the mono and multifunction input channels. These will help you keep a record of your most important settings and make notes. If necessary, you can make copies of these pages if you need more records. VeniceU Operator Manual... -
Page 104: Mono Input Channels
Appendix D: Crib Sheets Mono input channels Notes: VeniceU Operator Manual... -
Page 105: Multifunction Input Channels
Multifunction input channels Multifunction input channels Notes: VeniceU Operator Manual... - Page 106 Appendix D: Crib Sheets VeniceU Operator Manual...
-
Page 107: Appendix E Best Grounding Practice
Appendix E: Best Grounding Practice This appendix gives details of the best grounding practices for the VeniceU console in order to get the optimum performance out of it. Safety first The VeniceU is classified as a class 1 device and as such there is a safety requirement for the power cable to provide an earth connection to the console. -
Page 108: Noise Sources
Appendix E: Best Grounding Practice Audio connection Loop currents GEQ (for example, Square ONE Graphic) Midas VeniceU console Power connection Power connection Power distribution unit (PDU) Ground loop Noise sources Audio manufacturers have known about these issues for many years and most equipment is designed to reduce ground loop generation to the bare minimum or to minimise the effects. - Page 109 Noise sources Laptop PC/Mac USB connection Broken ground Isolation loop barrier Midas VeniceU console Power supply unit (PSU) with internal isolation barrier Power connection Power connection Power distribution unit (PDU) Isolated USB computer system. Note how the isolation barrier breaks the ground loop.
-
Page 110: Noise Solutions
Similarly, audio cables to and from equipment racks should be dressed together to reduce loop area — additionally, producing a tidy appearance. Audio connection Large loop area GEQ (for example, Square ONE Graphic) Midas VeniceU console Power Power connection connection Power distribution unit (PDU) -
Page 111: Balanced Connections
Balanced connections Audio connection GEQ (for example, Square ONE Graphic) Midas VeniceU console Small loop area Power connection Power connection Power distribution unit (PDU) Loop area diagram showing a small loop area Balanced connections Balanced connections are generally immune to ground loops because the grounded screen conductor is not used as a reference for the signal conductors. -
Page 112: Balanced Transformers
Appendix E: Best Grounding Practice Balanced transformers Active electronic circuits achieve good results, but for ultimate noise rejection, transformers are needed. Transformers colour the sound especially at low and high frequencies due to core saturation and impedance rises. They are also expensive, so they are typically only used as external problem solvers when all else fails. -
Page 113: Ground Referenced Connections
Ground referenced connections Source Destination Screen Chassis Chassis Screen termination diagram showing screen broken at source Ground referenced connections Many unbalanced signals are passed between pieces of equipment where one of the devices is balanced and the other is not. By careful wiring using two-core cable with an overall screen, it is possible to convert this connection so that it operates in a similar way to a balanced system, with a ground reference that is not corrupted by ground loop currents in the shield. -
Page 114: Unbalanced Connections
Appendix E: Best Grounding Practice connecting balanced external processing equipment to the insert points, the connection method described in this section should be adopted so as to benefit from the CMR of the external unit. For an example of how to wire a ground referenced insert, see Figure 2 on page 15. Unbalanced connections Ground loops with unbalanced signals are more difficult to deal with, but there are several good techniques available. -
Page 115: Xlr Shells
XLR shells XLR shells XLR pin 1s should only be used to provide a ground connection for cable screens. The shell (body) of cable XLRs also need to be connected to ground so they provide a screen for the terminals, but they should not be wired internally to the pin 1 terminal. Their ground should be prevented from contact with the panel XLR connector body. - Page 116 Appendix E: Best Grounding Practice Laptop PC/Mac USB connection Audio connection Bond 19” rack Midas VeniceU console Power supply unit (PSU) without internal Power connection isolation barrier Power connection Power connection Power connection Power distribution unit (PDU) Diagram showing the bond connection between console and 19” rack...
-
Page 117: Appendix F Service Information
Appendix F: Service Information This appendix give details of how to look after your VeniceU. Routine maintenance To help keep your VeniceU unit in good working order and to make sure it gives you optimum performance, we recommend that you carry out the following about once every month. -
Page 118: Equipment Disposal
Appendix F: Service Information Equipment disposal When this equipment has come to the end of it useful life, its disposal may come under the DIRECTIVE 2002/96/EC OF THE EUROPEAN PARLIAMENT AND OF THE COUNCIL of 27 January 2003 on waste electrical and electronic equipment (WEEE). Hazardous substances in WEEE contaminate water, soil and air and ultimately put at risk our environment and health. -
Page 119: Important Information
Operator Manual FEDERAL COMMUNICATIONS COMMISSION COMPLIANCE INFORMATION MUSIC Group Research UK Limited VeniceU16/VeniceU24/ VeniceU32 Responsible party name: MUSIC Group Research UK Limited Address: Klark Industrial Park, Walter Nash Road, Kidderminster. Worcestershire. DY11 7HJ. England. Phone/Fax No: Phone: +44 1562 741515... - Page 120 VeniceU MUSIC Group IP Limited...
- Page 121 Thank you for reading through this Operator Manual. We hope you found it useful. Please feel free to send us your comments. Our contact details and website address can be found at the front of this document.
- Page 122 Klark Industrial Park, Walter Nash Road, Kidderminster. Worcestershire. DY11 7HJ. England. Tel: +44 1562 741515, Fax: +44 1562 745371 Email: mkt.info@music-group.com Website: www.midasconsoles.com...
Need help?
Do you have a question about the VeniceU16 and is the answer not in the manual?
Questions and answers