Midas VENICE Operator's Manual

Midas VENICE Operator's Manual

Mono input channel
OPERATORS M A N U A L
Klark Teknik Group,
Klark Teknik Building,
Walter Nash Road,
Kidderm inster.
Worcestershire.
DY11 7HJ.
England.
Tel:+44 1562 741515
Fax:+44 1562 745371
Email:sales@ktgplc.com
W ebsite: m idasconsoles.com
(359 941)
Table of Contents
loading

Frequently Asked Questions (16)

  • Why am I getting no sound from certain channels on my Midas VENICE mixer?

    If you are getting no sound from certain channels on your Midas VENICE mixer, check the following:

    • The MUTE switch on the input channel mutes the input channel at all points after the insert send, including all auxiliary sends.
    • The MUTE switch on groups.
    • The MUTE switch on FX-returns mutes the FX-return at all points.
    • The MUTE switch on monitor sends mutes the monitor send output signal.
    • The MUTE switch on aux sends mutes the aux send output signal.
    • The MUTE switch for masters mutes all signals sent to master and master b outputs, except for the Tape In signal to masters.

    For more information, see pages 8, 12, 14, 16, 17, 18 and 19 of the manual.
    Was this helpful?
  • What are the key features of the Midas VENICE mixing desk?

    The Midas VENICE mixing desk features include:

    • Mono Input Channels with XLR and 1/4 inch jack inputs, 80Hz hi-pass filter, 4-band EQ (Treble, Hi Mid, Lo Mid, Bass), FX sends, MON sends, AUX sends, PAN control, MUTE switch, SOLO switch, SIGNAL/PEAK display, and a FADER.
    • Stereo Input Channels with XLR and 1/4 inch jack inputs, MIC GAIN and LINE TRIM controls, 80Hz hi-pass filter, 4-band EQ (Treble, Hi Mid, Lo Mid, Bass), FX sends, MON sends, AUX sends, BAL (pan) control, MUTE switch, SOLO switch, SIGNAL/PEAK display, and a FADER.
    • Groups with PAN control, MAS switch, SOLO switch, SIGNAL/PEAK display, and FADERS.
    • FX Sends/Returns with SEND controls, MON controls, return-routing to groups, MAS switch, MUTE switch, SOLO switch, and FADERS.
    • Monitor (MON) sends with MUTE switch, SOLO switch, and FADERS.
    • AUXes with global PRE/POST switch, SEND controls, MUTE switch, SOLO switch, RETURN controls, and MON controls.
    • Master A/B Tape In with level control, MAS switch, PRE/POST switch for Master B outputs, STEREO/MONO switch for Master B, BAL control for Master B, and FADERS for masters.
    • Talkback / Phones & Speak section with LEVEL control, non-latching MON, AUX, GRP, MAS switches, PHONES level control, SPEAKERS level control, SOLO control, and SOURCE switch.
    • Display / Lamp / Phones section with connections for desk lamps, stereo PHONES outputs, MON meters, and MASTER meters.

    For more information, see pages 7, 8, 9, 11, 12, 13, 14, 15, 16, 17, 18, 19, 20 and 21 of the manual.
    Was this helpful?
  • What type of microphone preamps are featured in the Midas VENICE console?

    The Midas VENICE console features hi-value microphone pre-amps on both mono and stereo input channels.


    For more information, see pages 7 and 11 of the manual.
    Was this helpful?
  • How do I activate phantom power on the Midas VENICE for condenser microphones?

    To activate phantom power for condenser microphones on the Midas VENICE, use the +48V switch located on the rear panel of each channel. This switch connects +48V phantom power to the XLR input connector.


    For more information, see pages 7 and 11 of the manual.
    Was this helpful?
  • What are the recommended steps for initial setup of the Midas VENICE mixer?

    For the initial setup of the Midas VENICE mixer:

    • Locate the console in a convenient and cool space, away from power distribution equipment or other interference sources.
    • Ensure there is a flat surface surrounding the console for use.
    • The console has an internal power supply. It must be set for the appropriate line voltage and plugged into the mains outlet using the supplied cable.
    • Verify the mains voltage setting matches the rear panel marking. If the mains voltage is changed, the mains fuse must also be changed to match the selected voltage.
    • For VENICE 240/320 models, an additional external power supply should be located as far as possible from the console and also set for the appropriate line voltage.
    • The console and external power supply must never be operated with the mains earth disconnected.

    For more information, see page 4 of the manual.
    Was this helpful?
  • How do I connect external outboard gear like compressors or EQs to the Midas VENICE?

    You can connect external outboard gear like compressors or EQs to the Midas VENICE using the Insert points available on the channels. These are 1/4 inch jack connections where the Tip is Send, Ring is Return, and Sleeve is Ground.


    For more information, see pages 3 and 22 of the manual.
    Was this helpful?
  • How do I use the direct outputs on the Midas VENICE mixer?

    The Midas VENICE mixer provides Direct Outputs via 1/4 inch jacks. These outputs are available on the Mono Channel and can be configured as pre-EQ or post-EQ using an internal cut and solder option.

    Was this helpful?
  • How can I optimize the sound quality from my Midas VENICE mixer?

    To optimize the sound quality from your Midas VENICE mixer:

    • Ensure the console is operated with the power supply connected to ground via its mains supply connector.
    • Use high quality screened twisted pair audio cables. All connector shells should be of metal construction to provide a screen when plugged into the console.
    • Connect all JACK connector shells to the cable screen and all XLR connectors should have pin 1 connected to the cable screen.
    • Avoid operating the console in an electromagnetic field that is amplitude modulated by an audio frequency signal, as this may degrade the signal to noise ratio.

    For more information, see page 4 of the manual.
    Was this helpful?
  • What types of audio outputs are available on the Midas VENICE mixing console?

    The Midas VENICE mixing console offers the following audio outputs:

    • Subgroups (4 impedance balanced 1/4 inch jacks)
    • Aux Pre-Fader (Monitor) (2 XLR balanced)
    • Aux Post-Fader (Effects) (2 impedance balanced 1/4 inch jacks)
    • Aux switchable Pre/Post-Fader (2 XLR balanced)
    • Master (with Inserts) (2 XLR balanced)
    • Master B Out (2 XLR balanced, switchable Mono/Stereo, pre-post Fader)
    • Tape Send (Recording) (1 Stereo Phono)
    • Direct Outputs (1/4 inch Jack)
    • Stereo-Headphones (2 Stereo-1/4 inch jack)
    • Stereo-Speakers (2 impedance balanced 1/4 inch jacks)

    For more information, see page 25 of the manual.
    Was this helpful?
  • What are the common causes of hum or noise when operating the Midas VENICE mixer?

    Common causes of hum or noise when operating the Midas VENICE mixer include:

    • Operating the console in an electromagnetic field that is amplitude modulated by an audio frequency signal, which can degrade the signal to noise ratio.
    • Not having the power supply connected to ground via its mains supply connector.
    • Operating the console or external power supply with the mains earth disconnected.

    For more information, see page 4 of the manual.
    Was this helpful?
  • How do I assign subgroups or auxiliary sends on the Midas VENICE for monitoring or effects?

    To assign subgroups or auxiliary sends on the Midas VENICE:

    • For Subgroups: On a mono or stereo input channel, use the 1-2 switch to send the post-fader channel signal to group 1-2 busses, or the 3-4 switch to send to group 3-4 busses, both via the pan/bal control.
    • For Auxiliary Sends (AUXes):
      • Use the AUX controls on each input channel to adjust the level sent to the AUX busses.
      • Configure AUX1 and AUX2 globally for pre- or post-fader operation by pressing the PRE/POST switch on the appropriate AUX-rail in the master section.

    For more information, see pages 8, 9, 12, 13 and 18 of the manual.
    Was this helpful?
  • What connections are available on the rear panel of the Midas VENICE?

    The rear panel of the Midas VENICE provides various connections, including:

    • XLR input for Mic/Line signals on mono channels and stereo channels.
    • 1/4 inch jack sockets for line level signals on mono channels and stereo channels.
    • Insert points for channels.
    • XLR input for Talkback Microphone with permanently connected +48V phantom power.
    • 4-pin female XLR connectors for two 12V desk lamps.
    • 1/4 inch jack sockets for two stereo PHONES outputs.
    • External Power Supply connector.
    • Tape IN/OUT (RCA) connections.
    • Subgroup outputs (4 impedance balanced 1/4 inch jacks).
    • Aux Pre-Fader (Monitor) outputs (2 XLR balanced).
    • Aux Post-Fader (Effects) outputs (2 impedance balanced 1/4 inch jacks).
    • Aux switchable Pre/Post-Fader outputs (2 XLR balanced).
    • Master (with Inserts) outputs (2 XLR balanced).
    • Master B Out outputs (2 XLR balanced, switchable Mono/Stereo, pre-post Fader).
    • Tape Send (Recording) output (1 Stereo Phono).
    • Direct Outputs (1/4 inch Jack).
    • Stereo-Headphones outputs (2 Stereo-1/4 inch jack).
    • Stereo-Speakers outputs (2 impedance balanced 1/4 inch jacks).

    For more information, see pages 3, 7, 11, 21 and 25 of the manual.
    Was this helpful?
  • How flexible is the signal routing on the Midas VENICE mixing desk?

    The Midas VENICE mixing desk offers flexible signal routing:

    • Mono Input Channels can send post-fader signals to group 1-2 busses, group 3-4 busses, or the master stereo bus via the pan control.
    • Stereo Input Channels can send post-fader signals to group 1-2 busses, group 3-4 busses, or the master stereo bus via the BAL (pan) control.
    • FX controls send post-fader signals from the input channel to the FX busses.
    • MON controls send pre-fader and pre-equaliser signals from the input channel to the MON busses.
    • AUX controls send signals from the input channel to the AUX busses, configurable globally for pre- or post-fader operation.
    • FX-return channels can route signals to group 1/2, group 3/4, or the stereo master bus.
    • AUX return signals are directly routed to the L/R master busses.
    • TAPE IN signals can be routed to the stereo master busses or to phones and speakers outputs.

    For more information, see pages 8, 9, 12, 13, 16, 18, 19 and 22 of the manual.
    Was this helpful?
  • How can I monitor my mix effectively using headphones with the Midas VENICE?

    To monitor your mix effectively using headphones with the Midas VENICE:

    • Connect your headphones to one of the 1/4 inch jack PHONES outputs on the rear panel.
    • Adjust the PHONES level control to set the output level from +10dB to off.
    • Use the SOLO control to adjust the incoming solo level before sending it to the headphones.
    • The SOURCE switch controls whether the tape in or master signal is present at the headphones and control room speaker outputs when no solo button is engaged.
    • If a solo button is engaged, the PFL / AFL switch controls whether the mono pre-fader listen or the stereo after-fader listen signal is present at the headphones and control room speaker outputs.
    Was this helpful?
  • How do I use the talkback function on the Midas VENICE console?

    To use the talkback function on the Midas VENICE console:

    • Connect a microphone to the XLR input for Talkback Microphone on the rear panel, which has permanently connected +48V phantom power.
    • Adjust the talkback LEVEL control to set the signal level from +50dB to off.
    • Use the non-latching MON switch to connect the talkback mic to mon1 and mon2 busses.
    • Use the non-latching AUX switch to connect the talkback mic to aux1 and aux2 pre-busses.
    • Use the non-latching GRP switch to connect the talkback mic to all group busses.
    • Use the non-latching MAS switch to connect the talkback mic to left and right master busses.
    Was this helpful?
  • How do I properly clean and maintain the surface and controls of my Midas VENICE mixing console?

    To properly clean the Midas VENICE mixing console, clean it only with a dry cloth.

    Was this helpful?
Need help?

Need help?

Do you have a question about the VENICE and is the answer not in the manual?

Questions and answers

Summary of Contents for Midas VENICE

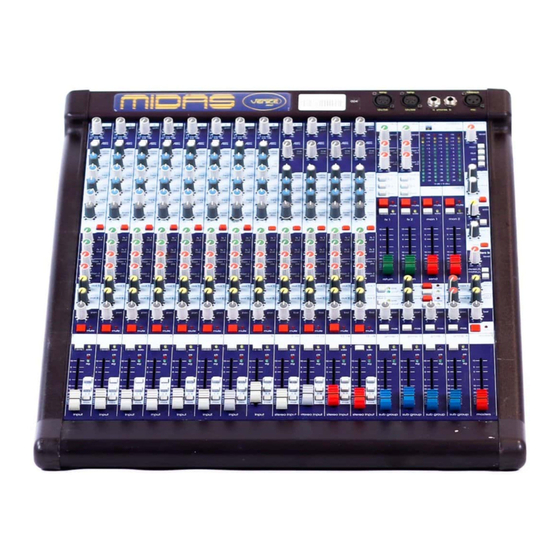
  • Page 1 OPERATORS M A N U A L Klark Teknik Group, Klark Teknik Building, Walter Nash Road, Kidderm inster. Worcestershire. DY11 7HJ. England. Tel:+44 1562 741515 Fax:+44 1562 745371 Email:sales@ktgplc.com W ebsite: m idasconsoles.com (359 941)
  • Page 2: Important Safety Instructions

    IMPORTANT SAFETY INSTRUCTIONS The lightning flash with arrowhead symbol, within an equilateral triangle is intended to alert the user to the presence of uninsulated “dangerous voltage” within the product’s enclosure that may be of sufficient magnitude to constitute a risk of electric shock to persons.
  • Page 3 VENICE CONNECTORS VENICE 160 VENICE 240 VENICE 320 Tape IN / OUT Input / Output XLR Pin 1: Ground Pin 2: Hot Pin 3: Cold Lamp out Pin 1: Chassis Pin 2: n.c. Pin 3: Ground Pin 4: +12V External Power Supply...
  • Page 4: Power Connection

    ADDITIONAL EXTERNAL POWER SUPPLY FOR VENICE 240/320 The power supply should be located as far from the console as the connecting cable will allow. It should be set for the appropriate line voltage and plugged into the mains outlet using the supplied cable.
  • Page 5: Table Of Contents

    CONTENTS Mono Input Channel Page 6 Stereo Input Channel Page 10 Groups Page 15 Effects Page 16 Monitor Page 17 AUXes Page 18 Master A/B Tape In Page 19 Talkback / Phones & Speak Page 20 Display / Lamp / Phones Page 21 Block Diagram s Page 62...
  • Page 6: Mono Input Channel

    M IDAS VENICE M O N O INPUT CHANNEL...
  • Page 7 The Venice Mono Channel is The +48V led monitors if phan- equipped with an XLR input, t o m p o w e r i s a s s i g n e d . T h e which can be used for M ic or...
  • Page 8 The FX controls give continuous adjustment of the post fader level sent from the input channel to the FX busses. The level adjustment is from + 10dB to off with 0dB at the centre position of the rota- ry control. The MON controls give conti- nuous adjustment of the pre- fa- der and pre- equaliser signal sent...
  • Page 9 The SOLO switch sends the in- put channel signal to the PFL / mono-and AFL / stereo busses. If the sw itch is engaged, the mon1/2 meters are automatically used for solo metering. The SIGNAL (-16dBu) / PEAK (+16dBu) display monitors the peak signal level of the pre fader input channel.
  • Page 10: Stereo Input Channel

    M IDAS VENICE STEREO INPUT CHANNEL...
  • Page 11 The Venice stereo input chan- The +48V switch for each chan- nel is equipped with an XLR nel is positioned at the rear panel input which can be used for M ic of the console. It connects +48 V o r L i n e l e v e l s i g n a l s u p t o phantom power to the XLR input +22dBu.
  • Page 12: Groups

    The FX controls give continuous adjustment of the level sent from the input channel to the FX bus- ses. The level adjustment is from + 10dB to off with 0dB at the centre position of the rotary con- trol. The FX controls are connec- t e d p o s t - f a d e r a n d s e n d t h e mixed left/right signal to the FX busses.
  • Page 13 The SOLO switch sends the input channel signal to the PFL/ mono and AFL/ stereo busses. If the switch is engaged, the mon1/2 meters are automatically used for The SIGNAL (-16dBu) / PEAK solo metering. (+16dBu) display monitors the peak signal level of the pre fader input channel.
  • Page 14 M IDAS VENICE M A STER SECTION...
  • Page 15 The PAN controls the group pla- cement within the master stereo- mix and has a constant power law i. e. -3dB at the centre posi- tion and 0dB or off at either ex- treme setting. The MAS switch connects the T h e S O L O s w i t c h s e n d s t h e post fader group signals to the group signal to the PFL / mono...
  • Page 16 The FX SEND control gives con- tinuous adjustm e n t of the FX send output level from +10dB to off with 0dB at the centre positi- on of the rotary control. The M O N controls give conti- nuous adjustment of the pre- fa- der signal sent from the FX- return channel to the MON bus- ses.
  • Page 17 T h e M U T E s w itch mutes the monitor send output signal. The SOLO switch routes the m o- nitor send signal to the PFL/ mono and AFL/ stereo busses. If the switch is engaged, the mon 1 / 2 m e t e r s a r e a u t o matically used for solo metering.
  • Page 18 T h e g l o b a l A U X P R E / P O S T switch configures the aux bus either in pre- fader (mon) or post-fader (fx) operation. The The MUTE switch mutes the aux LEDs next to the switch provide send output signal.
  • Page 19 The TAPE inputs provide a feed The MAS switch connects the from an unbalanced phono sour- TAPE IN signal to the master ce to the stereo master busses or L/R busses right after the master to phones and speakers outputs. mute switch.
  • Page 20 The talkback LEVEL control gi- ves continuous adjustment of the talkback signal from +50dB to off. The talkback input accepts a The non-latching M O N switch maximum input level of +8dBu. connects the talkback mic to mon1 and mon2 busses. The non-latching AUX switch connects the talkback m ic to aux1 and aux2 pre-busses.
  • Page 21 The input for a TALKBACK Mi- crophone is provided via a 3pin- female XLR connector. The +48V Phantom power is permanently connected which is suitable for condenser m icrophones. A convenient connection for two The 1/4 inch jack sockets 12V desk lamps is provided via the provide stereo outputs for 4pin-female XLR connectors.
  • Page 22: Block Diagram S

    B L O C K D I A G R A M S Mono Channel Stereo Channel...
  • Page 23 FX-send, FX-return Aux, Groups and Talkback...
  • Page 24 Master, Monitor, Tape and Solo...
  • Page 25: Specifications

    MIDAS VENICE SERIES PERFORMANCE SPECIFICATIONS Features and Specifications Venice 160 Venice 240 Venice 320 Inputs (total) Mono-Inputs (M ic/Line) with Inserts Stereo-Line/Mono-Mic-Input Channels Stereo-Effect-Returns (Line) Stereo-Tape-Return (Line) 1 left/right Busses Subgroups Aux Pre-Fader (Monitor) Aux Post-Fader (Effects) Aux switchable Pre/Post-Fader...
  • Page 26 Venice Technical Specifications Input Impedance M ic 2k Balanced Line 20k Balanced Input Gain M ic Continuously variable from 0dB to + 60dB Line Mono Channel Continuously variable from - 20dB to + 40dB Line Stereo Channel Continuously variable from...
  • Page 27 Equaliser Mono Channel Hi Pass Slope 12dB / Oct Hi Pass Frequency 80Hz Treble Gain Continuously variable + 15 dB to - 15 dB Centre detent = 0dB Treble Frequency Hi Mid Gain Continuously variable + 15 dB to - 15 dB Centre detent = 0dB Hi Mid Frequency Continuously variable...
  • Page 28: Dimensions

    DIMENSIONS Venice 160...
  • Page 29: Rack Mounting

    Modification for Venice 160 Rack Mounting The Venice 160 comes with additonal rack mounting brackets. For modification you need a Torx screwdriver type T20 (fig.1) and Phillips screwdrivers type Ph1 (fig. 2) and type Ph2 (fig.3). To modify the fig. 1 fig.

This manual is also suitable for:

Venice 160Venice 240Venice 320

Table of Contents