
Related Manuals for Midas PRO X


Summary of Contents for Midas PRO X
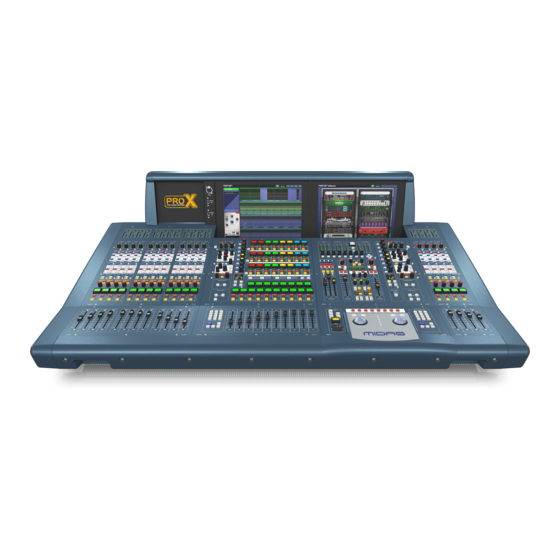
- Page 1 PRO X Live Digital Console Control Centre and Audio System Engine with 168 Input Channels, 99 Mix Buses and 96 kHz Sample Rate Quick Start Guide (Visit midasconsoles.com for Full Manual) A54-00001-28765...
-
Page 2: Important Safety Instructions
All trademarks are the property 10. Protect the power cord from being walked on or of their respective owners. MIDAS, KLARK TEKNIK, pinched particularly at plugs, convenience receptacles, TURBOSOUND, BEHRINGER, BUGERA and DDA are Terminals marked with this symbol... -
Page 3: Instrucciones De Seguridad
10. Coloque el cable de suministro de energía de manera MIDAS, KLARK TEKNIK, TURBOSOUND, BEHRINGER, magnitud sufi ciente como para constituir que no pueda ser pisado y que esté protegido de objetos BUGERA y DDA son marcas comerciales o marcas un riesgo de descarga eléctrica. -
Page 4: Consignes De Sécurité
Toutes les marques appartiennent à protégé d’arêtes coupantes. Assurez-vous que le cordon Utilisez uniquement des câbles d’ e nceintes de haute leurs propriétaires respectifs. MIDAS, KLARK TEKNIK, d’alimentation est suffisamment protégé, notamment au qualité disponibles dans les points de vente avec les TURBOSOUND, BEHRINGER, BUGERA et DDA sont des niveau de sa prise électrique et de l’... -
Page 5: Wichtige Sicherheitshinweise
Ankündigung geändert werden. Alle Warenzeichen sind Eigentum der jeweiligen der Stelle, an der das Netzkabel das Gerät verlässt, auf ausreichenden Schutz. Inhaber. MIDAS, KLARK TEKNIK, TURBOSOUND, Vorsicht BEHRINGER, BUGERA und DDA sind Warenzeichen oder 11. Das Gerät muss jederzeit mit intaktem Schutzleiter Die mit dem Symbol markierten eingetragene Warenzeichen der MUSIC Group IP Ltd. -
Page 6: Instruções De Segurança Importantes
Certifi que-se de que o cabo eléctrico está protegido. Verifi que particularmente nas fi chas, nos MIDAS, KLARK TEKNIK, TURBOSOUND, BEHRINGER, Aviso! receptáculos e no ponto em que o cabo sai do aparelho. - Page 7 いており、 そのうち一本はもう一方よりも幅 る人が損害を生じさせた場合にも、 が広くなっています。 アースタイプの三芯プ MUSIC Group は一切の賠償責任を負いま ラグにはニ本のピンに加えてアース用のピ せん。 技術仕様、 外観およびその他の ンが一本ついています。 これらの幅の広い 情報は予告なく変更になる場合があり ピン、 およびアースピンは、 安全のためのも ます。 商標はすべて、 それぞれの所有 のです。 備え付けのプラグが、 お使いのコン 者に帰属します。 MIDAS 、 KLARK TEKNIK 、 注意 セントの形状と異なる場合は、 電器技師に TURBOSOUND 、 BEHRINGER 、 BUGERA およ 感電の.恐れがありますので、 カ...
- Page 8 PRO X 法律声明 其他的重要信息 MUSIC Group MIDAS KLARK TEKNIK TURBOSOUND BEHRINGER BUGERA MUSIC Group IP Ltd. © MUSIC Group IP Ltd. 201 ¼ '' TS 保修条款 music-group.com/warranty 2000...
- Page 9 Quick Start Guide...
- Page 10 About This Guide True and consistent 96 kHz sampling frequency and 40 bit fl oating point This is the Quick Start Guide for the PRO X Live Audio System. Its purpose is to processing provide exemplary quality audio processing, and the oversampled...
- Page 11 Channel Count With 168 inputs, 96 buses and three master channels, on the PRO X what you see is what you get. There’s no ‘smoke and mirror’ DSP sharing, the PRO X provides a...
-
Page 12: About The Control Centre
N+1 redundant power supplies with three latching mains connectors. The control centre is of modular construction and is built on a robust MIDAS steel frame chassis similar to those used for established MIDAS analogue products. -
Page 13: Control Surface
Quick Start Guide Control Surface The control surface is divided into areas whose function is, largely, dependent on bay location. Each bay has assorted control elements with local feedback and/or support from the two centrally located GUI display screens. The screens can be controlled remotely via external VGA connections, and third party systems can also be viewed/controlled via an integrated KVM switch on the rear panel. - Page 14 PRO X During show time the screen functions that require fast access are controlled by control knobs, pushbutton switches, faders, etc. More complex functions that do The GUI comprises two screens that provide a pictorial representation of the not require this fast access are controlled by the trackballs and navigational keys.
-
Page 15: Front And Rear Panel Connections
Quick Start Guide Each GUI screen has its own default display, although either is selectable via A connector panel on the rear of the control centre has three main sections the GUI main menu. The Overview screen displays 12 inputs and 24 outputs, (see below). -
Page 16: Basic Principles
PRO X Basic Principles >> To fl ip mixes to input pan/fader control With an output selected on the control surface, press FLIP. The button will Before You Start illuminate to show you are in ‘fl ip’ mode. The currently selected mix bus in the... -
Page 17: Working With The Control Centre
Use a drag operation. Move the pointer up/down/left/right for adjustment. most of the PRO X controls and their operation. Therefore, this chapter only deals with the GUI controls that may be new to you. -
Page 18: Text Editing
PRO X Text Editing >> To select a GUI menu option A keyboard is used to type in text on the GUI, for example, to confi gure input Click the menu option, for example, Monitors. The background of the menu and output channel names. -
Page 19: An Introduction To Navigation
Quick Start Guide Navigation An Introduction To Navigation The control centre provides you with unique navigational controls to quickly and easily access the items, such as channels, buses, groups and processing areas, that you will require for mixing. Navigation is an important feature of the control centre. One of the advantages digital consoles have over analogue ones is that their channel count is not limited by the control surface hardware. - Page 20 PRO X Input channel navigation controls on the PRO X. Mix bay channel strip Input fast strip Item Element(s) Description Quick access button — Quickly selects the local processing area of the selected channel or channel pair, but doesn’t aff ect channel selection.
- Page 21 Quick Start Guide >> To assign an input channel to the control surface Do one of the following: • • Scroll buttons - Scroll the desired input channel to the control surface using the scroll by 1 / 12 buttons in the input select section. •...
-
Page 22: Navigating The Mix Buses
PRO X Navigating The Mix Buses The input channels each have aux and matrix mix buses. Mix sections Mix sections (mix bay) (master bay) Input fast strip Item Element(s) Description Quick access button — input This button in the mix section of the input fast strips quickly selects the local mix area of the selected channel. - Page 23 Quick Start Guide >> To navigate a mix bus to the control surface >> To navigate the mix bus processing area to the channel strip Do one of the following: Press the quick access button in the mix section of the desired input fast strip. This does not aff ect the current population of the output fast zone.
-
Page 24: Navigating The Output Channels
PRO X Navigating The Output Channels The output channels comprise auxes, matrices and masters. Master bay channel strip Master channels Item Element(s) Description Quick access button — Quickly selects the local master channel. Illuminates (blue) when active. master channels To Faders Moves the currently-selected group to the faders below. -
Page 25: Confi Guring The Inputs And Outputs
This is done via the GUI at their respective sheet screens. • • Channel type buttons - On the PRO X the Channel Type buttons For confi guration details, see Confi guring VCA/POP Groups. have been replaced with 24 Out LCDs which are assignable in the >>... - Page 26 PRO X Patching Introduction Patching is a GUI-only feature that lets you carry out all system routing requirements. The GUI main menu has a Patching option that takes you to the Patching screen, which contains all of the available patching connectors in the system.
-
Page 27: About The Patching Procedure
Quick Start Guide Item Element(s) Description REDO button Redoes an undo. This can be repeated for each undo in the previous undo operation. Clears all current selections and their patches. Important: CLEAR SEL. button Unlike the NONE button, which merely removes the current selections (highlighted in yellow), CLEAR SEL. goes a step further by removing the patch as well. -
Page 28: Confi Guring The Devices
PRO X Item Description List of Stage and FOH ports, showing current device assignments. device type drop-down list, contains a list of the available devices to choose from. device ID drop-down list, contains a full list of IDs for the selected device type. Those already in use will be prefi xed with the text “(In use)”. -
Page 29: How To Patch
Quick Start Guide How To Patch 3. Select the card/channel you want to confi gure/change, from the drop-down list at the upper-right corner of the confi guration window. For example, Patching, basically, involves selecting the source patching connectors in the the “Analogue In Card”. - Page 30 PRO X Single Patching (SINGLE) >> To patch a single source to multiple destinations The SINGLE function button lets you patch a single source to a single destination Patch the desired source patch connector to one of its destinations, as detailed in or multiple destinations.
-
Page 31: Basic Operation
2. In the fi lters section of the input channel strip, press the fi lter select button 3. Adjust the gain trim control knob to the required level to suit the MIDAS (high pass or low pass) to switch the fi lter in. -
Page 32: Input Equalisation (E Zone)
PRO X Input Equalisation (E Zone) Use EQ to equalise the input signal via the treble, hi-mid, lo-mid and bass fi lters, which are situated in the input channel strip’s E zone. Treble and bass each have a parametric fi lter option and three specifi c shelving modes. Visual feedback for EQ is via GUI only. -
Page 33: Input Dynamics Processing (D Zone)
Quick Start Guide Input Dynamics Processing (D Zone) Set up compressor and gate dynamics processors using the controls in the input channel strip’s D zone. There are four compressors available, corrective, adaptive, creative and vintage, each with the option of hard knee, medium knee and soft knee. Output Processing >>... -
Page 34: Confi Guring Vca/Pop Groups
PRO X >> To assign channels to a VCA/POP group 1. Press and hold down the LCD select button of the desired group (VCA or >> To set up the name of a VCA/POP group POP). For example, “Kit” in the VCAs (as shown above). The group’s LCD... - Page 35 Quick Start Guide >> To select the mix bus mode 1. Select the mix bus (see To Select A Mix Bus). 2. Press the quick access button (adjacent to the fi lters section) to assign the mix overview to the channel strip. For example, the aux send overview for AuxS1. 3.
-
Page 36: Simple Routing To Master Stereo Outputs
PRO X Mix bus routing 7. Click CLOSE to close the eff ect window. The new eff ect will appear in the eff ects rack. You can now patch the new eff ect, which will be on the You can route an aux or matrix (or even master output) to an eff ect or output. -
Page 37: Additional Control - Managing Events
Quick Start Guide >> To load a show >> To create a new scene using the current settings 1. Click LOAD. 1. Click STORE SCENE. 2. In the Load File window, click the show fi le you want to load (shown right). 2. -
Page 38: Show Editor
>> To copy and paste an event 4. You may see an “Analysing...” message in the Removable Storage panel, which means that the MIDAS folder on the USB memory stick is being read. 1. Right-click the event you want to copy, and then choose Copy from Wait for the message to clear. -
Page 39: User Library (Presets)
Quick Start Guide User Library (Presets) Surround Panning The control centre has a user library where you can store settings, such as for the In addition to stereo, the control centre has three surround panning modes: EQ or the whole channel. For example, you may wish to store the EQ settings of quad;... -
Page 40: Two-Man Operation
PRO X 2. In the Surround Mode section, select the desired surround mode. NOTE: This feature can also be used by a single operator if they require somewhere to store important channels. In this case, area B can be used in Two-Man Operation the same way a ‘channel 25’... -
Page 41: Setting Up The System
NOTE: Wwhen operating in area B, remember to select the B option, where appropriate, particularly in the monitor section. Also note that solo If you want to connect AES50 audio between two MIDAS digital consoles the B (also for talkback) is totally independent of area B, which is used for slave console must be set to external AES50 synchronisation, irrespective of the navigation only. -
Page 42: Switching The Control Centre On/Off
PRO X Switching The Control Centre On/Off After connecting up the audio cables, carry out the following: Carry out the following to switch the control centre on or off in a safe manner, 1. Plug the three mains cables into the mains power outlets. -
Page 43: Appendix A: Troubleshooting
Use solo at selected points in the signal path to try and pinpoint where the signal is being lost • • Check for correct signal routing by making sure channel sources/ destinations are correctly assigned. If you still don’t have any audio, contact MIDAS Technical Support. Item Element(s) Description CONFIG button Opens the AES50 Device Confi guration window. -
Page 44: Swapping The Active Network
PRO X The colour of each device, together with its link (if applicable), indicates its current status, as shown in the following table. State Description Unit Status Link Status Connection of Active Link Both the unit and link are green... -
Page 45: Audio Performance Specifi Cations
Quick Start Guide Audio Performance Specifi cations Frequency Response Input Output Gain 20 Hz 20 kHz Surface I/O Surface I/O 0 dB 0 dB to -1.0 dB 0 dB to -1.0 dB Surface I/O Surface I/O 40 dB 0 dB to -1.0 dB 0 dB to -1.0 dB Gain Error at 1 kHz Input... - Page 46 PRO X System Inputs and Outputs Control Surface Input Connector 3 pin XLR balanced AD Converter 24 bit, 96 kHz and 128 X oversampling Control Surface Analogue Outputs Connector 3 pin XLR balanced DA Converter 24 bit, 96 kHz and 128 X oversampling...
-
Page 47: Input & Output Characteristics
Quick Start Guide Input & Output Characteristics Analogue Input Characteristics Input Type Load Z Gain Max Level Connector Surface I/O 10 K -22.5 dB to +65 dB +21 dBu Talk Mic 600 R +15 dB to +60 dB +6 dBu Monitor 10 K 0 dB... -
Page 48: Appendix C: Dimensions
PRO X Appendix C: Dimensions PRO X is built around a road rugged frame: Width 1364 mm x Depth 945 mm x Height 431 mm (53.7" x 37.2" x 17.0") Weight: 97 kg (213.4 lbs)* *Weights are approximate and out of fl ight case. Packing may vary by territory... -
Page 49: Aspectos Importantes
Quick Start Guide Other important information Outras Informações Important information Informations importantes Importantes 1. Register online. Please register your new 1. Enregistrez-vous en ligne. Prenez le temps 1. Registre-se online. Por favor, registre seu novo MUSIC Group equipment right after you purchase it by d’enregistrer votre produit MUSIC Group aussi vite que equipamento MUSIC Group logo após a compra visitando visiting midasconsoles. - Page 50 PRO X Other important information 其他的重要信息 1. 在线注册。 请购买 产品后立 MUSIC Group 即在 网站注册。 网页上有简 midasconsoles. com 单的在线注册表格。 这有助于我们更快更有 效率地处理您维修等事宜。 请阅读保修的相 关条款及条件。 2. 无法正常工作。 若您的 产品 MUSIC Group 无法正常工作, 我们会为您尽快修复。 请联 系您购买产品的销售商。 若你所在地区没有 销售商, 请联系 MUSIC Group midasconsoles. com 网站的 “...
-
Page 51: Federal Communications Commission Compliance Information
Quick Start Guide FEDERAL COMMUNICATIONS COMMISSION COMPLIANCE INFORMATION PRO X MUSIC Group Research Responsible Party Name: UK Limited Klark Industrial Park, Address: Walter Nash Road, Kidderminster. Worcestershire. DY11 7HJ. England. Phone Number: +44 1562 741515 PRO X complies with the FCC rules as mentioned in the following paragraph: This equipment has been tested and found to comply with the limits for a Class A digital device, pursuant to Part 15 of the FCC Rules. - Page 52 midasconsoles.com...
Need help?
Do you have a question about the PRO X and is the answer not in the manual?
Questions and answers