
Related Manuals for Digisol DG-BR4015N


Summary of Contents for Digisol DG-BR4015N
-
Page 1: User Manual
DG-BR4015N 150Mbps Wireless 3G Broadband Router User Manual V1.1 2011-11-30 As our products undergo continuous development the specifications are subject to change without prior notice... - Page 2 Trademarks: DIGISOL™ is a trademark of Smartlink Network Systems Ltd. All other trademarks are the property of the respective manufacturers. Safety This equipment is designed with the utmost care for the safety of those who install and use it.
-
Page 3: Table Of Contents
DG-BR4015N User Manual INDEX 1. PRODUCT INFORMATION ........................5 1-1 I ............................. 5 NTRODUCTION 1-2 S .......................... 6 AFETY NFORMATION 1-3 S ........................7 YSTEM EQUIREMENTS 1-4 P ..........................7 ACKAGE ONTENTS 1-5 G ............8 AMILIAR WITH YOUR NEW WIRELESS BROADBAND ROUTER 2. - Page 4 DG-BR4015N User Manual 2-9-5 System Command ................... 73 2-10 M ..........................74 ANAGEMENT 2-10-1 System Management ..................74 2-10-2 Settings File (Factory)................... 76 2-10-3 Upload Firmware................... 77 2-11 S ............................. 78 TATUS 2-11-1 Syslog ......................78 2-11-2 Reboot ......................79...
-
Page 5: Product Information
1. Product Information 1-1 Introduction Thank you for purchasing DG-BR4015N 150Mbps Wireless 3G Broadband Router! DG- BR4015N is the best choice for Small office / Home office users, all computers and network devices can share a single 3G / Cable modem internet connection at high speed. -
Page 6: Safety Information
DG-BR4015N User Manual 1-2 Safety Information In order to keep the safety of users and your properties, please follow the safety instructions as mentioned below: 1. This router is designed for indoor use only; DO NOT place this router outdoor. -
Page 7: System Requirements
Before you start using this router, please check if there’s anything missing in the package, and contact your dealer of purchase to claim for missing items: • DG-BR4015N 3G Wireless Broadband Router • Switching power adapter (9V DC, 1A) • Quick Installation Guide •... -
Page 8: Get Familiar With Your New Wireless Broadband Router
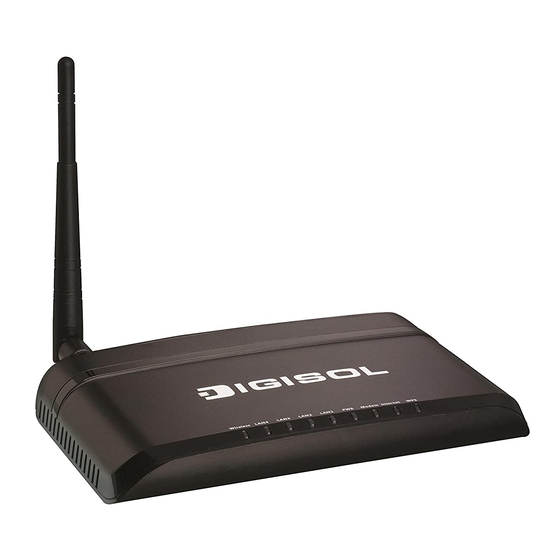
DG-BR4015N User Manual 1-5 Get Familiar with your new wireless broadband router Front Panel Name Color Status Description Wireless radio is ON. Wireless Green Blinking Data is being transmitted or received. Wireless is not enabled. LAN link is UP. Green Blinking Data is being transmitted or received. -
Page 9: Back Panel
DG-BR4015N User Manual Back Panel Antenna WPS/ Power Reset Connector Port Interface Description Antenna It is a 3dBi dipole antenna. Press this button and hold for 10 seconds to restore all settings to WPS/Reset factory defaults, and press this button for less than 5 seconds to start WPS function. -
Page 10: System And Network Setup
DG-BR4015N User Manual 2. System and Network Setup 2-1 Software Installation 1. Insert the Setup CD into your CD-ROM drive of notebook/desktop computer. 2. Explore the CD and execute the “Autorun.exe” file. Below given screen will appear. Click ‘next’ to continue with the installation. - Page 11 DG-BR4015N User Manual 3. Connect 3G USB dongle to the USB port on the Router. Click ‘next’ to continue with the installation. 4. Power ON the router. It will take approximately 30 seconds for router to boot up completely. Ensure that all the LED’s on the router are ON. If not, try the...
- Page 12 DG-BR4015N User Manual 5. Connect your desktop/notebook to one of the LAN ports (1~4) of the router. Click ‘next’ to continue with the installation. 6. Enter the IP address of the router (default IP 192.168.2.1 will automatically appear). Click ‘Login’ to continue with the installation.
- Page 13 DG-BR4015N User Manual 7. Default Username is admin and Password is admin. Click ‘OK’ to continue with the installation. 8. Below screen will display the Router Setup Wizard steps. Click ‘next’ to continue with the installation.
- Page 14 DG-BR4015N User Manual 9. Select the type of Internet connection you wish to set. Click ‘next’ to continue with the installation. i) If “Wan Interface Setup” is set to DHCP then the following screen will appear. Enter any Hostname, this field is optional. Click ‘next’ to continue with the...
- Page 15 DG-BR4015N User Manual ii) If “Wan Interface Setup” type is set to Static IP then following screen will appear. Enter the IP address, Subnet Mask, Default Gateway and DNS address provided by ISP in the screen shown below and click ‘next’ to continue with the installation.
- Page 16 DG-BR4015N User Manual 10. Configure the 3G connection parameters as shown in the following screen. Click ‘next’ to continue with the installation. Parameter Description Country Select the Country from drop-down list. If not listed select Manual. Select ISP from drop-down list.
- Page 17 DG-BR4015N User Manual 11. On the following screen the Default IP address (192.168.2.1) of router is displayed. If you wish to modify the LAN IP address of the router then enter a new valid IP here. Click ‘next’ to continue with the installation.
- Page 18 DG-BR4015N User Manual 12. In the following screen, assign a SSID to your wireless network. Default SSID is DG-BR4015N. Secure your wireless network by selecting an encryption as WPA/WPA2. Enter 8~63 characters as encryption key. Click ‘finish’ to complete the installation.
- Page 19 DG-BR4015N User Manual 14. Click “Reboot” button to reboot the router. Please wait for 60 seconds till the router reboots. Congratulations! Your router configuration is now finished.
-
Page 20: Connecting To 3G Router By Web Browser
DG-BR4015N User Manual 2-2 Connecting to 3G router by web browser After the network connection is setup, next step is to setup the router with proper network parameters, so it can work properly in your network environment. Please use the web browser to configure the router. A computer with wired Ethernet connection to the router is required for this first-time configuration. - Page 21 DG-BR4015N User Manual 2. Select ‘Specify an IP address’, then input the following settings in respective field: IP address: 192.168.2.2 Subnet Mask: 255.255.255.0 Gateway: 192.168.2.1 Click ‘OK’ when finish.
-
Page 22: Windows 2000 Ip Address Setup
DG-BR4015N User Manual 2-2-2 Windows 2000 IP address setup 1. Click ‘Start’ button (it should be located at lower-left corner of your computer), then click control panel. Double-click ‘Network and Dial-up Connections’ icon, Right click on ‘Local Area Connection’ and select ‘Properties’, Local Area Connection Properties window will appear. - Page 23 DG-BR4015N User Manual 2. Select ‘Use the following IP address’, then input the following settings in respective field: IP address: 192.168.2.2 Subnet Mask: 255.255.255.0 Default gateway: 192.168.2.1 Click ‘OK’ when finish.
-
Page 24: Windows Xp Ip Address Setup
DG-BR4015N User Manual 2-2-3 Windows XP IP address setup 1. Click ‘Start’ button (it should be located at lower-left corner of your computer), then click control panel. Click ‘Network Connections’, Right click on ‘Local Area Connection’ and select Properties, Local Area Connection Properties window will appear. - Page 25 DG-BR4015N User Manual 2. Select ‘Use the following IP address’, then input the following settings in respective field: IP address: 192.168.2.2 Subnet Mask: 255.255.255.0 Default gateway: 192.168.2.1 Click ‘OK’ when finish.
-
Page 26: Windows Vista Ip Address Setup
DG-BR4015N User Manual 2-2-4 Windows Vista IP address setup 1. Click ‘Start’ button (it should be located at lower-left corner of your computer), then click control panel. Click on ‘View Network Status and Tasks’ and then click on ‘Manage Network Connections’. Right-click ‘Local Area Connection’, then select ‘Properties’. - Page 27 DG-BR4015N User Manual 2. Select ‘Use the following IP address’, then input the following settings in respective field: IP address: 192.168.2.2 Subnet Mask: 255.255.255.0 Default gateway: 192.168.2.1 Click ‘OK’ when finish.
-
Page 28: Accessing Router's Web Gui
DG-BR4015N User Manual 2-3 Accessing router’s web GUI After you assign an IP address to the computer, open the web browser (Internet Explorer 5.x or above, Firefox, or Netscape) and type the IP address of router in the address bar as ‘http://192.168.2.1’... - Page 29 DG-BR4015N User Manual Following is the Web GUI interface of the router. TIP: This page shows the eight major setting categories: Wizard, Internet Mode (3G), Network, Wireless, Firewall, Advance, Management, Status. You can jump to another category directly by clicking the link.
-
Page 30: Using Router Setup Wizard
DG-BR4015N User Manual 2-4 Using Router Setup Wizard This router provides a ‘Quick Setup Wizard’ procedure, which will help you to complete all required settings you need to access the Internet quickly. Please follow the instructions mentioned below to complete the ‘Quick Setup’: Please go to Quick Setup menu by clicking ‘Wizard’... - Page 31 DG-BR4015N User Manual Here, you can configure the router using wizard in 2 simple steps. Step 1 : Configure Internet Connection Step 2 : Configure Wireless Settings Click ‘Next’ to continue with the Router Setup Wizard and the following window will appear to configure Internet connection.
- Page 32 DG-BR4015N User Manual A. Setup procedure for DHCP Click on ‘DHCP’ in Internet connection as shown in the below screen. Click ‘Next’ to continue with the router setup wizard. B. Setup procedure for Static mode Click on ‘Static Mode’ in Internet connection and below screen will appear.
- Page 33 DG-BR4015N User Manual Here are descriptions of every setup item: Parameter Description IP address Please input IP address assigned by your service provider. Subnet Mask Please input subnet mask assigned by your service provider Default Gateway Please input the default gateway assigned by your service provider.
- Page 34 DG-BR4015N User Manual Here are descriptions of every setup item: Parameter Description Username Enter the username provided by ISP Password Enter the password provided by ISP Verify Password Re-enter password to verify There are 3 types of Operation Modes: • Keep Alive - Internet connection is always alive.
- Page 35 DG-BR4015N User Manual Step2: Configure Wireless Settings. Here is the description of every setup item. Parameter Description Allows you to change the SSID. Default SSID is DG-BR4015N. Network Name (SSID) Security Please secure the wireless network using WEP or WPA/WPA2 security.
-
Page 36: Internet Mode Setup (3G)
DG-BR4015N User Manual 2-5 Internet Mode Setup (3G) Configure Internet mode setup manually. 2-5-1 3G mode If your ISP Internet mode is 3G, then configure the following parameters. Parameter Description State Enter state from pull-down menu. If not listed select Manual. -
Page 37: Static (Fixed Ip) Mode
DG-BR4015N User Manual 2-5-2 Static (Fixed IP) mode If your connection mode is static IP, then configure the following parameters. Parameter Description IP address Please input IP address assigned by your service provider. Subnet Mask Please input subnet mask assigned by your service provider Default Gateway Please input the default gateway assigned by your service provider. -
Page 38: Dhcp Mode
DG-BR4015N User Manual 2-5-3 DHCP Mode This router to automatically obtain IP address from your ISP, in DHCP mode. If your ISP does not provide any IP network parameters, select the connection and Input Hostname. Click Apply to continue with the installation. -
Page 39: Operation Mode
DG-BR4015N User Manual Parameter Description Username Enter the username provided by ISP Password Enter the password provided by ISP Verify Password Re-enter password to verify Operation Mode Connect Keep Alive: Connect automatically to the Internet after rebooting the system or connection failure. - Page 40 DG-BR4015N User Manual Gateway: The first Ethernet port is treated as WAN port. The other Ethernet ports and the wireless interface are bridged together and are treated as LAN ports. Parameter Description NAT can be enabled or disabled as suitable for user environment.
-
Page 41: Ip Address (Upnp)
DG-BR4015N User Manual 2-6-1 IP Address (UPnP) In this section you can configure LAN parameters. Please click ‘IP Address (UPnP)’ menu on the left of web management interface, under the ‘Network’ tab and the following screen will be displayed on your web browser. - Page 42 DG-BR4015N User Manual Assign IP address dynamically to the DHCP clients. Default is DHCP Type Enabled. Please input the Start IP address for this network. Start IP Address Please input the End IP address for this network. End IP Address Please input subnet mask for this network.
-
Page 43: Statistics
DG-BR4015N User Manual 2-6-2 Statistics Here you can view the statistics of 3G router such as memory statistics, WAN/LAN Tx and Rx and all interface statistics. Please click ‘Statistic’ menu on the left of web management interface, under the ‘Network’ tab and the following screen will be displayed on your web browser. -
Page 44: Dhcp Client List
DG-BR4015N User Manual 2-6-3 DHCP Client List Here you can view the DHCP clients connected to the router. Please click ‘DHCP Clients’ menu on the left of web management interface, under the ‘Network’ tab and the following screen will be displayed on your web browser. -
Page 45: Basic Wireless Setting
DG-BR4015N User Manual 2-7-1 Basic Wireless Setting This function allows you to define SSID, and Channel for the wireless connection. These parameters are used for the wireless stations to connect to the Access Point. Click ‘Basic’ under Wireless, below screen will prompt for Basic Setting. - Page 46 DG-BR4015N User Manual Network Name (SSID) When you are browsing for available wireless networks, this is the name that will appear in the list (unless Visibility Status is set to Hidden, see below). This name is also referred to as the SSID.
-
Page 47: Advance
DG-BR4015N User Manual Other HT TxStream HT means High Throughput. The number of HT TxStream means how many antennas will transmit data simultaneously. HT RxStream The number of HT RxStream means how many antennas will receive data simultaneously. When you finish with all settings, please click ‘Apply’ button to continue with other setup procedures. - Page 48 DG-BR4015N User Manual Parameter Description BG Protection This mode is a protection mechanism that prevents collisions among 802.11b/g Mode modes. Below are the choices. Auto BG protection mode goes ON or OFF automatically as needed. ON: BG protection mode is always ON.
-
Page 49: Wireless Security
DG-BR4015N User Manual 2-7-3 Wireless Security It’s very important to set wireless security settings properly. If you don’t, hackers and malicious users can reach your network and valuable data without your consent and this will cause serious security problem. To set wireless security settings, Please click ‘Wireless Security’ menu on the left of web management interface, under the ‘Wireless’... - Page 50 DG-BR4015N User Manual Here are descriptions of every setup item: Parameter Description Default Tx Key When ‘WEP’ Encryption is enabled then ‘Key 1’ will appear in this field. Key Format There are two types of key format: ASCII and Hex. When you select a key format, the number of characters of key will be displayed.
- Page 51 DG-BR4015N User Manual B. WPA-PSK/WPA2-PSK The WPA or WPA2 mode uses a common password phrase, called a Pre-Shared Key, that must be manually distributed to all clients that want to connect to the network. Specify a key as an easy-to-remember form of letters and numbers. The WPA/WPA2 Preshared Key can be input as ASCII string (8-63 characters).
- Page 52 DG-BR4015N User Manual Here are the descriptions of every setup item. Parameter Description TKIP will change the encryption key frequently to enhance the TKIP wireless LAN security. AES uses CCMP protocol to change encryption key frequently. AES can provide high level encryption to enhance the wireless LAN security.
- Page 53 DG-BR4015N User Manual C. WPA-RADIUS Wi-Fi Protected Access (WPA) is an advanced security standard. You can use an external RADIUS server to authenticate wireless stations and provide the session key to encrypt data during communication. It uses TKIP or AES to change the encryption key frequently, and this will improve security.
- Page 54 DG-BR4015N User Manual Here are the descriptions of every setup items. Parameter Description TKIP will change the encryption key frequently to enhance the TKIP wireless LAN security. AES uses CCMP protocol to change encryption key frequently. AES can provide high level encryption to enhance the wireless LAN security.
- Page 55 DG-BR4015N User Manual D. WPA2-RADIUS WPA2 is advanced and upgraded form of WPA. WPA2 provides better and secure wireless network as compared to WPA. Following screen appears if you select ‘WPA2-RADIUS’...
- Page 56 DG-BR4015N User Manual Here are the descriptions of every setup items: Parameter Description TKIP TKIP will change the encryption key frequently to enhance the wireless LAN security. AES uses CCMP protocol to change encryption key frequently. AES can provide high level encryption to enhance the wireless LAN security.
-
Page 57: Wps (Wi-Fi Protected Setup)
DG-BR4015N User Manual 2-7-4 WPS (Wi-Fi Protected Setup) Wi-Fi Protected Setup (WPS) is the simplest way to build connection between wireless network clients and this wireless router. You don’t have to select encryption mode and input a long encryption passphrase every time when you need to setup a wireless client, you only have to press a button on wireless client and this wireless router, and the WPS will do the rest for you. -
Page 58: Wds (Wireless Distribution System)
DG-BR4015N User Manual Here are the descriptions of every setup item. Parameter Description WPS mode Select Enable from drop down list to start WPS function. Select PBC if you wish to connect using push button. Also, enable PBC on clients so they can connect with WPS security. -
Page 59: Ap Clients List
DG-BR4015N User Manual Parameter Description WDS Mode WDS mode is disabled by default. You can set WDS in 3 different modes. Operates in an automatic mode that detects and learns WDS peer Lazy Mode addresses without the need to configure a WDS list entry This feature allows the wireless AP/Router to associate with other AP/Router in the network and use their WDS MAC list. -
Page 60: Statistics
DG-BR4015N User Manual 2-7-7 Statistics Displays the Wireless Tx/Rx statistics. -
Page 61: Firewall
DG-BR4015N User Manual 2-8 Firewall A firewall is designed to permit or deny network transmissions based upon a set of rules and is frequently used to protect networks from unauthorized access while permitting legitimate communications to pass. The firewall can also block users from accessing the specific URL. -
Page 62: Qos (Quality Of Service)
DG-BR4015N User Manual 2-8-1 QoS (Quality of Service) You may setup rules to provide Quality of Service guarantees for specific applications. To set QoS settings, Please click ‘QoS BwLimit’ menu on the left of web management interface, under the ‘Firewall’ tab and following screen will be displayed. - Page 63 DG-BR4015N User Manual Please click ‘TCP/IP Filter menu on the left of web management interface, under the ‘Firewall’ tab and the following screen will be displayed on your web browser. By default, the MAC/IP/Port Filtering feature is disabled. Note : When Access Control is disabled, every device on the LAN has unrestricted access to the Internet.
-
Page 64: Url Filter
DG-BR4015N User Manual When you finish with all settings, please click ‘Apply’ button to continue with other setup procedures. If you want to reset the setting click on ‘Reset’. 2-8-3 URL Filter URL Filter is a web solution that blocks web-sites access according the URL Filter String. - Page 65 DG-BR4015N User Manual Here is the description of every setup items: Parameter Description There are 3 options. When this options are checked Web Content Filter it will filter objects supporting proxy, java and active X. URL Filter blocks web-sites access according to Web URL Filter the URL Filter String.
-
Page 66: System Security
DG-BR4015N User Manual 2-8-4 System Security You can configure system firewall to protect AP/Router from attacks. Please click ‘System Security’ menu on the left of web management interface, under the ‘Firewall’ tab and the following screen will be displayed on your web browser. -
Page 67: Advance
DG-BR4015N User Manual Here are the descriptions of every setup item. Parameter Description Remote Management Allows you to access router remotely. Ping from WAN Filter If Enabled, will block all ICMP packets on the WAN port. To block the suspected port scan flood. -
Page 68: Routing
DG-BR4015N User Manual Here are the descriptions of every setup item. Parameter Description Select a dynamic DNS service provider from the drop-down Dynamic DNS list. Provider Account Enter the account provided by your service provider. Enter the password provided by your service provider. -
Page 69: Dmz
DG-BR4015N User Manual Here is the description of every setup items. Parameter Description Destination Destination IP address of packets that will take this route Range Select either range of IP address or Single host Specifies the next hop to be taken if this route is used. A gateway of 0.0.0.0 implies there is no next hop, and the IP... - Page 70 DG-BR4015N User Manual Here is the description of every setup items: Parameter Description Putting a computer in the DMZ may expose that DMZ Settings computer to a variety of security risks. Use of this option is only recommended as a last resort.
-
Page 71: Port Forwarding
DG-BR4015N User Manual 2-9-4 Port Forwarding This function allows you to redirect a single port or consecutive ports of Internet IP address to the same port of the IP address on a local network. The port number(s) of Internet IP address and private IP address (the IP address on local network) must be the same. -
Page 72: Virtual Server
DG-BR4015N User Manual When you finish with all settings, please click ‘Apply’ button to continue with other setup procedures. If you want to reset the setting click on ‘Reset’. Virtual Server This function allows you to redirect a port on Internet IP address (on WAN port) to a specified port of an IP address on local network, so you can setup an Internet service on the computer on local network, without exposing it on Internet directly. -
Page 73: System Command
DG-BR4015N User Manual When you finish with all settings, please click ‘Apply’ button to continue with other setup procedures. If you want to reset the setting click on ‘Reset’. 2-9-5 System Command In this section, you can run a system command as root. -
Page 74: Management
DG-BR4015N User Manual 2-10 Management In this section you can configure the admin password, NTP setting, Factory setting and Upload firmware. 2-10-1 System Management Please click ‘Management’ tab and the following screen will be displayed on your web browser. - Page 75 DG-BR4015N User Manual Here is description of every setup items. Parameter Description Language Select English or Simple Chinese as per the user need. Settings Recommended is English. Administrator Enter a password for the user "admin", who will have Setting full access to the Web-based management interface.
-
Page 76: Settings File (Factory)
DG-BR4015N User Manual 2-10-2 Settings File (Factory) In this section you can save system settings, by exporting the configuration file, restoring by importing the file or reset router to factory default setting. Please click ‘Settings File (Factory)’ menu on the left of web management interface, under the ‘Management’... -
Page 77: Upload Firmware
DG-BR4015N User Manual 2-10-3 Upload Firmware Once you have a firmware update on your computer, use this option to browse for the file and then upload the information into the router. Please click ‘Upload Firmware’ menu on the left of web management interface, under... -
Page 78: Status
DG-BR4015N User Manual 2-11 Status In this section, you can look at the status of 3G wireless Router, such as System Info, Internet Configurations, and Local Network. 2-11-1 Syslog In this section you can view the log generated. Click ‘Refresh’ to get new log message... -
Page 79: Reboot
DG-BR4015N User Manual 2-11-2 Reboot It is useful for restarting when you are not near the device.
Need help?
Do you have a question about the DG-BR4015N and is the answer not in the manual?
Questions and answers