
Related Manuals for Digisol DG-BG4300N


Summary of Contents for Digisol DG-BG4300N
-
Page 1: Broadband Router
DG-BG4300N 300Mbps Wireless ADSL2/2+ Broadband Router User Manual V1.0 2011-12-01 As our product undergoes continuous development the specifications are subject to change without prior notice... - Page 2 Trademarks: DIGISOL™ is a trademark of Smartlink Network Systems Ltd. All other trademarks are the property of the respective manufacturers.
-
Page 3: Table Of Contents
DG-BG4300N User Manual INDEX 1. Product Information ......................6 1.1 Introduction and Safety Information .................. 6 1.2 Other features of the router ....................6 1.3 Safety Information ......................7 1.4 System Requirements ..................... 8 1.5 Package Contents ......................8 1.6 Get Familiar with your new ADSL2+ Wireless broadband router ..........9 2. - Page 4 DG-BG4300N User Manual 6.3 QoS .......................... 63 6.3.1 IP QoS ....................... 63 6.4 CWMP Setup ......................65 6.4.1 TR-069 Configuration ..................65 6.5 Port Mapping Setup ....................67 6.5.1 Port Mapping Configuration ................. 68 6.6 Others ........................69 6.6.1 Bridge Setting ..................... 69 6.6.2 Client Limit Configuration ..................
- Page 5 DG-BG4300N User Manual 9.6 Diagnostic Setup ....................... 98 9.6.1 Ping Diagnostic ....................98 9.6.2 Ping6 Diagnostic ....................98 9.6.3 Traceroute Diagnostic ..................99 9.6.4 OAM Fault Management – Connectivity Verification ..........99 9.6.5 ADSL Diagnostic....................100 9.6.6 Diagnostic Test ....................101...
-
Page 6: Product Information
1. Product Information 1.1 Introduction and Safety Information The DG-BG4300N supports Annex A mode. It provides four 10/100 Base-T Ethernet ports for user. The device provides high-speed ADSL2+ broadband connection to the Internet or Intranet for high-end users, such as net bars and office users. -
Page 7: Safety Information
DG-BG4300N User Manual 1.3 Safety Information In order to keep the safety of users and your properties, please follow the safety instructions as mentioned below: 1. This router is designed for indoor use only; DO NOT place this router outdoor. -
Page 8: System Requirements
Before you start using this router, please check if there’s anything missing in the package, and contact your dealer of purchase to claim for missing items: DG-BG4300N ADSL2+ Wireless Broadband Router Switching power adapter (9V DC, 1A) ... -
Page 9: Get Familiar With Your New Adsl2+ Wireless Broadband Router
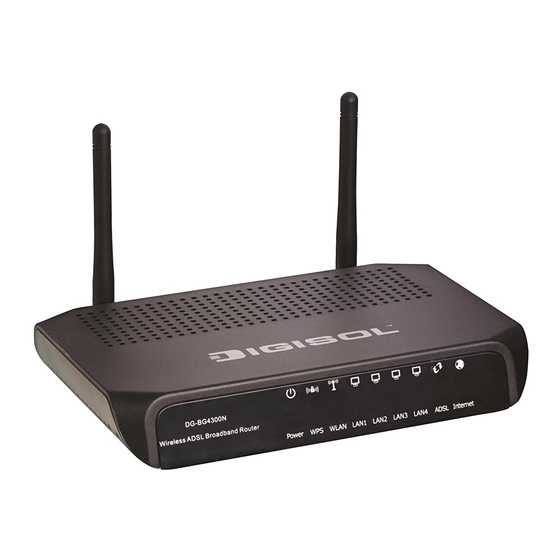
DG-BG4300N User Manual 1.6 Get Familiar with your new ADSL2+ Wireless broadband router Front Panel Color Status Description Device is initializing or initialization is failed Power Power is OFF Green Power is ON Blinking WPS negotiation is enabled, waiting for the clients Green WPS negotiation is not enabled on the device. -
Page 10: Rear Panel
DG-BG4300N User Manual Rear Panel Interfaces Description Antenna It is a 2dBi dipole antenna. Switch the button to activate or deactivate the wireless Radio functions. ON/OFF Press this button for less then 5 seconds to start WPS function. Press this button and hold for 10 seconds to restore all settings Reset to factory defaults. -
Page 11: System And Network Setup
DG-BG4300N User Manual 2. System and Network Setup 2.1 Hardware Installation Step 1 Connect the Line interface of the device and the Modem interface of the splitter with a telephone cable. Connect the phone set to the Phone interface of the splitter through a telephone cable. - Page 12 DG-BG4300N User Manual Step 3 Connect the power adapter (9V DC / 1A) to the wall socket, and then connect it to the ‘Power’ socket of the router. Step 4 Please check all LEDs on the front panel. Power LED ‘should be steadily ON, ADSL and LAN should be ON.
-
Page 13: Software Installation
DG-BG4300N User Manual 3. Software Installation Step 1: Insert the Setup CD into your CD-ROM drive of notebook/desktop computer. Step 2 : You will see the Autorun utilit. Click ‘Start’ to continue. - Page 14 DG-BG4300N User Manual Step 3 : Connect one end of the telephone cable RJ-11 into the ADSL port provided on the splitter from the service provider and connect other telephone cable from the splitter to the LINE port on the...
- Page 15 DG-BG4300N User Manual Step 4 : Power ON the router. It will take approximately 30 seconds for router to boot up completely. Ensure that all the LED’s on the router are ON. If not, try the above steps again else click ‘Next’ to continue.
- Page 16 DG-BG4300N User Manual Step 7 : If the LED indications are proper click ‘Next’ to continue with the installation. Step 8 : Here, you can configure the ADSL router. Select the Country : India and then select the service provider from the drop-down list. You can change the VPI/VCI value as instructed by your ISP.
- Page 17 DG-BG4300N User Manual VPI : The valid value is in the range of 0 to 255 VCI : The valid value is in the range of 32 to 65535. (0 to 31 is reserved for local management of ATM traffic).
- Page 18 DG-BG4300N User Manual Step 9 : Click ‘Next’ to continue with the installation. You can select LLC or VC-Mux as the encapsulation mode according to the uplink equipment or use the default setting. 1483 Bridged : If you select 1483 Bridged as the WAN protocol, you must use the third party Dial-up software or Windows New Connection Wizard to configure the Internet dial-up access.
- Page 19 DG-BG4300N User Manual Following page appears showing the WAN status.
- Page 20 DG-BG4300N User Manual Note: If the WAN IP address appears 0.0.0.0, then click Retry for retrying the connection to Internet. If a valid IP address appears, other than 0.0.0.0, then click Finish to complete the configuration. Click ‘Next’ to continue with the installation.
- Page 21 DG-BG4300N User Manual PSK key. For more information about wireless security, refer to the user manual. Step 13 : Click ‘Next’ and the following page appears. In this page, you can view the configuration summary. Step 14 : Click ‘Finish’ to save your settings and reboot the router.
-
Page 22: Web Browser Configuration
DG-BG4300N User Manual 4. Web Browser Configuration The DSL device is an ADSL2+ wireless router. When you power on the device, the system will boot up and connect to ADSL automatically. The system provides a PVC for bridge test by default. The default configurations for the system are listed below. - Page 23 DG-BG4300N User Manual Access the Web Console: Start your web browser. Type the Ethernet IP address of the modem/router on the address bar of the browser. Default IP address is 192.168.1.1. Enter Password in the dialog box when it appears. Default Username: admin Password: 1234...
- Page 24 DG-BG4300N User Manual Once you have connected to ADSL2+ router. You will see the status page. This page displays the ADSL modem/router’s current status and settings. This information is read-only except for the PPPoE/PPPoA channel for which user can connect/disconnect the channel on demand.
- Page 25 DG-BG4300N User Manual To view the ADSL Configuration Status please click on “ADSL”. To view the ADSL Statistics please click on “Statistics”.
- Page 26 DG-BG4300N User Manual...
-
Page 27: Setup
DG-BG4300N User Manual 5. Setup 5.1 WAN Configuration There are three sub-menu for WAN configuration: [Channel Config], [ATM Settings], and [ADSL Settings]. Channel Config ADSL modem/router supports 8 ATM Permanent Virtual Channels (PVCs). There are mainly three operations for each of the PVC channels: add, delete and modify. And there are several channel modes to be selected for each PVC channel. - Page 28 DG-BG4300N User Manual Function buttons in this page: Click Add to complete the channel setup and add PVC channel into configuration. Modify Select an existing PVC channel by clicking the radio button at the Select column of the Current ATM VC Table before we can modify the PVC channel.
-
Page 29: Atm Settings
DG-BG4300N User Manual 5.1.1 ATM Settings The page is for ATM PVC QoS parameters setting. The DSL device support 4 QoS mode —CBR/rt- VBR/nrt-VBR/UBR. Fields in this page: Field Description Virtual Path Identifier. This is read-only field and is selected on the Select column in the Current ATM VC Table. -
Page 30: Adsl Settings
DG-BG4300N User Manual Quality of Service, a characteristic of data transmission that measures how accurately and how quickly a message or data is transferred from a source host to a destination host over a network. The four QoS options are: UBR (Unspecified Bit Rate): When UBR is selected, the SCR and MBS fields are disabled. - Page 31 DG-BG4300N User Manual Fields in this page: Field Description Choose prefered xdsl standard protocols. G.lite : G.992.2 Annex A G.dmt : G.992.1 Annex A ADSL modulation T1.413 : T1.413 issue #2 ADSL2 : G.992.3 Annex A ...
-
Page 32: Lan Configuration
DG-BG4300N User Manual 5.2 LAN Configuration Click Setup -> LAN to configure the LAN Settings. 5.2.1 LAN Interface Setup Following page shows the current setting of LAN interface. You can set IP address, subnet mask, and IGMP Snooping for LAN interface in this page. -
Page 33: Dhcp Mode
DG-BG4300N User Manual Modify Click to modify the setting. 5.2.2 DHCP Mode You can configure your network and DSL device to use the Dynamic Host Configuration Protocol (DHCP). This page provides DHCP instructions for implementing it on your network by selecting the role of DHCP protocol that this device wants to play. -
Page 34: Dhcp Relay Configuration
DG-BG4300N User Manual Fields in this page: Field Description IP Pool Range Specify the lowest and highest addresses in the pool. The Lease Time is the amount of time that a network user is allowed to maintain a network connection to the device using the current dynamic IP address. At the... -
Page 35: Dhcp Static Configuration
DG-BG4300N User Manual Fields in this page: Field Description If you are using the other DHCP server to assign IP address to your hosts on the Relay Server LAN. You can set the DHCP server ip address. 5.2. 3 DHCP Static Configuration Static DHCP is as useful feature which makes the DHCP server on your router always assign the same IP address to a unique MAC address assigned to NIC. -
Page 36: Lan Ipv6 Configuration
DG-BG4300N User Manual 5.2.4 LAN IPV6 Configuration IPv6 configuration is mostly the same as IPv4 configuration. IPv4 uses only 32 bits for IP address space. IPv6 allows 128 bits for IP address space. - Page 37 DG-BG4300N User Manual Fields in this page: Field Description Global Specify the IPv6 global address and prefix for the LAN interface. Address Enable Enable or disable the RA (Router Advertisement) function on the LAN side. Specify the “Managed address configuration” flag on Router Advertisement message. When set, M Flag it indicates that addresses are available via Dynamic Host Configuration Protocol (DHCPv6).
- Page 38 DG-BG4300N User Manual The router will choose a random interval between max interval and minimum interval to send unsolicited multicast Router Advertisement. Prefix Mode Specify the prefix mode of the RA function. It can be set to either “Auto” or “Manual”.
- Page 39 DG-BG4300N User Manual When it set to “None”, the DHCPv6 Server function will be disabled on LAN side; when it set to “Auto”, the router will use the prefixes and DNS obtained from PD options for DHCPv6 on WAN side to generate the address pool; when it set to “Manual”, the router will use the user specified pool prefix and DNS configurations.
-
Page 40: Wireless Configuration
DG-BG4300N User Manual 5.3 Wireless Configuration Click Setup -> WLAN to configure the Wireless settings. This section provides the wireless network settings for your WLAN interface. The wireless interface enables the wireless AP function for ADSL modem. 5.3.1 Basic Setting This page contains all of the wireless basic settings. -
Page 41: Wireless Security Setup
DG-BG4300N User Manual Fields in this page: Field Description Disable Wireless LAN Interface Check it to disable the wireless function for ADSL modem. Select the appropriate band from the list provided to correspond with your Band network setting. Mode The selections are: AP The Service Set Identifier (SSID) or network name. - Page 42 DG-BG4300N User Manual Fields in this page: Field Description There are 4 types of security to be selected. To secure your WLAN, it’s strongly recommended to enable this feature. WEP: Make sure that all wireless devices on your network are using the same encryption level and key.
-
Page 43: Wireless Multiple Bssid Setup
DG-BG4300N User Manual There are 2 types of authentication mode for WPA. WPA-RADIUS: WPA RADIUS uses an external RADIUS server to perform user authentication. To use WPA RADIUS, enter the IP address of the RADIUS server, the RADIUS port (default is 1812) and the shared secret from the RADIUS server. -
Page 44: Wireless Access Control
DG-BG4300N User Manual broadcast SSID Relay Blocking Authentication Type 5.3.4 Wireless Access Control This page allows administrator to have access control by entering MAC address of client stations. MAC address can be added into access control list and only those clients whose wireless MAC address are in the access control list will be either allowed or denied to connect to the wireless AP as per the Access Control policy defined. -
Page 45: Wireless Advanced Settings
DG-BG4300N User Manual Fields in this page: Field Description The Selections are: Disable: Disable the wireless ACL feature. Allow Listed: When this option is selected, no wireless clients except those Wireless Access Control whose MAC addresses are in the current access control list will be able to Mode connect (to this device). - Page 46 DG-BG4300N User Manual This page allows advanced users who have sufficient knowledge of wireless LAN to configure advanced settings. These setting shall not be changed unless you know exactly what will happen from the changes you made on your DSL device.
- Page 47 DG-BG4300N User Manual Fields in this page: This value should remain at its default setting of 2346. It specifies the maximum size for a packet before data is fragmented into multiple packets. If you experience a high packet error Fragment rate, you may slightly increases the “Fragment Threshold”...
-
Page 48: Wps ( Wi-Fi Pprotected Setup)
DG-BG4300N User Manual 5.3.6 WPS ( Wi-Fi Pprotected Setup) Although home Wi-Fi networks have become more and more popular, users still have trouble with the initial set up of network. This obstacle forces users to use the open security and increases the risk of eavesdropping. Therefore, The Wi-Fi Protected Setup (WPS) is designed to ease set up of security-enabled Wi-Fi networks and subsequently network management. - Page 49 DG-BG4300N User Manual Fields in this page: Field Description Disable WPS Check to disable the Wi-Fi protected Setup. When AP’s settings are factory default (out of box), it is set to open security and un-configured state. “WPS Status” will display it as “UnConfigured”. If it already shows “Configured”, some registrars such as Vista WCN will not configure AP.
-
Page 50: Advanced Setup
DG-BG4300N User Manual 6. Advanced Setup The end user can configure the Advance Setup Route Configuration The Routing page enables you to define specific route for your Internet and network data. Most users do not need to define routes. On a typical small home or office LAN, the existing routes that set up the default gateways for your LAN hosts and for the DSL device provide the most appropriate path for all your Internet traffic. -
Page 51: Route Setup
DG-BG4300N User Manual 6.1 Route Setup 6.1.1 Static Route Setup You may need to define routes if your home setup includes two or more networks or subnets, if you connect to two or more ISP services, or if you connect to a remote corporate LAN. -
Page 52: Ipv6 Routing Configuration
DG-BG4300N User Manual The network IP address of the subnet. The destination can be specified as the IP address of a subnet or a specific host in the subnet. It can also be specified as all Destination zeros to indicate that this route should be used for all destinations for which no other route is defined (this is the route that creates the default gateway). -
Page 53: Rip Configuration
DG-BG4300N User Manual 6.1.3 RIP Configuration RIP is an dynamic routing Internet protocol. Here you can set up to share routing table information with other routing devices on your LAN, at your ISP’s location, or on remote networks connected to your network via the ADSL line. -
Page 54: Nat Configuration
DG-BG4300N User Manual Fields on the first setting block: Field Description Enable/Disable RIP feature. 6.2 NAT Configuration In computer networking, network address translation (NAT) is the process of modifying IP address information in IP packet headers while in transit across a traffic routing device. -
Page 55: Virtual Server
DG-BG4300N User Manual Fields in this page: Field Description Enable DMZ Check this item to enable the DMZ feature. IP address of the local host. This feature sets a local host to be exposed DMZ Host IP Address to the Internet. - Page 56 DG-BG4300N User Manual Fields in this page: Field Description Service Type Select a service from pull-down menu or User-defined Service Name. Protocol There are 2 options available: TCP, UDP. WAN Setting There are 2 options available: create rules by interface or by IP address...
- Page 57 DG-BG4300N User Manual Function buttons for the Current Table: Delete Selected Delete the selected rules from the table. You can click Delete button from the Current virtual serve forwarding table. Disable Without deleting the rule you can make specific virtual server entry in the table as inactive. You can click...
-
Page 58: Nat Forwarding Setup
DG-BG4300N User Manual 6.2.3 NAT Forwarding Setup Entries in this table allow you to automatically redirect common network services to a specific machine behind the NAT firewall. These settings are only necessary if you wish to host some sort of server like a... -
Page 59: Nat Alg And Pass-Through
DG-BG4300N User Manual 6.2.4 NAT ALG and Pass-Through An application-level gateway (also known as ALG or application layer gateway) consists of a security component that augments a firewall or NAT employed in a computer network. It allows customized NAT traversal filters to be plugged into the gateway to support address and port translation for certain application layer "control/data"... -
Page 60: Nat Exclude Ip Setup
DG-BG4300N User Manual 6.2.5 NAT EXCLUDE IP Setup The purpose is to exclude certain flows of traffic from translation. Any packets (going from inside or outside) matching the NAT EXCLUDE IP do not require NAT translation entries to be permitted by the router. -
Page 61: Ftp Alg Configuration
DG-BG4300N User Manual 6.2.7 FTP ALG Configuration Most FTP servers allow the capability of listening on a non standard control port other than TCP 21. When the policy associated with this non standard port is configured with the application ftp qualifier, as configured in the solution to this recipe, it dynamically open the... -
Page 62: Nat Ip Mapping
DG-BG4300N User Manual 6.2.8 NAT IP MAPPING Advanced users can use this feature for outgoing traffic, creating "NAT IP MAPPING" rules that divert all traffic that is destined for a certain IP address to a different IP address. Entries in this table allows you to configure one Global IP Pool for specified Local IP address... -
Page 63: Ip Qos
DG-BG4300N User Manual 6.3 QoS 6.3.1 IP QoS The DSL device provides a control mechanism that can provide different priority to different users or data flows. The QoS is enforced by the QoS rules in the QoS table. A QoS rule contains two configuration blocks: Traffic Classification and Action. - Page 64 DG-BG4300N User Manual The destination port of the selected protocol. You cannot configure this field without Destination Port entering the protocol first. The incoming ports. The selections include LAN ports, wireless port, and the blank Physical Port for not applicable.
-
Page 65: Cwmp Setup
DG-BG4300N User Manual 6.4 CWMP Setup 6.4.1 TR-069 Configuration TR-069 is a protocol for communication between a CPE and Auto-Configuration Server (ACS). The CPE TR-069 configuration should be well defined to be able to communicate with the remote ACS. - Page 66 DG-BG4300N User Manual Fields in this page: ACS Field Description http://10.0.0.1:80 https://10.0.0.1:443 ACS URL. For example, User Name The username the DSL device should use when connecting to the ACS. Password The password the DSL device should use when connecting to the ACS.
-
Page 67: Port Mapping Setup
DG-BG4300N User Manual The path of the device ConnectionRequestURL. The device Path ConnectionRequestURL should be configured based on the Device_IP, Path and Port as follows: http://Device_IP:Port/Path Port The port of the device ConnectionRequestURL. 6.5 Port Mapping Setup The DSL device provides multiple interface groups. Up to five interface groups are supported including one default group. -
Page 68: Port Mapping Configuration
DG-BG4300N User Manual DSL device can isolate traffic from group to group for some application. By default, all the interfaces (LAN and WAN) belong to the default group, and the other four groups are all empty. It is possible to assign any interface to any group but only one group. -
Page 69: Others
DG-BG4300N User Manual To manipulate a mapping group: Select a group from the table. Select interfaces from the available/grouped interface list and add it to the “Interface groups grouped/available interface list using the arrow buttons to manipulate the required mapping of the ports. -
Page 70: Client Limit Configuration
DG-BG4300N User Manual Set the Ethernet address ageing time, in seconds. After [Ageing Time] seconds of Ageing Time not having seen a frame coming from a certain address, the bridge will time out (delete) that address from Forwarding DataBase (fdb). -
Page 71: Tunnel Configuration
DG-BG4300N User Manual 6.6.3 Tunnel Configuration This configuration provides a configuration for tunneling an IPv6 network and traffic through a pre-existing IPv4 network. This technique allows you to connect IPv6 sites over the IPv4 backbone that exists. -
Page 72: Other Advanced Configuration
DG-BG4300N User Manual 6.6.4 Other Advanced Configuration Here you can set other miscellaneous advanced settings. Half Bridge: When the PPP Half Bridge is enabled the WAN IP address from the ISP is passed straight through the modem to the local client PC. Only one PC is able to access the Internet using half bridge mode as NAT is disabled. -
Page 73: Service Setup
DG-BG4300N User Manual 7. Service Setup 7.1 IGMP Configuration Multicasting is useful when the same data needs to be sent to more than one hosts. Using multicasting as opposed to sending the same data to the individual hosts uses less network bandwidth. -
Page 74: Igmp Proxy Configuration
DG-BG4300N User Manual IP hosts use Internet Group Management Protocol (IGMP) to report their multicast group memberships to neighboring routers. Similarly, multicast routers use IGMP to discover which of their hosts belong to multicast groups. This device supports IGMP proxy that handles IGMP messages. -
Page 75: Mld Configuration
DG-BG4300N User Manual Downstream: The interface data from the multicast router are sent to hosts in the multicast group database. Fields in this page: Field Description IGMP Proxy Enable/Disable IGMP proxy feature Proxy Interface The upstream WAN interface is selected here. - Page 76 DG-BG4300N User Manual similar to IGMPv2 and MLDv2 similar to IGMPv3.
-
Page 77: Upnp Setup
DG-BG4300N User Manual 7.2 UPnP Setup The DSL device supports a control point for Universal Plug and Play (UPnP) version 1.0, and supports two key features: NAT Traversal and Device Identification. This feature requires one active WAN interface. In addition, the host should support this feature. In the presence of multiple WAN interfaces, select an interface on which the incoming traffic is present. -
Page 78: Snmp Setup
DG-BG4300N User Manual 7.3 SNMP Setup Simple Network Management Protocol (SNMP) is a troubleshooting and management protocol that uses the UDP protocol on port 161 to communicate between clients and servers. The DSL device can be managed locally or remotely by SNMP protocol. -
Page 79: Dns Setup
DG-BG4300N User Manual Community name (write- Name of the write-only community. This write-only community allows write only) operation to the objects defines as read-writable in the MIB. 7.4 DNS Setup 7.4.1 DNS Configuration This page is used to select the way to obtain the IP addresses of the DNS servers. -
Page 80: Ipv6 Dns
DG-BG4300N User Manual 7.4.2 IPv6 DNS IPv6 configuration is mostly the same as IPv4 configuration (please refer to 6.4.1 DNS Configuration). IPv4 uses only 32 bits for IP address space, IPv6 allows 128 bits for IP address space. -
Page 81: Dynamic Dns
DG-BG4300N User Manual 7.5 Dynamic DNS Each time your device connects to the Internet, your ISP assigns a different IP address to your device. In order for you or other users to access your device from the WAN-side, you need to manually track the IP that is currently used. - Page 82 DG-BG4300N User Manual This field defaults to your device’s WAN interface over which your Interface device will be accessed. Username User-name assigned by the DDNS service provider. Password Password assigned by the DDNS service provider.
-
Page 83: Firewall Setup
DG-BG4300N User Manual 8. Firewall Setup Firewall contains several features that are used to deny or allow traffic from passing through the device. 8.1 MAC Filtering The MAC filtering feature allows you to define rules to allow or deny frames through the device based on source MAC address, destination MAC address, and traffic direction. -
Page 84: Ip/Port Filtering Setup
DG-BG4300N User Manual care. 8.2 IP/Port Filtering Setup 8.2.1 IP/Port Filtering The IP/Port filtering feature allows you to deny/allow specific services or applications in the forwarding path. Fields on the first setting block: Field Description Outgoing Default Action Specify the default action on the LAN to WAN forwarding path. - Page 85 DG-BG4300N User Manual Destination Subnet Mask Subnet-mask of the destination IP. Destination Port Starting and ending destination port numbers.
-
Page 86: Ipv6/ Port Filtering
DG-BG4300N User Manual 8.2.2 IPv6/ Port Filtering IPv6 configuration is mostly the same as IPv4 configuration (please refer to 8.2.1IP/Port Filtering). IPv4 uses only 32 bits for IP address space. IPv6 allows 128 bits for IP address space. -
Page 87: Url Filter
DG-BG4300N User Manual 8.3 URL Filter The URL Blocking is the web filtering solution. The firewall has the ability to block access to specific web URLs based on string matches. This can allow large numbers of URLs to be blocked by specifying only a FQDN (such as tw.yahoo.com). -
Page 88: Acl Setup
DG-BG4300N User Manual 8.4 ACL Setup The Access Control List (ACL) is a list of permissions for a packet to be matched. The list specifies who is allowed to access this device. If ACL is enabled, all hosts cannot access this device except for the hosts with IP address in the ACL table. -
Page 89: Ipv6 Acl Configuration
DG-BG4300N User Manual 8.4.2 IPv6 ACL Configuration IPv6 configuration is mostly the same as IPv4 configuration (please refer to 7.4.1 ACL Configuration). IPv4 uses only 32 bits for IP address space; IPv6 allows 128 bits for IP address space. -
Page 90: Dos Setting
DG-BG4300N User Manual 8.5 DoS Setting A denial-of-service attack (DoS attack) is an attempt to make a computer resource unavailable to its intended users. One common method of attack involves saturating the target machine with external communications requests, such that it cannot respond to legitimate traffic, or responds so slowly as to be rendered effectively unavailable. -
Page 91: Maintenance Setup
DG-BG4300N User Manual 9. Maintenance Setup 9.1 Upgrade 9.1.1 Upgrade Firmware To upgrade the firmware on the DSL device: Click the Browse button to select the firmware file. Confirm your selection. Click the Upload button to start upgrading. -
Page 92: Backup/Restore Settings
DG-BG4300N User Manual 9.1.2 Backup/Restore Settings This page allows you to backup and restore your configuration into and from file on your host PC. - Page 93 DG-BG4300N User Manual...
-
Page 94: Password
DG-BG4300N User Manual 9.2 Password The first time you log into the system, you use the default password. There are two-level for login: admin and user. The admin and user password configuration allows you to change the password for administrator and user. -
Page 95: Reboot
DG-BG4300N User Manual 9.3 Reboot Restart the ADSL router. 9.3.1 Commit/Reboot Function buttons in this page: 1. Save Current Configuration >> Save changes. 2. Factory Default Configuration >> Restore router to factory default settings. 3. Commit Changes >> Save the changes into flash memory. -
Page 96: Time Setup
DG-BG4300N User Manual 9.4 Time Setup Select a Network Time Server for synchronization. You can type in the address of a time server. If you have trouble using one server, enter another. Or, you can set the time manually. 9.4.1 System Time Configuration... -
Page 97: Log Setup
DG-BG4300N User Manual 9.5 Log Setup You can setup the system log file. 9.5.1 Log Setting This page shows the system log. -
Page 98: Diagnostic Setup
DG-BG4300N User Manual 9.6 Diagnostic Setup The DSL device supports some useful diagnostic tools. 9.6.1 Ping Diagnostic Ping operates by sending Internet Control Message Protocol (ICMP) echo request packets to the target host and waiting for an ICMP response. In the process it measures the time from transmission to reception (round-trip time) and records any packet loss. -
Page 99: Traceroute Diagnostic
DG-BG4300N User Manual 9.6.3 Traceroute Diagnostic Traceroute is a computer network diagnostic tool for displaying the route (path) and measuring transit delays of packets across an Internet Protocol (IP) network. 9.6.4 OAM Fault Management – Connectivity Verification In order to isolate the ATM interface problems, you can use ATM OAM loopback cells to verify connectivity between VP/VC endpoints, as well as segment endpoints within the VP/VC. -
Page 100: Adsl Diagnostic
DG-BG4300N User Manual PTI=101 End-to-End OAM F5 cells which are only processed by end stations terminating an ATM link. 9.6.5 ADSL Diagnostic This page shows the ADSL diagnostic result. Click “Start” button to start the ADSL diagnostic. -
Page 101: Diagnostic Test
DG-BG4300N User Manual 9.6.6 Diagnostic Test The Diagnostic Test page shows the test results for the connectivity of the physical layer and protocol layer for both LAN and WAN sides. Fields in this page: Field Description Select the Internet The available WAN side interfaces are listed. You have to select one for the WAN Connection interface configured and run the Diagnostic test. -
Page 102: Troubleshooting
DG-BG4300N User Manual Troubleshooting If you find that the router is not working properly or stops responding don’t panic! Before you contact your dealer of purchase for help, please read this troubleshooting first. Scenario Solution Unable access a. Please check the power cord connection and network cable of router through web page this router. - Page 103 DG-BG4300N User Manual provider too. Try to use IP address instead of hostname. If you can use IP address to communicate with a remote server, but can’t use hostname, please check DNS settings. I can’t locate my router by a. ‘Broadcast ESSID’ set to off? my wireless client b.
Need help?
Do you have a question about the DG-BG4300N and is the answer not in the manual?
Questions and answers