Digisol DG-BG4300NU User Manual
300mbps wireless adsl2/2+
broadband router with usb port
Hide thumbs
Also See for DG-BG4300NU:
- User manual (139 pages) ,
- Quick installation manual (22 pages) ,
- Faq (9 pages)
Table of Contents
Advertisement
Quick Links
Download this manual
See also:
User Manual
Advertisement
Table of Contents

Related Manuals for Digisol DG-BG4300NU


Summary of Contents for Digisol DG-BG4300NU
- Page 1 DG-BG4300NU 300Mbps Wireless ADSL2/2+ Broadband Router with USB port User Manual V4.0 2016-12-22 As our products undergo continuous development the s pecificati ons are s ubjec t to change without prior notice...
- Page 2 Trademarks: DIGISOL™ is a trademar k of DIGISOL SYSTEMS LTD. All other trademar ks ar e the property of the respecti ve manufacturers. Safety This equipment is designed with the utmos t care for the safety of thos e who install and use it.
-
Page 3: Table Of Contents
DG-BG4300NU Use r Manual INDEX Product Information………................5 Safety Precautions ................6 System Requirements ................7 Package contents ................. 7 LEDs and Interfaces ................8 Hardw are Installation..................12 Softw are Installation..................14 About the Web Configuration ..............24 Access the Router ................ - Page 4 DG-BG4300NU Use r Manual USB Storage ..................97 Firew all ....................98 MAC Filter ..................... 98 IP/Port Filter ..................100 IPv6/Port Filter ..................101 URL Filter .................... 103 ACL ..................... 104 DoS ..................... 107 Parental Control .................. 109 Maintenance ..................110 Update....................
-
Page 5: Product Information
DG-BG4300NU Use r Manual Product Information Thank you for purchasing DG-BG4300NU 300Mbps Wireless ADSL2/2+ Broadband Router with USB port! This router is the best choice for Small office / Home office users, all computers and network devices can share a single Internet connection at high speed. Easy Installation wizard provided with this router is designed to setup an Internet connection in a very short time by accessing the web configuration of the router. -
Page 6: Safety Precautions
DG-BG4300NU Use r Manual Safety Precautions In order to keep the safety of users and your properties, please follow the safety instructions as mentioned below: 1. This router is designed for indoor use only; DO NOT place this router outdoor. -
Page 7: System Requirements
Before you start using this router, please check if there‟s anything missing in the package, and contact your dealer of purchase to claim for missing items: DG-BG4300NU ADSL 2/2+ Broadband Router With 3G POTS splitter AC power adapter ... -
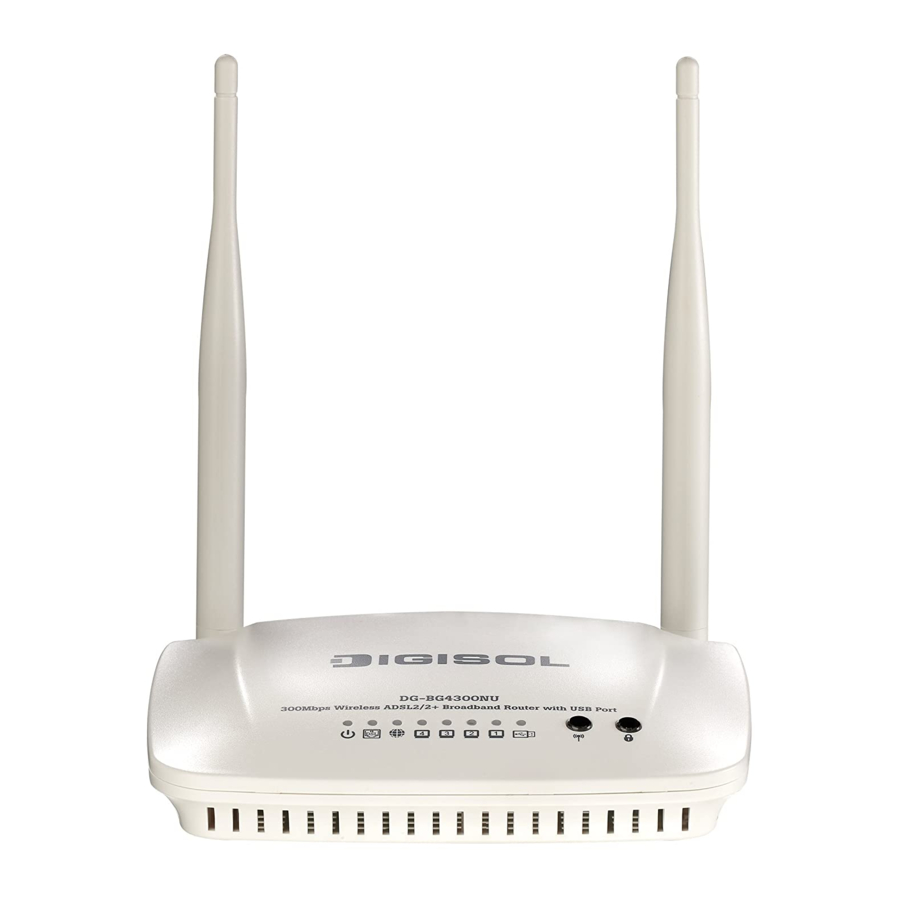
Page 8: Leds And Interfaces
DG-BG4300NU Use r Manual LEDs and Interfaces Top Panel The following table describes the LEDs of the device. LEDs Color Status Description Device is initializing or initialization has failed. Power Power is off. Green Power is on. Physical link is up... - Page 9 DG-BG4300NU Use r Manual USB device is not plugged. Wireless is enabled. WLAN Green Blinking Data is being transmitted or received. Wireless is not enabled. Blinking WP S negotiation is enabled waiting for the clients. WP S Green WP S negotiation is not enabled on the device.
- Page 10 DG-BG4300NU Use r Manual Rear Panel The following table describes the interfaces of the device. De scription Item Two 5dBi fixed dipole antennas. Antennas RJ-11 interface, for connecting to the ADSL interface or a splitter using a telephone cable. RJ-45 interface, for connecting to the Ethernet interface of a computer or the LAN4/3/2/1 Ethernet devices through an Ethernet cable/LAN Cable.
- Page 11 DG-BG4300NU Use r Manual Side Panel De scription Item To connect USB 3G Dongle or USB Mass Storage. Reset to the factory default configuration. Keep the device powered on, and insert Reset a pin into the reset hole for 3 seconds, then release it. The device will reset to the...
-
Page 12: Hardware Installation
DG-BG4300NU Use r Manual Hardware Installation Connect the ADSL interface of the device and the router interface of the splitter through a telephone cable. Connect the phone to the Phone interface of the splitter through a telephone cable. Connect the incoming line to the Line interface of the splitter. - Page 13 DG-BG4300NU Use r Manual The following figure shows the application diagram for the connection of the router, P C, splitter and the telephone sets.
-
Page 14: Software Installation
DG-BG4300NU Use r Manual Software Installation Insert the Setup CD into your CD-ROM drive of notebook/desktop computer. Explore the CD and execute the “ India_autorun.EXE” file. Screen given below will be displayed. Click „Start‟ to continue. - Page 15 DG-BG4300NU Use r Manual Connect the ADSL line and the phone line to the router. Click „ Next‟ . Connect the power adapter to the AC Mains and the other end to the power interface on the router . P ush...
- Page 16 DG-BG4300NU Use r Manual Connect the Ethernet interface on the router to the LAN card on the computer using the Ethernet cable. Click „Next‟ . After powering up the router, verify the status of the LED indicators on the front panel of the router.
- Page 17 DG-BG4300NU Use r Manual Below as shown please select the “ WAN Mode” type. Suppose you select “ ADSL and 3G” option to setup 3G failover click “ Next”. Please select your „ Country‟ and ADSL service provider. VPI and VCI values will auto fill.
- Page 18 DG-BG4300NU Use r Manual Select the network protocol for WAN interface. Click „ Next‟ . All the utility installation steps till here are the common steps to be followed for the modes. Following are the steps for configuring PPPoE connection: ...
- Page 19 DG-BG4300NU Use r Manual Configure the 3G Dialup parameters and click “ Next” Configure a wireless name (SSID) for your router. Click „ Next‟ .
- Page 20 DG-BG4300NU Use r Manual Configure the wireless security. Click „Next‟ . The next screen is a summary of the wirel ess settings of the router.
- Page 21 DG-BG4300NU Use r Manual Click on „Next‟ , the following screen will appear. Once the connection is established, the router connection status will appear.
- Page 22 DG-BG4300NU Use r Manual Bridging Mode: To configure the router in the bridge mode select “ Bridging” option. Click „Next‟ . Configure a wireless name (SSID) for your router. Click „ Next‟ .
- Page 23 DG-BG4300NU Use r Manual Configure the wireless security. Click on „Next‟ the following screen will appear. Click on „ Finish‟ to complete the configuration of the router in Bridge mode.
-
Page 24: About The Web Configuration
DG-BG4300NU Use r Manual About the Web Configuration This section describes how to configure the router by using the Web -based configuration utility. 4.1 Access the Router The following is the detailed description of accessing the router for the first time. - Page 25 DG-BG4300NU Use r Manual If you log in as a common user, you can check the status of the router, but cannot configure/modify most of the settings. Note: In the Web configuration page, you can click Appl y Changes to save the settings.
-
Page 26: 4.2 Wizard
DG-BG4300NU Use r Manual 4.2 Wizard When subscribing to a broadband service, you should be aware of the method by which you are connected to the Internet. Your physical WAN device can be PPP, ADSL or both. The technical information about the properties of your Internet connection is provided by your Internet Service P rovider (ISP). - Page 27 DG-BG4300NU Use r Manual Field Description your ISP. By default, VPI is set to 0. Virtual channel identifier (VCI) is the virtual channel between two points in an ATM network. Its valid value is in the range of 32 to 65535. (0 to 31 is reserved for local management of ATM traffic) Enter the correct VCI provided by your ISP.
- Page 28 DG-BG4300NU Use r Manual PPPoE/PPPoA In the Connection Type page, set the WAN connection type to PPP over Ethernet (PPPoE), the encapsulation mode to LLC/SNAP. The following table describes the parameters in this page: Field Description There are three WAN connection types: PPP over ATM Connection Mode (PPPoA), PPP over Ethernet (PPPoE) and 1483 Routed.
- Page 29 DG-BG4300NU Use r Manual Field Description this example, the connection type is set to PPPoE. You can select LLC/SNAP or VC-Mux. In this example, the Encapsulation Mode encapsulation mode is set to LLC/SNAP. IP P rotocol Select the IMP protocol: IPv4, IP v6 or IP v4/IPv6.
- Page 30 DG-BG4300NU Use r Manual After the settings are done, click Next, the page as shown in the following figure appears. If you need finish settings in the fast config, please click "Apply Changes" otherwise please click "Cancel" or " P rev".
- Page 31 DG-BG4300NU Use r Manual 1483 Routed In the Connection Type page, set the WAN connection type to 1483 Routed, the encapsulation mode to LLC/SNAP.
- Page 32 DG-BG4300NU Use r Manual After the settings are done, click Next, the page as shown in the following figure appears. For subsequent configuration, refer to the description in the above section PPPoE/PPPoA.
-
Page 33: Status
DG-BG4300NU Use r Manual Status In the navigation bar, choose Status. The Status page that is displayed contains: Device Info, 3G Info and ADSL. Device Info Choose Status > Device Info. The page that is displayed shows the current status and some basic settings of the router, such as firmware version, upstream speed, downstream s peed, LAN status, DNS status, ADSL WAN interfaces etc. -
Page 34: 3G Info
DG-BG4300NU Use r Manual 3G Info Choose Status > 3G Info. This page shows the Signal strength, Connection status, SIM card status, IP address details of 3G etc. -
Page 35: Adsl
DG-BG4300NU Use r Manual ADSL This page shows the settings of the ADSL Router. Statistics Choose Status > Statistics. - Page 36 DG-BG4300NU Use r Manual 4.3.1.1 Statistics Click Statistics in the left pane. The page shown in the following figure appears. In this page, you can view the statistics of each network port.
-
Page 37: Setup
DG-BG4300NU Use r Manual Setup In the navigation bar, click Network. The Network page that is displayed contains WAN, LAN and Wireless. Choose Network > WAN. The WAN page that is displayed contains WAN, 3G, Auto P VC, ATM Settings and... - Page 38 DG-BG4300NU Use r Manual 4.4.1.1 Click W AN in the left pane, the page shown in the following figure appears. In this page, you can configure WAN interface of your router.
- Page 39 DG-BG4300NU Use r Manual The following table describes the parameters of this page: Field Description WAN physical type: Ethernet When this option is selected the unit will auto reboot. WAN (Port-LAN1) Default Route Selection You can select Auto or Specified.
- Page 40 DG-BG4300NU Use r Manual If selected DHCP, the router is a DHCP client, the WAN IP address is assigned by the remote DHCP server. Local IP Address Enter the IP address of WAN interface provided by your ISP. Remote IP Address Enter the remote IP address.
- Page 41 DG-BG4300NU Use r Manual 4.4.1.2 3G This page is used to configure the parameters for your 3G network access.
- Page 42 DG-BG4300NU Use r Manual Field De scription 3G WAN Selection will Enable or Disable 3G WAN. (Enable/Disable) Enter the Pincode – Check with 3G Service provider. Pincode Enter the AP N - Check with 3G Service provider. Dial Number Enter the dial number eg: *99#, #777 etc as per ISP.
- Page 43 DG-BG4300NU Use r Manual 4.4.1.3 Auto PVC Click Auto PVC in the left pane, page shown in the following figure appears. In this page, you can get P VC automatically through detecting function, and add or delete the P VC that you want or do not want.
- Page 44 DG-BG4300NU Use r Manual 4.4.1.4 ATM Settings Click ATM Settings in the left pane, the page shown in the following figure appears. In this page, you can configure the parameters of the ATM, including VPI, VCI, QoS, P CR, CDVT, SCR and MBS.
-
Page 45: Lan
DG-BG4300NU Use r Manual P VC without the risk of cell loss. Its value ranges from 0 to 65535. Maximum burst size (MBS) is the maximum number of cells that can be transmitted at the P CR. Its value ranges from 0 to 65535. - Page 46 DG-BG4300NU Use r Manual 4.4.1.6 Click LAN IP in the left pane, the page shown in the following figure appears. In this page, you can change the IP address of the router. The default IP address is 192.168.1.1, which is the...
- Page 47 DG-BG4300NU Use r Manual The following table describes the parameters of this page: Field Description Enter the IP address of LAN interface. It is recommended to use an IP Address address from a block that is reserved for private use. This address block for example is 192.168.1.1 - 192.168.1.254.
- Page 48 DG-BG4300NU Use r Manual 4.4.1.7 DHCP Dynamic Host Configuration P rotocol (DHCP) allows the individu al P C to obtain the TCP /IP configuration from the centralized DHCP server. You can configure this router as a DHCP server or disable it. The DHCP server can assign IP address, IP default gateway and DNS server to DHCP clients.
- Page 49 DG-BG4300NU Use r Manual The following table describes the parameters of this page: Field De scription If set to DHCP Server, the router can assign IP addresses, IP default gateway and DHCP Mode DNS Servers to the host in Windows95, Windows NT and other operation systems that support the DHCP client.
- Page 50 DG-BG4300NU Use r Manual Click Show Client in the DHCP Mode page, the page shown in the following figure appears. You can view the IP address assigned to each DHCP client. The following table describes the parameters and buttons in this page:...
- Page 51 DG-BG4300NU Use r Manual Click Set Ven dorClass IP Range in the DHC P Mode page, the page as shown in the following figure appears. In this page, you can configure the IP address range based on the device type.
- Page 52 DG-BG4300NU Use r Manual The following table describes the paramet ers and buttons of this page: Field Description If set to DHCP Relay, the router acts a DHCP Server and relays the DHCP DHCP Mode requests and responses between the remote server and the client.
- Page 53 DG-BG4300NU Use r Manual 4.4.1.8 DHCP Static Click DHCP Static IP in the left pane, the page shown in the following figure appears. You can assign the IP addresses on the LAN to the specific individual P Cs based on their MAC address.
- Page 54 DG-BG4300NU Use r Manual 4.4.1.9 LAN IPv6 Click LAN IP in the left pane, the page shown in the following figure appears. In this page, you can change the IP address of the router. The default IP address is 192.168.1.1, which is the private IP address of the...
- Page 55 DG-BG4300NU Use r Manual The following table describes the RA parameters of this page. Field Description Global Address Specify the LAN global ipv6 address, which may be assigned by ISP. RA Setting Enable Enable or disable the Router Advertisement feature.
- Page 56 DG-BG4300NU Use r Manual Field Description “ None”: Close dhcpv6 server. “ Manual”: dhcpv6 server is opened and user specifies the dhcpv6 server address pool and other parameters. “ Auto”: dhcpv6 server is opened and it can use Wan dhcp-pd prefix to generate address pool.
-
Page 57: Wireless
DG-BG4300NU Use r Manual 4.4.1.10 Wireless Choose Setup > Wireless. The WLAN page that is displayed contains Basic, Security, MBSSID, Access Control List, Advanced, WPS and WDS. 4.4.1.11 Basic Choose Wireless > Basic and the following page appears. In this page, you can configure the parameters for... - Page 58 DG-BG4300NU Use r Manual The following table describes the parameters of this page: Field De scription Choose the working mode of the router. You can choose from drop -down list. Band Choose the network mode of the router, which varies accordin g to the software.
- Page 59 DG-BG4300NU Use r Manual 4.4.1.12 Security Choose Wireless > Security and the following page appears. The f ollowing table describes the parameters of this page: Field Description Configure the wireless encryption mode. You can choose None, WEP, WPA (TKIP ), WPA (AES), WPA2 (AES), WPA2 (TKIP ) or WPA2 Mixed.
- Page 60 DG-BG4300NU Use r Manual improved data encryption. Select P ersonal (P re-Shared Key), enter the pre-shared key in the P re-Shared Key field. Select Enterprise (RADIUS); enter the port, IP address and password of the Radius server. WPA Authentication Mode You need to enter the username and password provided by the Radius server when the wireless client connects to the router.
- Page 61 DG-BG4300NU Use r Manual 4.4.1.13 MBSSID Choose Wireless > MB SSID and the following page appears. In this page, you can configure the multiple SSID on the access point. It supports four virtual access points (VAPs). It is a unique name to identify the router in the wireless LAN.
- Page 62 DG-BG4300NU Use r Manual 4.4.1.14 Access Control List Choose WLAN > Access Control List and the following page appears. In this page, you can configure the access control of the wireless clients. Choose Allow Listed as the access control mode to enable white list function. Only the devices whose MAC addresses are listed in the Current Access Control List can access the router.
- Page 63 DG-BG4300NU Use r Manual 4.4.1.15 Advanced Choose WLAN > Advanced and the following page appears. In this page, you can configure the wireless advanced parameters. It is recommended to use the default parameters. Note: The parameters in the Advanced link are modified by the prof essional personnel, it is recommended to keep the default values.
- Page 64 DG-BG4300NU Use r Manual In Shared key, the wireless client connects to the router using the shared key. The default is set to Auto, which allows either Open System or Shared Key authentication to be used. This value should remain at its default setting of 2346. It specifies the maximum size for a packet before data is fragmented into multiple packets.
- Page 65 DG-BG4300NU Use r Manual Wifi Multicast to Unicast Enable it to use unicast to transmit multicast packets. Aggregation It is applied when the destination end of all MPDU are for one STA. It is not recommended to enable GI in obvious environment of Multi-path Short GI effect.
- Page 66 DG-BG4300NU Use r Manual Note: The wireless client establishes the connection with the router through WPS negotiation. The wireless client must support WPS. 4.4.1.17 Choose WLAN > WDS, and the following page appears. In this page you can enable wireless distribution system (WDS) so that the router can communicate with another AP.
-
Page 67: Advanced
DG-BG4300NU Use r Manual Advanced In the navigation bar, click Advanced. In the Advanced page that is displayed contains Routing, NAT, QoS, CWMP, Port Mapping and Others. Routing Choose Advance > Routing, and the page shown in the following figure appears. The page that is displayed contains Static Route, IPv6 Static Route and RIP. - Page 68 DG-BG4300NU Use r Manual The following table describes the parameters and buttons of this page: Field Description Enable Select it to use static IP routes. Destination Enter the IP address of the destination device. Subnet Mask Enter the subnet mask of the destination device.
- Page 69 DG-BG4300NU Use r Manual 4.5.1.2 IPv6 Static Route Click IPv6 Static Route in the left pane, and the page shown in the following figure appears. This page is used to configure the routing information. You can add or delete IP routes.
- Page 70 DG-BG4300NU Use r Manual 4.5.1.3 Click RIP in the left pane, the page shown in the following figure appears. If you are using this device as a RIP -enabled router to communicate with others using Routing Information P rotocol (RIP ), enable RIP. This page is used to select the interfaces on your devices that use RIP, and the version of the protocol used.
- Page 71 DG-BG4300NU Use r Manual choose RIP1, RIP2 or Both. Choose RIP1 indicates the router receives RIP v1 messages. Choose RIP2 indicates the router receives RIP v2 messages. Choose Both indicates the router receives RIP v1 and RIP v2 messages. Send Version The working mode for sending RIP messages.
-
Page 72: Nat
DG-BG4300NU Use r Manual Choose Advanced > NAT, and the page shown in the following figure appears. The page that is displayed contains DMZ, Virtual Server, ALG, NAT Exclude IP, P ort Trigger, FTP ALG Port and NAT IP Mapping. - Page 73 DG-BG4300NU Use r Manual 4.5.1.5 Virtual Server Click Virtual Server in the left pane, and the page shown in the following figure appears. The following table describes the parameters of this page. Field De scription You can select the common service type, for example, AUTH, DNS or FTP.
- Page 74 DG-BG4300NU Use r Manual Choose the transport layer protocol that the service type uses. You P rotocol can choose TCP or UDP. WAN Setting You can choose Interface or IP Address. WAN Interface Choose the WAN interface that will apply virtual server.
- Page 75 DG-BG4300NU Use r Manual 4.5.1.7 NAT Exclude IP Click NAT Exclude IP in the left pane, and the page shown in the following figure appears. In the page, you can configure some source IP addresses which use the purge route mode when accessing internet through the specified interface.
- Page 76 DG-BG4300NU Use r Manual 4.5.1.8 Port Trigger Click Port Trigger in the left pane, and the page shown in the following figure appears.
- Page 77 DG-BG4300NU Use r Manual Click the Usual Application Name drop -down menu to choose the application you want to setup for port triggering. When you have chosen an application the default Trigger settings will populate the table below. If the application you want to setup isn‟t listed, click the User-defined Application Name radio button and type in a name for the trigger in the Custom application field.
- Page 78 DG-BG4300NU Use r Manual 4.5.1.10 NAT IP Mapping NAT is short for Network Address Translation. The Network Address Translation Settings window allows you to share one WAN IP address for multiple computers on your LAN. Click NAT IP Mapping in the left pane, the page shown in the following figure appears.
-
Page 79: Qos
DG-BG4300NU Use r Manual Choose Advanced > Q oS, and the page shown in the following figure appears. Entries in the QoS Rule List are used to assign the precedence for each incoming packet based on physical LAN port, TCP /UDP port number, source IP address, destination IP address and other information. - Page 80 DG-BG4300NU Use r Manual The following table describes the parameters and buttons of this page: Field De scription Source IP The IP address of the source data packet. Source Mask The subnet mask of the source IP address. Destination IP The IP address of the destination data packet.
- Page 81 DG-BG4300NU Use r Manual Destination Port The port of the destination data packet. P rotocol The protocol responds to the IP QoS rules. You can choose TCP, UDP, or ICMP. Phy P ort The LAN interface responds to the IP QoS rules.
-
Page 82: Cwmp
DG-BG4300NU Use r Manual CWMP TR-069 is a protocol for communication between a CP E and Auto -Configuration Server (ACS). Choose Advanced > CWMP, and the page shown in the following page appears. In this page, you can configure the TR-069 CPE. - Page 83 DG-BG4300NU Use r Manual The following table describes the parameters of this page: Field De scription The URL of the auto-configuration server to connect to. User Name The user name for logging in to the ACS. P assword The password for logging in to the ACS.
-
Page 84: Port Mapping
DG-BG4300NU Use r Manual Port mapping Choose Advanced > Port Mapping, and the page shown in the following figure appears. In this page, you can bind the WAN interface and the LAN interface to the same group. The procedure for manipulating a mapping group is as follows: ... -
Page 85: Others
DG-BG4300NU Use r Manual Others Bridge Setting Choose Advanced > Others>B ridge Setting, and the page shown in the following figure appears. This page is used to configure the bridge paramet ers. You can change the settings or view some information on the bridge and its attached ports. - Page 86 DG-BG4300NU Use r Manual Click Show MACs, and the page shown in the following figure appears. This table shows a list of learned MAC addresses for this bridge. Client Limit Choose Client Limit in the left pane, and the page shown in the followi ng figure appears. This page is used...
- Page 87 DG-BG4300NU Use r Manual Tunnel Choose Tunnel in the left pane, and the page shown in the following figure appears. You may configure tunnels to connect to ipv4 and ipv6 networks. The following table describes the parameters and button of this page.
- Page 88 DG-BG4300NU Use r Manual Telnet This page is used to configure telnet function . Others Choose Others in the left pane, and the page shown in the following figure appears. You can enable half bridge so that the PPPoE or PPPoA connection will be set to Continuous.
-
Page 89: Service
DG-BG4300NU Use r Manual Service In the navigation bar, click Service. The Service page that is displayed contains IGMP, UPNP, SNMP, DNS, DDNS, FTP server and USB storage. IGMP IGMP Proxy Choose Service > IG MP Proxy, and the page shown in the following figure appears. IGMP proxy enables the system to issue IGMP host mess ages on behalf of hosts that the system discovered through standard IGMP interfaces. - Page 90 DG-BG4300NU Use r Manual This parameter indicates last member query interval. It is the Last member query maximum response time in seconds for an IGMP host in reply to count group-specific queries. By default, the value is set to 2 This parameter indicates the query interval.
-
Page 91: Upnp
DG-BG4300NU Use r Manual MLD P roxy and snooping can be configured here. UPnP Choose Service > UPnP, and the page shown in the following figure appears. This page is used to configure UPnP. The system acts as a daemon after you enable it. -
Page 92: Snmp
DG-BG4300NU Use r Manual SNMP This page is used to configure the SNMP protocol. Here you may change the setting for system description, trap ip address, community name, etc. The following table describes the parameters and buttons of this page:... -
Page 93: Dns
DG-BG4300NU Use r Manual Enter the trap IP address. The trap information is sent to the Trap IP Address corresponding host. Community Name The network administrators must use this password to read the (Read-only) information of this router. Community Name... - Page 94 DG-BG4300NU Use r Manual The following table describes the parameters and buttons of this page: Field De scription Select it, the router accepts the first received DNS assignment from Attain DNS one of the PPPoA, PPPoE or 1483 Routed enabled P VC(s) during the Automatically connection establishment.
- Page 95 DG-BG4300NU Use r Manual Automatically PPPoA, PPPoE or 1483 Routed enabled P VC(s) during the connection establishment. Select it, enter the IP addresses and choose the WAN interface of the primary, Set DNS Manually the secondary and the tertiary DNS server.
-
Page 96: Ftp Server
DG-BG4300NU Use r Manual The following table describes the parameters of this page: Field Description Choose the DDNS provider name. You can choose DynDNS.org , TZO DDNS provider or NO-IP. Host Name The DDNS identifier. Interface Select the interface form the list. -
Page 97: Usb Storage
DG-BG4300NU Use r Manual USB Storage This page allows you to enable the USB Mass Storage Service. User can plug the USB P endrive / Portable drive to upload and download the data. This Storage can also be accessed remotely using the FTP port. -
Page 98: Firewall
DG-BG4300NU Use r Manual Firewall Choose Firewall. The Firewall page that is displayed contains MAC Filter, IP/Port Filter, URL Filter, ACL, DoS and P arental Control. MAC Filter Click MAC Filter in the left pane, and the page shown in the following figure appears. Entries in the table are used to restrict certain types of data packets from your local network to Internet through the gateway. - Page 99 DG-BG4300NU Use r Manual Field Description Outgoing Select default Allow OR Deny for Outgoing policy. Default Policy Incoming Select default Allow OR Deny for Incoming policy. Default Policy Direction Select Incoming or Outgoing direction. Action Select Allow or Deny for MAC filter entry.
-
Page 100: Ip/Port Filter
DG-BG4300NU Use r Manual IP/Port Filter Click IP/Port Filter in the left pane, and the page shown in the following figure appears. Entries in the table are used to restrict certain types of data packets through the gateway. These filters are helpful in securing or restricting your local network. -
Page 101: Ipv6/Port Filter
DG-BG4300NU Use r Manual Destination IP Type the IPv4 address of destination device or host. Address Mask Address Type the subnet mask address. S-Port Type the Source port range. D-Port Type the destination port range. Enable Select check box to enable the rule or uncheck to disable the rule. - Page 102 DG-BG4300NU Use r Manual Field Description Rule Action Select P ermit to Allow packet route and select Deny to stop the packet. P rotocol Select the P rotocol type for a rule. Direction Select Upstream or Downstream direction. Icmp6Type Select the ICMP version.
-
Page 103: Url Filter
DG-BG4300NU Use r Manual URL Filter Click URL Filter in the left pane, and the page shown in the following figure appears. This page is used to block a fully qualified domain name, such as tw.yahoo.com and filtered keyword. You can add or delete the filtered keyword. -
Page 104: Acl
DG-BG4300NU Use r Manual Field Description Blocking Table table. Choose Firewall > ACL, the page shown in the following figure appears. In this page, you can permit the data packets from LAN or WAN to access the router. You can configure the IP address for Access Control List (ACL). - Page 105 DG-BG4300NU Use r Manual The following table describes the parameters and buttons of this page: Field Description Select the router interface. You can select LAN or WAN. In this example, Direction Select LAN is selected. LAN ACL Switch Select it to enable or disable ACL function.
- Page 106 DG-BG4300NU Use r Manual IPv6 ACL Configuration You can select which services are accessible from LAN or WAN. Entries in this ACL table are used to permit certain types of data packets from your local network or internet network to the gateway. Using of such access control can be helpful in securing or restricting the Gateway...
-
Page 107: Dos
DG-BG4300NU Use r Manual Denial-of-Service Attack (DoS attack) is a type of attack on a network that is designed to bring the network to its knees by flooding it with useless traffic. A denial-of-service attack (DoS attack) is an attempt to make a computer resource unavailable to its intended users. - Page 108 DG-BG4300NU Use r Manual...
-
Page 109: Parental Control
DG-BG4300NU Use r Manual Parental Control This page is designed to help control children‟s time spent online. The specified P C can only access to internet in the specified time. Note: B efore this f eature could work appropriately, make sure the system time is right. For detailed... -
Page 110: Maintenance
DG-BG4300NU Use r Manual Maintenance In the navigation bar, click Maintenance. The Maintenance page that is displayed contains Update, P assword, Reboot, Time, Log and Diagnostics. Update Choose Admin > Update. The Update page that is displayed contains Upgrade Firmware and Backup/Restore. - Page 111 DG-BG4300NU Use r Manual The following table describes the parameters and button of this page: Field De scription Select File Click Browse to select the firmware file. After selecting the firmware file, click Upload to start up grading Upload the firmware file.
-
Page 112: Password
DG-BG4300NU Use r Manual Password Choose Maintenance > Password, and the page shown in the following figure appears. By default, the user name and password are admin and admin respectively. The common user name and password are user and user respectively. -
Page 113: Reboot
DG-BG4300NU Use r Manual Reboot Choose Maintenance >Reboot, and the page shown in the following figure appears. You can set the router reset to the default settings. The following table describes the parameters and buttons on this page: Field De scription Reboot Click it to reboot the router. -
Page 114: Time
DG-BG4300NU Use r Manual Time Choose Maintenance > Time, and the page shown in the following figure appears. You can configure the system time manually or get the system time from the time server. The following table describes the parameters of this page:... -
Page 115: Log
DG-BG4300NU Use r Manual countries in the southern hemisphere may observe DST. NTP Configuration Select enable or disable NTP function. You need to enable NTP State if you want to configure the parameters of NTP. Server Set the primary NTP server manually. -
Page 116: Diagnostics
DG-BG4300NU Use r Manual Diagnostics In the navigation bar, click Diagnostics. The Diagnostics page that is displayed contains Ping, Ping6, Traceroute, Traceroute6, OAM Loopback, ADSL Diagnostic and Diag-Test. Ping Choose Diagnostics > Ping. The P ing page that is displayed contains Ping and P ing6. - Page 117 DG-BG4300NU Use r Manual Ping6 Click Ping6 in the left pane, and the page shown in the following figure appears . The following table describes the parameter and button of this page: Field De scription Host Enter an IP address for P ing6 diagnostic.
-
Page 118: Traceroute
DG-BG4300NU Use r Manual Traceroute Click Traceroute in the left pane, and the following page appears. By Traceroute Diagnostic, you can track the route path of information flow from your computer to the other side host. The following table describes the parameters and bu ttons of this page. -
Page 119: Traceroute 6
DG-BG4300NU Use r Manual Traceroute 6 OAM Loopback Choose Diagnostics > OAM Loopback. The page shown in the following figure appears. In this page, you can use VCC loopback function to check the connectivity of the VCC. The ATM loopback test is useful for... -
Page 120: Adsl Statistics
DG-BG4300NU Use r Manual Click Go! to start testing. ADSL Stati stics Choose Diagnostics > ADSL Statistics. The page shown in the following figure appears. It is used for ADSL tone diagnostics. Click Start to start ADSL tone diagnostics. -
Page 121: Diag-Test
DG-BG4300NU Use r Manual Diag-Test Choose Diagnostics > Diag-Test, the page shown in the following figure appears. In this page, you can test the DSL connection. You can also view the LAN status connection and ADSL connection. Click Run Diagnostic Test to start testing. -
Page 122: Smart Menu
DG-BG4300NU Use r Manual Smart Menu Smart Menu consists of all the mostly used features like: Setup wizard, Internet, LAN, Wireless, DDNS, Reboot, Firmware Update and Port forwarding as shown below for quick configuration. This is like an easy to use menu. -
Page 123: Appendix
DG-BG4300NU Use r Manual Appendix Technical Specifications Flash: 2MB SDRAM: 16MB Antennas: Two fixed dipole 5dBi antennas Network Interface: 1 x RJ11 interface for ADSL Line 4 x 10/100 Mbps UTP LAN ports Wireless Features Standard: IEEE802.11b/g/n Frequency band: 2.400~2.4835GHz Wireless output power: 11B: 16±1.5dBm... - Page 124 DG-BG4300NU Use r Manual Internet WP S LAN ports 1~4 Environment Requirements: Operating Temperature 0 ºC—40ºC Storage Temperature -20ºC—70ºC Operating Humidity 10%—95%, non-condensing Storage Humidity 5%—95%, non-condensing P ower Supply: 12 V DC, 1A Switching power adapter P hysical Dimension: Net Dimensions (L x W x H): 181 x 124 x 29 mm...
-
Page 125: Troubleshooting
DG-BG4300NU Use r Manual Troubleshooting If you encounter any problem when you are using this wireless broadband router, don‟t panic. Before you call your dealer of purchase for help, please check this troubleshooting section, the solution of your problem could be very simple, and you can solve the problem yourself. -
Page 126: Glossary
DG-BG4300NU Use r Manual Glossary Default Gateway (Router): Every non-router IP device needs to configure a default gateway IP address. When the device sends out an IP packet, if the destination is not on the same network, the device has to send the packet to its default gateway, which will then send it to the destination. - Page 127 DG-BG4300NU Use r Manual Example: 192.168.2.1. It consists of 2 portions: the IP network address and the host identifier. The IP address is a 32-bit binary pattern, which can be represented as fou r cascaded decimal numbers separated by “ .”: aaa.aaa.aaa.aaa, where each “ aaa” can be anything from 000 to 255, or as four cascaded binary numbers separated by “...
- Page 128 DG-BG4300NU Use r Manual area (such as home or office). Your home network is considered a LAN. MAC Address: MAC stands for Media Access Control. A MAC address is the hardware address of a device connected to a network. MAC address is a unique identifier for a device with an Ethe rnet interface. It is comprised of two parts: 3 bytes of data that correspond to the Manufacturer ID (unique for each manufacturer), plus 3 bytes that are often used as the product‟s serial number.
- Page 129 DG-BG4300NU Use r Manual Protocol: A protocol is a set of rules for interaction agreed upon between multiple parties so that when they interface with each other based on such a protocol, the interpretation of their behavior is well defined and can be made objectively, without confusion or misunderstanding.
Need help?
Do you have a question about the DG-BG4300NU and is the answer not in the manual?
Questions and answers