Table of Contents
Advertisement
Quick Links
Advertisement
Table of Contents

Related Manuals for CDA 9Q6 Series


Summary of Contents for CDA 9Q6 Series
- Page 1 Built in Electric Double Ovens Manual for Installation, Use and Maintenance Customer Care Department • The Group Ltd. • Harby Road • Langar • Nottinghamshire • NG13 9HY T : 01949 862 012 F : 01949 862 003 E : service@cda.eu W : www.cda.eu...
-
Page 2: Appliance Information
The CDA Group Ltd cannot be held responsible for injuries or losses caused by incorrect use or installation of this product. Please note that CDA reserve the right to invalidate the guarantee supplied with this product following incorrect installation or misuse of the appliance. -
Page 3: Important Safety Precautions And Recommendations
IMPORTANT SAFETY PRECAUTIONS AND RECOMMENDATIONS IMPORTANT: This appliance is designed and manufactured solely for the cooking of domestic (household) food and is not suitable for any non domestic application and therefore should not be used in a commercial environment. The appliance guarantee will be void if the appliance is used within a non domestic environment i.e. - Page 4 • Do not touch the appliance with wet or damp hands (or feet). • Do not use the appliance whilst in barefoot. • If you should decide not to use this appliance any longer (or decide to substitute another model), before disposing of it, it is recommended that it be made inoperative in an appropriate manner in accordance to health and environmental protection regulations, ensuring in particular that all potentially hazardous parts be made harmless, especially in relation to...
- Page 5 • FIRST USE OF THE OVEN - it is advised to follow these instructions: – Furnish the interior of the oven as described in the chapter “CLEANING AND MAINTENANCE”. – Switch on the empty oven on max to eliminate grease from the heating elements.
-
Page 6: Top Oven Controls
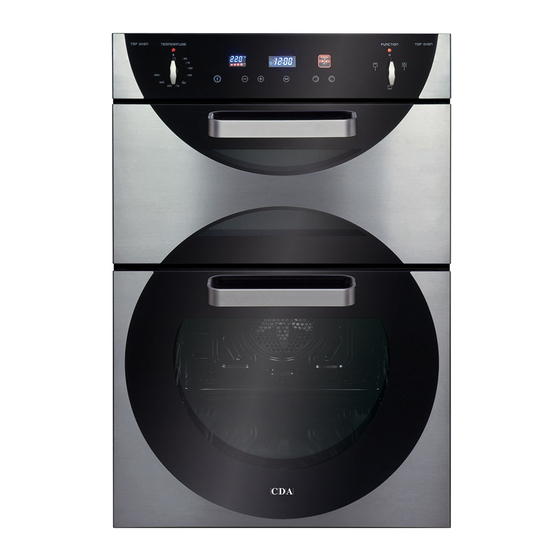
Top Oven Controls Controls Description 1. Temperature knob 2. Cooking functions knob 3. Top oven power ON indicator lamp 4. Top oven temperature indicator lamp 9Q6.. Fig. 1a DV 990.. Fig. 1b 9Z6.. Fig. 1c... -
Page 7: General Features
Top Natural Convection Oven General Features This oven features 2 different thermostatic control functions to satisfy all cooking requirements, provided by 3 heating elements: – Upper element, 700 W – Lower element, 1000 W – Grill element, 2000 W Note: When using for the first time, you are advised to operate the oven at maximum temperature (thermostat knob on the maximum position) for approximately one hour in the mode and for another 15 minutes in the... -
Page 8: How To Use The Top Oven
How to Use the Top Oven WARNING: The door is hot, use the handle. ATTENTION - MOST IMPORTANT Pay special attention not to touch the hot heating element inside the oven cavity. Fig. 2 Fig. 3 Thermostat Knob (Fig. 2) To turn on the heating elements of the oven, set function selector knob to the required position and the thermostat knob to the desired temperature. -
Page 9: Traditional Grilling
Traditional Convection Cooking The upper and lower heating elements come on. The heat is dispersed by natural convection and the temperature must be set to between 50 °C and 250 °C with the thermostat knob. The oven must be preheated before cooking. Recommended for: Food that requires the same degree of cooking both inside and out, for example roasts, spare pork ribs, meringues etc. - Page 10 Lower Main Oven Controls Controls Description 1. ON/OFF selection 2. Temperature and programmer functions regulation, Childlock selection 3. Programmer functions selection 4. Oven functions selection 5. Functions display 6. Clock/Programmer display 7. Temperature display 9Q6.. Fig. 4a DV 990.. Fig. 4b 9Z6..
- Page 11 Lower Main Full Electronic Multifunction Oven General Features This multifunction oven has 4 heating elements which allow you to choose between 9 cooking programmes: – Lower element 1300 W – Upper element 1000 W – Grill element 2000 W – Circular element 2200 W Note: Before using your new oven, it is necessary to condition your oven.
- Page 12 Operating Principles Heating and cooking in the FULL ELECTRONIC MULTIFUNCTION oven are obtained in the following ways: a. by Normal convection The heat is produced by the upper and lower heating elements. b. by Semi-Forced Convection From The Bottom The heat produced by the lower heating element is distributed throughout the oven by the fan.
- Page 13 Using the Lower Main Oven Electronic Display DIGITS SYMBOL - Oven switched on: Time of day and Lit = minute minder in operation selected function (alternating) Flashing = countdown completed - Oven switched off: Time of day by the minute minder SYMBOL SYMBOL Lit = operation of heating elements...
-
Page 14: Electronic Controller Features
Electronic Controller Features It performs the following functions: – 24 hours clock with illuminated display. – Timer (minute minder: up to 600 minutes - 10 hours). – Programme for semi-automatic oven cooking (up to 600 minutes - 10 hours - of cooking time). -
Page 15: Turning The Oven On And Off
Turning the Oven On and Off To turn the oven ON: – Touch the key “ ” and hold until “ On ” appears on the clock/programmer display. – You can now operate your oven. The time of the day appears on the clock/programmer display (followed by the programme number “... - Page 16 Childlock Safety To activate the Childlock option touch the “ ” and “ ” keys simultaneously and hold until the clock/programmer display shows “ n--0 ” and then “ On ”. Then the time of the day appears again (followed by the selected programme number “...
-
Page 17: Selecting The Cooking Functions
Using the Lower Main Oven Selecting the Cooking Functions Clock/ Functions Programmer Display Display Setting Oven Cooking Function When selection a cooking function the relative programme number and the symbol are activated. Setting Fig. 8 Set Oven Function Key Decreasing Set Oven Function Key Increasing... -
Page 18: Selecting The Temperature
Using the Lower Main Oven Selecting the Temperature Cooking Temperature All cooking functions start to operate with a pre-set temperature which can be modified, at any time, by touching the relative “+” and “–” keys positioned below the temperature display. “Celsius Degrees”... -
Page 19: Cooking Functions
Using the Lower Main Oven Cooking Functions Turn on the oven as indicated in the “TURNING THE OVEN ON AND OFF” chapter. Select the oven function and temperature as indicated in the previous pages. IMPORTANT: the cooking function and temperature can be modified at any time during the normal, semi-automatic or automatic cooking. -
Page 20: Turbo Grill
Fan Lower Heat The lower heating element and the fan motor are switched on. The heat coming from the bottom is diffused by forced convection and the temperature must be set between 50 and 250°C. The pre-heating temperature is set at 190°C. To change the temperature, follow the instructions in the “SELECTING THE TEMPERATURE”... -
Page 21: Hot Air Cooking
Ventilated Grill Cooking The infrared heating element and the fan are switched on. The heat is mainly diffused by radiation and distributed by the fan throughout the oven. Use with the oven door closed and the temperature between 50 and 200°C maximum. The pre-heating temperature is set at 200°C. -
Page 22: Defrosting Frozen Foods
Convection Cooking With Fan The upper and lower heating elements and the fan are switched on. The heat from the top and the bottom is diffused by fan convection. The temperature can be set between 50 and 250°C. The pre-heating temperature is set at 175°C. To change the temperature, follow the instructions in the “SELECTING THE TEMPERATURE”... - Page 23 Special “Booster” Programme This special programme allow a fast pre-heating of the cavity by a combination of the heating elements. VERY IMPORTANT NOTE: This special programme must be operated without food inside the oven cavity. Introduce the food to be cooked only at the end of the BOOSTER programme.
- Page 24 Using The Oven Manually Turn the oven ON as indicated in the “TURNING THE OVEN ON AND OFF” chapter. Operate the oven manually by selecting the oven function and temperature as indicated in the “SELECTING THE COOKING FUNCTIONS” and “SELECTING THE TEMPERATURE” chapters. The oven will start to operate about four seconds after your last selection.
- Page 25 Using The Oven Automatically Use automatic cooking to automatically turn the oven on, cook, and then turn the oven off. 1. Check the clock shows the correct time. 2. Select the function and temperature. The oven will come on. 3. Decide how long the food will take to cook, allowing time for pre-heating if necessary. 4.
-
Page 26: Cooking Advice
Cooking Advice Sterilization Sterilization of foods to be conserved, in full and hermetically sealed jars, is done in the following way: a. Set the switch to position b. Set the thermostat knob to position 185 °C and preheat the oven. c. - Page 27 Grilling and “Au Gratin” Grilling may be done by selecting the function because the hot air completely envelops the food that is to be cooked. Set the temperature between 50 and 200°C maximum and after having preheated the oven, simply place the food on the grid. Close the door and let the oven operate until grilling is done.
-
Page 28: Do's And Do Not's
Do’s and do not’s – Do always grill with the oven door closed. – Do read the user instructions carefully before using the double oven for first time. – Do allow the double oven to heat for one and a half hours, before using for the first time, in order to expel any smell from the new oven insulation, without the introduction of food. -
Page 29: Care And Maintenance
Care and Maintenance It is advisable to clean when the appliance is cold and especially for cleaning the IMPORTANT: enamelled parts. Before any operation Avoid leaving alkaline or acidic substances (lemon juice, vinegar, etc.) on the of cleaning and surfaces. maintenance Avoid using cleaning products with a chlorine or acidic base. - Page 30 Stainless Steel, Aluminium, Painted Parts and Silk-screen CAUTION: Printed Surfaces Do not use abrasive substances or non- Clean using an appropriate product. Always dry thoroughly. neutral detergents as Stainless steel surfaces: can be cleaned with an appropriate stainless steel cleaner. IMPORTANT: these parts must be cleaned very carefully to avoid scratching and these will irreparably damage the surface.
- Page 31 Replacing the Halogen Oven Lights WARNING: Ensure the appliance is switched off before replacing the lamp to avoid the possibility of electric shock. – Let the oven cavity and the heating elements to cool down; – Switch off the electrical supply; Top Right Lamp (Top &...
- Page 32 Assembling and Dismantling of the Side Runner Frames – Assemble the wire racks to the oven walls using the 2 screws (Figs. 12-14). – Slide into the guides, the shelf and the tray (Figs. 13-15). The rack must be fitted so that the safety notch, which stops it sliding out, faces the inside of the oven;...
- Page 33 Telescopic Sliding Shelf Supports Models: The telescopic sliding shelf supports make it safer and easier to insert and 9Q6.. remove the oven shelves and trays. They stop when they are pulled out to the 9Z6.. maximum position. Important! When fitting the sliding shelf supports, make sure that you fit: –...
- Page 34 To remove the telescopic sliding shelf supports: Models: – Remove the side racks by unscrewing the fixing screws (Figs. 17a-17b). 9Q6.. – Lay down the telescopic sliding shelf support and side racks, with the telescopic sliding shelf support underneath. 9Z6.. –...
- Page 35 Drop-down Grill Element (Lower Oven only) Models: – To lower the grill element: use a flat-head screwdriver or a small coin to 9Q6.. loosen the element fixing screw. 9Z6.. – When you have finished cleaning the oven ceiling, raise the grill element and screw the element fixing screw back onto the stud.
-
Page 36: Removing The Oven Doors
Oven Doors Removing the Oven Doors The oven door can easily be removed as follows: – Open the door to the full extent (fig. 21a). – Open the lever A completely on the left and right hinges (fig. 21b). – Hold the door as shown in fig. 21. –... - Page 37 Top and Lower Oven Door Model: Removable Inner Pane of Glass DV 990.. Cleaning the Panes of Glass The oven door is fitted with no. 2 panes: - no. 1 outside; - no. 1 inner; To clean the panes on both sides it is necessary to remove the inner pane as follows.
- Page 38 Replacing the Inner Pane of Glass Model: 1. Make sure the door is locked open (see fig. 24). DV 990.. 2. Replace the inner pane: – Check that the four rubber pads are in place (D in Fig. 27). – Check that you are holding the pane the correct way. You should be able to read the wording on it as it faces you.
- Page 39 Top Oven Door Models: Removable Inner Pane of Glass 9Q6.. 9Z6.. Cleaning the Panes of Glass The top oven door is fitted with no. 2 panes: - no. 1 outside; - no. 1 inner; To clean the panes on both sides it is necessary to remove the inner pane as follows.
- Page 40 Replacing the Inner Pane of Glass Models: 1. Make sure the door is locked open (see fig. 37). 9Q6.. 2. Replace the inner pane: 9Z6.. – Check that the four rubber pads are in place (D in Fig. 40). – Check that you are holding the pane the correct way. You should be able to read the wording on it as it faces you.
- Page 41 Lower Oven Door - Removable Inner and Models: Middle Panes of Glass 9Q6.. 9Z6.. Cleaning the Panes of Glass The lower oven door is fitted with no. 3 panes: - no. 1 outside; - no. 1 inner; - no. 1 in the middle. To clean all panes on both sides it is necessary to remove the inner and the middle panes as follows.
- Page 42 3. Remove the Middle Pane: Models: – Gently unlock the middle pane of glass from the bottom clamps 9Q6.. by moving it as in fig. 52. – Gently lift the bottom edge of the pane (arrow 1 in fig. 53) 9Z6..
- Page 43 Replacing the Middle and Inner Panes of Glass Models: 1. Make sure the door is locked open (see fig. 49). 9Q6.. 9Z6.. 2. Replace the middle pane: – Check that the four rubber pads are in place (M in fig. 54). –...
- Page 44 3. Replace the Inner Pane: Models: – Check that the four rubber pads are in place (D in fig. 57). 9Q6.. – Check that you are holding the pane the correct way. You should be able to read the wording on it as it faces you. 9Z6..
-
Page 45: Advice For The Installer
ADVICE FOR THE INSTALLER Important Appliance installation and maintenance must only be carried out by QUALIFIED TECHNICIANS and in compliance with the local safety standards. • Failure to observe this rule will invalidate the warranty. • Always disconnect the appliance from the electrical supply before carrying out any maintenance operations or repairs. -
Page 46: Fixing The Oven
Fixing the oven Introduce the oven into the furniture opening and fix it with screws (not supplied) as figure 63. It is essential that the oven rests on a surface which will support its weight, as the screw fixing is only complementary. Note It is essential that when installing your oven adequate air circulation is allowed for within the installation. - Page 47 IMPORTANT: – To avoid damage to the lower trim please note the following instructions. – The lower trim is designed to allow for good air circulation and the correct opening of the oven door. – To ensure the trim is not damaged due to the appliance being placed on the floor, the appliance should be suitably supported as in below illustrations.
-
Page 48: Electrical Installation
Electrical Installation For your safety please read the following information: WARNING! Before effecting any intervention on the electrical parts the appliance must be disconnected from the network. IMPORTANT: The oven must be installed in accordance with the manufacturer’s instructions. Incorrect installation, for which the manufacturer accepts no responsibility, may cause damage to persons, animals and things. - Page 49 Connection the Double Oven Mains Cable Important! This oven must be connected to the mains power supply only by a suitably qualified person. Unscrew the screw A securing the cover plate B behind the oven (fig. 65). – Remove the cover plate B. –...
-
Page 50: Appliance Servicing
Appliance Servicing CDA provide a quality and effective after-sales service to cover all your servicing needs. Please attach your receipt to this page for safekeeping. Please help us to help you by having the following information available when booking a service-call: 1. - Page 52 Please contact our Customer Care Department, or for Service on the details below. Customer Care Department • The Group Ltd. • Harby Road • Langar • Nottinghamshire • NG13 9HY T : 01949 862 012 F : 01949 862 003 E : service@cda.eu W : www.cda.eu...
Need help?
Do you have a question about the 9Q6 Series and is the answer not in the manual?
Questions and answers