Table of Contents
Advertisement
Advertisement
Table of Contents

Related Manuals for CDA SK320


Summary of Contents for CDA SK320
- Page 1 SK320 Single oven Installation, use and maintenance www.cda.eu...
-
Page 2: Table Of Contents
Contents: Important information Safety instructions First use of the oven Oven controls, functions and use Electronic programmer/timer Setting the current time Minute minder function Semi-automatic cooking Automatic cooking Cleaning and maintenance Removing the appliance door Replacing the appliance door Removing the inner door glass Changing the oven light bulb Installation Mains electrical connection... - Page 3 Any other use could be dangerous and may lead to premature failure of the appliance. The CDA Group Ltd cannot be held responsible for injuries or losses caused by incorrect use or installation of this product. Please note that CDA reserve the right to invalidate the guarantee supplied with this product following incorrect installation or misuse of the appliance.
-
Page 4: Important Information
Appliance Model Serial Number EU Declarations of Conformity: This oven has been designed, constructed and marketed in compliance with safety requirements of EU Directive 2014/35/EU (Low voltage) and requirements of EU Directive 2014/30/EU. This appliance has been manufactured to the strictest standards and complies with all applicable legislation, including Electrical safety (LVD) and Electromagnetic interference compatibility (EMC). - Page 5 Important • Read the user instructions carefully before using the oven for the first time. • Follow the instructions for first use of the oven. • Clean the oven regularly. • Remove spills as soon as they occur. • Always use oven gloves when removing shelves and trays from the ovens.
- Page 6 • Do not use the appliance if any part is broken (e.g. door glass). Disconnect it from the mains power supply and contact CDA Customer Care. • The cooling fan may run even long after the oven has finished cooking.
- Page 7 • Do not hang towels or cloths on the oven handle at any time. • Ensure that the oven is cool and power to the appliance has been turned off before carrying out any cleaning or maintenance including door removal. •...
-
Page 8: First Use Of The Oven
First use of the oven First use • The metal casing of this appliance has been coated with a preservative to protect it during transport and storage. This should be removed during installation by using a non-abrasive stainless steel cleaner. Always follow the instructions given with the cleaner being used. -
Page 9: Oven Controls, Functions And Use
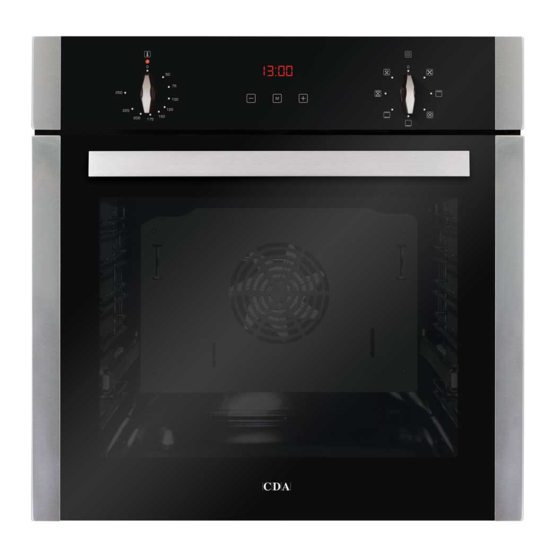
Oven controls and use Fig. 1 IMPORTANT: You must set the current time on the oven programmer, as per page 13, for the oven to operate properly. Cooking function knob (B in Fig. 1) To set the function, turn the cooking function knob (B in Fig. 1) to the required function. - Page 10 temperature, within the oven which helps to accelerate the defrosting process. 1 kg takes approximately 1 hour to defrost, depending on the type of food. Fanned Grill This function radiates the heat from the grill element but also uses the fan to circulate the hot air. The hot air is distributed over and under the food that you are grilling.
- Page 11 When grilling, please note: • Always grill with the oven door closed. • Put the grill pan as close to the grill as possible. • Do not grill for more than 30 minutes at a time. • Preheat the grill for up to five minutes with the oven door closed.
-
Page 12: Electronic Programmer/Timer
Temperature knob (A) • To set the temperature, turn the temperature knob clockwise to the required temperature. • Once the oven has reached the required temperature, the • The temperature indicator lamp will light up when the oven elements are in operation. Electronic programmer/timer Fig. -
Page 13: Setting The Current Time
This oven’s electronic timer is equipped with touch control sensors. Each registered touch of a sensor field is confirmed by a single beep. It is advisable to keep the sensor fields clean at all times to avoid errors in operation. Setting the current time After connection to the mains supply, or re-connection after a power outage, the display will show ‘12.00’... -
Page 14: Semi-Automatic Cooking
Please note: deactivate automatically after approximately 2 minutes. Cancelling the minute minder function The minute minder function can be cancelled at any time. • Press to select the minute minder settings. This is indicated by symbol . • Press the sensor until the time returns to 0.00 and wait 5 seconds. -
Page 15: Automatic Cooking
• Switch both control knobs to the off position. To cancel semi-automatic cooking The semi-automatic function can be cancelled at any time. To do this, simply press until the display shows the symbol and use the sensor to return the timer display to 0.00. Please note: The acoustic signal, if not switched off manually, will deactivate automatically after approximately 2 minutes. -
Page 16: Cleaning And Maintenance
• Press until the display illuminates the symbol and it begins to flash. • Set the end of cooking time using the sensors. The end of cooking time can be set no more than 23 hours and 59 minutes ahead of the current time. •... - Page 17 We recommend always wearing PPE (Personal Protective Equipment) when carrying out any cleaning or maintenance. Cleaning the oven exterior As the oven has, glass, stainless steel and enamel surfaces you should use a nonabrasive cleaner. Any abrasive cleaner (including Cif) will scratch the surfaces and could erase the control panel markings.
-
Page 18: Removing The Appliance Door
• Once care and maintenance is complete, ensure that all parts are correctly replaced before using the oven. Removing the appliance door In order to allow for easier access into the oven cavity for cleaning, it is possible to remove the door. Before removing the door, ensure that you have an area prepared in which you can place the removed door. -
Page 19: Replacing The Appliance Door
Replacing the appliance door • Hold the door to the appliance in the closed position and manoeuvre the hinges so that the part of the hinge, highlighted by the star in fig. 3, inserts into the hinge slot in the Fig. -
Page 20: Removing The Inner Door Glass
Removing the inner door glass The inner pane of glass can be removed for cleaning purposes. To do so, follow the steps below. Important: Do not disassemble the door without it having been removed from the oven as per page 18. Weight differences could cause the door to snap shut, causing damage to the oven and/or the user. -
Page 21: Changing The Oven Light Bulb
Changing the oven light bulb Important: • Before any maintenance, the appliance must be disconnected from the power supply. If the oven has been in use, let the oven cavity and the heating elements cool down before attempting any maintenance. •... -
Page 22: Installation
Installation Important! If installing this oven below a hob, ensure that the air gap between the two appliances is observed. This gap is usually detailed in the hob’s manual. The installation of this appliance must be carried out by suitably qualified personnel. - Page 23 When correctly installed ensure that there is a gap of 4 mm minimum between the sides of the oven and adjacent furniture doors. How to install your oven You will need the housing area in fig. 6 to fit your oven correctly. The oven is designed to fit into a cabinet of 600 mm width.
-
Page 24: Mains Electrical Connection
Mains electrical DOUBLE POLE SWITCHED connection FUSE SPUR OUTLET Warning! This appliance must be earthed. This appliance is intended to be connected to fixed wiring by a double pole switch, having a contact separation of at least 3mm in all poles and protected by a 13A fuse. - Page 25 Please note: • The mains cable must only be replaced by a qualified electrician or service engineer and must be of equivalent or better rating (i.e. 3 x 1.5 mm ² , HO5RR-F). • This appliance is intended to be connected to the mains supply with a cable of cross sectional area 1.5 mm ²...
-
Page 26: Troubleshooting
Contact CDA Customer Care. If any of the above steps do not resolve your issue, please contact CDA Customer Care to arrange a repair. Contact details are below. Please have to hand all the details from your appliance’s rating plate which can be found on the back of the oven and/or on the back of the instruction manual/warranty card. -
Page 27: Energy Efficiency Information
(gas final energy) E & O E. All instructions, dimensions and illustrations are provided for guidance only. CDA reserve the right to change specifications without prior notice. - Page 28 01949 862 012 or email customer.care@cda.eu For more information please contact: The Sales Department on 01949 862 010 or email sales@cda.eu Customer Care Department. The CDA Group Ltd, Harby Road, Langar, Nottinghamshire, NG13 9HY 01949 862 012 01949 862 003 customer.care@cda.eu www.cda.eu...
Need help?
Do you have a question about the SK320 and is the answer not in the manual?
Questions and answers