Table of Contents

Related Manuals for CDA SV310SS


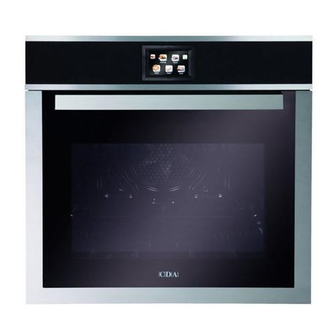
Summary of Contents for CDA SV310SS
- Page 1 Manual for Installation, Use and Maintenance Passionate about style Customer Care Department • The Group Ltd. • Harby Road • Langar • Nottinghamshire • NG13 9HY T : 01949 862 012 F : 01949 862 003 E : service@cda.eu W : www.cda.eu...
-
Page 3: Table Of Contents
Roast chicken or meat Pizza Toast Cake Special cooking menu screen Minute minder menu screen Cooking programme menu screen 16-17 Childlock and Settings Cleaning and Maintenance Changing the Oven Lamp Removing the Oven Door Electricity supply to your oven Installation... - Page 4 Keep the oven door closed whilst grilling. Appliance information: Please enter the details on the appliance rating plate below for reference, to assist CDA Customer Care in the event of a fault with your appliance and to register your appliance for guarantee purposes.
- Page 5 • Do not use the oven tray for roasting. • Do not perform maintenance or cleaning of the oven without first switching off the electricity supply. If the oven has recently been used, allow to cool. • Do not place hot enamel parts in water. Leave them to cool first.
-
Page 6: Use Of The Oven
The oven is equipped with a safety thermostat which will switch off the oven to prevent overheating. Overheating can be caused by incorrect use of the oven or defective components. If the oven switches off due to overheating, wait for the oven to cool down before using it again. If the error continues, contact CDA Customer Care. -
Page 7: Oven Controls And Use
The oven will show the clock screen when on standby. To turn on the oven, touch or swipe the screen for one to two seconds The loading screen will open for one second, and then the front menu screen will open. - Page 8 When the oven is off, the temperature is shown in white. When the oven is heating up, temperature flashes red and white When the oven reaches the required temperature, there will be a beep and the temperature is shown in red...
- Page 9 In manual cooking where no timer is set or automatic cooking the display will show the length of time the oven has been cooking Touch to switch boost on. Boost runs extra heating elements to speed up the preheating process. This option is available for manual cooking...
-
Page 10: Manual Cooking Menu Screen
6. Set the cooking and end time if required, as shown on page 15. 7. Touch the start icon for two seconds. The oven will beep and start cooking At the end of cooking, touch the stop icon for two seconds. -
Page 11: Auto Cooking Menu Screen
Pizza Toast Cake Please note: If you change the temperature on an auto cooking programme, the oven will store the new setting for the next time the programme is used. and the oven will set the from the front menu screen. -
Page 12: Roast Chicken Or Meat
The screen will show preheat and the timer will turn on the display until the oven reaches the required temperature. The oven will beep to confirm that the preheat is complete and the screen will display an icon to tell you put the roast into the oven. - Page 13 The oven will beep the display will show an icon to remind you to turn the toast over halfway through cooking. To stop the beep, touch the icon. At the end of the programme, the oven will beep and the flag will show on the display. To stop the beep, touch the flag. Cake 1.
-
Page 14: Special Cooking Menu Screen
15, then touch At the end of the programme, the oven will beep intermittently and the screen will show a flag at the end of the cooking time. To stop the programme, touch the flag. -
Page 15: Minute Minder Menu Screen
When the minute minder is running, the symbol will look like this: At the end of the countdown the oven will beep for approximately one minute. To stop the beep before the end of the... - Page 16 If the end timer is not available, then it is shown in grey. To set a cooking time The oven is equipped with a timer to allow you to set the oven to cook for a specific period of time. This option is available on all manual and special cooking programmes.
- Page 17 Childlock Settings Childlock The oven is equipped with a childlock to prevent accidental use. The childlock can be used when the oven is on standby or when in use. To switch the childlock on, touch and hold change to as confirmation that the childlock is set.
-
Page 18: Demo Mode
You can then programme the oven to any cooking function. When the programme is started, screen and there will be six short beeps to confirm that the Demo mode is on. The display will show as if the oven is cooking, but the heating elements will not be used. -
Page 19: Cleaning And Maintenance
Stainless steel can be effectively cleaned by simply using a dilute solution of water and mild detergent and drying to a shine with a clean cloth. Proprietary stainless steel cleaners are available. We recommend the CDA E-Cloth available from the CDA Sales Team for cleaning stainless steel surfaces. -
Page 20: Changing The Oven Lamp
If the oven has been in use, let the oven cavity and the heating elements cool down before attempting any maintenance. Never replace the bulb with bare hands as contamination from your fingers can cause premature failure. -
Page 21: Removing The Oven Door
2. Replace the upper blocks, ensuring they lock back into place. 3. Replace the oven door. IMPORTANT: Do not clean the glass whilst it is still hot. Please keep the ok symbol to the bottom right of the oven door (fig. 7). Fig. 5 Fig. 6... -
Page 22: Electricity Supply To Your Oven
Electricity supply to your oven The manufacturer cannot be held responsible for any issues arising from incorrect installation.Warning! This appliance must be earthed. The manufacturer declines all responsibility for any issues caused by failure to observe this requirement. THIS APPLIANCE MUST BE CONNECTED TO THE MAINS SUPPLY BY A COMPETENT PERSON, USING FIXED WIRING VIA A DOUBLE POLE SWITCHED FUSE SPUR OUTLET AND PROTECTED BY A SUITABLE FUSE (16A MINIMUM). - Page 23 Installation Important If the oven is being installed into a built under oven housing unit ensure that the front rail at the top of the unit is not installed as it could restrict ventilation. Ensure that air can flow freely around the housing area. If the oven is being installed into a fully enclosed built-under oven housing unit it may be necessary to cut a small slot in the top of the plinth fitted under the unit.
- Page 24 Passionate about style Customer Care Department • The Group Ltd. • Harby Road • Langar • Nottinghamshire • NG13 9HY T : 01949 862 012 F : 01949 862 003 E : service@cda.eu W : www.cda.eu...
Need help?
Do you have a question about the SV310SS and is the answer not in the manual?
Questions and answers