Hilti PR 2-HS Operating Instructions Manual
Rotating laser
Hide thumbs
Also See for PR 2-HS:
- Operating instructions manual (60 pages) ,
- Quick manual (2 pages) ,
- Operating instructions manual (19 pages)

Related Manuals for Hilti PR 2-HS


Summary of Contents for Hilti PR 2-HS
- Page 1 PR 2-HS Operating instructions Mode d’emploi Manual de instrucciones Manual de instruções Printed: 29.11.2013 | Doc-Nr: PUB / 5142564 / 000 / 02...
- Page 2 Printed: 29.11.2013 | Doc-Nr: PUB / 5142564 / 000 / 02...
- Page 3 MENU cmmin Printed: 29.11.2013 | Doc-Nr: PUB / 5142564 / 000 / 02...
- Page 4 Printed: 29.11.2013 | Doc-Nr: PUB / 5142564 / 000 / 02...
-
Page 5: Table Of Contents
Keep these pages open while studying the oper- ating instructions. On/off button In these operating instructions, the designation “the tool” or “the rotating laser” always refers to the Hilti PR 2-HS Units button rotating laser. “Laser receiver” or “receiver” always refers Volume button to the PRA 20 (02) laser receiver. -
Page 6: General Information
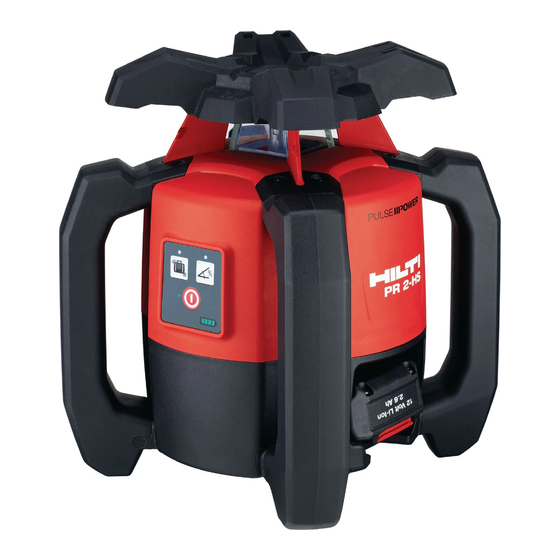
2 Description 2.1 Use of the product as directed The PR 2-HS is a rotating laser that projects a rotating, visible laser beam. The rotating laser can be used horizontally and for inclined planes. The tool is designed to be used for determining, transferring and checking references in the horizontal and inclined planes. -
Page 7: Charging The Battery In The Tool
To avoid the risk of injury, use only genuine Hilti accessories and insert tools. Observe the information printed in the operating instructions concerning operation, care and maintenance. Take the influences of the surrounding area into account. Do not use the appliance where there is a risk of fire or explosion. -
Page 8: Accessories
2.9 Operating status indicators The tool is equipped with the following operating status indicators: auto-leveling LED, battery charge status LED, shock warning deactivation LED and inclined plane mode LED. 2.10 LED indicators Auto-leveling LED The green LED blinks. The tool is in the leveling phase. The green LED lights con- The tool has leveled itself / is operating stantly. -
Page 9: Technical Data
2 The drop test was carried out from a tripod, dropping onto flat concrete under standard ambient conditions (MIL-STD-810G). PRA 20 (02) Detection range (area diameter) With the PR 2-HS (typical): 2…600 m (6.56…1,968.5 ft) Signal tone generator 3 volume levels plus mute setting... -
Page 10: Safety Instructions
Dimensions (L × W × H) 160 mm (6.3") × 67 mm (2.64") × 24 mm (0.94") Weight (including batteries) 0.25 kg (0.55 lb) Power source 2 AA batteries Battery life Temperature +20°C (+68 °F): Approx. 50 h (depending on the quality of the alkaline batteries used) Operating temperature range -20…+50°C (−4…+122 °F) Storage temperature range... -
Page 11: Pra 20 Laser Receiver Display
Changes or modifications not expressly approved tions, lead to electric shock. Dirty or dusty tools by the manufacturer can void the user’s authority to should thus be checked at a Hilti service center operate the equipment. at regular intervals, especially if used frequently g) Use of setting-up / adjusting devices and equipment for working on conductive materials. -
Page 12: Before Use
Take 6 Before use NOTE 6.3 Charging the battery The tool may be powered only by a Hilti PRA 84 or PRA 84G battery. 6.1 Fitting the battery 2 CAUTION Before inserting the battery in the tool, check to... - Page 13 6.3.2 Recharging a battery CAUTION Avoid ingress of moisture. Moisture in the interior of Check that the outer surfaces of the battery are the tool may cause a short circuit and chemical reactions clean and dry. resulting in burns to the skin or fire. Insert the battery in the tool.
-
Page 14: Operation
7 Operation 7.3.4 Working with the PRA 81 height transfer device 9 Open the catch on the PRA 81. Insert the laser receiver in the PRA 81 height transfer device. 7.1 Checking the tool Close the catch on the PRA 81. Check the accuracy of the tool before using it for impor- Switch the laser receiver on by pressing the on/off tant tasks, especially if it has been dropped or subjected... -
Page 15: Care And Maintenance
8.2 Care of the Li-ion battery battery cells suffer damage. Charge the battery with the Hilti charger approved NOTE for use with Li-ion batteries. A conditioning charge (as is required with NiCd or NiMH batteries) is not necessary with Li-ion batteries 8.3 Storage... -
Page 16: Disposal
Most of the materials from which Hilti tools or appliances are manufactured can be recycled. The materials must be correctly separated before they can be recycled. In many countries, Hilti has already made arrangements for taking back old tools and appliances for recycling. -
Page 17: Manufacturer's Warranty - Tools
10 Manufacturer’s warranty - tools Hilti warrants that the tool supplied is free of defects in Additional claims are excluded, unless stringent na- material and workmanship. This warranty is valid so long tional rules prohibit such exclusion. In particular, Hilti... - Page 18 Tel.: +423 / 234 21 11 Fax: +423 / 234 29 65 www.hilti.com Hilti = registered trademark of Hilti Corp., Schaan W 4270 | 1113 | 00-Pos. 2_USA | 1 Printed in Germany © 2013 Right of technical and programme changes reserved S. E. & O.
Need help?
Do you have a question about the PR 2-HS and is the answer not in the manual?
Questions and answers