
Subscribe to Our Youtube Channel
Related Manuals for Amica 601GE1.33ZYFG


Summary of Contents for Amica 601GE1.33ZYFG
- Page 1 601GE1.33ZYFG(W) 601GE2.33ZpYFG(Xx) INSTRUCTION MANUAL GAS COOKER IOAK-1023 / 8034979 (02.2008./1)
-
Page 2: Dear Customer
DEAR CUSTOMER, The cooker is exceptionally easy to use and extremely efficient. After reading the instruction manual, operating the cooker will be easy. Before being packaged and leaving the manufacturer, the cooker was thoroughly checked with regard to safety and functionality. Before using the appliance, please read the instruction manual carefully. -
Page 3: Table Of Contents
TABLE OF CONTENTS Safety instructions ......................4 Description of the appliance ..................... 9 Installation ......................... 12 Operation ........................... 17 Baking in the oven – practical hints ................23 Cleaning and maintenance ....................29 Technical data ........................33... -
Page 4: Safety Instructions
SAFETY INSTRUCTIONS The appliance becomes hot during operation. Take care not to touch the hot parts inside the oven. Please pay attention to children whilst the cooker is in operation, as children do not know the rules of cooker use. In particular, hot surface burners, the oven chamber, grates, the door pane, and pans containing hot liquids standing on the hob may cause burns to children. - Page 5 SAFETY INSTRUCTIONS Do not make your own alterations to the cooker in order to adapt it to a different type of gas, move the cooker to another place or make changes to the power supply. These operations may only be carried out by an authorised electrician or fitter. Do not use harsh cleaning agents or sharp metal objects to clean the door as they can scratch the surface, which could then result in the glass cracking.
- Page 6 SAFETY INSTRUCTIONS GAS & ELECTRICAL CONNECTION MOVING ThE COOKER Please refer to installation instructions for the Do not attempt to move the cooker by pulling Gas & Electrical Safety Regulations and the on the doors or handles. Open the door and Ventilation Requirements.
-
Page 7: How To Save Energy
hOW TO SAVE ENERGY Using energy in a respon- Make sure the oven door is properly sible way not only saves closed. money but also helps the Heat can leak through spillages on the door environment. So let’s save seals. Clean up any spillages immediately. energy! And this is how you Do not install the cooker in the direct can do it:... - Page 8 DISPOSAL OF ThE APPLIANCE UNPACKING During transportation, protec- Old appliances should not sim- tive packaging was used to ply be disposed of with normal protect the appliance against household waste, but should any damage. After unpack- be delivered to a collection and ing, please dispose of all recycling centre for electric and elements of packaging in a...
-
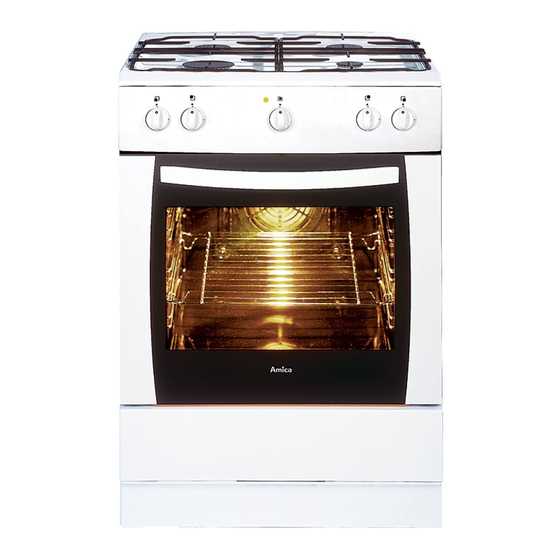
Page 9: Description Of The Appliance
DESCRIPTION OF ThE APPLIANCE 5, 6 3, 4 601GE1.33ZYFG(W) 1 Temperature/function oven control knob 2 Push-button ignition 3, 4, 5, 6 Gas burner control knobs 7 Temperatureregulatorsignal light red 8 Cooker operation signal light yellow 9 Oven door handle Burner safety valve... - Page 10 DESCRIPTION OF ThE APPLIANCE 5, 6 3, 4 601GE2.33ZpYFG(Xx) 1 Temperature control knob 2 Oven function selection knob 3, 4, 5, 6 Gas burner control knobs 7 Temperatureregulatorsignal light red 8 Cooker operation signal light yellow 9 Oven door handle Burner safety valve Spark ignitor 10 Drawer...
- Page 11 SPECIFICATIONS OF ThE APPLIANCE Oven fittings: Grill grate Baking tray* (drying rack) Roasting tray *optional...
-
Page 12: Installation
INSTALLATION Before you start: Please read the instructions. Ventilation Requirements Planning your installation will save you time The room containing the appliance should and effort. have an air suppły in accordance with Prior to installation, ensure that the local BS5440: Part2: 1989: distribution conditions (nature of the gas ... - Page 13 INSTALLATION Clearances Levelling No shelf or oyerhang or cooker hood should Before you start using the cooker it should be be closer than a minimum of 650mm, but leveled, which is particularly important for fat check with cooker hood manufacturer’s rec- distribution in a frying pan.
- Page 14 INSTALLATION Connect to the gas suppły The iniet to the cooker is 1/2” BSP internal situated at the rear corner. Fit the bayonet connection. This should be located so as to ensure that the flexible con- nector hose does not kink. Use a 900-1125mm length of flexible con- nector.
- Page 15 INSTALLATION Adapting the cooker to another type of In order to adapt the cooker to burn a different gas. type of gas, you should: exchange nozzles (see tables below), This operation may only be carried out by an adjust the “economical” flame. appropriately authorised fitter.
- Page 16 INSTALLATION Surface burners applied do not require adjust- Gas supply to surface burners is opened and ment of primary air. A correct flame has dis- set by knobs, fig. A. Knobs should be adjusted tinct internal cones of blue and green colour. with the burner switched on and set to the A short, humming flame or long, yellow and economical flame position, using an adjust- smoking one, without clearly outlined cones, ment screwdriver of the 2.5 mm size.
-
Page 17: Operation
OPERATION Before first use remove packaging elements, gently (slowly) remove labels from the oven door, trying not to break the glue tape. empty the drawer, clean off factory pre- servatives from the oven chamber, take out and wash the oven fittings with warm water and a little washing-up liq- uid, ... - Page 18 OPERATION Ignition without an ignitor how to use surface burners light a match, Choice of cookware press in the knob to the end and turn it left to the “large flame” position ignite gas with a match, Mind that the diameter of a pan base is always ...
- Page 19 OPERATION Caution! Operation of the burner protection valve In cooker models equipped with a surface burner safety valve, hold the Some models are equipped with an automatic knob pressed down to the end when system that cuts off gas supply to a burner igniting for 10 seconds at the “large when the flame has disappeared.
- Page 20 OPERATION Bottom heater on Oven functions and operation. When the knob is set to this po- sition, the oven is heated using only the bottom heater. Use for, Natural convection oven e.g. final baking from the bottom. (conventional) Top heater on The oven can be heated up using the bottom When the knob is set to this po- and top heaters, and the grill (if any).
- Page 21 OPERATION Possible settings of the oven function knob Oven with automatic air circulation (including fan) Separate oven lighting By setting the knob to this posi- tion the lighting inside the oven is The oven can be warmed up using the bottom switched on, e.g.
- Page 22 OPERATION Use of the grill Combined grill (Grill and the top heater) The grilling process operates through infrared When the “combined grill” is ac- rays emitted onto the dish by the incandes- tive it enables grilling with the grill cent grill heater. and with the top heater switched on at the same time.
-
Page 23: Baking In The Oven - Practical Hints
BAKING IN ThE OVEN – PRACTICAL hINTS Baking we recommend using the baking trays which were provided with your cooker; it is also possible to bake in cake tins and trays bought elsewhere which should be put on the drying rack; for baking it is better to use black trays which conduct heat better and shorten the baking time;... -
Page 24: Oven Functions
BAKING IN ThE OVEN – PRACTICAL hINTS TABLE 1: Cakes Oven functions: bottom + top heaters bottom + top heaters CAKE TYPE BAKING TIME TEMPE- [min] RATURE LEVEL [°C] Baking in cake tins 170-180 60-80 Sponge cake/marble cake 160-180 65-80 Victoria sponge Base for a layer cake 170-180... -
Page 25: Roasting Meat
BAKING IN ThE OVEN – PRACTICAL hINTS TABLE 1A: Cakes Oven functions: cake (bottom and top heaters + fan) TEMPERATURE BAKING TIME BAKING TYPE [°C] [min] Baking in cake tins Meringues 60-70 Victoria sponge 65-70 Teacake 60-70 Layer cake 25-35 Baking on the trays provided with the cooker Yeast cake 40-45... - Page 26 BAKING IN ThE OVEN – PRACTICAL hINTS TABLE 2: Roasting meat Oven functions: bottom and top heaters bottom + top heaters TIME* IN MINUTES TYPE OF MEAT LEVEL TEMPERATURE [°C] FROM THE BOTTOM BEEF per 1 cm Roast beef or fillet rare 12-15 oven warmed up juicy (“medium”) 15-25...
- Page 27 BAKING IN ThE OVEN – PRACTICAL hINTS TABLE 3: Grill Oven functions: grill heater LEVEL GRILLING TIME [MINUTES] TYPE OF DISh TEMPERATURE FROM THE [°C] BOTTOM SIDE 1 SIDE 2 Pork chop 8-10 Pork schnitzel 10-12 Shish kebab Sausages 8-10 8-10 Roastbeef, (steak approx.
- Page 28 BAKING IN ThE OVEN – PRACTICAL hINTS TABLE 4: Fan with grill Oven functions: grill + fan WEIGhT LEVEL TEMPERATURE BAKING TYPE OF MEAT [kg] [°C] [MINUTES] FROM ThE BOTTOM 170-190 Roast pork 80-100 170-190 100-120 170-190 120-140 Leg of lamb 170-190 90-110 180-200...
-
Page 29: Cleaning And Maintenance
CLEANING AND MAINTENANCE Important: By ensuring proper cleaning and mainte- The burner caps and leads must be reposi- nance of your cooker you can have a sig- tioned correctly so that they sit squarely onto nificant influence on the continuing fault-free the hob as shown. operation of your appliance. - Page 30 CLEANING AND MAINTENANCE Replacement of the oven light Oven bulb The oven should be cleaned after every In order to avoid the possibility of an use. When cleaning the oven the lighting electric shock ensure that the appliance is should be switched on to enable you to switched off before replacing the bulb.
-
Page 31: Door Removal
CLEANING AND MAINTENANCE 4. Clean the panel with warm water with some cleaning agent added. Door removal Carry out the same in reverse order to reassemble the inner glass panel. Its In order to obtain easier access to the oven smooth surface shall be pointed up- chamber for cleaning, it is possible to remove wards. - Page 32 OPERATION IN CASE OF EMERGENCY In the event of an emergency, you should: switch off all working units of the cooker disconnect the mains plug call the service centre some minor faults can be fixed by referring to the instructions given in the table below. Before calling the customer support centre or the service centre check the following points that are presented in the table.
-
Page 33: Technical Data
TEChNICAL DATA Electrical supply 220-240V ~50Hz Warmng: This cooker must be earthed. Maximum load 2,9 kW Appliance category GB II2H3+ Hob: small burner 1,0 kW medium burner x2 1,8 kW large burner 2,8 kW Oven: bottom heater 1,3 kW top heater 0,9 kW grill 2,0 kW...
Need help?
Do you have a question about the 601GE1.33ZYFG and is the answer not in the manual?
Questions and answers
how to replace the heating element for the oven
how do i replace the oven element