Table of Contents

Related Manuals for Avtech AVP325


Summary of Contents for Avtech AVP325
- Page 1 317Z Please read instructions thoroughly before operation and retain it for future reference. The image shown above may differ from the actual product appearance. P325_P325A_Manual_V1.3...
-
Page 2: About This Document
IMPORTANT SAFEGUARD All lead-free products offered by the company comply with the requirements of the European law on the Restriction of Hazardous Substances (RoHS) directive, which means our manufacture processes and products are strictly “lead-free” and without the hazardous substances cited in the directive. The crossed-out wheeled bin mark symbolizes that within the European Union the product must be collected separately at the product end-of-life. -
Page 3: Table Of Contents
TABLE OF CONTENTS 1. INTRODUCTION ........................1 1.1 Overview................................1 1.2 Features................................1 1.3 Package Contents ............................1 1.4 Specifications..............................2 2. INSTALLATION AND SETUP ....................3 2.1 Installation................................3 2.2 Connection...............................5 2.2.1 Connecting to Keyboard Controller (Optional) ..................5 2.2.2 Connecting to DVR ..........................6 3. AUTO TRACKING ........................8 3.1 Overview................................8 3.2 Setup ................................8 3.3 Activation .................................8... - Page 4 6.7 ID Code No..............................16 6.7.1 Camera ID Code Number Setup......................16 6.8 ID Code Display.............................16 6.8.1 On / Off ..............................16 6.9 Baud Rate..............................17 6.9.1 Baud Rate Options (unit: bits/s) ......................17 7. MAIN MENU – STATUS ......................18 8. MAIN MENU – MODE ......................19 8.1 Reset Default ..............................20 8.2 Pan / Tilt Speed..............................20 8.3 Preset Setup ..............................20...
-
Page 5: Introduction
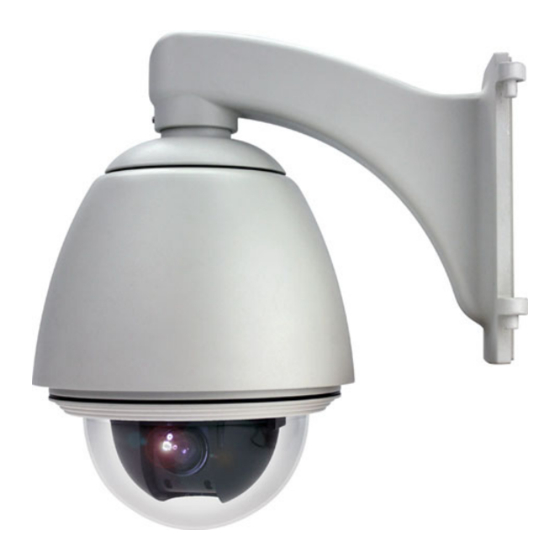
INTRODUCTION 1. INTRODUCTION 1.1 Overview Equipped with a 360° pan and 90° tilt base and 22X optical zoom lens, this outdoor type speed dome camera is capable of following the moving object precisely with Intelligent Auto Tracking, and long-time operation with High Spindle Reliability. -
Page 6: Specifications
INTRODUCTION 1.4 Specifications Outdoor 22X Zoom Speed Dome Camera ▓ GENERAL Signal System NTSC or PAL Pick-up Element 1/4" Sony Color Super HAD CCD image sensor Number of Pixels 768(H)*494(V)<NTSC> / 752(H)*582(V)<PAL> Resolution High Resolution Min. Illumination 0.3 Lux / F1.6 S/N Ratio More than 48dB (AGC off) Video Output... -
Page 7: Installation And Setup
INSTALLATION AND SETUP 2. INSTALLATION AND SETUP For the installation and connection of this speed dome camera, please check with qualified service personnel or installer. 2.1 Installation... - Page 8 INSTALLATION AND SETUP...
-
Page 9: Connection
INSTALLATION AND SETUP 2.2 Connection 2.2.1 Connecting to Keyboard Controller (Optional) The optional peripheral (keyboard controller) allows you to accurately control the pan / tilt / zoom movement for a speed dome camera with the convenient 3D joystick and functional keypad design. Note: It’s highly recommended to purchase this device to work with your speed dome camera for accurate control. -
Page 10: Connecting To Dvr
INSTALLATION AND SETUP STEP 5: On the touch panel of the keyboard controller, click “Conf” to enter the configuration page, and click (P.T.Z) to make related settings as follows. ● RATE : Check and select the baud rate the same as the connected speed dome camera is used. - Page 11 INSTALLATION AND SETUP STEP 3: Twist the RS485-A and RS485-B wires of the RJ11 cable and the speed dome camera together. Twist the RS485-A (red) and RS485-B (green) wires of the RJ11 cable to the RS485-A (brown) and RS485-B (orange) wires of the speed dome camera (as shown in the picture above). To protect the naked wires, use the insulation tape to cover on the twisted wires.
-
Page 12: Auto Tracking
AUTO TRACKING 3. AUTO TRACKING 3.1 Overview The camera will automatically aim and follow the largest movement in the monitoring view, making the camera pan (max. 360 ) & tilt (max. 90 ) within: (1) the camera's pre-defined surveillance area; (2) the pre-defined tracking timeout. -
Page 13: Quick Menu Guide
MAIN MENU – CAMERA 4. QUICK MENU GUIDE 4.1 Menu Configuration Setup menu is shown as below. You can customize the speed dome camera to your own requirements by setting up the respective items in these menus. For details, please refer to the corresponding pages. White Balance Auto, Indoor 1, Indoor 2, Sun, Cloudy 1/60, 1/100, 1/250, 1/500, 1/1000, 1/2000,... -
Page 14: Quick Programming Guide
MAIN MENU – CAMERA 4.2 Quick Programming Guide The optional keyboard controller can be used to control this speed dome camera. Note: Please enter the camera control mode of the keyboard controller first. Press “ ” to enter the camera control mode. Or use the stylus to click the speed dome camera icon on the touch panel to enter the camera control mode. -
Page 15: Main Menu - Camera
MAIN MENU – CAMERA 5. MAIN MENU – CAMERA Note: The following description assumes that users are using our brand’s keyboard controller to control the speed dome camera. For details about using the DVR or other brand’s keyboard controller to control the speed dome camera, please refer to “APPENDIX 2 CAMERA CONTROL VIA OUR DVR”... -
Page 16: White Balance
MAIN MENU – CAMERA 5.1 White Balance 5.2.1 Shutter Speed Options The white balance function processes the current NTSC: 1/60, 1/100, 1/250, 1/500, 1/1000, 1/2000, 1/4000, 1/10000 image to retain color balance over a color temperature PAL: 1/50, 1/120, 1/250, 1/500, 1/1000, 1/2000, 1/4000, 1/10000 range. -
Page 17: Iris
MAIN MENU – CAMERA 5.4 IRIS 5.6 Sharpness Auto sharpness enhances the clarity of image Auto iris is the lens function that automatically detail by adjusting the aperture and sharpening the opens and closes the iris in response to the changing edges in the pictures. -
Page 18: Main Menu - Tools
MAIN MENU – TOOLS 6. MAIN MENU – TOOLS Note: The following description assumes that users are using our brand’s keyboard controller to control the speed dome camera. For details about using the DVR or other brand’s keyboard controller to control the speed dome camera, please refer to “APPENDIX 2 CAMERA CONTROL VIA OUR DVR”... -
Page 19: Title Name
MAIN MENU – TOOLS 6.1 Title Name 6.3 Pan / Tilt Angle The title name is the label used to identify the The numeric value of the pan and tilt angle can be camera viewed on the monitor. Up to 10 characters can displayed on the monitor. -
Page 20: Zoom Bar
MAIN MENU – TOOLS 6.5 Zoom Bar 6.7 ID Code No. The zoom ratio can be easily checked on this The camera ID code number is a series of digits zoom bar graph. that indicate the location of the camera. Title Setting Title Setting Title Position... -
Page 21: Baud Rate
MAIN MENU – TOOLS 6.9 Baud Rate The baud rate is the transmission speed for the RS485 communication. Title Setting 19200 Title Position 9600 Pan / Tilt Angle 4800 Pan / Tilt Graph 2400 Zoom Bar Focus Window ID Code No. ID Code Display Baud Rate 6.9.1 Baud Rate Options (unit: bits/s) -
Page 22: Main Menu - Status
MAIN MENU – FUNCTION 7. MAIN MENU – STATUS Note: The following description assumes that users are using our brand’s keyboard controller to control the speed dome camera. For details about using the DVR or other brand’s keyboard controller to control the speed dome camera, please refer to “APPENDIX 2 CAMERA CONTROL VIA OUR DVR”... -
Page 23: Main Menu - Mode
MAIN MENU – MODE 8. MAIN MENU – MODE Note: The following description assumes that users are using our brand’s keyboard controller to control the speed dome camera. For details about using the DVR or other brand’s keyboard controller to control the speed dome camera, please refer to “APPENDIX 2 CAMERA CONTROL VIA OUR DVR”... -
Page 24: Reset Default
MAIN MENU – MODE 8.1 Reset Default 8.3 Preset Setup To restore all camera settings to the factory default The preset point setting is used to specify the settings, move to “Set”, and press to confirm. camera position (pan and tilt) and the lens zoom setting. When you see the message “Initial…OK”... -
Page 25: Add New Preset Points
MAIN MENU – MODE Factory-default preset point 2: 8.3.4 Set Duration Time of the Preset Points Move to “ ”, and use the up / down key to select the duration second. For example, set the duration second as 7, and you will see the similar window as follows. -
Page 26: Tracking Setup
MAIN MENU – MODE 3) Move to “EXIT” and press to leave the setting 8.4 Tracking Setup page. The speed dome camera will automatically aim and follow the largest movement in the monitoring view, making the camera pan (max. 360º) & tilt (max. 90º) within: (1) the camera's pre-defined surveillance area / (2) the pre-defined tracking timeout. -
Page 27: Home Position
MAIN MENU – MODE 8.5 Home Position 8.6 Auto Focus An auto mode is a memorized, repeating series of pan, There two types of the auto focus mode. You can tilt and zoom. In the home position setting mode, you select the mode depending on your need. -
Page 28: Select The Calibrating Result
MAIN MENU – MODE 8.9 Auto Mode Reset Default Start Select to set the mode when the “Auto” function of Pan / Tilt Speed this camera is activated. Preset Setup Tracking Setup Home Position Reset Default Track Auto Focus Pan / Tilt Speed Calibration Preset Setup Seq. -
Page 29: Main Menu - Exit
MAIN MENU – EXIT 9. MAIN MENU – EXIT Note: The following description assumes that users are using our brand’s keyboard controller to control the speed dome camera. For details about using the DVR or other brand’s keyboard controller to control the speed dome camera, please refer to “APPENDIX 2 CAMERA CONTROL VIA OUR DVR”... -
Page 30: Appendix 1 Default Value
APPENDIX 1 APPENDIX 1 DEFAULT VALUE Items Default Value White Balance Auto Shutter Speed 1/60 Gain Medium IRIS Level Sharpness Auto Title Display Position Pan / Tilt Angle Pan / Tilt Graph Zoom Bar Focus Window ID Code No. ID Code Display Baud Rate 2400 Pan / Tilt Speed... -
Page 31: Appendix 2 Camera Control Via Our Dvr
APPENDIX 2 APPENDIX 2 CAMERA CONTROL VIA OUR DVR When this camera is connected to our brand’s DVR, you can control the camera from the DVR’s front panel. If your DVR supports IR remote control, you can also control the camera by using the IR remote controller. ‧... -
Page 32: Appendix 3 Camera Control Via Other Keyboard Controller
APPENDIX 3 APPENDIX 3 CAMERA CONTROL VIA OTHER KEYBOARD CONTROLLER When this camera is connected to the keyboard controller other than our brand, you can control the camera via the protocol of Pelco-P or Pelco-D. If You Want To … Press …. -
Page 33: Appendix 4 Firmware Upgrade For 22X Speed Dome Camera
APPENDIX 4 APPENDIX 4 FIRMWARE UPGRADE FOR 22X SPEED DOME CAMERA Note: 1). Before upgrading the camera firmware, please get the upgrade file from your distributor. 2). The upgrade must be implemented with a PC / laptop and our brand’s keyboard controller. STEP 1: Connect the keyboard controller to the 22X speed dome camera, and make sure the controller can control the camera correctly.
Need help?
Do you have a question about the AVP325 and is the answer not in the manual?
Questions and answers