Table of Contents
Advertisement
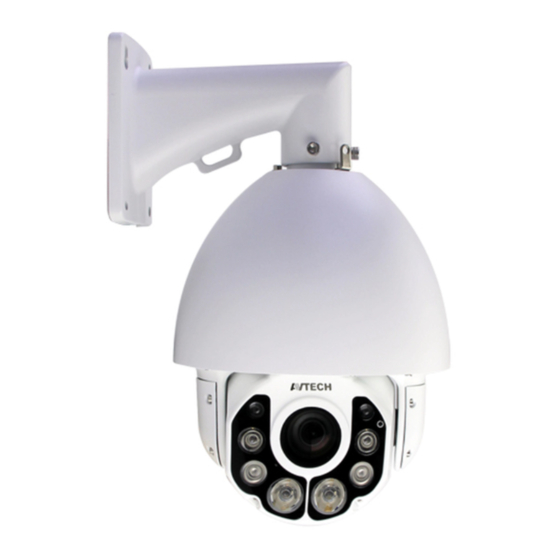
TRIBRID SPEED DOME CAMERA
System Configuration Guide
Compatible with TVI, AHD and IP systems
The product image shown above may differ from the actual product.
Please use this camera with a DVR which supports HD video recording.
Please read the instructions thoroughly before using the product.
z592_system_V0.9
Advertisement
Table of Contents

Related Manuals for Avtech AVZ592


Summary of Contents for Avtech AVZ592
- Page 1 TRIBRID SPEED DOME CAMERA System Configuration Guide Compatible with TVI, AHD and IP systems The product image shown above may differ from the actual product. Please use this camera with a DVR which supports HD video recording. Please read the instructions thoroughly before using the product. z592_system_V0.9...
- Page 2 IMPORTANT SAFEGUARD To reduce the risk of electric shock, do not expose this apparatus to rain or moisture. Only operate this apparatus from the type of power source indicated on the label. The company shall not be liable for any damages arising out of any improper use, even if we have been advised of the possibility of such damages.
-
Page 3: Table Of Contents
TABLE OF CONTENTS 1. OVERVIEW ..............................1 1.1 FEATURES.............................. 1 1.2 PACKAGE CONTENT ..........................2 1.3 DIMENSIONS............................2 1.4 CABLE OVERVIEW..........................2 1.5 CAMERA MODE, ID & BAUD RATE SETUP ................... 3 WHERE TO SET ........................... 3 SET TO IP CAMERA ..........................3 ... -
Page 4: Overview
1. OVERVIEW 1.1 FEATURES Tribrid video output of IP, TVI and AHD to fulfill different customers' requirements Zoom lens of f4.7 ~ 94mm with 20x optical zoom and auto focus, suitable for various monitoring environments PTZ control for seamless monitoring: - Capable of 360°... -
Page 5: Package Content
1.2 PACKAGE CONTENT Camera User manual Bracket (w/carabiner) Terminal block 1.3 DIMENSIONS *Dimensional Tolerance: ± 5mm 1.4 CABLE OVERVIEW Cable Description Power cable Connect to the supplied adapter. BNC cable Connect to an HD CCTV DVR with a coaxial cable (Used as an HD CCTV camera). -
Page 6: Camera Mode, Id & Baud Rate Setup
1.5 CAMERA MODE, ID & BAUD RATE SETUP This camera could be used as an IP camera, a TVI camera and an AHD camera. Before connecting this camera to any recorder, you may need to manually set the camera mode, ID & baudrate for the camera to work properly. Plase check the description below for details. -
Page 7: Set To Ahd Camera
SET TO AHD CAMERA Mode: You might need to set the ID and baud rate if you’re connecting to other brand’s AHD DVR: The ID number can be set from 0~255 (binary). Please check the examples below. Baud Rate:... -
Page 8: Ptz Control
2. PTZ CONTROL 2.1 VIA HD CCTV DVR / NVR NOTE: The panel below is available only when the camera is used with our brand’s HD CCTV DVR or NVR, and not all functions in the panel are supported for this camera. Right-click to return to the live view, and click the channel with this speed dome camera connected. -
Page 9: Via Ip Camera Interface
2.2 VIA IP CAMERA INTERFACE When this camera is individually used and is not connected to any NVR, PTZ control can be done via the interface of the camera. Step1: Open your web browser, and key in http://ipaddress:portnum in the URL address box. For example, for the IP address 60.121.46.236 and port No. - Page 10 Function Icon Description Switch to the system configuration page, and the functions available for “Supervisor” and “Power User” are different. Config. For details, please refer to the user manual. Arrow keys panel Click to move the camera lens up / up-left / down / up-right / left / down-right / right / down-left.
-
Page 11: Via Joystick Avx102 (Optional)
2.3 VIA JOYSTICK AVX102 (OPTIONAL) When this camera is connected to our brand’s DVR or NVR, simply plug the joystick to the recorder, switch to the channel which connects this camera and you’re ready to control via the joystick. When this camera is connected remotely via our free PC program, CMS Lite, simply plug this joystick to your PC or laptop, switch to the channel which connects this camera, and you’re ready to control via the joystick. -
Page 12: Camera Configurations - Tvi Dvr
3. CAMERA CONFIGURATIONS – TVI DVR NOTE: The method below is available only when the camera is used with our brand’s TVI DVR. On the DVR live view, right click to show the main menu, and select ADVANCED CONFIG DCCS. Then, select the channel which connects this camera, and click SETUP to enter the menu of camera parameters. - Page 13 Item Description WHITE BALANCE Process the current image to retain color balance over a color temperature range. The options are: AUTO, 2500K, 3200K, 4200K, 5800K & 9500K. SHARPNESS Sharpness enhances the clarity of image detail by adjusting the aperture and sharpening the edges in the pictures.
-
Page 14: Auto Pan Setup
3.1 AUTO PAN SETUP Step1: In the live view, right click to show the main menu. Select ADVANCED CONFIG DCCS. Then, select the channel which connects this camera, and click SETUP to enter the menu of camera parameters. ADVANCED CONFIG CAMERA DETECTION MENU... -
Page 15: Cruise Setup
3.2 CRUISE SETUP Step1: In the live view, right click to show the main menu. Select ADVANCED CONFIG DCCS. Then, select the channel which connects this camera, and click SETUP to enter the menu of camera parameters. ADVANCED CONFIG CAMERA DETECTION MENU... -
Page 16: Sequence Setup
3.3 SEQUENCE SETUP Step1: On the DVR live view, click the channel with this speed dome camera connected. Then, click on the bottom left side of the screen to show the PTZ control panel. Step2: Click to display the preset point panel, and click to go to the setting panel. - Page 17 Step6: Select CRUISE MODE, and choose SEQUENCE. Then, go to CRUISE CONFIG to select SETUP. SEQUENCE ACTIVE NO: ACTIVE TIME (MINUTES) PRESET DWELL TIME P AN SPEED >> 04 << 05 No10 No11 No12 No13 No14 EXIT Select how long the area patrolling lasts in minute.
-
Page 18: Camera Guard
3.4 CAMERA GUARD This function is used to lock the camera to a fixed point and no pan action could be made until the lock mode is disabled. Before using this function, make sure: You have an iOS or android mobile device with our free app, EagleEyes, installed. ... -
Page 19: Home Setup
Step4: Return to the address book of EagleEyes, and enable Guard. The camera will fix at the point after the time specified in Step2 unless the Guard status is disabled. 3.5 HOME SETUP This function is used to configure this camera to always return to a specific point when the camera is not operated for the specified time. -
Page 20: Auto Tracking Setup
3.6 AUTO TRACKING SETUP Step1: In the live view, right click to show the main menu. Select ADVANCED CONFIG DCCS. Then, select the channel which connects this camera, and click SETUP to enter the menu of camera parameters. ADVANCED CONFIG CAMERA DETECTION MENU... -
Page 21: Camera Configurations - Ip Camera
4. CAMERA CONFIGURATIONS – IP CAMERA 4.1 Digital PTZ (DPTZ) Operations This camera series has PTZ capability, i.e. digital PTZ (hereafter called “DPTZ”), for wide area monitoring. Click “DPTZ” on the top left corner to show the DPTZ control panel. FUNCTION ICON DESCRIPTION... -
Page 22: Event Record Search & Playback
4.2 Event Record Search & Playback This camera can only save a few recordings. Note: To save more recorded data, it’s recommended to use this camera with the compatible NVR. Click to jump to the next / previous time interval in an hour, for example, 11:00 ~ Previous / 12:00 or 14:00 ~ 15:00, and start playing the earliest event video clip recorded Next Hour... -
Page 23: System Configuration
4.3 System configuration Click “Config.” to enter the configuration page. Note: You need to be “Supervisor” to enter the system configuration page. If you’re not a “Supervisor”, please re-log into the camera with the correct user name and password. Main Menu Sub-Menu Reference Network... - Page 24 Main Menu Sub-Menu Reference This function should be used with the mini-guard control switch for alarm system integration. For details, please check with your distributor or installer. Enable this function to reduce blurring associated with the motion of a camera during exposure. Record Record Configure the record function.
-
Page 25: Network
4.3.1 Network Network You can set the network configuration of the camera depending on your network type. For details, please refer to “Advanced Network Setup” from www.surveillance-download.com/user/z59x.swf. QoS, Quality of Service, is the ability to control the data flow for real-time streaming. This function is important if your network bandwidth is insufficient and you have other devices to share the network bandwidth. - Page 26 SNTP SNTP (Simple Network Time Protocol) is used to synchronize your camera time with the networked computer systems. Function Description Once users choose the time zone, the camera will adjust the local area time of the system automatically. NTP Server Simply use the default SNTP server (For example, tock.stdtime.gov.tw) or change to another server with which users are familiar.
- Page 27 Function Description SMTP Server Enter the SMTP server address provided from your e-mail system supplier. Port Enter the port number provided from your e-mail system supplier. If this column is left blank, the e-mail server will use port 25 to send e-mails. Mail From Enter the name of the sender.
- Page 28 Function Description Test To know whether your SMS setting is correct, click this button to immediately send a SMS to your phone. Note: This testing is not free and you will be charged for SMS sending base on your local rate. Filter Choose to permit or block the IP address(es) which can access this camera, and click “Save”...
- Page 29 UPnP / Bonjour “UPnP” stands for “Universal Plug and Play”, which allows devices to connect seamlessly in the home and corporate environments and simplify installation of computer components, and is only suitable for Microsoft Windows-based operating system. “Bonjour” functions the same as “UPnP”, but it’s only suitable for Apple Mac-based operating system. ...
- Page 30 The Real-time Transport Protocol (RTP) is an Internet protocol standard to manage the real-time transmission of multimedia, such as VLC player. The media player you want to use for remote access must support RTP transmission for this function to work normally. Note: When you’re about to end the remote access, please press the stop button on your media player first, and then close the program.
- Page 31 Then, follow the steps below: Step1: Connect this camera to a PC or laptop directly, and go to its login page to log in. Note: To know how to connect the camera to a PC or laptop directly, please check “4 Modem / Hub + Modem”...
-
Page 32: Camera
Network Failure Detection Configure this camera to check the network connection of other device periodically, and send notifications via Email or FTP for disconnection events. 4.3.2 Camera Camera In this menu, you can set the camera title, OSD display, and location to save snapshots. Note: The actual functions shown depend on the model you have. - Page 33 How to check an existing preset point In “Available Positions”, select the name of the point you want to check from the drop-down list, and click “Goto”. You will see the camera view on the right side moving to the point it’s recorded. How to delete an existing preset point In “Available Positions”, select the name of the point you want to check from the drop-down list, and click “Remove”.
- Page 34 Sequence When “Sequence” is selected here and is clicked on the live view page, the camera will start patrolling each preset point defined in “Sequence”. Step1: Click “Add” to choose a preset point from the drop-down list, and select the duration to stay at this point from 1 ~ 60 minutes.
-
Page 35: Auto Tracking
Auto Tracking Set the surveillance area for auto tracking, and the tracking timeout. When the locked target is out of the pre-defined surveillance area or stops moving for a pre-defined period of time, the camera returns to the point it originally monitors. Item Description Limit 1... - Page 36 ROI, Region of Interest, is used to reinforce the image quality of the selected area(s). Users could specify two areas in the camera view. Color Adjust the color performance from Brightness, Contract, Hue and Saturation. Click and drag the slider to preview the color change on the right side of ths page and adjust the image color.
- Page 37 Advanced Adjust the camera parameters if necessary. Item Description Fixed Shutter Shutter Speed is a function that can adjust the duration of the electronic shutter to produce optimum image quality. Select the shutter speed suitable for your environment. Slow Shutter Select the slow shutter speed suitable for your environment.
- Page 38 Item Description IRIS IRIS is used to adjust the amount of light reaching the image sensor for best image results. When the shutter speed is selected to a certain value, the iris mode is switched to “AI”. Please adjust the image brightness here when necessary. Day and Night This function is used to configure the day and night mode: ...
-
Page 39: Record
4.3.4 Record Record In “Record Configuration”, you can: Enable or disable the alarm record function. When “Enable” is set to “No”, the alarm record function is disabled even if you enable it in other configuration pages. Select if the data should be overwritten when the memory storage is full. ... -
Page 40: Storage
4.3.5 Storage Memory In “Memory”, you can check the remaining capacity for recording, or clear all recorded data saved if needed. Note: The recorded data will be removed also when you reset or reboot this camera. You can only record a limited number of recordings. Note: To save more recorded data, it’s recommended to use this camera with the compatible NVR. - Page 41 Detect Item Description External Alarm Enable or disable detection from external alarm-in device, and click the title “External Alarm” (in blue) to set “N.O.” or “N.C.” depending on the configuration of your alarm-in device. Motion Enable or disable motion detection. Motion detection is not supported when the stream format is Motion JPEG.
- Page 42 Snapshot Enable this function to schedule the camera to take snapshots periodically or at a specific time, and send the snapshots to E-Mail, FTP, and / or Network Share for backup. Note: Before using E-Mail, FTP and Network Share, make sure the related configurations are done in “Network”...
-
Page 43: General
4.3.7 General General To change the language of UI interface, select from the drop-down list in “Language”. “Turbo Steps” is used to speed up one-click from 1 to 10. For example, if the value of the turbo step is set to 5, one mouse-click will function as 5 mouse-clicks when you click the arrow keys. - Page 44 Server Log To quickly search the system logs you want by event type, click “Prev. Page” or “Next Page” to find the logs you want, or check the event type(s) and click “Reload” to start searching. To clear all system event logs, click “Clear All”. Online You can check the current online user(s) with respective online information.
- Page 45 Account You can create a new account with different user access privilege, or delete or modify an existing account setting. How to create a new account Step1: Click “New”, and fill in the following columns. Column Description Set a user name that will be used for camera access. The user name allows up to 16 User Name alphanumeric characters.
-
Page 46: Google Maps
Google Maps This function is used to let you know where the camera is. The system will prompt you to apply a Goole Maps Key if your access is denied. Please follow the instructions below when you’re denied: Step1: Click “Sign up for a Google Maps key” to enter the application page. Step2: Check the terms and conditions, and enter the IP address of the camera. - Page 47 Maintenance Firmware Upgrade This function is used when users need to upgrade the camera for function scalability. Note: Before using this function, make sure you have the correct upgrade files provided by your installer or distributor. Note: The event videos saved in the camera will be removed after firmware upgrade. Make sure you’ve copied important events to your PC before firmware upgrade.
-
Page 48: Specifications
SPECIFICATIONS* Network LAN Port LAN Speed 10/100 Based-T Ethernet Data Transmission Speed 10/100/1000 Based-T DDNS, PPPoE, DHCP, NTP, SNTP, TCP/IP,ICMP, SMTP, FTP, HTTP, RTP, Supported Protocols RTSP, RTCP,IPv4, Bonjour,UPnP, DNS,UDP,IGMP, QoS, IEEE802.1X, SNMP ONVIF Compatible YES (Profile S) Number of Online Users (1) Multiple user access levels with password Security (2) IP address filtering... - Page 49 PTZ Mechanism Pan Range 360° continuous rotation Max. Pan Speed 90º/s Tilt Range -6° ~ 90° Max. Tilt Speed 70º/s Zoom Ratio 20X Optical Zoom Max. Zoom Speed Approx. 3s (Tele ~ Wide) Preset Points Up to 256 preset points 1.
-
Page 50: Micro Sd Card Compatible List
MICRO SD CARD COMPATIBLE LIST Manufactu Capacity Class Manufactur Capacity Class ADATA Transcend Class 6 Class 2 Apacer Class 4 Class 4 Class 6 SanDisk Class 6 Class 4 16GB Class 10 Class 4 Kingston 16GB Class 4 Class 4 32GB Class 4 Class 4... -
Page 51: Api Id Application For Sms Messaging
API ID APPLICATION FOR SMS MESSAGING To allow the camera automatically sending a text message when an event happens, you need to apply an API ID from a mobile messaging company first, such as Clickatell or EVERY8D. Below shows an example of how to get an API ID from Clickatell. Note: The SMS messaging may not be totally free. - Page 52 Step3: When the account is created, the system will automatically send an Email to your specified Email address with the user name, password, and client ID used to log into the service. Step4: Click the link within the email to log in, and you will be prompted to validate your mobile phone number.
-
Page 53: Prerequisites For Network Share
PREREQUISITES FOR NETWORK SHARE Check PC IP Address Note: The instructions below are taking Windows 7 and 8 for an example. Step1: Go to "Network and Sharing Center”, and select “Change adapter settings”. Step2: Right-click on “Local Area Connection”, and select “Properties”. Note: If your local area connection is not enabled, please also enable it. -
Page 54: Create "Administrator" Account
Create "Administrator" Account It’s recommended to create a new administrator account on the PC for “Network Share” to use, or user could use the existing administrator account. Note: The instructions below are taking Windows 7 and 8 for an example. Step1: Go to "User Accounts”... -
Page 55: Share Folder
Step3: Set the password, and click “Create Account”. Share Folder Note: The instructions below are taking Windows 7 and 8 for an example. Step1: Right-click the folder you want to use to save snapshots for “Network Share”, and choose “Properties”. Step2: In “Share Properties”, select the tab of “Sharing”, and choose “Share…”. - Page 56 Step3: Choose the account you want to share with, and click “Share” to save.
Need help?
Do you have a question about the AVZ592 and is the answer not in the manual?
Questions and answers