
Related Manuals for Avtech AVM503


Summary of Contents for Avtech AVM503
-
Page 1: Operation Guide
IR DOME IP CAMERA SERIES OPERATION GUIDE Please read instructions thoroughly before operation and retain it for future reference. AVM503_521A_311_411_511_542A_542B_532 operation_V1.0... - Page 2 IMPORTANT SAFEGUARD All lead-free products offered by the company comply with the requirements of the European law on the Restriction of Hazardous Substances (RoHS) directive, which means our manufacture processes and products are strictly “lead-free” and without the hazardous substances cited in the directive. The crossed-out wheeled bin mark symbolizes that within the European Union the product must be collected separately at the product end-of-life.
- Page 3 MPEG4 Licensing THIS PRODUCT IS LICENSED UNDER THE MPEG4 VISUAL PATENT PORTFOLIO LICENSE FOR THE PERSONAL AND NON-COMMERCIAL USE OF A CONSUMER FOR (i) ENCODING VIDEO IN COMPLIANCE WITH THE MPEG4 VISUAL STANDARD (“MPEG-4 VIDEO”) AND/OR (ii) DECODING MPEG4 VIDEO THAT WAS ENCODED BY A CONSUMER ENGAGED IN A PERSONAL AND NON-COMMERCIAL ACTIVITY AND/OR WAS OBTAINED FROM A VIDEO PROVIDER LICENSED BY MPEG LA TO PROVIDE MPEG4 VIDEO.
-
Page 4: Table Of Contents
TABLE OF CONTENTS 1. OVERVIEW............................1 1.1 Product Features............................1 1.2 Package Content............................1 1.3 Product Overview ............................1 1.4 Connectors ..............................2 1.5 External Alarm Connection........................2 1.6 Status Indicator (For selected models only) ....................2 1.7 Insert a Micro SD card (For selected models only) ................... 4 2. -
Page 5: Overview
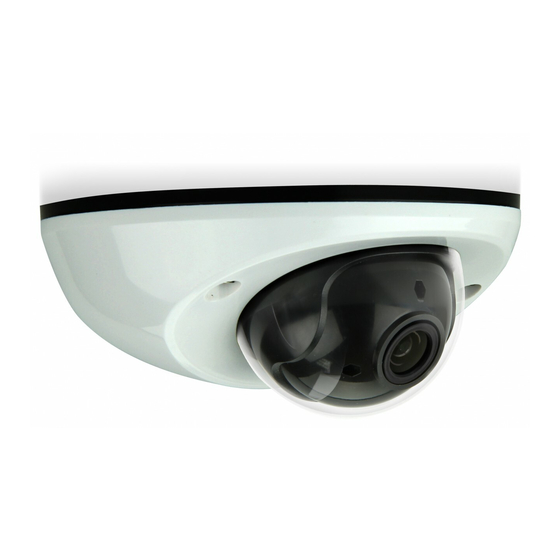
1. OVERVIEW 1.1 Product Features 1.3 / 2 Megapixel solution with HDTV 720p quality, allowing users to notice minor details more easily (For selected models only) 3-axis mechanism for flexible ceiling and wall-mount installation POE (Power-over-Ethernet) support to eliminate the use of power cables and reduce installation costs ... -
Page 6: Connectors
1.4 Connectors Ethernet: Connect a RJ45 network cable. DC IN: Connect the regulated power supply, DC 5V or 12V depending on the model you have. RESET: With the power connected, press to reset all parameters, including the IP address to factory default settings. - Page 7 When the “privacy mode” (for selected models only) is on, the status indicators will blink as the following table illustrates: ICON LAN connection status Internet connection status System Status During powering on Always on Always on Blinking Always off (on 250 ms, off 250 ms) Reset default ...
-
Page 8: Insert A Micro Sd Card (For Selected Models Only)
1.7 Insert a Micro SD card (For selected models only) For local video recording, a micro SD card slot can be found on the camera. The camera doesn’t support hot-swapping. Please insert or remove the micro SD card with power disconnected. Please follow the directions in the below graphic to insert Micro SD card properly: Type 1 Type 2... -
Page 9: Camera Access With Internet Explorer
2. CAMERA ACCESS WITH INTERNET EXPLORER This network camera can be accessed via Microsoft® Internet Explorer® and iPhone / iPad / Android mobile devices with our self-developed program “EagleEyes” installed depending on different using situations. Note: For details about accessing network cameras via iPhone / iPad / Android mobile devices, please refer to http://www.eagleeyescctv.com. - Page 10 Type 2 For other buttons, please check the following table. Function Icon User Level Description Supervisor / Power User Switch to the live view page. Live / Normal User / Guest Enter the event record list for video playback. Supervisor / Power User Backup For details, please refer to “2.4 Event Record Search &...
- Page 11 Function Icon User Level Description Video Profile* Supervisor / Power User Select the image resolution from the drop list: / Normal User 1920 x 1080 1280 x 720 720 x 480 352 x 240 Supervisor / Power User Video Resolution* Select the image resolution from the drop list: / Normal User...
-
Page 12: Digital Ptz (Dptz) Operations
2.3 Digital PTZ (DPTZ) Operations This series of camera has PTZ capability, i.e. digital PTZ (hereafter called “DPTZ”), for wide area monitoring. STEP1: Click “DPTZ” to show the DPTZ control panel. Type1 FUNCTION ICON DESCRIPTION When is selected, the moving control panel will be shown to move the picture after zoom-in is Moving panel performed. - Page 13 Type 2 FUNCTION ICON DESCRIPTION Resolution Select the video resolution for the DPTZ function. Only “VGA” and “QVGA” are available. Click to take a snapshot of the current view on a new window. Right click on the picture and re-save it to the Take snapshots location you want.
-
Page 14: Event Record Search & Playback
2.4 Event Record Search & Playback Note: To save more recorded data, it’s recommended to use this camera with the compatible NVR. Click to jump to the next / previous time interval in an hour, for example, 11:00 ~ 12:00 or 14:00 Previous / Next Hour ~ 15:00, and start playing the earliest event video clip recorded during this whole hour. -
Page 15: Camera Configurations
3. CAMERA CONFIGURATIONS Users can further configure this network camera by accessing via Internet Explorer. 3.1 System configuration menu Click “Config.” to enter the configuration page. The functions are categorized into six menus: Network, Camera, Record Timer, Storage, Trigger and General. ... -
Page 16: Network
3.4 Record ” at page 22. For details about “Storage”, please refer to “3.5 Storage”’ at page 24. For details about “Trigger”, please refer to “3.6 Trigger” at page 25. For details about “General”, please refer to “3.7 General” at page 26. Main Menu Sub-Menu Reference... -
Page 17: Network
3.2 Network 3.2.1 Network You can set the network configuration of the network camera depending on your network type. For details, please refer to “Advanced Network Setup” from www.surveillance-download.com/user/ .swf. m521 3.2.2 QoS QoS, Quality of Service, is the ability to control the data flow for real-time streaming. This function is important if your network bandwidth is insufficient and you have other devices to share the network bandwidth. -
Page 18: Ftp
3.2.5 FTP Enter the detailed FTP information and click “Save” to confirm. The information you set here will be applied when “FTP” is selected in “Trigger” → “Trigger”. 3.2.6 MAIL Enter the detailed e-mail information and click “Save” to confirm. The information you set here will be applied when “Email”... -
Page 19: Sms
3.2.7 SMS Note: Before using this function, you need to apply an account and get an API ID from the mobile messaging company, such as Clickatell and EVERY8D.For details, please refer to “APPENDIX 4 API ID APPLICATION FOR SMS MESSAGING” at page 36. Enter the detailed information needed for text messaging, and click “Save”... -
Page 20: Filter
3.2.8 Filter Choose to permit or block the IP address(es) which can access this camera, and click “Save” to confirm. Function Description Filter Configuration Error Count Set the maximum count for login failure. When the maximum count is reached, the IP address trying to access the network camera will be locked. -
Page 21: Rtp
Double-click it to quickly open the web browser for camera access. Port Mapping (Available only in UPnP) This function can eliminate the need to additionally access the router for port forwarding. For details, please refer to “Advanced Network Setup” from www.surveillance-download.com/user/m521.swf Note: Before using this function, make sure your router supports UPnP, and this function is enabled. - Page 22 Function Description Port Range The port range used by RTP is limited, and preserving 100 ports between the start port and end port is necessary. Start Port The range of the start port is 1024 ~ 65434. End Port The range of the end port is 1124 ~ 65534.
-
Page 23: Camera
3.3 Camera 3.3.1 Camera (For selected models only) Rename the camera, and change the place where the camera name is shown on the screen, UP-LEFT / UP-RIGHT / DOWN-LEFT / DOWN-RIGHT. "Snapshot Path” is used to specify the path to save snapshot files. Type 1 Type 2 3.3.2 Preset (For selected models only) -
Page 24: Video
3.3.3 Video Adjust video-related settings in different video format. “Quality” is related to image clearness. “FPS” is related to the fluency of the video. The more the FPS, the more fluent the video. “Max Bit Rate” is the maximum limitation of data transmission in the selected image format and resolution. Note: QQVGA is for mobile surveillance only. -
Page 25: Color
3.3.3 Color Adjust the color performance from Brightness, Contract, Hue and Saturation. Click and drag the slider to preview the color change on the right side of ths page and adjust the image color. To restore the default values, click “Back to Default” 3.3.4 Audio (For selected models only) Drag the slider to adjust the volume of the microphone and speaker. - Page 26 Item Description IR Turn On Level Select the level for IR light to activate. White Balance Process the current image to retain color balance over a color temperature range. The options are: Auto, 2500K, 3200K, 4200K, 5800K, 9500K. Sharpness Sharpness enhances the clarity of image detail by adjusting the aperture and sharpening the edges in the pictures. Hold and drag the slider to adjust the level of sharpness from 0 ~ 100.
-
Page 27: Record
3.4 Record 3.4.1 Record In “Record Configuration”, you can: Enable or disable the alarm record function. When “Enable” is set to “No”, the alarm record function is disabled even if you enable it in other configuration pages. Select if the data should be overwritten when the memory storage is full. ... -
Page 28: Storage
3.5 Storage 3.5.1 Memory In “Memory”, you can check the remaining capacity for recording, or clear all recorded data saved if needed. Note: The recorded data will be removed also when you reset or reboot this camera. Note: To know how and where to insert a micro SD card, please refer to “1.7 Insert a Micro SD card (For selected models only)”... -
Page 29: Trigger
3.6 Trigger 3.6.1 Trigger You can configure how this camera reacts when there’s an alarm, a motion or a PIR event. Detect Item Description External Alarm Enable or disable detection from external alarm-in device, and click the title “External Alarm” (in blue) to set “N.O.” or “N.C.”... -
Page 30: General
Action Here defines how the camera delivers alerts to you for any event. Item Description E-Mail Select the event type you want to receive E-mail notifications when it occurs. Then, click the title “E-Mail” (in blue) to configure the media type (H264 / JPEG / MPEG4), file format (AVC / AVI), and record time (1 ~ 5 seconds) for the event video clip. -
Page 31: Time
3.7.2 Time Set daylight saving time and the current time, and click “Save” to confirm. Function Description Time Configuration Set the current date. Date Set the current time. Time Daylight Saving Time Configuration Specify whether to use daylight saving time (Enable / Disable). Daylight Saving Time If this function is enabled, set the time period (Start Time / End Time), and adjust the daylight saving time in hours (Adjust Time). -
Page 32: Online
3.7.4 Online You can check the current online user(s) with respective online information. To refresh the list, click “Reload”. To allow anonymous login, select “Enable” in “Anonymous Viewer Login”. To disable image code verification at login, select “No” in “Login with CAPTCHA Image”. 3.7.5 Account You can create a new account with different user access privilege, or delete or modify an existing account setting. -
Page 33: Google Maps
3.7.6 Google Maps This function is used to let you know where the network camera is. The system will prompt you to apply a Goole Maps Key if your access is denied. Please follow the instructions below when you’re denied: Step1: Click “Sign up for a Google Maps key”... - Page 34 Step2: Select “Upgrade” to start system upgrading. Note: You’ll be prompted to keep current configurations. It’s recommended to keep them, or all configurations will be restored to default values after upgrade. Note: It takes a few minutes to finish the upgrade process. Do not disconnect the power during firmware upgrade, or the upgrade may be failed.
-
Page 35: Appendix 1 Product Specifications
APPENDIX 1 PRODUCT SPECIFICATIONS Model 1 Model 2 ▓ Network Network Compression H.264 / MJPEG Multiple Video Streaming 4 (H.264, MJPEG) (Encode Modes, IPS, Resolution) LAN Port LAN Speed 10/100 Based-T Ethernet DDNS, PPPoE, DHCP, NTP, SNTP, TCP/IP, ICMP, SMTP, FTP, HTTP, RTP, RTSP, RTCP, Supported Protocols IPv4, Bonjour, UPnP, DNS,UDP,IGMP, QoS Frame Rate... - Page 36 Model 3 Model 4 ▓ Network Network Compression H.264 / MPEG4 / MJPEG H.264 / MJPEG Multiple Video Streaming 4 (H.264, MPEG4, MJPEG) 4 (H.264, MJPEG) (Encode Modes, IPS, Resolution) LAN Port LAN Speed 10/100 Based-T Ethernet DDNS, PPPoE, DHCP, NTP, SNTP, TCP/IP, ICMP, SMTP, FTP, Supported Protocols HTTP, RTP, RTSP, RTCP,IPv4, Bonjour, UPnP, DNS,UDP,IGMP, QoS Frame Rate...
-
Page 37: Appendix 2 Bit Rate Table For Reference
APPENDIX 2 BIT RATE TABLE FOR REFERENCE The data below is for reference only. The bit rates listed here may vary depending on the resolution, image quality & frame rate you choose, the complexity of your monitoring area, and how often the moving objects show in your monitoring area. Testing Environment ... - Page 38 Resolution Quality Frame Rate (Dynamic) kbps (Static) kbps SXGA Best 1/15 High Normal Basic Best High Normal Basic QVGA Best High Normal Basic...
-
Page 39: Appendix 3 Poe Connection
APPENDIX 3 POE CONNECTION This device supports PoE (Power-over-Ethernet), developed by the IEEE802.3af task force, and power can be supplied over the same network (Ethernet) cable as the one used to connect to Internet. No power cable is needed. Below shows two examples of POE application for reference. ... -
Page 40: Appendix 4 Api Id Application For Sms Messaging
APPENDIX 4 API ID APPLICATION FOR SMS MESSAGING To allow the camera automatically sending a text message when an event happens, you need to apply an API ID from a mobile messaging company first, such as Clickatell or EVERY8D. Below shows an example of how to get an API ID from Clickatell. Note: The SMS messaging may not be totally free. - Page 41 Step4: In your account, find “Connection Status” and create a connection (API ID). Step5: Select “HTTP/S”. Give a meaning name for this connection, and click “Submit and Get API ID”. Step5: An API ID will be generated as follows. Note: Note down the API ID for SMS notification setting later.
-
Page 42: Appendix 5 Q&A
APPENDIX 5 Q&A For more details about EagleEyes Q&A, please visit our official website: www.eagleeyescctv.com. Question Answer I can connect to this camera in my house You didn’t configure this camera to Internet, but only in LAN. or office where it’s installed with wireless Please follow the steps in the advanced network setup guide network. -
Page 43: Appendix 6 Recording Time Table
APPENDIX 6 RECORDING TIME TABLE Below shows the estimated total recording time for each recording resolution. The recording time per resolution is the average value collected from the both alarm trigger conditions indicated in “Testing Environment”, and is for reference only. The time may vary depending on the resolution, image quality &... -
Page 44: Appendix 7 Micro Sd Card Compatible List
APPENDIX 7 MICRO SD CARD COMPATIBLE LIST Manufacturer Capacity Class Manufacturer Capacity Class ADATA Transcend Class 6 Class 2 Apacer Class 4 Class 4 Class 6 SanDisk Class 6 Class 4 16GB Class 10 Class 4 Kingston 16GB Class 4 Class 4 32GB Class 4...
Need help?
Do you have a question about the AVM503 and is the answer not in the manual?
Questions and answers