
Subscribe to Our Youtube Channel
Related Manuals for Smooth Fitness SMOOTH CE-9.0 ELLIPTICAL


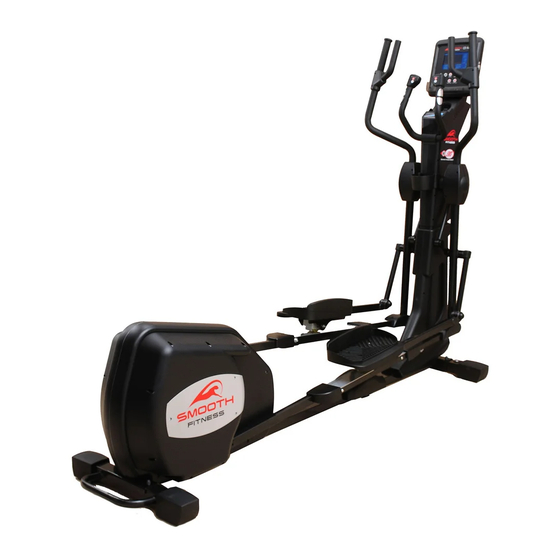
Summary of Contents for Smooth Fitness SMOOTH CE-9.0 ELLIPTICAL
- Page 1 USER’S MANUAL SMOOTH CE-9.0 ELLIPTICAL USER WEIGHT LIMITATION: 400lbs (181kgs). SERIAL NUMBER (found on frame): Ver. 20121221...
-
Page 2: Step
SMOOTH CE 9.0 ELLIPTICAL PREASSEMBLY For future service or related questions: Please staple your receipt and/or write in the name and phone number of the retail store where you purchased your Smooth Fitness. Name: ______________________________ Phone Number: ___________________ Receipt: ______________________ Open the boxes: You are now ready to open the boxes of your new equipment. -
Page 3: Power Requirements
www.smoothfitness.com POWER REQUIREMENTS Power Requirements: IMPROPER CONNECTION OF THE EQUIPMENT GROUNDING CONNECTOR CAN RESULT IN THE RISK OF AN ELECTRIC SHOCK. CHECK WITH A QUALIFIED ELECTRICIAN OR SERVICE MAN IF YOU ARE IN DOUBT AS TO WHETHER THE PRODUCT IS PROPERLY GROUNDED. DO NOT MODIFY THE PLUG PROVIDED WITH THE PRODUCT, IF IT WILL NOT FIT THE OUTLET;... - Page 4 SMOOTH CE 9.0 ELLIPTICAL POWER REQUIREMENTS Alimentation : UN MAUVAIS BRANCHEMENT DU CONNECTEUR DE MISE À LA TERRE DE L’ÉQUIPEMENT POURRAIT PROVOQUER UN CHOC ÉLECTRIQUE. EN CAS DE DOUTE, CONSULTER UN ÉLECTRICIEN OU UN RÉPARATEUR QUALIFIÉ POUR SAVOIR SI LE PRODUIT EST CORRECTEMENT MIS À LA TERRE. NE PAS MODIFIER LA FICHE FOURNIE AVEC LE PRODUIT. SI ELLE N’ENTRE PAS DANS LA PRISE, FAIRE INSTALLER UNE PRISE APPROPRIÉE PAR UN ÉLECTRICIEN PROFESSIONNEL.
- Page 5 www.smoothfitness.com SUPPLIED COMPONENTS This list identifies the major components you will use to assemble this product. Base Frame Main Frame Upright Tube Long Connecting Bars Pedal Support Tube (L) Console Pedal Support Tube (R) Rear Stabilizer Pedal L&R Front Stabilizer Action Handlebar (R) Fixed Handlebar Second Pedal Support Tube (L)
- Page 6 SMOOTH CE 9.0 ELLIPTICAL SUPPLIED COMPONENTS This list identifies the major components you will use to assemble this product. Pedal Tube Cover Pedal Tube Cover Bottom L/R Action Arm Cover Rear Fan/VST Board Top L/R Console Base Cover Hardware box Rear Water Bottle Holder Hardware Pack List By step...
- Page 7 www.smoothfitness.com SUPPLIED COMPONENTS This list identifies the major components you will use to assemble this product. Hardware Pack List By Step cont. Allen head bolt M8*1.25*15 Screw M5*0.8*12 Washer 10*22*3T Step 8 Nylock nut M10*1.5 #122 Screw 5/32*5/8 Nylock nut M10*1.5 End cap Step 9 Pedal tube shaft ∮17*97mm...
- Page 8 SMOOTH CE 9.0 ELLIPTICAL COMPLETE PARTS LIST Item No. Description Qty. Part No. Handlebar end cap CE90-1 Handlebar grip CE90-2 T-Bar grip CE90-3 Hand pulse grip unit CE90-4 Protective cap CE90-5 Screw M8*1.25*15 CE90-6 Locking washer CE90-7 Washer ∮25.4 CE90-8 Sleeve O.D.
- Page 9 www.smoothfitness.com COMPLETE PARTS LIST Item No. Description Qty. Part No. Belt 550 J6 CE90-49 Tool storage cover CE90-50 Plastic flat round cap CE90-51 Pedals CE90-52 Pedal bracket CE90-53 Adjustable foot CE90-54 Small square plastic cap CE90-55 End cap (T-Bar) CE90-56 Rear cover left CE90-57 Rear cover right...
- Page 10 SMOOTH CE 9.0 ELLIPTICAL COMPLETE PARTS LIST Item No. Description Qty. Part No. Main cable top CE90-90B Power wire 750MM CE90-91 Power ADAPTOR CE90-92 Washer ∮17*∮12*T1.0 CE90-93 Washer ∮35*∮12*T2.0 CE90-94 Washer ∮35*∮6*T2.0 CE90-95 Bearing 6001 CE90-96 Toggle switch left CE90-97A Toggle switch right CE90-97B Square moving arms (L)
-
Page 11: Table Of Contents
www.smoothfitness.com COMPLETE PARTS LIST Item No. Description Qty. Part No. 132B Right upper upright post cover CE90-132B Front computer cover CE90-133 Front cover CE90-134 Screw M4*16mm CE90-135 Screw M3.5*12mm CE90-136 Adjustor end cap CE90-137 Large adjustor screw M10 CE90-138 Fan network CE90-139 CE90-140 Cable for Fan... - Page 12 SMOOTH CE 9.0 ELLIPTICAL EXPLODED DIAGRAM...
- Page 13 www.smoothfitness.com ASSEMBLY STEP 1: Attach the Front Support (Front Stabilizer) NOTE: To make attaching the support easier, place a large Styrofoam block under the machine. (A) Attach the front support to the base frame with the wheels facing outward. (B) Align the 2 bolt holes in the front support with the bolt holes in the main frame.
- Page 14 SMOOTH CE 9.0 ELLIPTICAL ASSEMBLY STEP 2: Attach the Rear Support (Rear Stabilizer) NOTE: To make attaching the support easier, place a large Styrofoam block under the machine. (A) Attach the rear support to the base frame (B) Align the 2 bolt holes in the rear support with the bolt holes in the main frame.
- Page 15 www.smoothfitness.com ASSEMBLY STEP 3: Attach the Base Frame to the Main Frame NOTE: Caution: Pinch Point Warning Do Not Pinch the Data Cables Between the Frames. Keep Hands Clear. (A) Place the base frame flat on the ground in front of the base frame. (B) Slide the base frame connecting tube inside the main frame connector tube (C) Align the main frame bolt holes with the base frame threaded holes and...
- Page 16 SMOOTH CE 9.0 ELLIPTICAL ASSEMBLY STEP 4: Attach the Upright Tube Assembly to the Base Frame NOTE: This step is easier to complete with 2 people ! Caution Pinch Point: Do not pinch the wires between the frames! (A) Hold the upright tube over the round base frame tube so that the data cable can be connected prior to assembly (B) After the data cables are connected slide the upright tube onto the round base frame tube.
-
Page 17: Handlebar Cover
www.smoothfitness.com ASSEMBLY STEP 5:Attach the Console Base, Upright Covers and Handlebars (A) Place the console base #131 on top of the upright tube #68 and align the bolt holes (See Fig. 5A) (B) Secure the console base to the upright tube by using 3 x #18 Allen bolts. #135 Completely tighten the bolts now (C) Attach the upper upright covers #132A and 132B around the upright post... - Page 18 SMOOTH CE 9.0 ELLIPTICAL WIRING DIAGRAM Fig. 6B...
-
Page 19: Large Bolt
www.smoothfitness.com ASSEMBLY STEP 6: Attach the Fan and Handlebar Covers (A) Place the fan cover #133 in-between the #132A and #132B covers (See Fig.6A). #136 (B) Take the fan wire and route it with the other wires from the handrail assembly (C) Secure the fan cover #133 by using 4 x #136 screws. - Page 20 SMOOTH CE 9.0 ELLIPTICAL ASSEMBLY STEP 7: Assembling the Pedal Tubes (A) Place both the left pedal tubes #74A and #74B on a flat surface. #150 (B) Secure the two pedal tubes together by using 2x #150 bolts and 2 x #20 Nylock nuts.
-
Page 21: Www.smoothfitness.com
www.smoothfitness.com ASSEMBLY STEP 8: Attach the Pedal Tube Assembly to the Main Frame #122 (A) Attach the front pedal covers top and bottom #104/#105 to the left pedal (this was assembled in the prior step) tube by using 2x #122 screws and 1 x #30 screw. - Page 22 SMOOTH CE 9.0 ELLIPTICAL ASSEMBLY STEP 9:Attach the Second Pedal Support Tube Assembly (A) Place the left second pedal support tube assembly on top of the pedal support tube and align the rubber roller on the center of the #113 aluminum rail.
-
Page 23: Www.smoothfitness.com
www.smoothfitness.com ASSEMBLY STEP 10:Attach the Foot Pedals NOTE: The left and right pedals are different. Please verify the correct pedal for each side by the L and R sticker located on the pedals. (A) Locate and attach the left pedal, to the second pedal support tube “foot plate”. - Page 24 SMOOTH CE 9.0 ELLIPTICAL ASSEMBLY STEP 11:Roller Alignment (A) There are two plastic alignment bars preassembled to the aluminum rails. (see Fig. 11A) (B) Place the second pedal support tube roller between the two alignment rods. (Fig. 11B) (C) If the rollers are not in the center of the alignment rods, rotate the upright post side to side until the rollers are centered.
-
Page 25: Tablet Holder
www.smoothfitness.com ASSEMBLY STEP 12:Attach the Console and Covers CAUTION: DO NOT PINCH THE POWER WHIRE BETWEEN THE PLASTIC #135 COVERS BE CERTAIN TO CENTER THE POWER WIRE CONNECTOR BETWEEN THE COVERS (A) Place the lower upright post covers #130A/B around the upright post (See #30/E Fig. -
Page 26: Ce90
SMOOTH CE 9.0 ELLIPTICAL ASSEMBLY STEP 13: Attach the Upper Action Handle Bars and Covers Place the left upper action handlebar #72 inside the left lower action handlebar #69. Secure the left upper action handlebar to the left lower action handlebar by using 2 x #18 Allen head bolt, 2x #65 flat washer and 2 x #A Spring lock washer (See Fig. -
Page 27: Ce90
www.smoothfitness.com ASSEMBLY STEP 14: Attach the Bottle Holder and Center Frame Cover (A) Place the water bottle holder #136 on the upper upright cover #132A/B (See Fig. 14A).and slide it downwards on to the mounting bracket, aligning #136 the screw holes. (B) Secure the water bottle holder to the covers using 2 x # 136 screws. -
Page 28: Ce90
SMOOTH CE 9.0 ELLIPTICAL ASSEMBLY STEP 15: Attach the Rear Covers HINT: USE THE LONGER SCREWDRIVER FOR THIS STEP Align the right outer rear cover screw holes with the inner rear cover screw holes Secure the outer rear cover to the inner rear cover by using 7x #31 screws (See Fig. -
Page 29: Ce90
www.smoothfitness.com Operation Power and Leveling Attach the power supply to power up the Elliptical. The power supply inlet is located in the front of the elliptical near the floor. There are levelers under the front and middle of the elliptical. Turn the levelers clockwise to lower the leveler and counter clockwise to raise the leveler. -
Page 30: Ce90
SMOOTH CE 9.0 ELLIPTICAL Mp3,Smooth AIR Fan and STRIDE ADJUSTMENT Mp3 Functionality To play music or audio books through the console sound system while you exercise, plug the included audio cable into the jack on the back of the console and into a jack on your MP3 or iPod; make sure that the audio cable is fully plugged in. -
Page 31: Wheel
www.smoothfitness.com HOW TO MOVE THE ELLIPTICAL • Please follow these instructions when carrying and moving the equipment about, because lifting it incorrectly may strain your back or cause other incidents: • The device is easy to move by pulling it on the integrated transport wheels that are located on the front support. -
Page 32: Console 1
SMOOTH CE 9.0 ELLIPTICAL Wireless Heart Rate WIRELESS CHEST BELT MONITOR CE 9.0 includes the pre‐installed receiver with console. The chest belt is included with the equipment. For sanitary reasons it is recommended not to share the chest belt with any other person. To purchase an additional chest belt from our website go to www.smoothfitness.com or call 1‐888‐800‐1167. -
Page 33: Ce90
www.smoothfitness.com MUSCLE CHART Targeted muscle groups: The exercise routine that is performed on this product will develop primarily lower body muscle groups. These muscle groups are shown in gray color on the chart below. MUSCLE GROUPS Shoulder muscles Calf muscles Pectoral muscles Trapezius muscles Bicep muscle... -
Page 34: Ce90
SMOOTH CE 9.0 ELLIPTICAL STRETCHING ROUTINE Warm up and cool down: A successful exercise program consists of a warm-up, aerobic exercise, and a cool-down. Do the entire program at least two and preferably three times a week, resting for a day between workouts. After several months, you can increase your workouts to four or five times per week. -
Page 35: Ce90
To set up your account, refer to the instructions in the Getting Started Guide contained in your Smooth Fitness customer care kit or visit www.my smoothtrainer.com *Not all Smooth Fitness products include the Smooth Customer Care Kit... -
Page 36: Ce90
SMOOTH CE 9.0 ELLIPTICAL COMPUTER OPERATION MySmooth Bluetooth Compatible INTRODUCING MYSMOOTH VIRTUAL TABLET-BASED FITNESS CONTROLS, ALLOWING YOU TO IMMERSE THEMSELVES IN VIRTUAL OUTDOOR WORKOUT EXPERIENCES THROUGH FULL MOTION VIDOES AND INTERACTIVE CAPABILIATES BENEFITS: The app is FREE. The app is available through the iTunes store and the Android Market. You must purchase the •... -
Page 37: Ce90
Then sync your MY Smooth Virtual Fitness Trainer USB device. Once complete simply plug in the MY Smooth Virtual Fitness Trainer USB device to you compatible Smooth Fitness exercise machine. Displayed on the equipment will be your name, weight height and age. -
Page 38: Ce90
SMOOTH CE 9.0 ELLIPTICAL COMPUTER OPERATION Button Function Return to the “User Set Up” screen Return to the “Program Selection” screen, only when the button is pressed during a Reset Button short pause in a workout. Hold the Reset button for 3 seconds to return to the “Power On” screen. Start/Stop Press start, to begin and pause a workout. -
Page 39: Power Adaptor 1
www.smoothfitness.com COMPUTER OPERATION Power Modes Power On: Plug in the power cord with power adaptor into an appropriate outlet. Next, locate and switch on the "reset/off button" on the frame, near the power cord. A loud beep will sound and the display will then light (Fig. -
Page 40: Ce90
SMOOTH CE 9.0 ELLIPTICAL COMPUTER OPERATION HEIGHT entry – After the age set up procedure, the symbol “H.t” will flash in the upper right corner, the computer will display the default “175(cm)/69” or previous setting and begin blinking. Press the RESISTANCE UP/DOWN button to adjust the user height information then press ENTER to confirm. -
Page 41: Ce90
www.smoothfitness.com COMPUTER OPERATION MANUAL PROGRAM Once the manual program is entered press +/- to increase the program difficulty level. Press enter to confirm. Once the level has been set you can enter the time of the program. To increase or decrease the time of the program press the +/- keys. Press enter to confirm. - Page 42 SMOOTH CE 9.0 ELLIPTICAL COMPUTER OPERATION PRESET PRORGAMS CONTINUED...
-
Page 43: Computer Operation
www.smoothfitness.com COMPUTER OPERATION FITNESS PROGRAM After selecting this program, press the start/stop. The program will go through t warm ups and then into the fitness test. The computer will continue to add resistance dependent upon your heart rate and resistance level. The level is based upon 85% of maximum heart rate. After the program has been completed the program will enter the heart rate recovery evaluation to test how long it will take to return to your resting heart rate. -
Page 44: Troubleshooting
If doing the above does not fix the problem, the speed sensor and/or magnet may have become dislodged or damaged. Contact your local Smooth Fitness service technician PROBLEM: the resistance levels seem to be incorrect, seeming too hard too easy. - Page 45 Smooth Fitness will provide a replacement part free of charge if a defect is found during the Warranty period. Smooth Fitness may at its discretion, choose to provide any of following parts or repair options. In the event that a part is determined in need of replacement, upon receipt of the part by Smooth Fitness, Smooth Fitness may send out the part by UPS ground or another such carrier directly to the customer’s home.
- Page 46 SMOOTH CE 9.0 ELLIPTICAL...
- Page 47 www.smoothfitness.com mooth Fitness 780 5 King of Prussia, PA 19406 Toll Free Customer Service: 1.888.800.1167 Website: www.smoothfitness.com...
Need help?
Do you have a question about the SMOOTH CE-9.0 ELLIPTICAL and is the answer not in the manual?
Questions and answers