Table of Contents
Advertisement
Quick Links
Advertisement
Table of Contents

Related Manuals for AirLive CW-720


Summary of Contents for AirLive CW-720
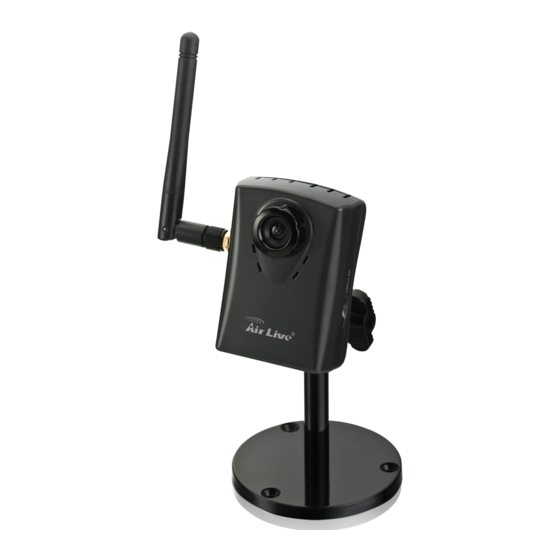
- Page 1 CW-720 720P Wireless 150Mbps IPCAM User’s Manual i...
- Page 2 All information is subject to change without notice All Trademarks are properties of their respective holders. i AirLive CW-720 User’s Manual...
-
Page 3: Fcc Statement
IMPORTANT NOTE FCC Radiation Exposure Statement: This equipment complies with FCC radiation exposure limits set forth for an uncontrolled environment. This equipment should be installed and operated with minimum distance 20cm between the radiator & your body. AirLive CW-720 User’s Manual... -
Page 4: Table Of Contents
IP Notification....................37 4.2.12 Camera – Adjust Camera Parameters ..............39 4.3.1 Picture ........................ 39 iii AirLive CW-720 User’s Manual... - Page 5 5. Troubleshooting & FAQ ..................... 69 Monitor the Image Section ..................69 PING ..........................74 Bandwidth Estimation ....................75 Specification Table....................76 Configure Port Forwarding Manually ..............79 DDNS ..........................82 Power Line Frequency....................88 3GPP Table ........................89 UPnP..........................90 AirLive CW-720 User’s Manual...
-
Page 6: Introduction
H.264, MPEG4 and JPEG triple compression simultaneously 1.3 Mega-pixel resolution Up to 8-profile encoder simultaneously 1 AirLive CW-720 User’s Manual... -
Page 7: System Requirements
This camera is the main element of the product. Camera Stand with screws Detachable WLAN antenna Power adapter dedicates 12V DC electric power output to Network Camera. User’s manual CD provides important information and instructions for operating the Network Camera. AirLive CW-720 User’s Manual... -
Page 8: Physical Description
A user can insert a micro SD card into this slot for event or continuous recording. 3 AirLive CW-720 User’s Manual... -
Page 9: Bottom View
Note: Restoring the factory default setting will lose all previous settings included IP address forever. A user needs to run the IPWizard II program to search the device and configure it to let the device work properly again. AirLive CW-720 User’s Manual... -
Page 10: Hardware Installation
Use three screws to fix the Network Camera onto the ceiling or wall. You could also put the Network Camera on the table directly. 5 AirLive CW-720 User’s Manual... - Page 11 4. Connect the external power supply to the DC power jack of the Network Camera. Note: Use the power adapter, 12VDC, included in the package and connect it to wall outlet for AC power. AirLive CW-720 User’s Manual...
-
Page 12: Getting Started
When you install the Camera on a LAN environment, you have two easy ways to search your Cameras by IPWizard II or UPnP™ discovery. 7 AirLive CW-720 User’s Manual... -
Page 13: Ip Wizard
Here is the way to execute IPWizard II to discover Camera’s IP address and set up related parameter in a Camera. When launch the IPWizard II, a searching window will pop up. IPWizard II is starting to search Network Cameras on the LAN. The existed devices will be listed as below. AirLive CW-720 User’s Manual... -
Page 14: View
LAN button. Relative settings will be carried out as below. 9 AirLive CW-720 User’s Manual... - Page 15 LAN setting procedure and click “>>” button will move to next page as below. If you do not want to change username and/or password, just click “Submit” button to perform your setting accordingly. Click “<<” button will go back to previous page. AirLive CW-720 User’s Manual...
- Page 16 After keying in new username and password, click “Submit” button to perform your setting accordingly. Click “<<” button will go back to previous page. 11 AirLive CW-720 User’s Manual...
-
Page 17: Wireless
In case you want to change the IP related parameters of wireless interface, please select the device you want to configure and click the WIRELESS button. Relative settings will be carried out as above. Click SSID to select your wireless AP or router and key in WEP or WPA key. AirLive CW-720 User’s Manual... - Page 18 Click OK to confirm these parameters, then IPWizard II will start to configure this camera with specified information. 13 AirLive CW-720 User’s Manual...
- Page 19 2. Getting Started Once this step finished, IPWizard II will prompt you to unplug the Ethernet cable to activate wireless access. Then IPWizard II will prompt you to test wireless setting or finish wireless procedure as below. AirLive CW-720 User’s Manual...
-
Page 20: Upnp For Windows
IP, also the port forwarding or Virtual Server function of router needs to be setup. 15 AirLive CW-720 User’s Manual... -
Page 21: Configure Ip Camera Via Web Ui
2.4 Configure IP Camera via Web UI 1. Start the web browser on the computer and type the IP address of the Camera you want to monitor as below: The Login Window of the Camera is prompted: AirLive CW-720 User’s Manual... - Page 22 4. After the ActiveX control was installed and ran, the first image will be displayed. 17 AirLive CW-720 User’s Manual...
-
Page 23: Login As User
Login as Administrator If you log in the Camera as the administrator, you can perform all the settings provided by the device. Start-up screen will be as follow no matter an ordinary users or an administrator. AirLive CW-720 User’s Manual... -
Page 24: Configure The Camera
3. Streaming Protocol A user can select proper streaming protocol according to networking environment. 19 AirLive CW-720 User’s Manual... - Page 25 Enlarge video to full screen display. : Enlarge video to full screen display. Press “ESC” key to disable this function. 8. Digital Zoom User can drag or scale the box over the video to adjust zoom ratio and position. AirLive CW-720 User’s Manual...
- Page 26 Select Snapshot Location to select the save path and file name prefix, select OK to continue. 21 AirLive CW-720 User’s Manual...
-
Page 27: Monitor The Image Section
Status and configuration of SD card Continuous Recording Configure storage type and path Recording List Files list inside the SD Card Event Server Setup FTP/TCP/HTTP server for event Event Schedule Configure the schedule while event triggered AirLive CW-720 User’s Manual... -
Page 28: Configure Via Web Ui
If you do not select Obtain an IP address automatically, then you need to enter these network parameters manually. Obtain DNS from DHCP: DNS: Stands for Domain Name System. 23 AirLive CW-720 User’s Manual... -
Page 29: Wireless
These settings should always be made in the camera first and secondly in the wireless access point. This ensures that the device is always accessible when making changes. Note that this function is only available for the model with WLAN capability. AirLive CW-720 User’s Manual... - Page 30 Step 2: Key in security key of WEP or WPA. Then click “Submit” button to activate wireless setting. 25 AirLive CW-720 User’s Manual...
- Page 31 Choose wired or wireless mode. However, note that wired is priority. Type: To select one of WLAN modes from Infrastructure or Ad-Hoc mode. Security mode: Shows which type of security the network uses. The device supports three security methods: None WPA_PSK/WPA2_PSK AirLive CW-720 User’s Manual...
- Page 32 If you do not select Obtain an IP address automatically, then you need to enter these network parameters manually. Select “OK” to save and enable the setting. 27 AirLive CW-720 User’s Manual...
-
Page 33: Ipv6
The main idea of HTTPS is to create a secure channel over an insecure network. This ensures reasonable protection from eavesdroppers and man-in-the-middle attacks, provided that adequate cipher suites are used and that the server certificate is verified and trusted. AirLive CW-720 User’s Manual... -
Page 34: Ddns
One of the possible solutions to the dynamic IP address problem comes in the form of a dynamic DNS service. 29 AirLive CW-720 User’s Manual... - Page 35 DDNS: To enable or disable the DDNS service here. Server name: Choose the built-in DDNS server. DDNSHost: The domain name is applied of this device. User name: The user name is used to log into DDNS. AirLive CW-720 User’s Manual...
-
Page 36: Pppoe
• Connect to a LAN by DHCP or Fixed IP • Access the device; enter Setting Network PPPoE as below 31 AirLive CW-720 User’s Manual... -
Page 37: Streaming
Enter the RTSP port number to use. The default value is 554. RTP Port: Specify the range of transmission port number of video stream. The default range is 50000 to 50999. User can specify a number between 1024 and 65535. AirLive CW-720 User’s Manual... -
Page 38: Upnp
HTTP traffic to an external HTTP port in the NAT router will be forwarded to the device. 33 AirLive CW-720 User’s Manual... -
Page 39: Bonjour
IP networks. Bonjour uses industry standard IP protocols to allow devices to automatically discover each other without the need to enter IP addresses or configure DNS servers. Specifically, Bonjour enables automatic IP address AirLive CW-720 User’s Manual... -
Page 40: Onvif
IP products within video surveillance and other physical security areas can communicate with each other. 35 AirLive CW-720 User’s Manual... -
Page 41: Ip Filter
You can enter different user’s IP address which are allowing enter or denying by the device. IP Filter: To enable or disable the IP filter function here. IP Filter Policy: Choose the filter policy where is denying or allowing. AirLive CW-720 User’s Manual... -
Page 42: Ip Notification
TCP Server: Type the server name or the IP address of the TCP server. 37 AirLive CW-720 User’s Manual... - Page 43 Type the server name or the IP address of the HTTP server. HTTP Login name: Type the user name for the HTTP server. HTTP Login Password: Type the password for the HTTP server. Proxy Address: Type the server name or the IP address of the HTTP Proxy. AirLive CW-720 User’s Manual...
-
Page 44: Camera - Adjust Camera Parameters
Use this menu to set the functions of the camera parameters of the device. 4.3.1 Picture 39 AirLive CW-720 User’s Manual... - Page 45 Exposure value is AE target value. This value is to adjust the integration, analog gain and digital gain to achieve the target brightness value (Exposure Value). This value is dependent to “Auto Exposure” only. Color Level: Large value will be colorful. AirLive CW-720 User’s Manual...
-
Page 46: Privacy Mask
Level Defines the gray level of mask block. The lower value will be darker. 41 AirLive CW-720 User’s Manual... -
Page 47: System - Configure And Maintain
4. Monitor the Image Section 4.4 System – Configure and Maintain Use this menu to perform the principal settings of the device. 4.4.1 System AirLive CW-720 User’s Manual... - Page 48 The information will be shown on IPWizard II once the device is found. 43 AirLive CW-720 User’s Manual...
-
Page 49: Date & Time
Click this option if you want to synchronize the device’s date and time with those of time server called NTP server (Network Time Protocol). NTP Server: Type the host name or IP address or domain name of the NTP server. AirLive CW-720 User’s Manual... -
Page 50: Maintenance
The unit is restarted and most current settings are reset to factory default values. This action will not reset the network setting. 45 AirLive CW-720 User’s Manual... - Page 51 (Note that it must make sure that the Firmware only applies to this device, once update, it will be burned into FLASH ROM of system.) 5. Once the firmware file was selected, click “Firmware Upgrade” button. AirLive CW-720 User’s Manual...
-
Page 52: Video - Configure Profile
Switching 1.3 Mega and 720p mode, the device will take time to reboot system. 47 AirLive CW-720 User’s Manual... -
Page 53: Common
“720p” mode. If user needs this function, must switch this camera to “720p” mode first. Text Overlay Setting: There are some important information can be embedded into image, including date, time, and/or text. User also can change the font color, background color, or Transparency. AirLive CW-720 User’s Manual... -
Page 54: Video Profile
The quality level is between 1 and 100. The higher value can reach the better quality but of course will consume higher bandwidth. 49 AirLive CW-720 User’s Manual... - Page 55 Always Enable Multicast: Multicast streaming is always enabled or by request. Warning!!! To enable the multicast streaming, you shall make sure your Intranet does support multicast function. Otherwise, your Intranet may occur network storm seriously. AirLive CW-720 User’s Manual...
-
Page 56: Roi
ROI means Region of Interest. Use this page to specify ROI window which ROI is QVGA resolution. 51 AirLive CW-720 User’s Manual... -
Page 57: Audio - Audio Parameters
To enable or disable audio function Audio Type: To select audio codec Audio Mode: To select Simplex or Full duplex (2-way audio) mode Input Gain: To adjust gain of input audio Output Gain: To adjust gain of output audio AirLive CW-720 User’s Manual... -
Page 58: Manage User Name, Password And Login Privilege
53 AirLive CW-720 User’s Manual... - Page 59 Disable: if no authentication is required when an e-mail is sent. Enable: if authentication is required when an e-mail is sent. Authentication User name: Type the user name for the SMTP server if Authentication is Enable. AirLive CW-720 User’s Manual...
-
Page 60: Object Detection
By dragging mouse on the image, you can change the position and size of the selected motion window accordingly. 55 AirLive CW-720 User’s Manual... -
Page 61: Storage - Status And Configuration Of Sd Card
Defines the sensitivity value of motion detection. The higher value will be more sensitivity. 4.10 Storage – Status and Configuration of SD card 4.10.1 SD Card This page shows the status of attached SD card. You may setup related parameters to manage the attached SD card also. AirLive CW-720 User’s Manual... -
Page 62: Samba Server
Type the share folder of remote SAMBA server which the camera will upload files to this space. 57 AirLive CW-720 User’s Manual... -
Page 63: Continuous Recording
Save recorded files to SD card or remote SAMBA server. Path: Define the folder path for the recorded files. Restart: Be careful, click this button will delete all continuous files recorded in SD card or remote SAMBA server. AirLive CW-720 User’s Manual... -
Page 64: Recording List- Files List Inside Sd Card
This page only shows the continuous recording files which stored in SD card or remote SAMBA server. User may play or delete the selected file. 59 AirLive CW-720 User’s Manual... -
Page 65: Event Server
Type the server name or the IP address of the FTP server. Test: Check the FTP server whether this account is available or not. FTP Login name: Type the user name for the FTP server. FTP Login Password: Type the password for the FTP server. AirLive CW-720 User’s Manual... -
Page 66: Tcp Sever
4.13.3 HTTP Sever The device also can send event message to specified HTTP server. 61 AirLive CW-720 User’s Manual... - Page 67 Type the password for the HTTP server. Proxy Address: Type the server name or the IP address of the HTTP Proxy. Proxy Login name: Type the user name for the HTTP Proxy. Proxy Login Password: Type the password for the HTTP Proxy. AirLive CW-720 User’s Manual...
-
Page 68: Samba Sever
Type the password for the SAMBA server. SAMBA Path: Set working directory path of SAMBA server. 63 AirLive CW-720 User’s Manual... -
Page 69: Event Schedule- Configure The Event Schedule
4.14.1 Setting Name: Name of the Event or Schedule. Enable: Enable or disable this Event or Schedule. Type: Event trigger or Schedule trigger. Enable Time: Define the feasible time slot. Trigger by: Select the triggered sources. AirLive CW-720 User’s Manual... - Page 70 Trigger by: Motion Area (Added in Object Detection page) Action : Send FTP (Add in Event Server -> FTP Server page) 65 AirLive CW-720 User’s Manual...
- Page 71 Trigger by : Motion Area (Added in Object D etection page) end e-mail (Add in E-Mail page) To email address: You need to input the receive r email address. Subject: You could specify the email subject. iii. Message: You could specify the email content. AirLive CW-720 User’s Manual...
- Page 72 : You do not need to choose it, because this will be triggered every minute Action : Voice Alert 67 AirLive CW-720 User’s Manual...
-
Page 73: Record
Define the picture numbers of JPEG to be sent out. Pre-Trigger Duration: Define the maximum duration of pre-alarm. Post-Trigger Duration: Define the maximum duration of post-alarm. Max File Size: Define the maximum buffer size of record file. AirLive CW-720 User’s Manual... -
Page 74: Troubleshooting & Faq
The HTTP port and RTSP port need to be 69 AirLive CW-720 User’s Manual... - Page 75 firewall exists on the opened on the firewall or NAT router. network. username Username = admin and password = airlive. password for the first Note that it’s all case sensitivity. time or after factory default reset Forgot the username Follow the steps below.
- Page 76 • If it’s not working after above procedure, reset Network Camera to default setting and installed it again. 71 AirLive CW-720 User’s Manual...
- Page 77 Use the operating system of the selected language. Set the characters are Encoding or the Character Set of the selected language on the displayed. Internet Explorer. Frame rate is slower • The traffic of the network and the object of the image affect AirLive CW-720 User’s Manual...
- Page 78 50 or 60Hz format of your device. • If the object is dark, the image will flicker. Make the 73 AirLive CW-720 User’s Manual...
-
Page 79: Ping
The replies, as illustrated below, will provide an explanation to the problem. If you want to detect any other devices conflicts with the IP address of Network Camera, also can utilize the PING command but you must disconnect the device from the network first. AirLive CW-720 User’s Manual... -
Page 80: Bandwidth Estimation
Even though the upload speed is more than 128kbps, for optimal video performance, disabling audio streaming will get better video performance. 75 AirLive CW-720 User’s Manual... -
Page 81: Specification Table
Streaming over UDP, TCP, or HTTP M-JPEG streaming over HTTP (for non IE browser) Streaming 3GPP mobile view Configurable frame rate and bandwidth Support both CBR and VBR Region of Interest Up to 5 configurable region Image Processing AE, AWB AirLive CW-720 User’s Manual... - Page 82 Speaker jack Reset button Operation: Temp: 0 ~ 40 Environment Humidity: 20% ~ 80% non-condensing 77 AirLive CW-720 User’s Manual...
- Page 83 Save to SD card Audio alerting output Continuous recording Windows® XP, Vista, 7 Browser IE 6.0 or later, Firefox 2.0 or later, Safari Viewing System Cell Phone With 3GPP player Video Player VLC, Quick Time, Real Player, Core Player AirLive CW-720 User’s Manual...
-
Page 84: Configure Port Forwarding Manually
IP address. Failure to do so will reset the IP address when you restart your computer. 79 AirLive CW-720 User’s Manual... - Page 85 • Click Enabled. • Enter a unique name for each entry. • Select Both under Protocol Type (TCP and UDP) • Enter your camera’s local IP Address (e.g., 192.168.1.100, for example) in the Private IP field. AirLive CW-720 User’s Manual...
- Page 86 WAN IP Address. By now, you have finished your entire PC configuration for this device. 81 AirLive CW-720 User’s Manual...
-
Page 87: Ddns
DDNS and PPPoE of the Networked Device in order to let the outside administrator be able to access through internet. 3. Application Steps—DDNS & Domain Name (1). Visit the following web site: http://www.dyndns.org/ (2). Click “Account” AirLive CW-720 User’s Manual... - Page 88 Password and confirmation d. Submit all the input information and finish creating an account 83 AirLive CW-720 User’s Manual...
- Page 89 5. Troubleshooting & FAQ Click these two options AirLive CW-720 User’s Manual...
- Page 90 Input your username and password that you just applied to login administration interface of DDNS server. 85 AirLive CW-720 User’s Manual...
- Page 91 5. Troubleshooting & FAQ Input your account (7). If the correct username and password are input, you can see the following picture at the top-right of the login page. (8). Click the “Services”. (9). Click the “Dynamic DNS”. AirLive CW-720 User’s Manual...
- Page 92 “Create Host” to submit the domain name information and finish DDNS application. (Pink No.4) 87 AirLive CW-720 User’s Manual...
-
Page 93: Power Line Frequency
220V only, with the exception of Fortaleza (240V). Canada 120V 60 Hz China, People's 220V 50 Hz Republic of Finland 230V 50 Hz France 230V 50 Hz 230V 50 Hz Germany Hong Kong 220V* 50 Hz AirLive CW-720 User’s Manual... -
Page 94: 3Gpp Table
If so, user needs to change this port accordingly. 89 AirLive CW-720 User’s Manual... -
Page 95: Upnp
Please contact your dealer to get the approved list of compatible 3G phone. 5.9 UPnP Use the following steps to enable UPnP settings only if your operating system of PC is running Windows XP. Go to Start > Settings. Click Control Panel AirLive CW-720 User’s Manual... - Page 96 5. Troubleshooting & FAQ Click Add or Remove Programs Click Add/Remove Windows Components 91 AirLive CW-720 User’s Manual...
- Page 97 5. Troubleshooting & FAQ The following screen will appear: Select Networking Services Select Universal Plug and Play AirLive CW-720 User’s Manual...
- Page 98 5. Troubleshooting & FAQ Click Details Click Next Please wait while Setup configures the components. 93 AirLive CW-720 User’s Manual...
- Page 99 5. Troubleshooting & FAQ Click Finish AirLive CW-720 User’s Manual...
Need help?
Do you have a question about the CW-720 and is the answer not in the manual?
Questions and answers