Table of Contents
Advertisement
Quick Links
Advertisement
Table of Contents

Related Manuals for AirLive BU-2015


Summary of Contents for AirLive BU-2015
- Page 1 BU-2015 2-Megapixel Outdoor IR NightVision Bullet IP Camera User’s Manual...
- Page 2 Please use with caution. All information is subject to change without notice This product contains some codes from GPL. In compliance with GPL agreement, AirLive will publish the GPL codes on our website. Please go to www.airlive.com and go to the "Support->GPL" menu to download source code.
- Page 3 The lists of entities entitled to receive used equipment can be found on the websites of municipalities. Some components of devices such as external wiring, circuit boards and liquid crystal displays have a negative impact on the environment. AirLive BU-2015 User’s Manual...
-
Page 4: Table Of Contents
4. Operating IP Camera via Mobile Phone ..........11 4.1 Using IP Camera via iPhone..............11 5. Operating the Network Camera ..............14 5.1 Live View....................15 5.2 Configuration ..................16 6. Configuration ...................17 6.1 System....................17 6.2 Security....................19 6.3 Network....................20 6.4 IP Filter....................23 6.5 Video....................25 6.6 Motion ....................29 AirLive BU-2015 User’s Manual... - Page 5 Table of Contents 6.7 Event....................31 6.8 Recording ..................36 6.9 SDHC....................37 6.10 Log....................39 6.11 Device info ..................40 6.12 Maintenance ..................40 AirLive BU-2015 User’s Manual...
-
Page 6: Overview
AirLive PoE cameras in locations without access to electrical source. With the IP66 rated housing, AirLive BU-2015 offered water and dust proof features for demanding environments. Also it can be easily installed and integrated into kinds of surveillance project. -
Page 7: Features
B/W: 0 Lux (IR On) Mechanical IR-Cut Filter Auto Iris None Viewing Angle D111.5°, H83.7°, V60.6° Analog Video Out None H.264 High/Main/Baseline Profile, MPEG4 Video Video Compression Simple Profile, MJPEG and 3GPP Resolution and Frame 30fps@1920x1080 Rate 30fps@1280x960 30fps@1280x720 AirLive BU-2015 User’s Manual... - Page 8 Connector 5V DC power jack Reset Button Operation Temp: -20℃ ~ 50℃ Humidity: 20% ~ 85% non-condensing Environment Storage Temp: -20℃ ~ 60℃ Humidity: 0% ~ 90% non-condensing Weather Proof IP66 SD card slot 32G MicroSD/SDHC AirLive BU-2015 User’s Manual...
-
Page 9: System Requirement
Web Browser Internet Explorer 7 or later; Apple Safari; Firefox; Google Chrome Cell Phone 3GPP Player Note: Please keep updating the latest Windows software and service package. (Ex: Net Framework, Windows Media Player, Enhance ActiveX Security) AirLive BU-2015 User’s Manual... -
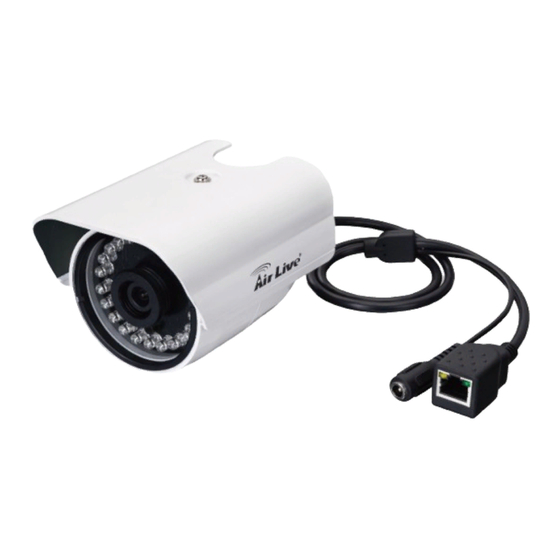
Page 10: Package Contents And Installation
POE switch, you can use power adapter to provide power to camera. Switch/Connector There are various connectors of AirLive BU-2015 as shown in the figures below. Please refer to the diagrams and tables accompanied with for using of each switch / connector. - Page 11 In the LAN socket, there are two LEDs embedded: LAN LED (Green color) Green Link Light indicates the network accessing. Power (Amber color) This LED is used to indicate whether DC power/PoE power is on or not. 2. DC-in: The input power is DC5V/2A. AirLive BU-2015 User’s Manual...
-
Page 12: Install The Camera
Connect the external power supply to camera by power adapter or PoE switch. Remove the front cover to adjust the focus and insert the MicroSD card if necessary. Find the screws in the package to fix the sun shield on top. AirLive BU-2015 User’s Manual... -
Page 13: Connect To Ip Camera
2. Package Contents and Installation 2.4 Connect to IP Camera 1. Insert the bundled CD into your PC/Laptop. Auto Run screen pops up, click “Install Software AirLive IP Wizard II” to install the configuration tool. AirLive BU-2015 User’s Manual... - Page 14 5. If the Camera’s IP address is in the same IP segment as your LAN, select the founded IP Camera and double click on the item. Then, the default browser will show up and connect to the IP camera’s Web automatically. AirLive BU-2015 User’s Manual...
-
Page 15: Using Ip Camera Via Web Browser
Location / Address field of your browser. 2. Use the default account “admin” and default password “airlive”. Note: The default user name “admin” and the password “airlive” are the default values. You can change them in the Security Menu. (Please check “Configuration → Security”) -
Page 16: Operating Ip Camera Via Mobile Phone
4.1 Using IP Camera via iPhone You can access to your IP camera via your iPhone. Please follow the setting process below. Then you can see the live view via iPhone. 2. Execute AirLive CamPro Mobile 1. Download AirLive CamPro Mobile from APP store 3. - Page 17 4. Operating IP Camera via Mobile Phone 5. Click Add button. Click LAN button and select the camera. AirLive BU-2015 User’s Manual...
- Page 18 OK button. appear on the page. 10. The video appears on the main screen. 9. Click Live View button. Note: The image is continuous snapshots, not video. Thus, live image can’t be recorded here. AirLive BU-2015 User’s Manual...
-
Page 19: Operating The Network Camera
Network Camera Start-up screen will be shown as follow no matter an ordinary users or an administrator. In the left side, you can control Live View in your main Browser. Please refer to the description below: AirLive BU-2015 User’s Manual... -
Page 20: Live View
5. Operating the Network Camera 5.1 Live View 1. Language BU-2015 support multi-language, please choose from the pull-down list. 2. Stream The device supports multi-profile function for H.264, MEPG4 and JPEG simultaneously. User can choose the proper and/or preferred profile which is listed here. -
Page 21: Configuration
5. Operating the Network Camera 5.2 Configuration Click “Configuration” for the camera detail settings. For more information, please refer to Chapter 6. AirLive BU-2015 User’s Manual... -
Page 22: Configuration
You can enter the name of this unit here. It’s very useful to identify the specific device from multiple units. The information will be shown on IP Wizard II once the device is been found. - Indicator LED Turn on or off the Indicator LED. AirLive BU-2015 User’s Manual... - Page 23 Click this option if you want to synchronize the device with NTP server (Network Time Protocol). - Set Manually Click this option to set time and date manually. When you finish with above settings, click ‘Apply’ button to save the changes AirLive BU-2015 User’s Manual...
-
Page 24: Security
Input this user’s password in both ‘Password’ and ‘Retype Password’ Retype Password field. To define the access privilege, select ‘User’ or ‘Guest’ in the dropdown menu. Authority When you finish new user’s information, click ‘New’ button to create a new user. AirLive BU-2015 User’s Manual... -
Page 25: Network
DHCP server on your local area network, you must use this option to specify an IP address. - IP Address (IPv4): Input IPv4 IP address* - IP Address (IPv6): Input IPv6 IP address* - Prefix Length: Input IPv6 IP address’ prefix length (0 128) AirLive BU-2015 User’s Manual... - Page 26 IP camera’s web configuration interface. RTSP Port: Input RTSP port number. When this port number changes, you must change corresponding settings in external network devices (NVR or CMS software) so they can receive this IP camera’s video. AirLive BU-2015 User’s Manual...
- Page 27 Password: Input the password used to login dynamic IP service provider. DIPS ID: It’s a unique number of each device for identification and this ID is used for DIPS. This function now is reserved for future use. AirLive BU-2015 User’s Manual...
-
Page 28: Ip Filter
‘Remove’ button. IP Address Input the starting and ending IP address of IP address you wish to (Accepted IP list) accept connections here. IP camera will only accept connections established from these IP address. AirLive BU-2015 User’s Manual... - Page 29 If you want to specify one IP address only, input the same IP address in both field. Click ‘New’ button to add IP address into deny IP list. When you finish with above settings, click ‘Apply’ button to save changes. AirLive BU-2015 User’s Manual...
-
Page 30: Video
Auto: IR filter will act automatically. If you don't know wheatear you should use IR filter or not, select this option. Night mode (B/W): IR filter is always on. Day mode (Color): IR filter is always off. AirLive BU-2015 User’s Manual... - Page 31 720x480 (D1) / 640x480 (VGA) / 320x240 (QVGA) MJPEG: ‐ 720x480 (D1) / 640x480 (VGA) / 320x240 (QVGA) Frame Rate Select video frame rate. When network speed is insufficient, select a lower frame rate will help. AirLive BU-2015 User’s Manual...
- Page 32 512 and 6000. Higher bit rate provides better video quality, but consumes more network bandwidth. Mobile View Checking the radio box to enable remote access when you need to remote access via mobile phone. When you finish with above settings, click ‘Apply’ button to save changes. AirLive BU-2015 User’s Manual...
- Page 33 Image’s resolution should be less than 160 x 128, and can be ‐ divided by 4. Do not upload image files that size is greater than 64KB. ‐ When you finish with above settings, click ‘Apply’ button to save changes. AirLive BU-2015 User’s Manual...
-
Page 34: Motion
1 to 3 to enable up to 3 motion detection windows. When a Window 3) motion detection window is enabled, a rectangular will appear on camera’s view, with its title on the top. And you can move / resize the detection window. AirLive BU-2015 User’s Manual... - Page 35 When you finish with above settings, click ‘Apply’ button to save changes. Once the window detects motion, one blue flexible bar will appear at the bottom edge. One video file will be saving at this moment if the ftp server was enabled. AirLive BU-2015 User’s Manual...
-
Page 36: Event
Server’ setting in ‘Event Server’ tab) when this event is activated. Check this box and IP camera will send an Email to designated Enable EMAIL recipient address (refer to ‘SMTP Server’ setting in ‘Event Server’ tab) when this event is activated. AirLive BU-2015 User’s Manual... - Page 37 ‘Post’ Event’. For example, if you set ‘Pre Event’ to ‘10’ and ‘Post Event’ to 5’, and an event is triggered at 14:10:30, then the video file will be 15 seconds long, starting from 14:10:20 to 14:10:35. AirLive BU-2015 User’s Manual...
- Page 38 A Samba server can be any computer running windows operating system with network neighbor function enabled. Many stand-alone network file server also support samba server function. Here are the descriptions of every setup item: Item Description Enable FTP Check this box to enable FTP server upload. Server AirLive BU-2015 User’s Manual...
- Page 39 SMTP Server Check this box to enable Email send. SMTP Server: Input SMTP server’s IP address or hostname. ‐ Port: Input SMTP server’s port number. In most cases it should be ‐ default value ‘25’. AirLive BU-2015 User’s Manual...
- Page 40 Samba Server Address: Input Samba server’s IP address or ‐ hostname. Path: Input the path where you want to save file on Samba server, ‐ like ‘upload/record’. If you want to save file on this user’s home directory, you can leave this field blank. AirLive BU-2015 User’s Manual...
-
Page 41: Recording
‘From’ and ‘To’ field. Select ‘Always’ to record 24 hours in selected weekday(s). Storage Option Select Memory card or Samba server as your destination. When you finish with above settings, click ‘Apply’ button to save changes. AirLive BU-2015 User’s Manual... -
Page 42: Sdhc
6. Configuration 6.9 SDHC 1. Status Once the Micro-SD card is inserted, the UI will show the information of the Micro-SD card. AirLive BU-2015 User’s Manual... - Page 43 Click “All file” to list all files. You also can define the range and click “Search” to sort the files needed. It shows likes the images in the next page. 3. Event Set the time range then click “Search” then shows the records like below. AirLive BU-2015 User’s Manual...
-
Page 44: Log
In this page, you can click: First page / Final page: Jump to first / final page of log. Previous / Next: Jump to previous or next page of log. Remove: Clear log. You’ll be prompted for confirmation. AirLive BU-2015 User’s Manual... -
Page 45: Device Info
You can do some maintenance job about this IP camera here. Here are the descriptions of every setup item: Item Description Reboot Click this button to reboot the IP camera. This function is useful when the IP camera is not working properly. AirLive BU-2015 User’s Manual... - Page 46 Restore from Restore IP camera’s configuration which is previously-saved on SD SD card device card. Upgrade Upgrade IP camera’s firmware. Click ‘Browse’ button to select a firmware image file on your computer first, then click ‘Upgrade’ button. AirLive BU-2015 User’s Manual...
Need help?
Do you have a question about the BU-2015 and is the answer not in the manual?
Questions and answers