Motorola TC55 User Manual
Mobile phone
Hide thumbs
Also See for TC55:
- Integrator manual (140 pages) ,
- Quick start manual (13 pages) ,
- User manual (152 pages)
Table of Contents
Advertisement
Quick Links
Advertisement
Chapters
Table of Contents
Troubleshooting

Subscribe to Our Youtube Channel
Related Manuals for Motorola TC55


Summary of Contents for Motorola TC55
- Page 1 TC55 USER GUIDE...
-
Page 3: Copyrights
United States and other countries preserve for Motorola certain exclusive rights for copyrighted computer programs. Accordingly, any copyrighted Motorola computer programs contained in the Motorola products described in this document may not be copied or reproduced in any manner without the express written permission of Motorola. ©... -
Page 5: Revision History
Revision History Changes to the original guide are listed below: Change Date Description Rev. A 10/1/2013 Initial release. MN000015A01 | September 2013... -
Page 7: Table Of Contents
Display Setting..............................45 Setting the Screen Brightness........................45 Setting Screen Rotation........................... 45 Setting Screen Timeout Setting.......................46 Setting Font Size............................. 46 Setting Touch Key Light......................... 46 Touch Mode............................47 General Sound Setting............................48 Setting LED Notifications........................... 49 Chapter 2: Using the TC55..................51 Home Screen............................... 51... - Page 8 8 | Contents Status Bar..............................52 Status Icons..........................52 Notification Icons........................54 Managing Notifications...........................55 Application Shortcuts and Widgets......................56 Adding an Application or Widget to the Home Screen...............56 Moving Items on the Home Screen.....................56 Removing an App or Widget from the Home Screen..............56 Folders..............................
- Page 9 Contents | 9 Taking Photos............................82 Taking a Panoramic Photo........................83 Recording Videos............................ 84 Camera Settings............................84 Video Settings............................85 Gallery................................. 86 Working with Albums..........................87 Share an Album........................... 88 Get Album Information....................... 88 Deleting an Album........................88 Working with Photos..........................88 Viewing and Browsing Photos....................88 Rotating a Photo..........................
- Page 10 Dock Settings............................140 Installing the Protective Boot..........................142 Attaching the Stylus to the Protective Boot...................... 143 Holster................................145 Chapter 8: Maintenance and Troubleshooting..........149 Maintaining the TC55............................149 Battery Safety Guidelines..........................149 Cleaning Instructions............................150 Cleaning the TC55..........................151 Connector Cleaning........................151 Cleaning Cradle Connectors......................151...
- Page 11 Contents | 11 Troubleshooting the TC55........................152 Chapter 9: Technical Specifications..............155 TC55 Technical Specifications......................... 155...
- Page 12 12 | Contents...
-
Page 13: List Of Tables
Table 5: Home Screen Items ......................52 Table 6: Status Icons ........................52 Table 7: Notification Icons ......................54 Table 8: Applications ........................59 Table 9: ............................94 Table 10: TC55 Accessories ......................129 Table 11: Troubleshooting the TC55 ....................152 Table 12: TC55 Technical Specifications ..................155... - Page 14 14 | List of Tables...
-
Page 15: List Of Figures
List of Figures | 15 List of Figures Figure 1: Manufacturing Label Location ..................23 Figure 2: Front View ........................25 Figure 3: Back View ........................27 Figure 4: Unlock SIM Card Holder ....................29 Figure 5: Install SIM Card ......................29 Figure 6: Close SIM Card Holder ....................30 Figure 7: Lock SIM Card Holder ....................30 Figure 8: Unlock microSD Card Door ....................31... - Page 16 16 | List of Figures Figure 26: Unlock microSD Card Door ..................41 Figure 27: Insert microSD Card ..................... 41 Figure 28: Lock microSD Card Cover ....................42 Figure 29: Battery Screen ....................... 43 Figure 30: Low Battery Notification ....................43 Figure 31: Battery Depleted Screen ....................44 Figure 32: Brightness Dialog Box ....................
- Page 17 List of Figures | 17 Figure 54: Call in Progress ......................69 Figure 55: Dialer Contacts Tab .......................70 Figure 56: Call History Tab ......................71 Figure 57: Two Calls ........................72 Figure 58: Merged Calls ......................... 72 Figure 59: Un-merge Calls ......................73 Figure 60: Incoming Call Screen ....................
- Page 18 Figure 105: Using the Micro USB Cable ..................131 Figure 106: Rugged Charge Cable ....................131 Figure 107: Connect Rugged Charge Cable to TC55 ..............132 Figure 108: Connect to Power ...................... 132 Figure 109: Removing the Rugged Charge Cable ................ 133...
- Page 19 Figure 128: Style in Protective Boot .................... 145 Figure 129: Holster ........................145 Figure 130: Inserting the TC55 with 2,490 mAh Battery into the Holster ........146 Figure 131: Inserting the TC55 with 4,410 mAh Battery into the Holster ........146 Figure 132: Stylus in Holster ......................147...
- Page 20 20 | List of Figures...
-
Page 21: About This Guide
Note: Screens and windows pictured in this guide are samples and can differ from actual screens. Documentation Set The documentation set for the TC55 provides information for specific user needs, and includes: • TC55 Quick Start Guide - describes how to get the device up and running. -
Page 22: Chapter Descriptions
Topics covered in this guide are as follows: • Getting Started on page 25 provides information on getting the TC55 up and running for the first time. • Using the TC55 on page 51 provides information for operating the TC55. -
Page 23: Related Documents
Service Information If you have a problem with your equipment, contact Motorola Solutions Global Customer Support Center for your region. Contact information is available at: http://www.motorolasolutions.com/support. When contacting Motorola Solutions Global Customer Support Center, please have the following information available: •... - Page 24 Motorola responds to calls by email or telephone within the time limits set forth in support agreements. If your problem cannot be solved by Motorola Solutions Global Customer Support Center, you may need to return your equipment for servicing and will be given specific directions. Motorola is not responsible for any damages incurred during shipment if the approved shipping container is not used.
-
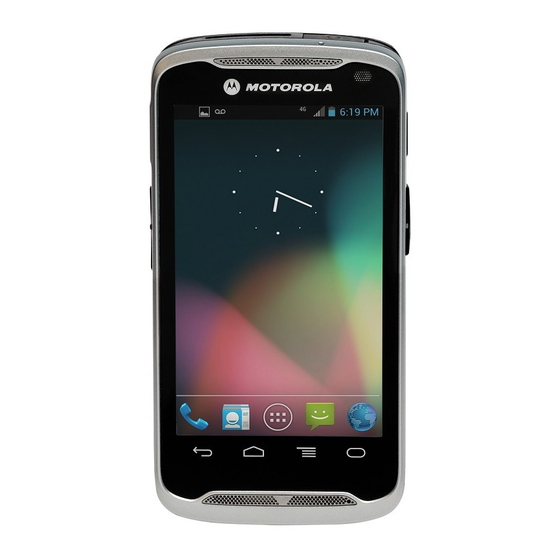
Page 25: Chapter 1: Getting Started
Chapter Getting Started This chapter provides the features of the TC55 and explains how to set it up for the first time. TC55 Features Figure 2: Front View Table 1: Front View Features Number Item Function Receiver Provides audio in handset mode. - Page 26 Increase and decrease audio volume. Buttons Programmable Initiates scanning when a scan application is enabled (default). Button Programmable using the Button Remap settings. See TC55 Integrator Guide for more information. Light Sensor/ Determines ambient light for controlling display backlight intensity and Proximity Sensor for turning off display when in handset mode.
-
Page 27: Table 2: Back View Features
USB Port Provides USB client and host communications. Power Button Press and hold to turn on the TC55. Press to turn the screen on or off. Press and hold to select one of these options: • Power off - Turn off the TC55. -
Page 28: Unpacking
ESD mat and ensuring that the user is properly grounded. Note: The TC55 accepts a full size SIM card. If using a micro or nano SIM card, a third-party SIM adapter is required. The TC55 requires an activated SIM card. Obtain the card from a service provider. -
Page 29: Figure 4: Unlock Sim Card Holder
Getting Started | 29 Figure 4: Unlock SIM Card Holder 2 Lift the SIM door. 3 Insert the SIM card with the cut edge and the contacts facing up. Figure 5: Install SIM Card 4 Close the SIM card holder. MN000015A01 | September 2013... -
Page 30: Installing An Optional Microsd Card
30 | Getting Started Figure 6: Close SIM Card Holder 5 Slide the SIM card holder toward the top of the TC55 to lock into place. Figure 7: Lock SIM Card Holder Installing an Optional microSD Card Caution: For proper electrostatic discharge (ESD) precautions to avoid damaging the SD card. Proper ESD precautions include, but not limited to, working on an ESD mat and ensuring that the user is properly grounded. -
Page 31: Figure 8: Unlock Microsd Card Door
4 Insert the microSD card into the card holder. Figure 9: Insert microSD Card 5 Close the SD card door. 6 Slide the SD card door toward the bottom of the TC55 to lock into place. MN000015A01 | September 2013... -
Page 32: Installing The Battery
Figure 10: Lock SD Card Door Installing the Battery There are two sizes of batteries available for the TC55; a 2,940 mAh battery and a 4,410 mAh battery. Procedure: 1 Align the three tabs on the bottom of the battery with the three slots in the battery compartment. -
Page 33: Figure 12: Inserting The 4,410 Mah Battery
Getting Started | 33 Figure 12: Inserting the 4,410 mAh Battery 3 Align the battery door with the back of the device and press the battery door down until it snaps into place. Figure 13: Install the Battery Cover 4 Press around the edge of the cover to ensure that the battery door is seated properly. MN000015A01 | September 2013... -
Page 34: Charging The Battery
149. Charging the Main Battery Before using the TC55 for the first time, charge the main battery until the light emitting diode (LED) turns solid green (see Charging LED Status on page 35 for charge status indications). To charge the TC55, use the Rugged Charge Cable with the optional power supply. -
Page 35: Charging Led Status
Charge batteries in temperatures from 0 °C to 40 °C (32 °F to 104 °F). Note that charging is intelligently controlled by the TC55. To accomplish this, for small periods of time, the TC55 or accessory alternately enables and disables... -
Page 36: Powering On The Tc55
Note: Ensure that the battery cover is properly installed. Otherwise, the TC55 will not power on. If the TC55 did not turn on when the battery was installed, press the Power button. The LED flashes green and the device vibrates. The splash screen displays for about a minute as the TC55 boots. -
Page 37: Figure 17: Remove 2,940 Mah Battery
Getting Started | 37 Figure 17: Remove 2,940 mAh Battery 6 Remove the battery from the battery compartment. 7 Align the three tabs on the bottom of the replacement battery with the three slots in the battery compartment. 8 Press the battery down and rotate until it locks into place. Figure 18: Inserting the 2,940 mAh Battery 9 Align the battery door with the back of the device. -
Page 38: Replacing The 4,410 Mah Battery
38 | Getting Started Figure 20: Secure the Battery Cover 11 Press the Power button to turn on the TC55. Replacing the 4,410 mAh Battery Procedure: 1 Press the Power button until the menu displays. 2 Touch Power off. 3 Touch OK. -
Page 39: Figure 22: Remove 4,410 Mah Battery
Getting Started | 39 Figure 22: Remove 4,410 mAh Battery 6 Rotate the battery out of the compartment. 7 Align the three tabs on the bottom of the replacement battery with the three slots in the battery compartment. 8 Press the battery down and rotate until it locks into place. Figure 23: Inserting the 4,410 mAh Battery 9 Align the battery door with the back of the device. -
Page 40: Replacing The Microsd Card
Changing the microSD card can change the functionality of the TC55. Ensure that you follow the procedures to shut down the TC55 before replacing the microSD card. Data corruption can occur if reading or writing to the microSD card and power is removed. -
Page 41: Figure 26: Unlock Microsd Card Door
Getting Started | 41 Figure 26: Unlock microSD Card Door 8 Lift the microSD card door. 9 Remove the microSD card from the card holder. 10 Align the replacement microSD card with the card holder. Ensure that the contacts on the card are facing down and toward the card holder. -
Page 42: Battery Management
16 Press the Power button to turn on the device. Battery Management Note: Prior to checking the battery charge level, remove the TC55 from any AC power source (cradle or cable). To check the charge status of the main battery, touch >... -
Page 43: Low Battery Notification
Low Battery Notification When the battery charge level drops below 20% (2,940 mAh battery) or 13% (4,410 mAh battery), the TC55 displays a notice to connect the TC55 to power.The user should charge the battery using one of the charging accessories. -
Page 44: Battery Optimization
Use the Power Control widget to check and control the status of radios, the screen brightness, and syncing. • Minimize use of applications that keep the TC55 from suspending, for example, music, GPS and video applications. Turning Off the Radios... -
Page 45: Display Setting
Getting Started | 45 2 Touch 3 Touch Date & time. 4 Touch Automatic date & time to disable automatic date and time synchronization. 5 Touch Automatic time zone to disable automatic time zone synchronization. 6 Touch Set date. 7 Move the sliders up and down to select the month, date and year. 8 Touch Done. -
Page 46: Setting Screen Timeout Setting
46 | Getting Started 3 Touch Display. 4 Check Auto-rotate screen to set the TC55 to automatically switch orientation when the TC55 is rotated. Note: The Home screen does not rotate. 5 Touch Setting Screen Timeout Setting To set the screen sleep time:... -
Page 47: Touch Mode
• Auto - The TC55 uses the light sensor to determine the state of the touch key light. When in bright areas, the touch key light will not turn on. When in dim areas, the touch key light will turn on and then turn off after approximately seven seconds. -
Page 48: General Sound Setting
48 | Getting Started General Sound Setting Use the Sounds settings to configure media and alarm volumes. On the Home screen, touch > > Sounds. Figure 35: Sounds Screen • Volumes — Use to change the volume of media, ringtones, notifications and alarms. Figure 36: Volumes Dialog Box •... -
Page 49: Setting Led Notifications
Vibrate on touch - Check to have the device vibrate when touching soft keys and on certain screen interactions. Setting LED Notifications The TC55 LED can be configured to blink blue when an system or application notification occurs. Procedure: 1 Touch 2 Touch 3 Touch LED options. -
Page 51: Chapter 2: Using The Tc55
Chapter Using the TC55 This chapter describes the screens, status and notification icons, and controls on the TC55, and provides basic instructions for using the TC55. Home Screen The Home screen displays when the TC55 turns on. Depending upon the configuration, the Home screen might appear different. -
Page 52: Status Bar
Displays the time, status icons (right side), and notification icons (left side). For more information see Status Icons on page 52 Managing Notifications on page 2 — Shortcut Icons Opens applications installed on the TC55. See Application Shortcuts and Widgets on page 56 for more information. 3 — Browser Icon Opens the Browser application. - Page 53 Indicates that the battery is charging. Indicates that the Airplane Mode is active. All radios are turned off. Indicates that Bluetooth is on. Indicates that the TC55 is connected to a Bluetooth device. Connected to a Wi-Fi network. No Wi-Fi signal.
-
Page 54: Notification Icons
Indicates that a problem with sign-in or sync has occurred. Indicates that the TC55 is uploading data. Indicates that the microSD card is almost full. Indicates that the TC55 is downloading data when animated and download is complete when static. Indicates that the TC55 is connected via USB cable. -
Page 55: Managing Notifications
Using the TC55 | 55 Icon Description Indicates that the TC55 has received a text message. Indicates a missed call. Indicates that the TC55 is in car mode. Indicates that diagnostics data has been sent using the Elemez application. Indicates that Bluetooth tethering is active. -
Page 56: Application Shortcuts And Widgets
56 | Using the TC55 Application Shortcuts and Widgets Application shortcuts placed on the Home screen allow quick and easy access to applications. Widgets are self- contained applications placed on the Home screen to access frequently used features. Adding an Application or Widget to the Home Screen Procedure: 1 Go to the desired Home screen. -
Page 57: Removing A Folder
Using the TC55 | 57 Figure 41: Open Folder 2 Touch the title area and enter a folder name using the keyboard. 3 Touch Done. 4 Touch anywhere on the Home screen to close the folder. The folder name appears under the folder. -
Page 58: Using The On-Screen Keyboard
Applications The APPS screen displays icons for all installed applications. Table 8: Applications on page 59 lists the applications installed on the TC55. Refer to the TC55 Integrator Guide for information on installing and uninstalling application. September 2013 | MN000015A01... -
Page 59: Table 8: Applications
Elemez on page 95 for more information. Email - Use to send and receive email. File Browser - Organize and manage files on the TC55. See File Browser on page 77 for more information. Gallery - Use to view photos stored on the microSD card. For more information, see... - Page 60 Movie Studio on page 93 for more information. MSP Agent - Enables management of the TC55 from an MSP server. Requires the purchase of an appropriate MSP client license per device to suit the level of management functionality required. Music - Play music stored on the microSD card.
-
Page 61: Accessing Applications
Using the TC55 | 61 Icon Description AppLock Administrator - Use to configure the Application Lock feature. This icon appears after the optional applications is installed. MultiUser Administrator - Use to configure the MultiUser feature. This icon appears after the optional applications is installed. -
Page 62: Un-Locking The Screen
Un-Locking the Screen Use the Lock screen to protect access to data on the TC55. Some email account require locking the screen. Refer to the TC55 Integrator Guide for information on setting up the locking feature. The Locking feature functions differently in Single User mode or Multiple User mode. -
Page 63: Figure 45: Lock Screen
Using the TC55 | 63 Figure 45: Lock Screen Figure 46: PIN Screen MN000015A01 | September 2013... -
Page 64: Multiuser Mode
64 | Using the TC55 Figure 47: Pattern Screen Figure 48: Password Screen MultiUser Mode With MultiUser login, multiple users can log on to the device with each user having access to various applications and features. When enabled, the Login screen appears after powering on, resetting or after the device wakes from suspend mode. -
Page 65: Multiuser Logout
3 The device shuts down and then reboots. Performing a Hard Reset Caution: Performing a hard reset with a SIM card installed in the TC55 may cause damage or data corruption to the SIM card. Perform a hard reset if the TC55 stops responding. -
Page 66: Suspend Mode
2 The TC55 shuts down and then reboots. Suspend Mode The TC55 goes into suspend mode when the user presses the Power button or after a period of inactivity (set in the Display settings window). To wake the TC55 from Suspend mode, press the Power button. -
Page 67: Chapter 3: Calls
Chapter Calls Make a phone call from the Phone application, the People application or other applications or widgets that display contact information. Emergency Calling The service provider programs one or more emergency phone numbers, such as 911 or 999, that the user can call under any circumstances, even when the phone is locked, a SIM card is not inserted or the phone is not activated. -
Page 68: Making A Call Using The Dialer
68 | Calls Figure 52: Insert Wired Headset Plug Adjusting Audio Volume Use the Volume buttons to adjust the volume of the ringer when not in a call and the audio volume when in a call. Note: Adjust the conversation phone volume during a call. Adjusting the volume while not in a call affects the ring and notification sound levels. -
Page 69: Dialer Dialing Options
Calls | 69 Touch below the dialer to initiate the call. Figure 54: Call in Progress If… Then… You want to display the dialer. Touch You want to turn on the speakerphone. Touch You want to mute the call. Touch You want to place the call on hold. -
Page 70: Making A Call Using Contacts
70 | Calls Making a Call Using Contacts Procedure: On the Home screen touch 2 Touch the tab. Figure 55: Dialer Contacts Tab 3 Touch the contact to initiate the call. Touch to end the call. Making a Call Using Call History Call History is a list of all the calls placed, received, or missed. -
Page 71: Making A Conference Call
Calls | 71 Figure 56: Call History Tab Touch next to the contact to initiate the call. Touch to end the call. Making a Conference Call To create a conference phone session with multiple people. Note: Conference Calling and the number of conference calls allowed may not be available on all services. Please check with the service provider for Conference Calling availability. -
Page 72: Figure 57: Two Calls
72 | Calls Figure 57: Two Calls Touch icon to create a conference call with three people. Figure 58: Merged Calls Touch to add another call. The conference is placed on hold. 11 Touch the keys to enter the second phone number. Touch below the dialer to initiate the call. -
Page 73: Making A Call Using A Bluetooth Headset
Calls | 73 Figure 59: Un-merge Calls To remove a caller from the conference, touch next to the caller. Note: To speak privately with one party during a conference call, touch Manage Conference and then touch the caller. To include all parties again, touch Making a Call Using a Bluetooth Headset Procedure: 1 Pair the Bluetooth headset with the device. -
Page 74: Figure 60: Incoming Call Screen
74 | Calls Figure 60: Incoming Call Screen All incoming calls are recorded in the Phone application Call log tab. If you miss a call, you receive a notification. To silence the ringer before answering the call, press the volume down button on the side of device. When a call arrives, touch the white phone icon and slide over one of these icons: Figure 61: Select Answer Options •... -
Page 75: Answering Calls With A Bluetooth Headset
All incoming calls are recorded in the Phone application Call log tab. If you miss a call, you receive a notification. To silence the ringer before answering the call, press the volume down button on the side of TC55. When a call arrives, touch the Call button on the Bluetooth headset to answer the call.. - Page 76 TTY/HAC mode - Touch to set the TTY/HAC setting. Use an optional teletypewriter (TTY) device with the TC55 to send and receive calls. Plug the TTY device into the TC55 headset jack and set the TC55 to operate in one of the TTY modes.
-
Page 77: Chapter 4: Applications
Chapter Applications This section describes the applications installed on the device. File Browser Use the File Browser application to view and mange files on the device. To open File Browser, touch > Figure 63: File Browser Screen The address bar (1) indicates the current folder path. Touch the current folder path to manually enter a path and folder name. -
Page 78: Messaging
78 | Applications Touch and hold an item to perform an operation on that item. Select one of the options from the File Operations menu: • Information - View detailed information about the file or folder. • Move - Move the file or folder to a new location. •... -
Page 79: Sending A Multimedia Message
Applications | 79 3 In the Type message field, enter the text message. The 160-character limit counter indicates how many characters are left. If it goes over that limit, a new message is created, which is joined with its predecessors when received. If the user presses the Back button while composing a message, it’s saved as a draft in the Messaging screen. -
Page 80: People
80 | Applications People Use the People application to manage contacts. From a Home or Apps screen, touch . People opens to the main list of contacts. View contacts in three ways at the top of the screen: Groups , All contacts , and Favorites. Touch the tabs to change how to view the contacts. Swipe up or down to scroll through the lists. -
Page 81: Calling A Person By Name
Applications | 81 Figure 66: Voice Dialer Window The user says one of the following commands: • Call • Dial • Redial • Open. Calling a Person By Name Procedure: 1 Launch Voice Dialer. 2 Say “Call John Doe.” 3 In the Voice Dialer dialog box, touch Call John Doe The call is initiated. -
Page 82: Camera
This section provides information for taking photos and recording videos using the integrated digital cameras. Note: If a microSD card is installed, The TC55 saves photos and videos on the microSD card. If a microSD card is not installed, the TC55 saved photos and videos on the internal storage. -
Page 83: Taking A Panoramic Photo
Applications | 83 The camera brings the image into focus. When the image is in focus, the focus indicators in each corner turn green, the camera takes a photo and a shutter sound plays. Note: To disable the shutter sound, turn notification sounds off. Touch >... -
Page 84: Recording Videos
84 | Applications Recording Videos To record a video: Procedure: Touch > 2 Touch the options bar and touch Figure 69: Video Mode Touch to adjust exposure, flash, and other settings using the video settings. See Video Settings on page 85 for more information. -
Page 85: Video Settings
Applications | 85 Store location - Include location information with each photo using the device global positioning system (GPS). Options: On or Off (default). Picture size - Touch to set the size (in pixels) of the photo. Options: 8M pixels (default), 5M pixels, 3.2M pixels, 2M pixels, 1M pixels, VGA or QVGA. -
Page 86: Gallery
86 | Applications SD 480p - Standard definition 480p. • Time lapse interval - Touch to select a time interval to set the frame rate for time lapse photography. Options: Off (default), 1s, 1.5s, 2s, 2.5s, 3s, 5s or 10s. •... -
Page 87: Working With Albums
Applications | 87 Figure 70: Gallery — Albums • Touch an album to open it and view its contents. The photos and videos in the album are displayed in chronological order. • Touch a photo or video in an album to view it. •... -
Page 88: Share An Album
88 | Applications Share an Album Procedure: 1 Touch Touch 3 Touch and hold an album until it highlights. 4 Touch other albums as required. Touch . The Share menu opens. Touch the application to use to share the selected albums. 6 Follow the instructions within the selected application. -
Page 89: Rotating A Photo
Applications | 89 Figure 72: Photo Example 5 Swipe left or right to view the next or previous photo in the album. 6 Turn the device to view the photo in upright (portrait) or sideways (landscape) orientation. The photo is displayed (but not saved) in the new orientation. -
Page 90: Setting A Photo As A Contact Icon
90 | Applications Figure 73: Cropping Tool 5 Touch OK to save a copy of the cropped photo. The original version is retained. Setting a Photo as a Contact Icon Procedure: 1 Touch Touch 3 Touch an album to open it. 4 Touch the photo to open it. -
Page 91: Share A Photo
Applications | 91 Share a Photo Procedure: 1 Touch Touch 3 Touch an album to open it. 4 Touch a photo to open it. Touch 6 Touch the application to use to share the selected photo. The application selected opens with the photo attached to a new message. -
Page 92: Sharing A Video
92 | Applications Figure 74: Video Example Touch . The video begins to play. 6 Touch the screen to view the playback controls. Sharing a Video Procedure: 1 Touch Touch 3 Touch an album to open it. 4 Touch a video to open it. Touch . -
Page 93: Movie Studio
Applications | 93 Movie Studio Movie Studio is a video editing application. Capture or upload videos or photos and Movie Studio automatically turns them into beautifully edited movies, complete with music and effects. Key features include: • Select video, photo and music files from the device. •... -
Page 94: Sound Recorder
Toggles the flash on and off when using the camera to capture bar code data. Use the flash in dimly lit areas. Toggles the data capture function between the imager and camera. If the TC55 does not have an imager, only camera icon is active. -
Page 95: Elemez
Note: Elemez collects specific device information in the background and sends this information to Motorola Solutions to help improve product functionality . This feature can be disabled. See . Use Elemez to provide diagnostics information to Motorola Solutions. Touch Submit Diagnostics button to send the data. -
Page 96: Enabling Elemez Data Collection
5 In the App info screen, touch Enable. 6 Touch 7 Touch Touch 9 Touch Enable Elemez. MLog Manager Use MLog Manager to capture log files for diagnostics. See the TC55 Integrator Guide for detailed information on configuring the application. September 2013 | MN000015A01... -
Page 97: Figure 79: Mlog Manager
Applications | 97 Figure 79: MLog Manager MN000015A01 | September 2013... -
Page 99: Chapter 5: Data Capture
• optional CS3070 Bluetooth scanner • optional RS507 Hands-free Bluetooth imager. Note: DataWedge is installed and enabled on the TC55 by default. Linear Imager The device with an integrated linear imager has the following features: • Reading a variety of bar code symbologies, including the most popular 1-D code types. -
Page 100: Rs507 Hands-Free Imager
100 | Data Capture Figure 80: CS3070 Bluetooth Scanner 1 Bluetooth Button/LED 2 Delete Button 3 Scan Button 4 LED 5 Exit Window See the CS3000 Series Scanner Product Reference Guide for detailed information for configuring the CS3070. RS507 Hands-Free Imager The RS507 Hands-free Imager is a wearable bar code scan solution for both 1D and 2D bar code symbologies. -
Page 101: Bar Code Capture With Linear Imager
To capture bar code data: Procedure: 1 Ensure that an application is open on the TC55 and a text field is in focus (text cursor in text field). 2 Point the top of the TC55 at a bar code. Figure 82: Scanning 3 Press and hold the Programmable button. -
Page 102: Bar Code Capture With Integrated Camera
(LED) lights red to indicate that data capture is in process. Figure 84: Application with Preview Window Note: When Picklist mode is enabled, move the TC55 until the bar code is centered under the red target on the screen. -
Page 103: Bar Code Capture With Rs507 Hands-Free Imager
5 The scanner beeps and the LED turns green to indicate a successful decode. 6 The captured data appears in the text field. Bar Code Capture with RS507 Hands-Free Imager Prerequisites: Pair the RS507 with the TC55. See Pairing the RS507 Hands-Fee Imager on page 124 for more information. -
Page 104: Figure 87: Bar Code Scanning With Rs507
104 | Data Capture Figure 87: Bar Code Scanning with RS507 3 Press and hold the trigger. The red laser aiming pattern turns on to assist in aiming. Ensure the bar code is within the area formed by the cross-hairs in the aiming pattern. The aiming dot is used for increased visibility in bright lighting conditions. The RS507 LEDs light green, a beep sounds to indicate the bar code was decoded successfully. -
Page 105: Datawedge
The captured bar code data is converted to keystrokes and sent to the target application as if it was typed on the keypad. To configure DataWedge refer to the TC55 Integrator Guide. Enabling DataWedge... -
Page 107: Chapter 6: Wireless
USB tethering or Bluetooth tethering. You can also share the data connection with up to eight devices at once, by turning it into a portable Wi-Fi hotspot. While the TC55 is sharing its data connection, an icon appears at the top of the screen and a corresponding message appears in the notification list. -
Page 108: Bluetooth Tethering
4 Touch Tethering & portable hotspot. 5 Check Portable Wi-Fi hotspot. After a moment, the TC55 starts broadcasting its Wi-Fi network name (SSID), so you can connect to it with up to eight computers or other devices. Post requisites: To stop sharing the data connection, uncheck Portable Wi-Fi hotspot. -
Page 109: Data Usage
Data Usage Data usage refers to the amount of data uploaded or downloaded by the TC55 during a given period. Depending on the wireless plan, you may be charged additional fees when your data usage exceeds your plan's limit. To monitor your data usage, go to >... -
Page 110: Disabling Data When Roaming
110 | Wireless Figure 91: Data Usage Screen To display Wi-Fi data usage settings in a separate tab touch > Show Wi-Fi usage. Just below the on-off switch, note the data usage cycle. Touch it to choose a different cycle. This date range is the period of time for which the graph displays data usage. -
Page 111: Limiting Data Connection To 2G Networks
6 Touch 2G only. 7 Touch Locking the SIM Card Locking the SIM card requires the user to enter a PIN every time the TC55 is turned on. If the correct PIN is not entered, only Emergency calls can be made. Procedure:... -
Page 112: Wireless Local Area Networks
Wireless local area networks (WLANs) allow the TC55 to communicate wirelessly inside a building. Before using the TC55 on a WLAN, the facility must be set up with the required hardware to run the WLAN (sometimes known as infrastructure). The infrastructure and the TC55 must both be properly configured to enable this communication. -
Page 113: Figure 93: Settings Screen
Connect. See the system administrator for more information. The TC55 obtains a network address and other required information from the network using the dynamic host configuration protocol (DHCP) protocol. To configure the TC55 with a fixed internet protocol (IP) address, See Configuring the Device to Use a Static IP Address on page 116. -
Page 114: Configuring A Wi-Fi Network
5 The TC55 searches for WLANs in the area and lists them on the screen. 6 Scroll through the list and select the desired WLAN network. 7 Touch the desired network. If the network security is Open, the TC55 automatically connects to the network. For all other network security a dialog box appears. -
Page 115: Manually Adding A Wi-Fi Network
Wireless | 115 Manually Adding a Wi-Fi Network Manually add a Wi-Fi network if the network does not broadcast its name (SSID) or to add a Wi-Fi network when out of range. Procedure: 1 Touch Touch 3 Touch Wi-Fi. 4 Slide the Wi-Fi switch to the On position. 5 Touch + in the bottom right corner of the screen. -
Page 116: Configuring The Device To Use A Static Ip Address
116 | Wireless 3 Touch Proxy settings and select Manual. Figure 96: Proxy Settings 4 In the Proxy hostname text box, enter the address of the proxy server. 5 In the Proxy port text box, enter the port number for the proxy server. Note: When entering proxy addresses the Bypass proxy for field, do not use spaces or carriage returns between addresses. -
Page 117: Advanced Wi-Fi Settings
Wireless | 117 5 If required, in the Gateway text box, enter a gateway address for the device. 6 If required, in the Network prefix length text box, enter a the prefix length. 7 If required, in the DNS 1 text box, enter a Domain Name System (DNS) address. 8 If required, in the DNS 2 text box, enter a DNS address. -
Page 118: Connecting To A Wi-Fi Network Using Wps
Wi-Fi. 4 Slide the Wi-Fi switch to the On position. Touch 6 On the wireless router, press the WPS button. The TC55 connects to the wireless router. 7 Touch Remove a Wi-Fi Network To remove a remembered or connected network:... -
Page 119: Security
TC55. • Object Push Profile (OPP) - Allows the TC55 to push and pull objects to and from a push server. • Dial-up Networking (DUN) - Allows the TC55 to access the Internet and other dial-up services using a Bluetooth enabled mobile phone. -
Page 120: Bluetooth Power States
Suspend - When the TC55 goes into suspend mode, the Bluetooth radio stays on. • Airplane Mode - When the TC55 is placed in Airplane Mode, the Bluetooth radio turns off. When Airplane mode is disabled, the Bluetooth radio returns to the prior state. When in Airplane Mode, the Bluetooth radio can be turned back on if desired. -
Page 121: Changing The Bluetooth Name
6 Touch Bluetooth. 7 Touch SCAN FOR DEVICES. The TC55 begins searching for discoverable Bluetooth devices in the area and displays them under AVAILABLE DEVICES. 8 Scroll through the list and select a device. The Bluetooth pairing request dialog box appears. -
Page 122: Connecting To A Bluetooth Device
1 Press the CS3070 scan button (+) to wake the scanner. 2 Press and hold the Bluetooth button (round button with Motorola logo) for five seconds. The scanner beeps and the Bluetooth button starts blinking quickly to indicate that the scanner is discoverable by the host. -
Page 123: Cs3070 Numeric Bar Codes For Pin Entry
Wireless | 123 Figure 100: Bluetooth Keyboard Emulation (HID) Bar Code 3 Touch Touch 5 Touch Bluetooth. 6 Slide the switch to the ON position. 7 The CS3070 appears in the Available Devices list, indicated by its model name and serial number. 8 Select the CS3070 from the list. -
Page 124: Pairing The Rs507 Hands-Fee Imager
124 | Wireless Enter Pairing the RS507 Hands-Fee Imager An RS507 Hands-free Imager can be used with the device to capture bar code data. Procedure: 1 Ensure that Bluetooth is enabled on both devices. 2 Ensure that the Bluetooth device to discover is in discoverable mode. 3 Ensure that the two devices are within 10 meters (32.8 feet) of one another. -
Page 125: Near Field Communications
Procedure: 1 Open a screen that contains a web page, video, photo or contact. 2 Move the back of the TC55 toward the back of the other device. Figure 102: Sharing Data Using NFC When the devices connect, you hear a sound, the image on the screen reduces in size, the message Touch to beam appears. -
Page 126: Pairing With Nfc Enabled Bluetooth Devices
126 | Wireless Figure 103: Communication with NFC Chip, Tag or Card 3 Move TC55 to close to the NFC chip, tag or card until data transfer is complete (usually indicated by the application). Pairing with NFC Enabled Bluetooth Devices Prerequisites: Ensure that the NFC-enabled Bluetooth devices is on and in discoverable mode. -
Page 127: Figure 104: Pairing With Nfc Enabled Device
Wireless | 127 Figure 104: Pairing with NFC Enabled Device 2 Move TC55 to close to the device. The device indicates that pairing is successful. MN000015A01 | September 2013... -
Page 129: Chapter 7: Accessories
Cable Micro USB 25-MCXUSB-01R Provides USB communication with a host computer. Cable Auto Charge VCA400-01R Charges the TC55 in a Vehicle Cradle using a vehicle’s cigarette Cable lighter. US AC Line 50-16000-221R Provides power to the power supplies. Cord (3-wire) International AC Provides power to the power supplies. -
Page 130: Micro Usb Cable
Use the Micro USB Cable to provide USB communication with a host computer. When the TC55 is connected to a host computer using the Micro USB Cable, the TC55 appears as a Removable Disk on the host computer. Refer to the TC55 Integrator Guide for more information. -
Page 131: Rugged Charge Cable
Figure 105: Using the Micro USB Cable Note: The preferred method to charge the TC55 is to use the Rugged Charge Cable. You can also use the Micro USB Cable to charge the TC55 but the time to fully charge the battery will increase. -
Page 132: Figure 107: Connect Rugged Charge Cable To Tc55
132 | Accessories Rugged Charge Cable Setup Figure 107: Connect Rugged Charge Cable to TC55 Figure 108: Connect to Power September 2013 | MN000015A01... -
Page 133: Five Slot Charge Only Cradle
Simultaneously charges up to five TC55s. • Consists of a cradle base and optional cups. Refer to the TC55 Integrator Guide for setup and configuration instructions. Charging the TC55 To charge the TC55, insert the TC55 into an open slot. -
Page 134: Figure 110: Five Slot Charge Only Cradle
LED. Inserting a TC55 with Boot into Cradle Each cradle cup has an insert that must be removed prior to inserting the TC55 with Protective Boot. Remove the insert and then insert the TC55 into the cup. -
Page 135: Vehicle Charge Cradle
Install the vehicle mount on the windshield or other flat car surface using the supplied mounting disc. The TC55 can detect when it is inserted into the cradle. Use the Dock settings to configure the TC55 when in the cradle. See the TC55 Integrator Guide for more information. -
Page 136: Figure 112: Windshield Installation
3 Make sure that the suction bond is strong enough before proceeding to the next step. 4 Place the TC55 top first into the cradle and push up. 5 Rotate the bottom into the cradle and place in the bottom of the cradle. -
Page 137: Figure 114: Insert Tc55 Into Vehicle Charge Cradle
Accessories | 137 Figure 114: Insert TC55 into Vehicle Charge Cradle Note: When the TC55 is installed in the vehicle cradle, it automatically detects the insertion and goes into Car Mode, by default. 6 Position the TC55 for best viewing. -
Page 138: Figure 115: Tighten Nut
138 | Accessories Figure 115: Tighten Nut 8 In order to charge the TC55 while in a vehicle, connect the micro USB connector of the auto charge cable (p/n VCA400–01R) to the input power connector in the Vehicle Charge Cradle. -
Page 139: Removing The Device From The Vehicle Cradle
Accessories | 139 Figure 117: Cable Retention 10 Connect the other end to the vehicle power outlet. The LED indicator flashes green indicating the TC55 is charging. Removing the Device from the Vehicle Cradle Procedure: 1 Lift the TC55 up. -
Page 140: Dock Settings
2 Remove bottom of TC55 from the cradle Dock Settings Use the Dock Settings to set specific device settings when the TC55 is inserted into the Vehicle Cradle. Note: To ensure that data communications, such as FTP transfers, are uninterrupted when the TC55 is inserted or removed from the Vehicle Cradle, disable Dock detection. -
Page 141: Figure 120: Dock Settings Screen
Dock detection - Check to enable the detection of the TC55 when placed into the Vehicle Cradle. Disabled by default. • Dock insert sound - Check to play a sound when the TC55 is placed in or removed from the Vehicle Cradle. • Dock settings - Touch to modify the TC55 settings when placed in the cradle. -
Page 142: Installing The Protective Boot
Installing the Protective Boot Figure 121: Protective Boot Procedure: 1 Insert the top of the TC55 into the top of the Protective Boot. Figure 122: Insert Top of TC55 into Boot 2 Rotate the bottom of the TC55 into the protective Boot. -
Page 143: Attaching The Stylus To The Protective Boot
Accessories | 143 3 Ensure that the Protective Boot is properly fitted on the TC55. Attaching the Stylus to the Protective Boot Procedure: 1 Insert one end of the tether into the hole in the stylus. Figure 124: Insert Tether into Stylus 2 Feed the other end of the tether through the first loop. -
Page 144: Figure 126: Insert Stylus Point Into Mounting Hole
144 | Accessories Figure 126: Insert Stylus Point into Mounting Hole 8 Rotate the stylus into the boot. Figure 127: Lock Stylus into Place 9 Ensure that the top of the stylus snaps into the boot. September 2013 | MN000015A01... -
Page 145: Holster
Figure 128: Style in Protective Boot Holster Use the holster to securely carry the TC55 when working. Figure 129: Holster Insert the TC55 with the 2,2940 mAh battery into the holster with the screen facing in or out. MN000015A01 | September 2013... -
Page 146: Figure 130: Inserting The Tc55 With 2,490 Mah Battery Into The Holster
Figure 131: Inserting the TC55 with 4,410 mAh Battery into the Holster The holster provides a sleeve for holding an optional stylus. Note: Do not place the stylus into the holder when the TC55 with the Protective Boot is in the holster. September 2013 | MN000015A01... -
Page 147: Figure 132: Stylus In Holster
Accessories | 147 Figure 132: Stylus in Holster MN000015A01 | September 2013... -
Page 149: Chapter 8: Maintenance And Troubleshooting
Do not store or use the TC55 in any location that is dusty, damp, or wet. • Use a soft lens cloth to clean the TC55. If the surface of the TC55 screen becomes soiled, clean it with a soft cloth moistened with isopropyl alcohol. -
Page 150: Cleaning Instructions
Always wear eye protection. Read warning label on compressed air and alcohol product before using. If you have to use any other solution for medical reasons please contact Motorola Solutions for more information. Warning: Avoid exposing this product to contact with hot oil or other flammable liquids. If such exposure occurs, unplug the device and clean the product immediately in accordance with these guidelines. -
Page 151: Cleaning The Tc55
They may be cleaned as frequently as required, but it is advisable to clean the camera window periodically when used in dirty environments to ensure optimum performance. Cleaning the TC55 Housing Using the alcohol wipes, wipe the housing including buttons. -
Page 152: Troubleshooting
When charging, the LED The TC55 is at an Charge the TC55 for a few minutes. The LED will change to flashing slowly blinks red. extremely low green then press the Power button to turn on the TC55. If LED power state. - Page 153 Adjust the volume. low or turned off. TC55 turns off. TC55 is inactive. The display turns off after a period of inactivity. Set this period to 15 seconds, 30 seconds, 1, 2, 5, 10, or 30 minutes. Battery is Recharge or replace the battery.
- Page 154 TC55 Integrator Guide for DataWedge configuration. the bar code type. TC55 is not If the TC55 does not beep on a good decode, set the application to programmed to generate a beep on good decode. generate a beep.
-
Page 155: Table 12: Tc55 Technical Specifications
Chapter Technical Specifications The following sections provide technical specification for the device. TC55 Technical Specifications The following table summarize the TC55’s intended operating environment and technical hardware specifications. Table 12: TC55 Technical Specifications Item Description Physical Characteristics Dimensions Height: 137 mm (5.4 in.) Width: 69 mm (2.7 in.) - Page 156 156 | Technical Specifications Item Description Memory 1 GB RAM, 8 GB Flash Output Power (USB) 300 mA User Environment Operating Temperature –10 °C to 50 °C (14 °F to 122 °F) Storage Temperature -40 °C to 70 °C (-40 °F to 158 °F) Charging Temperature 0°...
- Page 157 Technical Specifications | 157 Item Description Spreading Technique Direct Sequence Spread Spectrum (DSSS) and Orthogonal Frequency Division Multiplexing (OFDM) Wireless PAN Data and Voice Communications Bluetooth Class II, v 4.0; integrated antenna. Data Capture Linear Imager Captures 1D bar codes. Camera For bar code scanning and image capture: 8 MP auto-focus camera;...
- Page 158 158 | Technical Specifications Item Description 2D (Camera only) Australian Postal, Aztec, Canadian Postal, Composite AB, Composite C, Data Matrix, Dutch Postal, Japanese Postal, Linked Aztec, Maxi Code, Micro PDF-417, microQR, PDF-417, QR Code, US Planet, UK Postal, US Postnet, USPS 4-state (US4CB) September 2013 | MN000015A01...
- Page 159 Index | 159 Index adaptive frequency hopping file browser adjust volume finger usage airplane mode five slot universal charge only cradle albums five-slot charge only cradle android version five-slot charge only cradle base application shortcuts flash approved cleanser font size audio modes battery handset mode...
- Page 160 160 | Index resetting ringtone RS507 scanning scan angle scanning range screen font size screen lock sound screen rotation screen timeout screen touch notification serial number service information set date set time set time zone setting camera video setup SIM card installation soft reset spare battery speaker mode...
Need help?
Do you have a question about the TC55 and is the answer not in the manual?
Questions and answers