Advertisement
Advertisement
Table of Contents

Related Manuals for DeDietrich oven


Summary of Contents for DeDietrich oven
- Page 1 FR GUIDE D'UTILISATION CS NÁVOD K POUŽITÍ DA BRUGERVEJLEDNING DE BETRIEBSANLEITUNG EN USER GUIDE ES MANUAL DE UTILIZACIÓN MANUALE D'USO NL GEBRUIKSAANWIJZING PT MANUAL DE UTILIZAÇÃO Four Trouba Backofen Oven Horno Forno Oven Forno...
- Page 2 We wanted to offer you a product of excellence. In the line of DE DIETRICH products, you will also find a wide range of cookers, hobs, ventilation hoods, dishwashers, and refrigerators, all of which can be built in and coordinated with your new DE DIETRICH oven.
-
Page 3: Table Of Contents
º Immediate start ________________________________________ º Delayed start __________________________________________ • Using the timer function _____________________________________ • Customising the recommended temperature ___________________ • Locking the controls ________________________________________ 3 / OVEN COOKING MODES _______________________________________ 4 / CARING FOR AND CLEANING YOUR OVEN _______________________... -
Page 4: Description Of Your Appliance
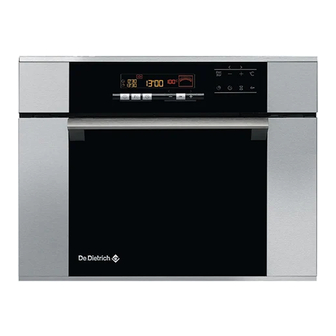
1 / DESCRIPTION OF YOUR APPLIANCE • INTRODUCTION TO YOUR OVEN Programmer Wire shelf supports Controls Hole for rotisserie Lamp... -
Page 5: Introduction To The Programmer
1 / DESCRIPTION OF YOUR APPLIANCE INTRODUCTION TO THE PROGRAMMER • Cooking modes display Control panel lock indicator (child safety device). Setting the temperature Oven temperature display Shelf support indicator and Start/Stop selected cooking mode indicator. Cooking end time display Temperature rise indicator... -
Page 6: Using Your Appliance
2 / USING YOUR APPLIANCE • USING THE PROGRAMMER • How to set the time When plugged in The displays flashes 12:00 (fig.1). fig.1 Set the time by pressing the + or - buttons (holding your finger on the button allows you to scroll through the numbers rapidly) (fig.2). -
Page 7: Immediate Cooking
—> shelf support two recommended. — Confirm using the OK button. Cooking indicator self-selects. The shelf support indicator and functions appear. fig.2 The oven begins heating. Place your dish in the oven based on the recommendation shown in the display. Your oven recommends optimal temperature for the chosen cooking mode. -
Page 8: Programmed Cooking
The countdown of the cooking time begins immediately after it has been set. After these three steps, the oven heats up: A series of beeps will sound when the oven reaches the selected temperature. At the end of cooking (end of programmed time),... - Page 9 The cooking end time is automatically fig.2 recorded after a few seconds. The cooking end time display stops flashing. After these 3 steps, the oven heating is delayed so that cooking ends at 16:00. At the end of cooking (end of programmed time),...
-
Page 10: Using The Timer Function
• Your oven’s programmer can be used as an independent timer that allows you to count down a time wit t hout operating the oven. In this case, the timer display has priority over the clock display. - Press the button 3 times (fig.1) -
Page 11: Customising The Recommended Temperature
-> access to the oven fig.1 controls is now blocked (fig.1). To unlock access, hold down the OK button for a few seconds. The oven controls are once again accessible. Warning You cannot lock the oven if you have programmed a cooking cycle. - Page 12 CIRCULATING HEAT (recommended temperature 180°C min 35°C max 235°C) •Cooking is by a heating element at the bottom of the oven and the oven fan. •Rapid temperature increase: Some dishes can be placed in the oven while it is still cold.
-
Page 13: Oven Cooking Modes
•Cooking sequence recommended for baking bread. •After preheating, place the dough on the pastry dish - 2nd shelf support. •Place a bowl of water at the botom of the oven to get a crusty and shiny crust. DEFROSTING (recommended temperature 30°C min 30°C max 50°C) •Dishes are defrosted by a limited amount of heat and the fan. - Page 14 (fig.4). At the end of pyrolysis, 0:00 starts flashing as well as the symbol - When the oven is cool, use a damp cloth to remove the white ashes. fig.4 The oven is clean and once again ready for...
-
Page 15: Caring For And Cleaning Your Oven
Before starting a pyrolysis cleaning cycle, make sure that any accessories that are not pyrolysis safe have been removed from the oven (sliding rails, baking trays, chrome-plated grills, and so on) as well as any cookware. The side grills are pyrolysis safe and may be left...
Need help?
Do you have a question about the oven and is the answer not in the manual?
Questions and answers