RED ONE Operation Manual
Hide thumbs
Also See for ONE:
- Operation manual (132 pages) ,
- Operation manual (120 pages) ,
- Quick start manual (13 pages)
Table of Contents
Advertisement
Quick Links
Sections:
1. Before You Start
2. Camera Assembly
3. Physical Controls
4. Theory of Operation
5. Basic Operation
6. Sensor Menu Controls
7. Audio Video Menu Controls
8. System Menu Controls
Appendix A. Upgrading camera firmware
Appendix B. Digital Media Management
Appendix C: Input and Output Connectors
Appendix D: Post Production
Nov 12 2008
RED ONE™ CAMERA: OPERATIONS GUIDE
(Firmware Build 18 – BETA - Version 3.6.0)
Copyright RED Digital Cinema
Page
2
3
5
9
16
23
31
39
60
62
66
75
1
Advertisement
Table of Contents

Related Manuals for RED ONE


Summary of Contents for RED ONE
- Page 1 RED ONE™ CAMERA: OPERATIONS GUIDE (Firmware Build 18 – BETA - Version 3.6.0) Sections: Page 1. Before You Start 2. Camera Assembly 3. Physical Controls 4. Theory of Operation 5. Basic Operation 6. Sensor Menu Controls 7. Audio Video Menu Controls 8.
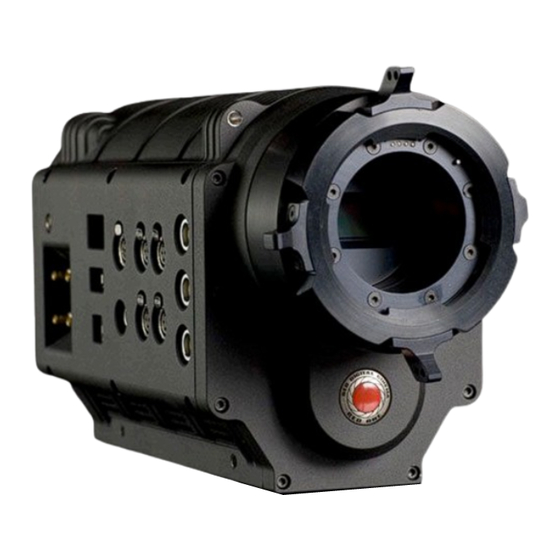
- Page 2 RED ONE Digital Cinema Camera The RED ONE camera ships with a PL mount. To protect against dust or other contaminants entering the optical path, ensure the lens cap is used at all times a lens is not mounted to the camera.
-
Page 3: Camera Assembly
If using RED-DRIVE, place it into the RED-CRADLE and secure it with the four thumbscrews. Then connect the RED e-SATA cable to the RED-DRIVE and to the e-SATA input on the rear of the camera body. (In normal operation use the right angle connector to mate to the RED-DRIVE, and the straight connector to mate to the camera) Remove the lens cap and mount the PL lens you wish to use. - Page 4 Finally tighten the butterfly locks to maintain that position. The shoulder pad/wedge plate adap- tor is also designed to slide within the RED RAIL base plate until you lock it in place. You won’t need to remove it to mount the camera on a tripod.
- Page 5 B. Record C. User Keys 1 and 2 A PL mount is provided as standard with the RED ONE camera. The mount is compatible with the majority of S35mm, 35mm and S16mm cinematography lenses. In addition, broadcast B4 mount lenses may be used if the camera is equipped with the optional B4 to PL mount optical converter.
- Page 6 Aux/RS232 port that can interface to a variety of B4 lenses and lens motor control devices. One 6-inch length DIN 1.0 / 2.3 to BNC video adaptor cable and one 9-inch length 3 pin mini- XLR to mini-XLR cable plus a mini-XLR to full size XLR adaptor are provided with the camera.
- Page 7 The status display reports key camera status values, and is complimented by two LED’s: the red LED provides a record tally, while the green LED indicates the camera is ready for operation.
- Page 8 To power the camera up from a RED-CHARGER, connect it via the supplied power cable. Plug the RED-CHARGER into an AC power source and switch it on. After the green LED illuminates on the RED-CHARGER, the camera can be powered on by pressing its On/Off switch.
- Page 9 A B4 mount to PL mount adaptor is also available to permit use of 2/3” HD lenses on the RED ONE camera. The optical coverage it provides is equivalent to S16 mm. Hence, the maximum recording resolution with these lenses will be 2K RAW.
- Page 10 2.40:1 aspect ratio. Only use this mode with 2:1 anamorphic lenses. Audio Recording The RED ONE includes four channels of analog audio input as well as a headphone monitor and balanced analog audio output. Digitized audio is available on the HDM, Preview HD-SDI and Program HD-SDI outputs.
- Page 11 RED-EVF and RED-LCD are connected, these outputs only support Surround View. Note: Only if a RED-EVF or RED-LCD is connected, the HDMI output can also support a 1280 x 848 resolution video output with Surround View, frame guides, safe action / title, timecode / clip name, waveform, and camera status and operation menu overlays.
- Page 12 RED-LCD or RED-EVF monitor outputs, and the rear status display on the camera back. For applications where a RED-LCD or RED-EVF are not desired – for example working on a crane – the Surround View video, frame guides, and exposure overlays are also available on the Preview HD-SDI output, providing remote camera monitoring up to 200 ft away.
- Page 13 The upper LED to the right of the status display screen will turn red, and if using an EVF, the front LED will also turn red. If media is not present, the cam- era will provide a warning as follows – RECORD ERROR NO_DIGIMAG.
- Page 14 A001_C001_0502**.RDC and then force to 1 to create A001_C001_0503**.RDC SMPTE Timecode As each recording is made, the RED ONE camera records two independent timecode tracks. Edge Code is a SMPTE timecode track that always starts at 1.00.00.00 on the first frame of each piece of digital media.
- Page 15 Operating the camera from the RED-CHARGER. Plug the RED-CHARGER into an AC power source between (120 – 240V). Plug one end of the supplied 6-pin power cable into the Aux power output of the RED CHARGER and the other end into the DC power input of the camera.
- Page 16 Note: Quick Access keys may be re-programmed if desired. Enter the menu that you wish assigned to one of these keys, then press and hold the A, B or C key until the camera re- ports “ User button A/B/C has been assigned to this menu” Subsequent presses of this key will return the camera to that same menu location.
- Page 17 Status Display The status display mounted at the rear of the RED ONE camera provides a snapshot of the camera setup. The elements include – Timecode / Status reports current timecode value, clip name or system messages ASA Value reports current exposure index Project Frame Rate reports the project frame rate, 24.00 fps in this example...
- Page 18 Resolution. Choose 4K, 3K or 2K, or 2:1 variants. Use 2K or 2K 2:1 for S16mm/B4 lenses. Note: A project can only support one project Time Base as this defines the frame rate to be used for timecode and for clip playback. It is also the primary frame rate for acquisition, but variable speed (over-crank and under-crank) recordings can be made above and below this base frame rate.
- Page 19 Player to display the RAW data at _F full, _H high, _M medium or _P proxy resolutions. Double click on one of the QuickTime reference movies to see a preview of the .R3D file. Play- back frame rate will depend on the processor speed of your computer. If the frame rate is too low, select a smaller QuickTime movie.
- Page 20 The I< key cues the Clip to its Start Frame. If already at the Start Frame, pressing this key again will cue to the Start Frame of the previous clip recorded on the digital media, if one exists. The >I key cues the Clip to its End Frame. If already at the End Frame, pressing this key again will cue to the Start Frame of the next clip recorded on the digital media, if one exists.
- Page 21 Image intensity can be adjusted to compensate for ambient lighting conditions. For the RED- LCD, use the Up / Down keys on top of the display. For the RED-EVF use the rotary encoder. To assist with exposure, all monitor outputs can display either a dual Zebra pattern or a False Color exposure meter overlaid on the video.
- Page 22 USER KEY preferences menu. Using external HD-SDI or HDMI monitors. To aid external monitor alignment, the RED ONE camera provides a range of test signals in- cluding SMPTE Bars, Back and White Fields, Luma and Chroma Ramps, and a Chip Chart.
-
Page 23: Sensor Menu Controls
Speed, Color Temperature, Varispeed and Timelapse. To access these functions, press the SENSOR menu key or one of the direct access keys to the left of the status display. Note: Sensitivity and Color Temperature metadata values are stored as metadata and are also used to modify the RED-LCD, RED-EVF, Preview HD-SDI and HDMI monitor outputs. - Page 24 Genlock: references Shutter scan start time (phase) to an external Tri-Level Sync genlock sig- nal. For multi-camera use, permits scan time and scan phase of all cameras to be matched. Mode: enables one of three following shutter modes. Default selection is Normal. Normal: Shutter Speed is defined exclusively by the Shutter Speed setting.
- Page 25 Note: If operating in Relative or Syncro modes, the shutter speed is reported in yellow text. Note: If the operator requests a shutter speed (angle) that is outside the capability of the camera in that mode, the actual shutter speed (angle) used will be reported in red text. Shutter Speed When operating in Normal mode, the Shutter Speed value used by the camera is fixed, i.e.
- Page 26 E.g. = 1/ (24 x 360 / 180) = 1/ (8640 / 180) = 1 / 48 Degrees Shutter Degrees Shutter 1/32 1/120 1/48 1/192 172.8 1/50 22.5 1/348 1/60 1/696 1/96 1/1000 Copyright RED Digital Cinema Nov 12 2008...
- Page 27 On-Event: On recording start, the capture frame rate starts out at the Frame Rate, the start of the transition to the End Rate occurs only when an external GPI trigger has been received. Nov 12 2008 Copyright RED Digital Cinema...
- Page 28 Framerate: enables the user to choose any single frame rate. Minimum frame rate is 1 fps; maximum frame rate is a function of REDCODE setting, record resolution and media type: REDCODE 28 RED 8GB CF RED 16GB CF RED DRIVE RED RAM 2K 2:1 100 fps...
- Page 29 GPI contact closure to initiate the next frame capture. Interval: the camera waits for the period of time defined by the Interval parameter. One-Shot: the camera waits for a side record command or external GPI contact closure. The default setting is One-Shot.
- Page 30 Each successive event uses the next available Edge Code and Time Code value and uses the existing clip name. This results in a complete Timelapse sequence with a single clip name and correct timecode sequence. To exit Timelapse mode press the RECORD button. Copyright RED Digital Cinema Nov 12 2008...
-
Page 31: Audio / Video Menu Controls
The LOOK menu permits Video, Gain and Tone values to be exported or imported to an SD Card. Look (.RLK) files may be read by another camera, but not by REDALERT! or REDCINE. Clear: Resets the settings for Color, Gain and Tone menu parameters to their default values. Nov 12 2008 Copyright RED Digital Cinema... - Page 32 They do not affect the actual REDCODE RAW data being recorded. Master: adjusts the gain of RED, BLUE and GREEN equally. Range is 0.0 (no Red) to +4.0 Red Gain: adjusts the gain of the RED channel only. Range is 0.0 (no Red) to +4.0...
- Page 33 TONE menu The TONE sub-menu allows a Tonal Response Curve to be overlaid on the video monitor path. The curves parameter values are stored in metadata, and may be visualized in RED ALERT! post-production software as Curve data. Curve: This checkbox enables the Tonal Response Curve. Default setting is enabled.
- Page 34 18% ND and skin tones. This is the corresponding white balanced but otherwise unprocessed, source image – captured at late morning at exposure index A320, 24fps, 1/48 sec shutter and no filtering. Copyright RED Digital Cinema Nov 12 2008...
- Page 35 Meter, Luma Histogram, RGB Histogram and MONO (RGB without color) Histogram. If Spot Meter is selected, a red rectangular box will appear centered on the center cursor of the image. The size of this sample box can be adjusted by rotating the Joystick, and its loca- tion can be adjusted by moving the joystick in X and Y directions.
- Page 36 R, G and B channels using the full width of the lower section of the camera display. If Focus Assist or Focus Overlay is selected, a full screen width red rectangular box will ap- pear centered on the center cursor of the image. The vertical position of this sample box can be adjusted by rotating the Joystick, and its height can be adjusted by moving the joystick left or right.
- Page 37 Dark Detail: allows the RED-EVF to view addition information (detail) in dark areas of a scene, or in dimly illuminated nighttime scenes. Default setting is ON, and 1% Open Gate: lets the camera preview images at 48Hz (50Hz) update rate when operating in 23.98 or 24.00 fps (25 fps) Project Frame Rates.
- Page 38 Feeds channel 1 to the left side, channel 2 to the right. 3L + 4R Feeds channel 3 to the left side, channel 4 to the right. Quad Mix Feeds channels 1&2 to the left, channels 3&4 to the right. Copyright RED Digital Cinema Nov 12 2008...
- Page 39 Note: the +48V Phantom Power output is disabled each time the camera is power cycled. Media Menu This menu provides various media management functions including digital media formatting. Selections are PRE-RECORD, UNMOUNT, FORMAT, CHANGE and RESET Nov 12 2008 Copyright RED Digital Cinema...
- Page 40 All have the same clip name. Note: On playback, either on camera or in the RED Alert!, REDCINE or any QuickTime application, these eleven individual .R3D files are seen as a single continuous video clip.
- Page 41 Unmount: select to un-mount digital media from the RED ONE camera in a failsafe manner. The camera operating system will ensure that all files are closed, hard disk heads (if present) are parked, and CF card or RED-DRIVE magazine is properly powered down.
- Page 42 Time Base: allows the user to set the project time base - the playback & editing frame rate. Resolution. Choose 4K, 3K or 2K resolutions. Do not use 4K or 3K for S16mm/B4 lenses. Copyright RED Digital Cinema Nov 12 2008...
- Page 43 The maximum available time base supported by each media type for each resolution is - REDCODE 28 RED 8GB CF RED 16GB CF RED DRIVE RED RAM 2K 2:1 60 fps 60 fps 60 fps 60 fps 2K ANA 60 fps...
- Page 44 Note: An individual project should only use one Time Base, as it defines the frame rate used for timecode and editing. To vary the capture frame rate above or below the base frame rate defined by the project’s time base, enable VARISPEED in the SHUTTER menu.
- Page 45 Cross Gen: activates 29.97 from 23.98 fps time code sync. The RED-ONE camera will gener- ate a 23.98 Time Code signal for use with the camera’s 23.98 fps recording, and also gener- ates a synchronized 29.97 fps Time Code signal for use by an external device, available as an output from the 5-pin timecode I/O connector.
- Page 46 Frame Guide: displays film projection areas with 1.85 or 2.40 aspect ratios and television dis- play areas with 16:9 or 4:3 aspect ratios. Frame Guide color can be set to White, Black, Blue, Yellow or Red for maximum color contrast with the scene you are shooting. Copyright RED Digital Cinema...
- Page 47 16:9, 14:9 or 4:3 aspect ratios, or User Areas. Safe area color can be set to White, Black, Blue, Yellow or Red for maximum color contrast with the scene you are shooting. PROGRAM allows the use to program the specific PROTECT areas to be used.
- Page 48 User Title: enables the user to program a custom Safe Title area. Operation is the same as for USER ACTION areas. See above description. Preview This sub-menu selects the operating mode of the HD Preview output. Copyright RED Digital Cinema Nov 12 2008...
- Page 49 If only one of either a RED-EVF or RED-LCD are present, the HD-SDI and HDMI outputs will support Surround View, frame guides and safe action / title overlays, waveforms overlaid on a 1280 x 720 pixel video signal. Both of theses outputs include up to 4 channels of 24-bit 48KHz audio.
- Page 50 1280 x 720 pixels when in preview and record, but switches to 1920 x 1080 pixels in playback. EVF Refresh EVF Refresh: permits the operator to select the display refresh rate used by the RED-EVF. Copyright RED Digital Cinema Nov 12 2008...
- Page 51 PROFLE_**.RPF You may edit USER PROFILE filenames on a computer, but do not change its extension (.RPF) or the camera will not recognize it. Restrict file names to 12 characters. Nov 12 2008 Copyright RED Digital Cinema...
- Page 52 User-5: When checked USER-5 key is enabled, and its function is defined in the associated list. Default is enabled – Meter. User Key 5 is the left hand side key on the RED-LCD Available functions that may be allocated to the User Keys are –...
- Page 53 Record: starts standard mode (video and audio) record. Subsequent trigger stops record. Pre-Record: activates Pre-record. Subsequent triggers start / stop record. Timelapse: activates Timelapse. Subsequent trigger activates one-shot or burst recording. Ramp: initiates variable frame rate ramp speed change. Shut Down: initiates a controlled camera power down Play Clip: causes the selected Clip to play back at normal speed Next Clip: cues the selected clip to end.
- Page 54 (HD-SDI and HDMI), HD Program (Dual Link HD-SDI), RED-EVF and RED-LCD outputs. RED- EVF and RED-LCD will display a 1280 x 720 pixel center cut of the larger 1920 x 1080 image. LOOK: permits the look used by the camera on playback to be specified.
-
Page 55: Maintenance
The default setting is AUTO Auto: This setting combines VARIABLE speed fan operation while not recording, with SILENT mode when in record. This mode is recommended for extended duration dialog recordings. Nov 12 2008 Copyright RED Digital Cinema... - Page 56 Quiet: This setting is most useful when the ambient temperature is below 72°F/25°C. In quiet mode the fan runs at one quarter its maximum speed when in record. Silent: This setting is most useful when the ambient temperature is below 60°F/15°C. In silent mode the fan runs at its minimum speed when in record.
- Page 57 User - Allows all user preference parameters to be reset to the factory default values. Restore – Press the RESTORE key to confirm the above selections. Update SW: initiates a camera software update. Nov 12 2008 Copyright RED Digital Cinema...
- Page 58 Set Clock – loads the selected Date and Time parameters into the camera’s system memory. Note: After pressing this key the camera will re-boot. The new parameters will take ef- fect, and be visible as TIME CODE, on completion of the re-boot cycle. Copyright RED Digital Cinema Nov 12 2008...
- Page 59 Check the S4/i box to enable communication between the RED ONE and an S4/i compatible lens, and to enable recording of the lens data as metadata in the RED ONE .R3D files. To enable the display of Focus / Zoom / Iris data from the S4/i lens, also check the LENS DATA checkbox located in SYSTEM / SETUP / PREFERENCES / DISPLAY menu.
-
Page 60: Appendix A: Upgrading Camera Firmware
Firmware and software identified by a build and version number. A higher number reflects a later release. The current release is identified on the home page of www.red.com web site. To download, click on the desired release’s link at ww.red.com/support. Before the download starts you will be prompted to enter your account and password or the camera’s P.I.N. - Page 61 Power-cycle the camera to continue Power cycle the camera to return to normal operation. During the camera power up process, the camera will display the camera P.I.N and the firmware Build and Version number. Nov 12 2008 Copyright RED Digital Cinema...
-
Page 62: Appendix B: Managing Digital Media
Compact Flash (CF) media requires a RED-FLASH (CF) module mounted to the left side of the camera body. Hard disk media is housed in a RED-DRIVE magazine mounted to the rear of the camera body and connected via a custom16 pin SATA interface cable. - Page 63 The digital magazine is ready for immediate use Press the Joystick to acknowledge. The format process is now complete. Formatting a CF card or RED-RAM will take about 10 -15 seconds; a RED-DRIVE will format in less than a minute. Nov 12 2008...
- Page 64 FORMAT label and press the joystick to confirm media formatting. Erasing media on a Macintosh personal computer On a Macintosh computer, connect the CF card via a CF card reader, or the RED-DRIVE or RED-RAM via a standard FireWire 400 / 800 cable, and then open Disk Utility.
- Page 65 Removing a CF card or disconnecting a RED-DRIVE or RED-RAM without first un-mounting it will not physically damage the media, however it does increase the risk of file corruption, so it’s good operational practice to un-mount the media if possible before removing / disconnecting.
-
Page 66: Appendix C: Input And Output Connectors
Note: It is very important that both pairs of the +VBATT and GROUND pins are wired up. DO NOT fabricate power cables with just one each of +VBATT and GROUND pins wired, as this may cause damage to the camera’s power supply. - Page 67 SMPTE 12M serial time code input, or pin 2 may be used by itself (leave pin 3 open) to receive a single-ended SMPTE 12M serial time code input. Pin 5 is time code output. Mating connector: LEMO FGG.0B.305.CLAD42Z View into camera Timecode connector Nov 12 2008 Copyright RED Digital Cinema...
- Page 68 Preston MDR-2 using an appropriate adaptor cable. Note: Do not attempt to power a cinema lens motor from this connector. Depending on your max current requirement, extract power from either one of the two Auxiliary Power outputs, or the D-Tap connector on the battery V-Plate.
- Page 69 The RED-EVF interface is a custom digital video and power interconnection between the camera and a RED-EVF. Due to the data integrity nature of this interface, the pin-out is not published. Contact RED technical support for details of available RED-EVF cable lengths.
- Page 70 At +54 dB the microphone input level equivalent to Full Scale is -36 dBu (0.013 Volts RMS). Note: Cameras shipped prior to Sept 15 2008 should use RED supplied XLR to mini-XLR adaptor cables to achieve equivalent input signal level compliance.
- Page 71 This port is currently not enabled. Note: The USB-2 Master port may be used as a convenient power source for a LED-based USB based script light. USB-2 Slave (Device) This port is currently not enabled. Nov 12 2008 Copyright RED Digital Cinema...
- Page 72 Genlock Input Signal Program (Dual-link) HD-SDI Two DIN 1.0/2.3 connectors labeled HD-SDI support progressive scan HD Program signals. Pin: Signal Description Direction Center HD-SDI SMPTE-292M HD-SDI Shield/Screen GROUND Camera ground Program HD-SDI Output (each connector) Copyright RED Digital Cinema Nov 12 2008...
- Page 73 Note: the Program HD-SDI output provides 4 channels of embedded audio plus timecode. Note: When in Varispeed, the Program output will be blanked. Note: RED ONE outputs progressive scan video, it does not support the 1080PsF format. Note: If recording in ANA (anamorphic) mode, the Program HD-SDI output will represent the image in the final 2.40:1 aspect ratio.
- Page 74 PVW output. i.e. the timecode sequence will be discontinuous. Note: RED ONE outputs progressive scan video, it does not support the 1080PsF format. Note: If recording in ANA (anamorphic) mode, the Preview HD-SDI output will represent the image in the final 2.40:1 aspect ratio.
-
Page 75: Appendix D: Post Production
If you are using CF media, copy the clips onto the workstation’s hard drive. If you are recording to a RED-DRIVE, it can be directly mounted as an external drive using FireWire if desired which eliminates the media copy step. -
Page 76: Software Tools
Render performance of computers will vary based on CPU speed, number of cores and disk speed. The RED ONE camera, RED Alert! and REDCINE offer QuickTime reference movies at _F full, _H half, _M medium and _P proxy resolution. Choose the resolution that is most appropriate to your requirement for playback frame rate on your specific computer. - Page 77 RED Alert! is available for Intel based Mac OSX computers only. In addition to performing white balance and one light color correction, RED Alert! can export a clip at 4K and 2K resolution via 10-bit DPX or 16-bit TIFF files, or create color corrected Quick- Time reference movies for editing or other uses by applications that use the RED QuickTime Codec.
- Page 78 Presets may be saved in RED Alert! that allow a consistent “look” to be established across multi- ple clips, or alternative color treatments may be made for the same clip.
- Page 79 REDCINE is available on Intel based Mac OSX and Windows XP platforms. In addition to performing white balance and one light color correction, REDCINE provides image pan/scan, crop and scaling operations. The application can export either a singe clip, or a se- quence of clips, as 4K or 2K resolution 10-bit DPX or 16-bit TIFF files.
- Page 80 HD-SDI outputs has been stretched 2:1 to illustrate the final 2.40:1 aspect ratio of the final image projection. The actual recorded image is 1.2:1 aspect, and the QuickTime reference movies will reflect that aspect ratio. Copyright RED Digital Cinema Nov 12 2008...
Need help?
Do you have a question about the ONE and is the answer not in the manual?
Questions and answers