
Related Manuals for Fri-Jado TDR 7


Summary of Contents for Fri-Jado TDR 7
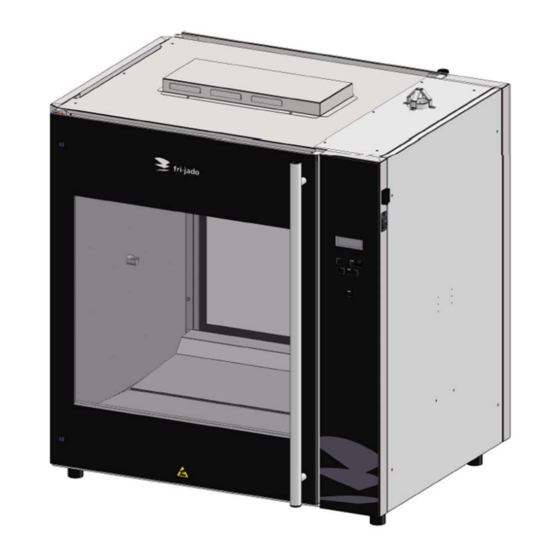
- Page 1 TDR 7/8 P Gas USER MANUAL TDR 7 Programmable TDR 8 Programmable EN (Original Instruction) 9123983 / 1309 ...
- Page 2 TDR 7/8 P Gas KEEP THIS USER MANUAL FOR FUTURE USE © 2013 Fri-Jado BV, Etten-Leur, The Netherlands. We advise you to contact your supplier for the guarantee period and conditions. Further we refer to our General Terms and Conditions for Sales and Delivery that are available upon request.
- Page 3 TDR 7/8 P Gas EN 3 / 48 ...
-
Page 4: Table Of Contents
TDR 7/8 P Gas CONTENTS INTRODUCTION ...................... 6 1. 1.1. General ........................... 6 1.2. Identification of the unit .................... 6 1.3. Pictograms and symbols ..................... 6 1.4. Safety instructions ...................... 7 1.4.1. General ........................ 7 1.4.2. Moving ........................ 8 1.4.3. Outdoor use restrictions ................... 8 1.5. ... - Page 5 TDR 7/8 P Gas Switching-off the unit .................... 23 4.7. 5. OPERATION ........................ 24 5.1. Operation of the rotisserie .................. 24 5.2. Operation options ....................... 27 5.2.1. To end a running program. .................. 27 5.2.2. Check the actual temperature ................ 27 5.2.3. Check the remaining time in a program .............. 28 5.2.4. ...
-
Page 6: Introduction
INTRODUCTION 1.1. General This manual is intended for the user of the TDR 7/8 P Gas. The features and controls are being described, along with directions for the safest and most efficient use, in order to guarantee a long life of the unit. -
Page 7: Safety Instructions
TDR 7/8 P Gas 1.4. Safety instructions WARNING The top cover (in particular the flue tube) and the outside of the unit can be very hot. WARNING Do not put any objects on the equipment as this may cause fire. Keep all openings free from obstacles. -
Page 8: Moving
TDR 7/8 P Gas 1.4.2. Moving When moving the unit: Before moving the unit, first switch off the mains voltage by pulling the plug from the wall socket and empty the fat collecting drawer. After that, cool-down the unit for at least ten minutes. -
Page 9: Hygiene
TDR 7/8 P Gas 1.5. Hygiene The quality of a fresh product always depends on hygiene. Especially grilling products. With the risk of salmonella contamination – especially for chicken products – you must make sure that grilled products can never be mixed with uncooked products. Also contact between grilled products and hands or tools that have been in contact with raw chicken meat, must be avoided at all times. -
Page 10: Description Of The Unit
TDR 7/8 P Gas DESCRIPTION OF THE UNIT 2.1. Technical description Heating takes place by means of gas that is burnt in a heat exchanger placed in the ceiling. A fan mixes the gas and air, which mixture is ignited by means of an automatic ignition. The combustion takes place in the inner part of the heat exchanger and is therefore not visible. -
Page 11: Installation And First Use
TDR 7/8 P Gas INSTALLATION AND FIRST USE All packing materials used for this unit are suited for recycling. After unpacking, check the state of the unit. In case of damage, store the packing material, and contact the transporter within fifteen working days after receiving the goods. 3.1. -
Page 12: Dismantling The Pallet
TDR 7/8 P Gas 3.2. Dismantling the pallet For proper unpacking the unit, the pallet must be taken apart. Use the instructions shown in Figure 6. Figure 6 3.3. Installation and positioning WARNING Install the equipment in a sufficiently ventilated room in order to prevent concentrations of harmful substances in that room. - Page 13 TDR 7/8 P Gas WARNING Do not store or use gasoline or other flammable vapours or liquids in the vicinity of the appliance. Figure 7 The user must have sufficient freedom of movement to properly operate the unit (see Figure 7).
-
Page 14: First Use
TDR 7/8 P Gas 3.4. First use When using the unit for the first time, clean the interior thoroughly with soap suds and heat up the unit, see section 3.4.1. After commissioning discolouration of the cooking/grilling area can occur. The cleaning remains will find its way to the fat collection drawer, so this drawer must be cleaned and emptied after cleaning the unit. -
Page 15: Metal Odour
TDR 7/8 P Gas Place the bottom plates in the grilling compartment (see Figure 8). Bottom Plates Figure 8 3.4.1. Metal odour To remove the metal odour that will appear at first use, the unit must be heated at the maximum temperature of 250 °C (482 °F) for at least half an hour. -
Page 16: Operation And Use
TDR 7/8 P Gas OPERATION AND USE WARNING Hot glass, grease and parts can cause burns. Use with care when operating and servicing the unit. WARNING Check the grease drawer after each cooking process and empty already when about half full to avoid overflowing. -
Page 17: Switching-On The Unit
TDR 7/8 P Gas Functions of the controls Button Function ON / OFF Switching the unit on / off UNDO Go back to previous menu LIST Receipt / Programming modus FORWARD One step ahead in setting ROTOR Switching the rotor on Acknowledge a function or change BACK One step back in setting... -
Page 18: Loading The Rotisserie Using Meat Forks
TDR 7/8 P Gas Figure 10 4.3.1. Loading the rotisserie using meat forks The unit will be equipped with a set of meat forks. Whole uncut chickens should always be grilled using the meat forks. This way their natural fat will baste each other, giving a perfectly slender cooking result. -
Page 19: Loading The Rotisserie Using V-Shape Spits (Accessory)
TDR 7/8 P Gas 2. Leave some space between the products, for an even exposure and browning. 3. Put the meat forks onto the rotor disks in such a way that during grilling the chicken breasts face the operator. 4. -
Page 20: Loading The Rotisserie Using Meat Baskets (Accessory)
TDR 7/8 P Gas 4.3.3. Loading the rotisserie using meat baskets (accessory) Figure 15 If you are using meat baskets act as follows: Attach the meat baskets to the appropriate pins. Make sure the accessory is level. Whilst loading the unit with meat baskets, you must see to it, that the rotor gets evenly loaded, so that the mass of the products is evenly spread over de rotor, causing an equal balance. -
Page 21: Loading The Rotisserie Using Two Different Accessories
TDR 7/8 P Gas For preparing chicken or any other poultry in the racks, you can use Picture 1 as an example. Picture 1 4.3.5. Loading the rotisserie using two different accessories. WARNING After loading the rotor, at least make ONE full rotation, and check whether the rotor can spin without obstructions. -
Page 22: Taking Out The Products
TDR 7/8 P Gas 4.5. Taking out the products WARNING After the grilling, the interior of the unit and the glass panes are very hot. Always use oven gloves when taking out the meat forks or other accessories. 4.5.1. Taking out the meat fork When taking out the meat forks, it is best to act as follows (see Figure 18): Figure 18... -
Page 23: Emptying Grease Drawer
TDR 7/8 P Gas 4.6. Emptying grease drawer WARNING Check the grease drawer after each cooking process and empty already when about half full to avoid overflowing. Push the grease drawer completely into the unit after placing it back to prevent damage to the window. -
Page 24: Operation
TDR 7/8 P Gas OPERATION Buttons are lit when functional. 5.1. Operation of the rotisserie 1. Press Start. 2. Display shows Fri-Jado logo. 3. Display shows software version. Interface P Eco TDR Version x.x.x ... - Page 25 TDR 7/8 P Gas 9. Pre-heat ready LOAD (unit returns a sound signal). Note: press OK or open the door to START or stop the signal. Display shows the next step of the program. Note: Screen 9 and 11 alternate each 5 seconds.
- Page 26 TDR 7/8 P Gas 18. A reminder to measure the core Measure Core Temp. temperature appears. Note: Screen 17 and 18 alternate every 5 seconds. 19. (Optional, visible for 5 min.) request 2 Chicken for additional time (minutes) after ...
-
Page 27: Operation Options
TDR 7/8 P Gas 5.2. Operation options 5.2.1. To end a running program. 1. Press and hold start for 3 seconds. Stop? 2. Make a choice with the arrow buttons. NO YES 1 Note: Select NO to abort ending the program. -
Page 28: Check The Remaining Time In A Program
TDR 7/8 P Gas 5.2.3. Check the remaining time in a program 1 Chicken 1. Use the arrow buttons to show the remaining time pro step. 230°C P123 0:05 2. Time left at step 1 1 Chicken (first digit blinks). ... -
Page 29: Eco Function
TDR 7/8 P Gas 6. Press the OK button to update the screen (automatically refreshed every 15 seconds). 7. Press List button to go back. 8. Display returns to the original 1 Chicken operating display. 180°C P123 0:20 5.2.5. -
Page 30: Display Information
TDR 7/8 P Gas 5.2.7. Display information 180°C 1. Display shows the programmed 0:20 temperature and time. 2. Press the list button. 3. Display shows after 3 seconds 1 Chicken cooking step + temperature + time. ... -
Page 31: Manager Menu
TDR 7/8 P Gas MANAGER MENU 6.1. Manager menu items Programming Parameters Change pin Pre-Heat Clock Edit Preheat temperature Transfer Delete Holding Version Copy Holding temperature Cook correction* Reading recipes Eco function* Store recipes Language Big digits Sound preheat Sound step Sound done * Only visible when selected in the service menu. ... - Page 32 TDR 7/8 P Gas 6. Enter the User PIN code. Pin 0 ‐ ‐ ‐ Give User PIN code Note: the original PIN code is 1111. The operator can change the User PIN code. 7. Use the arrow button to enter the PIN code. 8.
- Page 33 TDR 7/8 P Gas 15. The first available number is shown. 10 Choose new number Note: use the arrow right button to select the next available number. 16. Press the OK button to confirm. 17. Enter the recipe name. 10 A‐‐‐‐‐‐‐‐‐‐‐‐‐‐ ...
- Page 34 TDR 7/8 P Gas 22. Press the OK button to confirm. 23. Set the “step 1” temperature. 10 Step 1 Starting with the first digit. Temp 1 ‐ ‐ °C 24. Use the arrow buttons to increase/decrease the value of the selected digit. 25.
- Page 35 TDR 7/8 P Gas 32. Press the OK button to confirm. 33. Set the second digit. 10 Step 1 Temp 215 °C Time 21 ‐ 34. Press the OK button to confirm. 35. Set the last digit. 10 Step 1 Temp 215 °C Time 210 36. Press the OK button to confirm. 37.
- Page 36 TDR 7/8 P Gas 40. When ready programming press the OK button to confirm. 41. Save the finished programs. 10 TEST Save 1Disc Note: if the program is not saved all changes are lost! 42. Press the OK button to confirm. 43.
-
Page 37: Programming Parameters
TDR 7/8 P Gas 6.3. Programming parameters 1. Press the list button. Pin * * * * 2. Enter your user PIN code. Give User PIN code 3. Press the OK button to confirm. 4. Press the arrow buttons to select MANAGER MENU ... - Page 38 TDR 7/8 P Gas 9. Use the arrow buttons to select Language: English Change, Next or Previous. Change Next 1Previous Press back to enter the manager menu. 10. Press the OK button to confirm or Save parameters? select Discard to cancel. ...
-
Page 39: Change Pin Code
TDR 7/8 P Gas 6.4. Change pin code 1. Manager menu. MANAGER MENU 2. Select Change Pin. Para Change Pin 1Clock 3. Press the OK button. 4. Enter the new pin code. Pin 0 0 0 0 5. Press the OK button. ... -
Page 40: Usb
TDR 7/8 P Gas 6.8. 1. Manager menu. MANAGER MENU USB Programming 1Para. 2. Use the arrow buttons to select the USB function. 3. Screen shows the USB function. MANAGER MENU Place the USB stick into the USB- ... -
Page 41: Cleaning And Maintenance
TDR 7/8 P Gas CLEANING AND MAINTENANCE WARNING Never use a water hose for cleaning. Water can seep into the unit through the ventilation holes of the unit. WARNING Do not touch the halogen lamps with bare hands. Protect hot lamps from cold water. -
Page 42: Weekly Cleaning
TDR 7/8 P Gas Fat collecting drawer Carefully take out the fat collection drawer partly. Open the tap until the drawer is empty. Clean the drawer with cleaning agent or hot water combined with an appropriate cleaning agent. The interior Clean the interior with cleaning agent or hot water combined with an appropriate cleaning agent. -
Page 43: Three Monthly Cleaning
TDR 7/8 P Gas 7.4. Three Monthly Cleaning WARNING Remove the power plug from the wall socket. Clean the heat exchanger and the fan blades thoroughly as described below. The parts can be accessed in the following way (see also Figure 20): Figure 20 Heat exchanger: Remove the screws (A) from the ventilation grille (B). -
Page 44: Malfunctions And Service
TDR 7/8 P Gas MALFUNCTIONS AND SERVICE Before you contact your supplier/dealer in case of a malfunction, there are some items you can check yourself: Is the power supply working properly? Check fuses and differential switch. Is the gas supply in good order? ... -
Page 45: Replace The Gas Hose
TDR 7/8 P Gas 8.2. Replace the gas hose WARNING If the gas hose is damaged or has visible cracks immediately contact your supplier/service station. Immediate replacement is required in view of possible danger. Maintenance on the gas installation must be done by a registered installer in accordance with the current national and local regulations. -
Page 46: Technical Specifications
TECHNICAL SPECIFICATIONS WARNING Consult the identification plate to get the proper specifications of the unit. The gas and electrical data may vary from country to country. European Models Model TDR 7/8 P Dimensions Width 995 mm Depth 830 mm Height... -
Page 47: 10. Accessories And Options
TDR 7/8 P Gas 10. ACCESSORIES AND OPTIONS For the TDR the following accessories are available: Figure 21 Figure 22 Options Matching stand on castors TDR GAS stacked on TDW holding cabinet Figure 23 EN 47 / 48 ... - Page 48 TDR 7/8 P Gas Fri-Jado BV Oude Kerkstraat 2 4878 AA Etten-Leur The Netherlands Tel: +31 (0) 76 50 85 400 Fax: +31 (0) 76 50 85 444 EN 48 / 48 ...
Need help?
Do you have a question about the TDR 7 and is the answer not in the manual?
Questions and answers