
Subscribe to Our Youtube Channel
Related Manuals for Dalsa Falcon4 86M


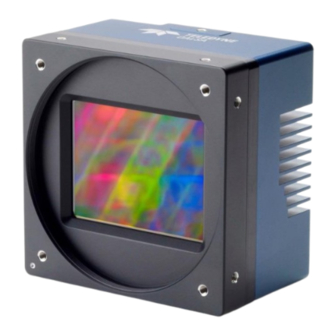
Summary of Contents for Dalsa Falcon4 86M
- Page 1 Falcon4 86M Camera User’s Manual FA-S0-86M16-01-R and FA-S1-86M16-00-R sensors | cameras | frame grabbers | processors | software | vision solutions 03-032-20220-05 www.teledynedalsa.com...
- Page 2 All information provided in this manual is believed to be accurate and reliable. No responsibility is assumed by Teledyne DALSA for its use. Teledyne DALSA reserves the right to make changes to this information without notice. Reproduction of this manual in whole or in part, by any means, is prohibited without prior permission having been obtained from Teledyne DALSA.
-
Page 3: Table Of Contents
Contents THE FALCON4 86M CAMERA ................5 ....................5 ESCRIPTION Key Features ..................5 Programmability ..................5 Applications ................... 5 ............. 6 ODEL UMBERS AND OFTWARE EQUIREMENTS ..............6 AMERA ERFORMANCE PECIFICATIONS ................ 8 NVIRONMENTAL PECIFICATIONS ..............8 ENSOR OSMETIC PECIFICATIONS &... - Page 4 Creating a Camera Configuration File in the Host........23 CAMERA OPERATION ................... 24 Factory Settings ................... 24 ............24 HECK AMERA AND ENSOR NFORMATION Verify Temperature ................24 .................. 25 HERMAL ANAGEMENT Handling ..................... 25 ............26 AVING AND ESTORING AMERA ETTINGS ...........
- Page 5 Image Format Control Feature Descriptions ..........68 CLHS L ............71 RANSPORT AYER ATEGORY Camera Link Transport Layer Feature Descriptions ........71 ..............72 CCESS ONTROL ATEGORY File Access Control Feature Descriptions ..........72 APPENDIX B: CLEANING THE SENSOR WINDOW ......... 74 Recommended Equipment ..............
- Page 6 Figures Figure 1: Spectral Responsivity ..................9 Figure 2: Typical Spectral Quantum Efficiency ..............9 Figure 3: Angular Response ..................10 Figure 4: Random Vibration ..................11 Figure 5. Single CLHS Connector Configuration ............12 Figure 6: Pixel Readout of the Falcon 4 camera............13 Figure 7: Input and Output, trigger, and Power Connectors ...........
-
Page 7: The Falcon4 86M Camera
The Falcon4 86M Camera Description Teledyne DALSA’s new generation of color and monochrome area scan cameras—the Falcon4™ 86M—incorporate very large resolutions and fast frame rates, enabling high-speed image capture with superb spatial resolution and excellent image quality. Global shuttering and correlated double sampling ensure smear free and low noise images. -
Page 8: Model Numbers And Software Requirements
Model Numbers and Software Requirements This manual covers the Falcon4 camera models summarized below. New models are added to this manual as they are released by Teledyne DALSA. Table 1: Camera Models Overview Model Number Description FA-S0-86M16-01-R 86M pixel monochrome, Camera Link HS. - Page 9 3) Responsivity with FFC enabled. 4) Mono camera PRNU w/o correction is measured at 50% output with FPN removed. 5) Integral non-linearity = Deviation from best fit line 10 to 90%/4096. The Falcon4 86M Camera • 7 Falcon 86M CLHS Camera User Manual...
-
Page 10: Environmental Specifications
15% to 80% relative, non-condensing MTBF (mean time between failures) >100,000 hours, typical field operation Sensor Cosmetic Specifications The following table lists the current cosmetic specifications for the Teledyne DALSA sensor used in the cameras. Table 6: Blemish Specifications Description... -
Page 11: Responsivity & Qe
Figure 1: Spectral Responsivity Figure 2: Typical Spectral Quantum Efficiency The Falcon4 86M Camera • 9 Falcon 86M CLHS Camera User Manual... -
Page 12: Angle Of Incidence
Flash Memory Size Table 7: Memory Camera Flash Memory Size FA-S0-86M16-01-R 500 MByte program storage 8,000 MByte correction coefficients FA-S1-86M16-00-R 500 MByte program storage 8,000 MByte correction coefficients 10 • The Falcon4 86M Camera Falcon 86M CLHS Camera User Manual... -
Page 13: Certifications & Compliance
• Random vibration per MIL-STD-810F at 25 G /HZ [Power Spectral Density] or 5 RMS • Shock testing 75 G peak acceleration per MIL-STD-810F Figure 4: Random Vibration The Falcon4 86M Camera • 11 Falcon 86M CLHS Camera User Manual... -
Page 14: Supported Industry Standards
The designation C2, 7M1 defines the use of a SFF-8470 connector (C2) and up to 7 lanes of data with 1 command channel using M-Protocol (8b/10b) at the default speed of 3.125 Gb/sec. 12 • The Falcon4 86M Camera Falcon 86M CLHS Camera User Manual... -
Page 15: Camera Link Hs Roi Characteristics
Figure 6: Pixel Readout of the Falcon 4 camera. Note: • As viewed looking at the front of the camera without a lens. (The Teledyne DALSA logo on the side of the case will be right-side up.) The Falcon4 86M Camera • 13... -
Page 16: Camera Setup
Camera Setup System Precautions & Cleaning Precautions Read these precautions and this manual before using the camera. Do not open the housing of the camera. The warranty is voided if the housing is opened. • Confirm that the camera’s packaging is undamaged before opening it. If the packaging is damaged please contact the related logistics personnel. -
Page 17: Software And Hardware Setup
3. Establish communication with the camera. Step 1: Install and Configure Frame Grabber and Software Teledyne DALSA recommends its Xtium PX8 CLHS series frame grabber or equivalent. Follow the manufacturer’s installation instructions. A GenICam™ compliant XML device description file is embedded within the camera firmware allowing GenICam™... -
Page 18: Power Connector
Figure 7: Input and Output, trigger, and Power Connectors WARNING! Grounding Instructions Static electricity can damage electronic components. It’s critical that you discharge any static electrical charge by touching a grounded surface, such as the metal computer chassis, before performing handling the camera hardware. Power Connector WARNING: It is extremely important that you apply the appropriate voltages to your camera. -
Page 19: Camera Link Data Connector
Figure 8: 12-pin Hirose Circular Male Power Plug—Power Connector Table 9. Power Plug Pinout Description Description OUT2+ +12 V to +24 V OUT2- OUT1- OUT1+ IN1-/Trigger IN2+/Trigger IN1+/Trigger IN2-/Trigger WARNING: When setting up the camera’s power supplies follow these guidelines: •... -
Page 20: Led Indicators
LED Indicators The camera is equipped with 2 LEDs on the back to display the operational status of the camera. The tables below summarize the operating states of the camera and the corresponding LED states. When more than one condition is active, the LED indicates the condition with the highest priority. Camera Status LED Meaning No power or hardware malfunction... -
Page 21: Step 3: Establish Communication Between The Frame Grabber And The Camera
The camera must boot fully before it will be recognized by the GenCP compliant application. In this ready-state, the CLHS LED will be green and the Camera LED will be green or blue (if using a Teledyne DALSA frame grabber). You are now ready to connect the frame grabber, step 2. -
Page 22: Connect To The Camera
Connect to the camera • CamExpert will search for Sapera devices installed on your system. In the Devices list area on the left side of the GUI, the connected Cabernet camera will be shown. • When CamExpert detects a camera (as per the CLHS device discovery protocol), camera parameters are displayed along with the board parameters. -
Page 23: Using Camexpert
Using CamExpert The Sapera CamExpert tool is the interfacing tool for GenCP compliant Camera Link cameras, and is supported by the Sapera library and hardware. When used with a CLHS camera, CamExpert allows a user to test most of the operating modes. Additionally, CamExpert is able to save and reload the frame grabber configuration to simplify repeated power-up system configuration. -
Page 24: Figure 10: Camexpert Interface
Figure 10: CamExpert Interface • Device Selector pane: View and select from any installed Sapera acquisition device. After a device is selected, CamExpert will only present parameters applicable to that device. Optionally select a camera file included with the Sapera installation or saved by the user. •... -
Page 25: Camexpert View Parameters Option
Visibility level from the View ∙ Parameters Options menu. Creating a Camera Configuration File in the Host • When using the Teledyne DALSA Sapera SDK – the CCF is created automatically via a save. • When using a 3 party SDK application, if that SDK supports GenAPI 2.4, then the process is... -
Page 26: Camera Operation
Camera Operation Factory Settings The camera ships and powers up for the first time with the following factory settings: • Flat field coefficients enabled (calibrated in internal exposure mode, non-concurrent readout and integration). • Defect concealment enabled. • Internal exposure mode (internal frame rate and exposure time). •... -
Page 27: Thermal Management
This accessory can be ordered from Teledyne DALSA. The fan’s electrical connection is via 2 pigtail wires. The red wire is hooked to a +14 V to +24 V supply @ 150 mA max, 100 mA typ. -
Page 28: Saving And Restoring Camera Settings
Saving and Restoring Camera Settings The Power-up Configuration parameter opens a dialog allowing you to specify the camera configuration to use on power up and to save current parameter settings. Figure 11: CamExpert Power-up Configuration Dialog When the user changes a camera parameter, the settings are stored in the camera’s volatile memory and will be lost if the camera resets or is powered down. -
Page 29: Figure 12: Relationship Between The Camera Settings
The relationship between these three settings is illustrated here: Figure 12: Relationship between the Camera Settings Note: If a test pattern is active when you save the User Set, the camera will turn off all digital processing upon restart. For example: •... -
Page 30: Acquisition And Transfer Control Features
Use the commands grouped under the Acquisition and Transfer Control category to choose the acquisition mode, start and stop acquisitions, and to monitor the acquisition status. The latest Teledyne DALSA frame grabber driver issues the acquisition start command by default. Figure 13: CamExpert Acquisition and Transfer Control Category... -
Page 31: Test Pattern
Table 10: Test Patterns Test Pattern Description Grey Horizontal Ramp Image is filled horizontally with an image that goes from the darkest possible value to the brightest. The ramp repeats every 4096 horizontal pixels. Grey Vertical Ramp Image is filled vertically with an image that goes from the darkest possible value to the brightest. -
Page 32: Gain And Black Level Control Details
Gain and Black Level Control Details Gain and black level adjustments are available in the cameras. The analog black level and analog gain are factory calibrated and not adjustable by the user. It is possible to optimize the image by adjusting the digital offset controls and gain controls. -
Page 33: Exposure Controls
Exposure Controls Exposure Control modes define the method and timing of how to control the sensor integration period. The integration period is the amount of time the sensor is exposed to incoming light before the video frame data is transmitted to the controlling computer. •... -
Page 34: Figure 15: Internally Programmable Frame Rate And Exposure Time (Default)
Internally-generated Exsync Exposure Time Exposure Time Programmable Programmable Readout Time Readout Time Programmable Programmable Frame Time Frame Time FVAL Figure 15: Internally Programmable Frame Rate and Exposure Time (Default) External Frame Rate and External Exposure Time (Trigger Width) In this mode, EXSYNC sets both the frame period and the exposure time. The rising edge of EXSYNC marks the beginning of the exposure and the falling edge initiates readout. -
Page 35: External Frame Rate, Programmable Exposure Time
External Frame Rate, Programmable Exposure Time In this mode, the frame rate is set externally with the falling edge of EXSYNC generating the rising edge of a programmable exposure time. Camera Features: • TriggerMode = On • ExposureMode = Timed •... -
Page 36: Trigger Modes
Trigger Modes The camera’s image exposures are initiated by a trigger signal. The trigger event is either a programmable internal signal used in free running mode, an external input used for synchronizing exposures to external triggers, or a programmed function call message by the controlling computer. -
Page 37: Opto-Coupled Inputs
Opto-Coupled Inputs The camera provides two sets of opto-isolated input signals. These can be used as external trigger sources. The signals should be in range from 2.4 V to 24 V, 5 V typical. See the lineDetectionLevel feature. The delay between signals at the I / O pin and the internal timing core is a function of the signal swing and the typical latency @ 5V swing is 3.5 µs. -
Page 38: Flat Field Correction And Defective Pixel Detection Overview
Flat Field Correction and Defective Pixel Detection Overview The Flat Field correction function consists of using two coefficients per pixel which correct the gain and offset of the corresponding pixel. These corrections compensate for the Photo-response Non- uniformity (PRNU) and Fixed Pattern noise (FPN) attributes unique to each camera sensor. In addition, the camera supports replacement of defective pixels (hot, dead, blinking) with a value based on neighborhood pixels. -
Page 39: Dark Row Subtract Algorithm
Dark Row Subtract Algorithm The dark row subtract algorithm can be enabled, disabled, or set to off. The camera ships from the factory with this feature enabled. This algorithm improves the time stability of the FPN output from the sensor. The Dark Row Subtract Mode feature has 3 modes: Off, Disabled, Enabled. -
Page 40: Important Note On Command Timeout Errors
Another option is to perform the flat field correction in the frame grabber. In either case, Teledyne DALSA recommends repeating the correction when a temperature change of greater than 10 °C occurs. For best results, ensure that: • Gain (PRNU) calibration has a clean, white reference. The quality of this reference is important for proper calibration. -
Page 41: Important Note On Window Blemishes
Important Note on Window Blemishes When flat field correction is performed, window cleanliness is paramount. The figure below shows an example of what can happen if a blemish is present on the sensor window when flat field correction is performed. The blemish will cast a shadow on the wafer. FFC will compensate for this shadow by increasing the gain. -
Page 42: Performing An Ffc Setup In The Camera
Performing an FFC Setup in the Camera The calibration is performed in two steps. The offset FPN (base and Delta) is determined first by performing an averaging without any light. This calibration determines exactly how much offset to subtract per pixel in order to obtain flat output when the sensor is not exposed to light. If the calibration finds any defective pixels, where its FPN base value is greater than Pixel Replacement Offset Threshold, or its PRNU value is greater than Pixel Replacement Gain Threshold, the pixel can be replaced if... -
Page 43: Defective Pixel Detection And Replacement
Run Gain (PRNU) calibration. See flatfieldCalibrationPRNU. A defective pixel will be replaced if Pixel Replacement Mode is Active. A defective pixel is defined as a pixel whose FPN base value is greater than Pixel Replacement Offset Threshold or / and whose PRNU value is greater than Pixel Replacement Gain Threshold. 11. -
Page 44: Single Pixel Replacement
4) The modified list can be saved in a user set. Teledyne DALSA recommends that the user update the user defect map file after making changes to the row/col replacement to keep track of which rows or columns are set to be replaced in the user set. -
Page 45: Median Filter
Median Filter Enable the median filter by setting the medianFilter to Active (Image Format Controls). Setting this filter to Off disables the medianFilter. When the Median Filter is Active, then the Median Filter Threshold value controls the decision to replace the pixel value. Replacement occurs when a pixel’s current value differs from the median value of a 3 x 3 kernel by more than the threshold value. -
Page 46: File Access Via The Camexpert Tool
File Access via the CamExpert Tool Click on the “Setting…” button to show the file selection menu. Figure 25 Initial File Access Control Dialog From the Type drop menu, select the file type that will be uploaded to the camera. From the File Selector drop menu, select the camera memory location for the uploaded data. -
Page 47: Technical Specifications
Technical Specifications Mechanicals Technical Specifications • 45 Falcon 86M CLHS Camera User Manual... -
Page 48: Ec & Fcc Declaration Of Conformity
EC & FCC Declaration of Conformity Teledyne DALSA inc. 605McMurray Road, Waterloo, Ontario, Canada, N2V 2E9 Declare under sole legal responsibility that the following products conform to the protection requirements of council directive 2004/108/EC (2014/30/EU after April 2016) on the approximation... -
Page 49: Appendix A: Genicam Commands
Features listed in the description table but tagged as Invisible are typically reserved for Teledyne DALSA Support or third party software usage, and not typically required by end user applications. Additionally the Standard & View column will indicate which parameter is a member of the custom DALSA Features Naming Convention (denoted by DFNC), versus the GenICam Standard Features Naming Convention (SFNC not shown) along with their view attribute. -
Page 50: Camera Information Category
Camera Information Category The camera information group provides general information about the camera. Parameters such as camera model and firmware version uniquely identify the connected device. As well, temperature can be monitored and user sets can be saved and loaded to and from the camera’s non-volatile memory using the features grouped here. Figure 26 CamExpert Camera Information Category Camera Information Feature Descriptions Display Name... - Page 51 Device User ID DeviceUserID Feature to store a user-programmable identifier of up to 15 characters. Beginner The default factory setting is the camera serial number. (RW) Device Temperature DeviceTemperatureSelector Select the source where the temperature is read. (RW) Beginner Selector FPGA Board FPGABoard Read FPGA Board temperature.
- Page 52 Device Reset DeviceReset Resets the device to its power up state. (W) Beginner DFNC Major Rev deviceDFNCVersionMajor Major revision of Dalsa Feature Naming Convention which was used to DFNC create the device’s XML. (RO) Invisible DFNC Minor Rev deviceDFNCVersionMinor Minor revision of Dalsa Feature Naming Convention which was used to DFNC create the device’s XML.
-
Page 53: Acquisition And Transfer Control Category
Acquisition and Transfer Control Category The acquisition and transfer control category, as shown by CamExpert, group acquisition and transfer specific parameters. Figure 27 CamExpert Acquisition and Transfer Control Category Acquisition and Transfer Control Feature Descriptions Display Name Feature & Values Description Standard &... -
Page 54: Sensor Control Category
Sensor Control Category The camera sensor controls, as shown by CamExpert, group sensor specific parameters. Figure 28 CamExpert Sensor Control Category Sensor Control Feature Descriptions Display Name Feature & Values Description Standard & View Device Scan Type DeviceScanType Scan type of the sensor. < RO> Beginner Area scan Areascan... - Page 55 Frame Rate (in Hz) AcquisitionFrameRate Specifies the camera internal frame rate, in Hz. (Read-only when TriggerMode = "On") 1 to x Hz (where x is a calculated maximum) The maximum value of the frame rate is the result of a complicated formula and Beginner is dependent on the following features: Height, summingMode, pixelformat...
- Page 56 Shutter Mode shutterMode Determines the exposure mode used by the sensor (RW) Global Global All pixels integrate simultaneously and then held constant until they can be read. This is at the cost of higher noise. Guru Rolling Rolling The rows of the sensor integrate light at slightly different times. This can cause image artifacts.
-
Page 57: I/O Control Category
I/O Control Category The camera’s I / O controls, as shown by CamExpert, group features used to configure external inputs and acquisition actions based on those inputs, plus camera output signals to other devices. Figure 29 CamExpert I/O Control Category I/O Controls Feature Descriptions Display Name Feature &... - Page 58 Trigger Source TriggerSource Specifies the internal signal or input line to use as the trigger source. Beginner (RW) The trigger mode must be set to On. Software Software Software trigger through the TriggerSoftware command. LinkTrigger0 LinkTrigger0 CLHS trigger message from the FG. Line1 Line1 General Purpose Input Line 1...
- Page 59 Line Debouncing Period lineDebouncingPeriod Specifies the minimum length of an input line voltage transition before DFNC recognizing a signal transition. Available when the Line Selector is set Beginner to an input. Each input line stores its own debouncing period.(RW) Possible values are: 1 to 255 µs. Line Inverter Line Inverter Controls whether to invert the selected input or output line signal.
- Page 60 Output Line Value outputLineValue Selects the state of the output on the selected line. (RW) The Value DFNC will be applied immediately if the outputLineSoftwareLatchControl Beginner feature is equal to OFF. The Value will be applied when the outputLineSoftwareCmd feature is set if the outputLineSoftwareLatchControl feature is equal to LATCH.
- Page 61 outputLineSoftwareCmd Contains a bit field representing whether to apply to cached DFNC Output Line Software outputLineValue values. (W) Beginner Command Value Do not apply any value Apply outputLineValue of Output1 Apply outputLineValue of Output2 Apply outputLineValue of Output1 and Output2 Note: LineMode feature must be set to Output and outputLineSource is set SoftwareControlled.
-
Page 62: Advanced Processing Control Category
Advanced Processing Control Category The camera’s Advanced Processing controls, as shown in CamExpert, group parameters used to configure Defective Pixel Detection, Flat Field calibration. Figure 30 CamExpert Advanced Processing Category 60 • Appendix A: GenICam Commands Falcon 86M CLHS Camera User Manual... -
Page 63: Advanced Processing Control Feature Descriptions
Advanced Processing Control Feature Descriptions Display Name Feature & Values Description Standard & View Correction Mode flatfieldCorrectionMode Sets the mode for flat field correction.(RW) DFNC Beginner Flat field correction is disabled. Active ActiveAll Flat field correction is enabled. FPN and PRNU correction is active. Active, FPN Only ActiveFPNOnly FPN correction is active. - Page 64 To use, set the Correction Mode feature to Calibration. Pixel Delta Offset(FPN) flatfieldCorrectionOffsetDelta Sets the offset to apply to the currently selected pixel. Measured at the current exposure time at dark with a subtraction of flatfieldCorrectionOffsetBase. Range is 0 to 511, as float. Read-Write when in Calibration Mode.
- Page 65 if an odd number is entered, the entry will be rounded down when possible. Also the AutoBrightnessOffsetY may need to be decreased before increasing this parameter. autoBrighitnessHeight =<OffsetY+Height-2-autoBrightnessOffsetY AutoBrightness Width autoBrightnessWidth Determines the number of columns to include in the average used to DFNC set the PRNU targets for color sensors.
- Page 66 The PRNU coefficient is calculated using customer entered per color targets. It is recommended these values be 1.2x the measured color average. FFCGainxyr/g/b = Targetr/g/b/(Average signalxy – DarkRowSubtract- FFCOffsetx,y – currentIntTime/CalIntTime*DeltaFPNxy) White balance gains are set to unity and saved with the coefficient set.
- Page 67 Gain(PRNU) Calibration flatfieldCalibrationPRNU Performs photo response non-uniformity (PRNU) calibration. (W) DFNC Expert PRNU calibration eliminates the difference in responsivity between the most and least sensitive pixel, creating a uniform response to light. Pixels that fall outside gain range of 1 to 4 for their color are marked as defective.
- Page 68 replaces the current value regardless of the calculation. Pixel Replacement Row or rowColInterpolationSelector Determines if the Pixel Replacement Row or Column Number is for DFNC Column Selector Rows or Columns (RW) Expert DefecticeRow Selects row processing configuration to edit. Column DefectiveColumn Selects column processing configuration to edit Pixel Replacement Row or...
- Page 69 image sensor (row 16 to 31). The bit mask is one hot and rows 0,15,16 and 31 are always marked as excluded. Mandatory set bits are shown below: (Bit 31…..Bit0) Mask = 0x80018001 Dark Row Defect Threshold DarkRowDefectThreshold The value entered is checked against every dark pixel. If a single DFNC pixel is found to be greater than the threshold, then the entire row is Guru...
-
Page 70: Image Format Controls Category
Image Format Controls Category The camera Image Format controls, as shown by CamExpert, group parameters used to configure camera pixel format, and image cropping. Additionally, a feature control to select and output an internal test image simplifies qualifying a camera setup without a lens. - Page 71 PixelColorFilter Indicates the type of color filter applied to the image. <RO> Beginner Pixel Color Filter BayerGB BayerGB Color Sensor (color camera) None None No filter applied on the sensor (monochrome camera) Pixel Coding PixelCoding Output image pixel coding format of the sensor. <RO> Beginner BayerGB BayerGB...
- Page 72 The camera to average the specified number of frames (summingCount) as it receives the internal or external frame triggers. Median Filter medianFilter Enable 3X3 2D median filter. This filter applies on the whole image. DFNC Guru Active Active Active: The camera will use 3x3 2D median filter The camera will not use 3x3 2D median filter Median Filter Threshold medianFilterThreshold...
-
Page 73: Clhs Link Transport Layer Category
CLHS Link Transport Layer Category The camera’s CLHS Link Transport Layer category groups parameters used to document and configure the Camera Link HS input and output of the camera. Figure 32 CamExpert CHLS Link Transport Layer Category Camera Link Transport Layer Feature Descriptions Display Name Feature &... -
Page 74: File Access Control Category
8b/10b ErrorCount LinkErrorCount Indicates the number of low level data errors on the connection between the camera DFNC and frame grabber. <RO> Beginner Possible values are: 0 to 4294967295 Refresh Features RefreshFeatures Refresh features on the CLHS Link Transport Layer page. DFNC Beginner Reset Link Error... - Page 75 Factory Rolling Flatfield FlatFieldCoefficientsFact2 A tiff containing the factory flat field correction coefficients for rolling shutter operation (i.e. gain and offset) Logs Logs Download camera logs. This is a zipped file Factory Defect Map FactoryDefectMap Download camera defect map. User Defect Map UserDefectMap File that allows user to test file transfer.
-
Page 76: Appendix B: Cleaning The Sensor Window
Appendix B: Cleaning the Sensor Window Recommended Equipment • Glass cleaning station with microscope within clean room. • 3M ionized air gun 980 (http://solutions.3mcanada.ca/wps/portal/3M/en_CA/WW2/Country/) • Ionized air flood system, foot operated. • Swab (HUBY-340CA-003) (http://www.cleancross.net/modules/xfsection/article.php?articleid=24) • Single drop bottle (FD-2-ESD) •... -
Page 77: Appendix C: Internal Flat Field Calibration Algorithms
Appendix C: Internal Flat Field Calibration Algorithms The camera provides the user with the ability to perform a custom flat field calibration. This appendix gives details of the calibration algorithms. All calibration is performed on averaged image data to reduce noise. Dark Row Subtract It is recommended that the Dark Row Subtract Algorithm is enabled during camera operation and calibration. -
Page 78: Gain (Prnu) Calibration
Gain (PRNU) Calibration The flat field gain calibration is performed after the offset calibration, when the sensor is exposed to a flat light source. The gain on each pixel is adjusted to achieve a target value. There are two methods for selecting the correction target: PRNU Customer Target or PRNU Auto Color Gain. PRNU customer target allows the customer to enter the expected output value after PRNU calibration. -
Page 79: Color Camera Gain (Prnu) Calibration
Color Camera Gain (PRNU) Calibration The flat field gain calibration is performed after the offset calibration, when the sensor is exposed to a flat light source. The gain on each pixel is adjusted to achieve a user-entered per-color target value ( PRNU_Customer_Target) or 1.20 above the specific color’s average flatfieldCorrectionAlgorithm = PRNU_Auto_Gain). - Page 80 User Interface Rules • autoBrightnessHeight:minimum 4 rows • autoBrightnessWidth: minimum 64 columns autoBrightnessOffsetX: multiple of 32 • autoBrightnessOffsetY: multiple 2. • The minimum autoBrightnessOffsetY =2+ OffsetY (Avoid the first row of data) The maximum autoBrightnessHeight is such that the last 2 rows of the output data are omitted. autoBrightnessHeight <...
-
Page 81: Appendix D: Ffc File Format
Appendix D: FFC File Format FFC File Format FFC file is downloaded / uploaded as shown in the following figure: Figure 35: CamExpert File Access Control Dialog Appendix D: FFC File Format • 79 Falcon 86M CLHS Camera User Manual... - Page 82 The file downloaded to PC is a raw image file, which combines each FPN base, FPN delta, and PRNU into a double word. Teledyne Dalsa provides a standalone command line application (FFC_Codec.exe) to decode this raw image into 3 readable .tif files.
-
Page 83: Camera Defect Map
Camera Defect Map The camera defect map file is a text file that contains information on row, column, and cluster defects found during the camera test. This text file is for information purposes only and is not used with any internal camera function. There are two copies of the file loaded into the camera: a factory version that the user has read- only access to, and a user version that can be overwritten. -
Page 84: Revision History
Revision History Number Change Date Initial release of preliminary version to support early consignment 8 November cameras 2016 • Fan mounting accessory (AC-MS-00117-00-R) listed 19 April 2017 • Performance specifications table revised • Cosmetic sensor specifications revised • Angle of Incidence graph added •... -
Page 85: Contact Information
Sales Information Visit our web site: www.teledynedalsa.com/mv Email: mailto:info@teledynedalsa.com Canadian Sales Teledyne DALSA — Head office Teledyne DALSA — Montreal office 605 McMurray Road 880 Rue McCaffrey Waterloo, Ontario, Canada, N2V 2E9 Saint-Laurent, Quebec, Canada, H4T 2C7 Tel: 519 886 6000...
Need help?
Do you have a question about the Falcon4 86M and is the answer not in the manual?
Questions and answers