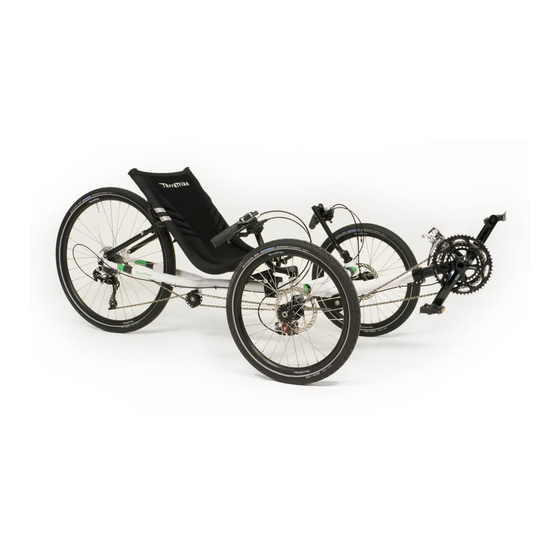
TerraTrike Sportster Assembly Manual
Pilot’s handbook, technical illustration & parts list
Hide thumbs
Also See for Sportster:
- Quick start manual (4 pages) ,
- Quick start manual (8 pages) ,
- Quick start manual (8 pages)

Subscribe to Our Youtube Channel
Related Manuals for TerraTrike Sportster


Summary of Contents for TerraTrike Sportster
-
Page 1: Parts List
Assembly Guide Pilot’s Handbook Technical Illustration & Parts List www.TerraTrike.com - 800.945.9910 4460 40th St SE. Grand Rapids, MI 49512... - Page 2 Pg 17 - Riding Tips & Warranty Information Technical Drawings & Parts List- Pg 18-20 Pg 18 - Sportster Exploded Technical Drawing Pg 19 - Parts List for Sportster Technical Drawing Pg 20 - Seat Clamp Exploded Technical Drawing, Seat Clamp Parts List...
-
Page 3: Assembly Guide
Assembly Guide Dark Grey = Installation/Adjustment PLEASE NOTE: Make sure you’re greasing bolts before installing them. Failure to do so can cause “galling” to occur (heat and friction will fuse (weld) the fasteners together). Adjustment will be impossible and not covered under warranty. Rear Section Installation Make sure rear section is installed straight (rear wheel is perpendicular... - Page 4 Handlebar & Shifter Installation At this time, over-tighten the cap screw (#1). This will help when setting up the brakes. You will loosen the cap screw later. Rear Wheel Installation...
- Page 5 Boom Installation Some parts omitted for clairty Tighten to 125-150 in. lbs. Make sure one M8 at washer is installed under each nyloc nut on boom clamp.
- Page 6 X-seam (Sizing) Setup Measure from center of bottom bracket to front edge of outrigger tube. This measurement is “boom length” in the table below. Size Boom Length Chain Length X-Seam Range Short 16” 145” 36” - 41” Medium 18” 149” 38”...
- Page 7 Front Wheel Installation Tighten to 325 in. lbs. Apply grease to axle and axle bolt and tighten securely Rear and Front Derailleur Installation and Set High and Low Stops...
- Page 8 Brake Caliper Installation and Setup Tighten cap-screw until wheel doesn’t move (Number 1). This makes brake caliper setup easier. Loosen cap screw to desired steering resistance when finished. Proper setup: you should see day- light on either side of the rotor with caliper bolts tightened down.
-
Page 9: Tire Pressure
Tire Pressure Inflate tires before alignment! Tire pressure is indicated on the side-wall of of each tire. TIRE PRESSURE SHOULD BE CHECKED BEFORE EACH RIDE. Tie Rod Installation & Wheel Alignment RIGHT HAND SIDE OF TRIKE Hubmount M8 Flat Washer Hubmount M8 Flat Washer “L”... - Page 10 Measuring Front of Tire to Front of Tire 31” The measurement from front 14 11/16” 787mm to front should equal the measurement from back to back 373mm of tires.
-
Page 11: Front Idler Assembly
Idler Installation & Chain Installation Some parts omitted for clarity. Front Idler Assembly RIGHT SIDE LEFT SIDE Idler Spacer Idler Spacer OF TRIKE OF TRIKE Trike Frame M8 x90 Bolt M8 Lock Nut Idler Wheel Idler L Bracket Chain Routing - under both Idlers Rear Idler Assembly Return Chain - over outside Idler Idler L Bracket... - Page 12 Seat Clamp Installation Some parts are omitted for clarity. Right Side of Clamp Left Side of Clamp When assembling, use a generous amount of grease on the bolt threads. This will prevent galling and allow for easy adjustment.
- Page 13 Seat Mesh and Seat Installation Install the seat mesh on the seat frame. After the mesh is installed on the seat frame, tuck the excess strap back up into the buckles. Tighten seat frame bolts before tightening seat clamp bolts! Upper seat clamp bolt must be tightened enough to allow seat frame tabs to...
- Page 14 Cable Routing Right Handlebar Use the longer shift cable housing on the right. Use the shorter cable on the left. Left Handlebar Use the longer brake cable housing on left. Use the shorter cable on the right. Use zipties to secure cables to handle bar. Re ector Installation Front re ector on derailleur post...
-
Page 15: Serial Number
Serial Number Location Serial Number is located on the underside of the main frame. Serial Number TAM1103424... - Page 16 Your Sportster handlebars are adjustable in two different ways: 1) The stiffness/ease of steering can be adjusted - you can make your Sportster harder or easier to steer by adjusting your “Top Cap Bolts” (number 29 in the technical illustration on pg 18).
- Page 17 Seating Position Adjustment Your Sportster’s seat is adjustable on two different planes: incline/recline angle of the seat back and fore/ aft positions at the base. Your seating position can adjust anywhere from 35-70 degrees depending on where the seat bracket is located on the frame.
- Page 18 •Brake evenly using both hands. Your TerraTrike is designed with front brakes only. You will expe- rience brake-steer if you brake only one side. •Although your TerraTrike is suitable for riding on dirt roads if equipped with more rugged tires, it is not designed for all-terrain, off-road use, or canyoneering.
- Page 19 •Steering: All of the steering parts tend to settle in after the first 100 miles or so. This may require some tightening of nuts and bolts. •Cleaning: Your TerraTrike will operate for years to come if you keep it regularly cleaned and lubed! Water and soap won’t hurt your TerraTrike, provided you dry and lubricate right after cleaning. If you need to wash the seat mesh, remove it from the seat frame, wash it in the gentle cycle and let it air dry.
- Page 21 Seat Stay (Lower) M5 Lock Nut M5x12 Bolt (Socket Head) M5 Flat Washers Sportster Rear Frame Section M8 Nyloc Nut Rear Idler Assembly - See pg 8 for parts list Seat Clamp - See pg 18 for exploded drawing 20mm Flat Washer...
- Page 23 NOTES...
-
Page 24: Warranty Registration
COMPANY INFORMATION: TerraTrike (WizWheelz Inc.) 4460 40th St SE Grand Rapids, MI 49512 Email: sales@terratrike.com - for Ordering & Customer Service tech@terratrike.com - for Technical Assistance shipping@terratrike.com - for Shipping Inquiries Phone: 1-800-945-9910 or 1-616-455-5988 Fax: 1-616-455-6058 RESOURCES: ∙TerraTrike Forum - http://www.terratrike.com/forum/ ∙TerraTrike Blog - http://terratrike.com/blog/...
Need help?
Do you have a question about the Sportster and is the answer not in the manual?
Questions and answers