Advertisement
Quick Links
INSTALLATION MANUAL
Be sure to read this installation manual thoroughly prior to installation. If installation methods or nonstandard parts
not specified in this installation manual are used, accidents or injury may result.
Professional installation is required to install this system. ECLIPSE recommends you to have the system installed
at your retailer. Be sure to keep this manual after installation for later reference.
Customer should keep manual for reference.
Contents
Contents
Before
installation
Installation
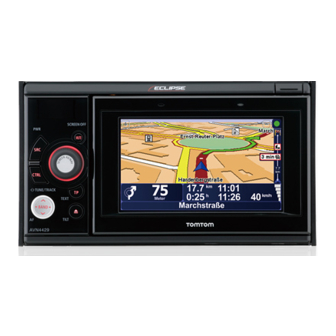
In-Car Audio Visual Navigation
MODEL
2
3
5
8
10
11
13
15
Advertisement

Related Manuals for Eclipse AVN4429


Summary of Contents for Eclipse AVN4429
-
Page 1: Table Of Contents
Professional installation is required to install this system. ECLIPSE recommends you to have the system installed at your retailer. Be sure to keep this manual after installation for later reference. -
Page 2: Components
Components Components Check that all of the following components are present Check that all of the following components are present Main unit components Main unit x 1 Interconnecting cable Interconnecting cable Interconnecting cable (Power and speaker connector) (Speed pulse, Parking, USB, (Reverse, Back-eye camera, (16P) x 1 iPod, etc) -
Page 3: For Your Safety In Using The Avn4429
VN4429 Warnings and caution signs, illustrated bellow, are posted throughout this manual as well as on the AVN4429. They show safe and correct ways to handle the main unit so as to prevent personal injury to you and others and avoid damage to property. - Page 4 • Avoid installing this main unit in places where it may get connector but pin configurations are incorrect for use with ECLIPSE main units and can damage the main unit. Prior to wet, such as near windows, or in places that are moist or powering up the main unit, please make sure the main unit dusty.
-
Page 5: Names And Functions Of Terminals
Names and functions of ter minals Names and functions of ter minals • Never cut the insulation on the power cable or use it to power any other equipment. If the rated current capacity of the power cable is exceeded, fire and electric shocks may result. •... - Page 6 Connect to a USB device such as a flash drive or digital audio player. Playback will not be possible even when the iPod is connected to the USB connector. Back-eye camera external input terminal (4P) Used with the ECLIPSE back-eye camera (sold separately). VTR output terminals Connect to the monitor with video input.
- Page 7 • iPod ® is a registeredtrademark of Apple Inc. in the U.S. and other countries. • "Made for iPod" means that an electronic accessory has been designed to connect specifically to iPod and has been certified by the developer to meet Apple performance standards. •...
-
Page 8: Connections Connecting The Vehicle Speed Pulse, Parking Brake, And Reverse Cables (Wires)
The locations where the vehicle speed pulse signal cable may vary depending on the vehicle model and grade. Ask the car dealer or your nearest ECLIPSE dealer for details. - Connecting point for the vehicle speed pulse signal (example) -... - Page 9 - Connecting point for the reverse signal (example) - Attach a splicing connector at this location • Be sure to connect the reverse signal cable. If it is not Reverse lamp connected, the vehicle position may be incorrect when the vehicle is reversed. •...
-
Page 10: System Connection Example
System connection e xample System connection e xample • Never cut the insulation on the power cable or use it to power any other main unit. If the rated current capacity of the power cable is exceeded, fire and electric shocks may result. •... -
Page 11: Installing The Gps Antenna
Installing the GPS antenna Installing the GPS antenna Notes on installation • The cables should be bound together with tape or a similar securing method (example: cable ties) so that they do not interfere with driving. If it becomes wound or entangled around parts such as the steering wheel, shifting lever, or brake pedal, accidents may result. - Page 12 Choose an installation location on the dashboard which is flat and has a clear view of the sky. • Select a location that is at least 50 cm. away from the main unit. If this is not done, the GPS measurement precision will drop.
-
Page 13: Installing The Main Unit
Installing the main unit Installing the main unit To maintain proper function, the unit must be mounted less than 30 degrees. If the angle is in excess of 30 Front degrees, DVD CD skipping and improper DVD CD ejection may occur. 30˚... - Page 14 If installing using the 2DIN installation kit (sold separately) Refer to the instructions provided with the kit (sold separately) for details on the installation method. If installing using the existing vehicle bracket and a multi-purpose bracket (such as for Japanese vehicles) Attach the brackets to the main unit.
-
Page 15: Checking Operation After Installation
Use the “GPS signal” gauge which is displayed in the lower-right corner of the map screen to check the reception status. Check that the gauge is white. "ECLIPSE" is a registered trademark of FUJITSU TEN LIMITED in 54 countries. - 15 -...
Need help?
Do you have a question about the AVN4429 and is the answer not in the manual?
Questions and answers