Craftmade Civic CI52 Installation Instructions Manual
Civic ceiling fans
Hide thumbs
Also See for Civic CI52:
- Specifications (1 page) ,
- Installation instructions manual (23 pages)
Advertisement
BETTER BY DESIGN
P.O. Box 1037
650 S. Royal Lane, Suite 100
Coppell, TX 75019
(800) 486-4892
8:00 to 5:00 CST (Central Standard Time)
Toll Free Fax: (877) 304-1728
email: customerservice@craftmade.com
www.craftmade.com
MEJOR DISEÑO
P. O. Box 1037
650 S. Royal Lane, Suite 100
Coppell, TX 75019 EE.UU.
(800) 486- 4892
8:00 a 5:00 CST (Hora local central)
Número de fax sin cargo: (877) 304-1728
Correo electrónico: customerservice@craftmade.com
www. craftmade.com
®
®
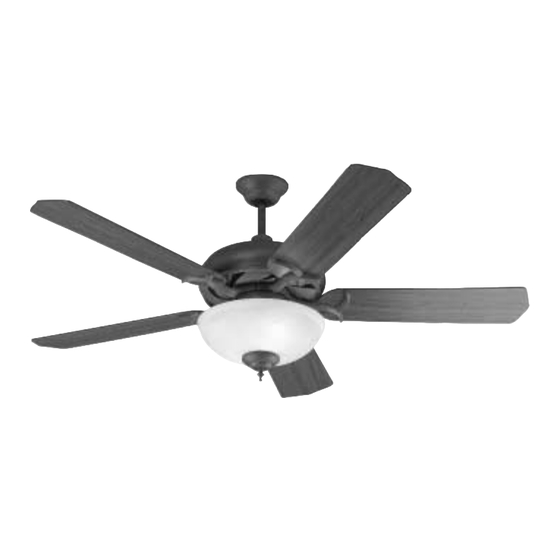
Civic Ceiling Fans
Ventiladores de
Installation Instructions
Models: CI52
Instrucciones de instalación
Modelos: CI52
®
BETTER BY DESIGN
Civic
CI52
®
MEJOR DISEÑO
Advertisement
Table of Contents

Related Manuals for Craftmade Civic CI52


Summary of Contents for Craftmade Civic CI52
-
Page 1: Installation Instructions
8:00 to 5:00 CST (Central Standard Time) Toll Free Fax: (877) 304-1728 email: customerservice@craftmade.com www.craftmade.com ® Installation Instructions MEJOR DISEÑO Models: CI52 P. O. Box 1037 650 S. Royal Lane, Suite 100 Instrucciones de instalación Coppell, TX 75019 EE.UU. Modelos: CI52 (800) 486- 4892 8:00 a 5:00 CST (Hora local central) Número de fax sin cargo: (877) 304-1728... -
Page 2: Before Assembly
Before Assembly Read and Save These Safety Precautions Make sure that the fan voltage (120) is compatible with your own electrical Turn off electricity at main switch before wiring or servicing fan in order to avoid system. possible electrical shock. Check to make sure that your carton contains all the parts mentioned in the All wiring must be in accordance with the National Electric Code (ANSI/NFPA parts list. -
Page 3: Preparation / Preparación
Downrod Installation Tornillos para madera B. Angle Mount (Normal Ceilings) S2. Screws (for Canopy) Craftmade Part #45AD (see dealer) Instalación con vara hacia abajo Tornillos (para la cúpula) (cielos rasos normales) S3. Bracket Screws & Washer Determine el método de montaje a usar. - Page 4 Step 3 / Paso 3 Step 5 / Paso 5 Check to make sure blades are at least 30” from any obstruction. Check Locate downrod assembly (#2). Loosen ball screw on black hanging ball downrod length to ensure blades are at least 7' above the floor. to free lock pin.
-
Page 5: Outlet Box
Step 7 / Paso 7 Step 6 / Paso 6 Lift fan onto the mounting bracket (#1). Turn housing until Position downrod so the hole in the downrod aligns with the hole in the hanging ball seats itself into ball socket (listen for click). coupling on the motor. - Page 6 Step 8/ Paso 8 Step 8 Continued…/ Step 8 Continuación… 1. Conecte los cables del ventilador a los del techo: el cable blanco del ventilador 1. Connect fan wires to ceiling wires: white fan wire to white outlet wire, con el cable blanco de salida, negro con negro y verde con verde. Se incluyen los black to black and green to green.
- Page 7 Step 10 / Paso 10 Step 11 / Paso 11 5 Blade Installation / Instalación de 5 aspas For blade assembly, position blade holder (#6), blade (#5) so that all screw holes are aligned (as shown in figure below). Using blade screws Remove rubber cushions, saving motor screws for blade installation.
-
Page 8: Optional Light Kit Installation
Operation Instructions / Instrucciones de uso Optional Light Kit Installation Instalación de la iluminación opcional Operation Instructions / Instrucciones de uso Remove three screws from side of switch hub (as shown in figure below). Remove hub cover from hub and pop out center plug. Carefully thread 1. - Page 9 Electrical Connections / Conexiones eléctricas Electrical Connections Continued… Conexiones eléctricas Continuación… Electrical Connections /Conexiones eléctricas Ground/ Tierra Connect black and blue (if provided) fan wires to black outlet wire. Connect White / Blanco white fan wire to white outlet wire and green grounding lead wire from the Black / Negro grounding conductor to the supply circuit (see figure A).
-
Page 10: Common Problems
Common Problems Problem A: Fan Will not Start Remedies: 1. Check fuse or circuit breaker and replace if necessary 2. Turn off electrical power and check all wire connectors. 3. Check on/off TCS and wall control selector switch. See operation instructions.
Need help?
Do you have a question about the Civic CI52 and is the answer not in the manual?
Questions and answers