Table of Contents
Advertisement
Quick Links
Download this manual
See also:
User Manual
Advertisement
Table of Contents

Related Manuals for Digitus DN-16023


Summary of Contents for Digitus DN-16023
- Page 1 IP Network Camera Pan/Tilt Remote Control & With Audio & Night Vision User’s Guide...
-
Page 3: Table Of Contents
Table of Contents 1. Overview 1.1 Product Description...................2 1.2 Product Feature....................2 1.3 Product Specification..................2 1.4 Product Accessories Include................3 1.5 System Requirement..................4 1.6 IP CAM exterior Function introduce.............4 1.7 TV_OUT Function introduce.................5 1.8 Product SET-UP....................5 2. Utilities and tools 2.1 CAM_EZ Search....................6 2.2 Use IP-CAM and test the image function for the first time........6 2.3 HOW TO SET UP IP CAM..................8 2.4 Setting the way to obtain the IP address of IP-CAM..........8 2.5 IP-CAM Network Framework Installation.............14... -
Page 4: Overview
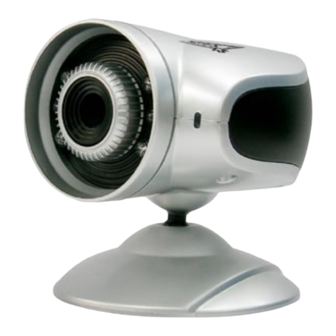
Overview 1.1 Product Description DN-16023 is an easy and effective IP Camera product for remote monitoring / administrating. The setup for this device is simply. Built-in Web server allows you to use web browser (e.g., Microsoft IE) through LAN or broadband network in any time and any place. -
Page 5: Product Accessories Include
Humidity : 5%~85% non-condensing 1.4 Product Accessories Include 1.DN-16023 IP-Camera 2.Power adaptor, 5V/ 1A Switching Power adaptor 3.Ethernet Cable (red), used to connect to the network card of PC for testing and configuring the product 4.Ethernet Cable (blue), used to connect to Hub, ADSL modem, IP Share 5.TV OUT A/V Cable... -
Page 6: System Requirement
1.5 System Requirement Processor: Intel Pentium 4 1.4GHz or above is recommended ® RAM: 256MB or above Operation System: Windows 2000 or Windows XP ® ® Hard Disk: Minimum 10MB or above Network Network Card: 10/100 base T ... -
Page 7: Tv_Out Function Introduce
1.7 TV_OUT Function introduce 1. First, insert the TV_OUT cable to the place as shown in Figure 1. 2. Next, plug in power adapter as shown in Figure 2. Press and hold Reset switch for three seconds. Then, release it. The IP-CAM will access into TV_OUT mode. 3.TV_OUT operation description: a.Hold to change mode: For the default setting for TV_OUT is NTSC system, if you want to use PAL system, please press and hold Reset switch about three seconds... -
Page 8: Utilities And Tools
Utilities and tools 2.1 CAM_EZ Search CAM_EZ Search is an IP search engine offered by this product. It can search IP CAM connected in LAN. Through sending the inquiry of broadcasting packets, after IP CAM responds the question, the window will display a list of all IP CAMs in the network. And it allows you to modify the network settings of specified IP CAM, such as IP address or IP CAM naming. - Page 9 IP CAM NOTEBOOK B.Check if the IP addresses for PC network and CAM_EZ Search are on the same network section: - Usually, static IP address will be used to access into Internet, so the IP address will vary. When you want to change IP address, please write down the original IP address on your computer first.
-
Page 10: How To Set Up Ip Cam
D.Open and execute CAM_EZ Search (as shown in Figure 2). The system will scan the IP-CAM that you just installed automatically. Then, you will find 255IP CAM in the column of Camera Lists. Click 255IP CAM with left mouse button. You can see the default settings for IP-CAM. - Page 11 - You computer must be equipped with network card and RT-45 network nnector. - Connect the RJ-45 terminator on the rear of IP-CAM to the red test network cable. One end is connected to the network card of computer; the other end is connected to the rear side of the IP-CAM.
- Page 12 Step 4. CAM_EZ Search V2.6 Type Fixed IP. Name : IP CAM 255 IP CAM IP Assignmet: STATIC : 211.78.174.94 Version: IP_CAM_V2.2_F5 SubMask :255.255.255.248 GateWay :211.78.174.89 HTTP Port:Http communication port. The default setting is 80. (If you have multiple IP-CAMs installed in the same network, you have to divide them with different Port numbers, e.g, 1025、1026、...
- Page 13 LAN HUB IP CAM ADSL/ CABLE MODEM NOTEBOOK - Connect the power adaptor to the power port (on the rear) of IP-CAM. Now, the status LED on the top of IP- CAM will light up. - Set up the connection way inside the PC network: Please go to Control Panel --->...
- Page 14 Step 5. CAM_EZ Search V2.6 Click Update. You can see 255 IP CAM. 255 IP CAM IP Assignmet: STATIC Step 6. Version: IP_CAM_V2.2_F5 Click 255 IP CAM. You can see the change of IP-CAM: Name:IP CAM IP:10.1.10.82 SubMask:255.255.0.0 GateWay:10.1.10.252 HTTP Port: Http communication port.
- Page 15 2.4-3 PPPoE - IP Address Setting - Access into monitoring screen of network by following the way stated in 2.2. - Click Network and open Network menu. Please choose PPPoE and key in the Account and Password. (the following example uses ADSL account from AT&T), press Submit to finish key in and then, please reboot and re-enter.
-
Page 16: Ip-Cam Network Framework Installation
2.5IP-CAM Network Framework Installation 1.IP-CAM Network Framework Installation 1 Way to access Internet Use Permanent ADSL or Cable Modem Physical IP Address Owns several physical IP addresses IP Share or LAN Hub General model is OK. Network Setup for IP -CAM LAN Enable / Manually Users with several physical fixed IP addresses Suitable Objects... - Page 17 2.IP-CAM Network Framework Installation 2 Way to access Internet Use Permanent ADSL or Cable Modem Physical IP Address Owns more than one IP address IP Share or LAN Hub Must be equipped with DHCP function LAN Enable / Manually Network Setup for IP -CAM Web Server Port Number, need to be adjusted Users with one physical fixed IP addresses, IP Suitable Objects...
- Page 18 3.IP-CAM Network Framework Installation 3 Way to access Internet Use dial-up ADSL or Cable Modem Physical IP Address Owns one float IP address (dispatched by ISP dynamically) IP Share or LAN Hub Must be equipped with DHCP and NAT functions LAN Enable / Manually Network Setup for IP -CAM Web Server Port Number, need to be adjusted...
- Page 19 4.IP-CAM Network Framework Installation 4 Way to access Internet Use Permanent ADSL or Cable Modem Physical IP Address Owns one physical IP address IP Share or LAN Hub Not necessary LAN Enable / Manually Network Setup for IP -CAM Web Server Port Number, no need to be adjusted Users with permanent ADSL, one fixed physical IP Suitable Objects address and one IP-CAM installed...
- Page 20 5.IP-CAM Network Framework Installation 5 Way to access Internet Use dial-up ADSL or Cable Modem Owns one float IP address (dispatched by ISP Physical IP Address dynamically) IP Share or LAN Hub Not necessary PPPoE function should be set, LAN Enable Network Setup for IP -CAM Web Server Port Number, no need to be adjusted Suitable Objects...
- Page 21 6.IP-CAM Network Framework Installation 6 Way to access Internet Use dial-up ADSL or Cable Modem Owns several float IP addresses Physical IP Address (dispatched by ISP dynamically) IP Share or LAN Hub Must be equipped with DHCP and NAT functions LAN Enable / Manually Network Setup for IP -CAM Web Server Port Number, need to be adjusted...
- Page 22 7.IP-CAM Network Framework Installation 7 Way to access Internet Use Permanent ADSL or Cable Modem Physical IP Address Owns one physical IP address IP Share or LAN Hub Must be equipped with DHCP and NAT functions LAN Enable / Manually Network Setup for IP -CAM Web Server Port Number, need to be configured Users with one fixed physical IP, IP Share and...
-
Page 23: Installation For Ip Share
2.6Installation for IP Share When IP-CAM is installed under IP Share, it can obtain CAM_EZ Search V2.6 a dynamic IP address from 255 IP CAM IP Assignmet: STATIC DHCP server. If you want to Version: IP_Cam_V2.2_F5 install the IP-CAM in WAN interface, you have to set a fixed IP address for the device. - Page 24 (4) Access into the web page of Virtual Server. Add the fixed IP address specified by CAM_EZ Search in step (1) and enable it. (Refer to Figure 4.1) Figure 4.1 (5) After adding the IP address, you can see jeffipcam1 in the virtual server list (refer to Figure 4.2).
-
Page 25: Internet Ip Sharing & Audio Setting
2.7Internet IP sharing & Audio setting Please use the following CAM_EZ Search V2.6 steps for setting up if your IP cam does not have Audio 255 IP CAM IP Assignmet: STATIC Version: IP V2.2_F5 Step 1, setting Audio Part : the Pre-setting is 1500 (setting range is 1500~65535) and press Submit... -
Page 26: Getting Started
Getting Started 3.1System Login The system login is the process of identifying all users trying to log into the system to confirm user identify and grant permission to access to the system’s functions. This system provides two layers of security access: “administer” and “general user”. After a successful login to the system, users can begin to access both surveillance and setting functions, Follow the steps below to log in as an ”admin”... -
Page 27: Liveview
3.2LiveView When using IP Cam for the first time, users must change the Internet Explorer security settings (please refer to settings step 3.2.1). Otherwise, the system will display the following warning, and be unable to display the surveillance feeds. After having successfully set up the IP CAM settings during the first use, users do not need to change the settings again for later use. - Page 28 Step 4. At this time, the computer should display a warning window, as shown above : Press “Yes” , to begin; Step 5. When the installation is complete, you may begin viewing the surveillance image for the first time, as shown below. IP CAM Note: This action loads ActiveX components from the IP CAM System to the local machine.
-
Page 29: Take A Shot
3.3Take a Shot This function allows users to capture the screenshot as a photo, and save it on the computer. Directions: Step 1. IP CAM Go to the menu, and go to the live image. Step 2: Hold down the Ctrl key on your keyboard;... -
Page 30: Image Adjustment
4.1 Image Adjustment After selecting an Image, you may change various image settings, as shown below: 4.2 AVI Record Setup By selecting “Record”, you can adjust the AVI Frame Rate settings ad file name. 4.3Zoom In display Using your mouse, click and drag out a box to select the portion of video that you wish to view as shown by the black box in the image below. -
Page 31: Motion Detection Setup
4.4Motion Detection Setup Setting up the Motion Detection (MD) values, including the first area (red border) and second area (green border). Please check to see whether the Event Trigger has been enabled. If so, you can set up Motion Detection as described below: - Reset MD range: Select motion detect 1or2, and hold down on the left mouse button (this will appear as the upper left corner of the MD range). -
Page 32: Advanced Application
Advanced Application This chapter explains the advanced settings for the IP CAM, including: - Image Setup -Capture View -Network Setup -Server Setup -Event Trigger Setup -Administration Setup -Software Update 5.1Image Setup This includes: - Resolution:Users can select between image resolution of 160x120, 320x240, and 640x480. -
Page 33: Capture View
5.2Capture View This view includes: -Manual capture of still images using LiveView. -Automatic capture of still images via MD. How to Use Capture View: Step 1. Click on to enter the menu. The menu is capable of saving up to 48 images, viewable on three pages of. -
Page 34: Event Trigger
5.3 Event Trigger This includes both event trigger settings and display, including: - Event:Entering events - Trigger:Setting trigger and picture capture times Detailed explanations are presented in the next chapter. 5.3.1Event Event settings, including: - Motion Detection (set 1) - Motion Detection (set 2) Individual or both set signal input triggers can be seleced. - Page 35 - Http Server port settings - Set the port of UDP Server and also Audio Port - DNS settings MAC Address:Displays the Mac address of the IP CAM 5.4.1 IP Assignment: Static IP Assignment refers to the fixed settings of the ISP or network engineering department.
-
Page 36: Server Setup
5.4.2 PPPoE This menu allows you to enter the dial-up settings during PPPoE IP assignment. This usually refers to entering your ID account name and password. Remember that you must also enter your ISP log-in settings. How to Setup PPPoE Step 1. - Page 37 5.5.1 Mail Server This refers to settings pertaining to sending image files via a mail server. You must also make sure that the Mail Image settings from are enabled to e-mail a file to the designated address upon event trigger. This system supports SMTP (Simple Mail Transfer Protocol) servers.
-
Page 38: Administration Setup
Step 3. Enter the account ID of the DDNS server in “Account ID” Step 4. Enter the DDNS server password in “Password” Step 5. Select the DDNS server connection status automatic display setting. Step 6. Click on Submit when you are finished. 5.5.4 NTP Server NTP(Network Time Protocol) allows you to calibrate the IP CAM timing. -
Page 39: Software Update
5.6.2 General User This menu allows you to change the account ID and password for general users. Using the General User settings: Step 1. Enter the user name in the “Account ID” field. Step 2. Enter existing password you wish to change in the “Old Password” field. Step 3. - Page 40 Step 8. After finishing update, please close the window of Internet Explorer and delete CSQ objects in the following path: My Computer\Control Panel\Internet Options\Settings…\View Objects…\CSQ Object Step 9. Re-login IP CAM and type the Account ID and Password. Step10. View Current Version to check if the upgrade is successful or not.
-
Page 41: Appendix
ppendix Appendix A. Using a PPPoE dialup Connection and DDNS with the IP CAM EZ IPCAM (Using a Hub ) This section is intended to help users connect to a computer to the IP CAM via a hub. It also describes how to connect to ADSL with a PPPoE type IP address and also how to connect to the IP CAM using DDNS. - Page 42 Step 5: If the application is successful, the following shall appear on your screen. domain MailFrom@com Step 6: domain After your application has been completed successfully, respond by E-mail to confirm, MailFrom@com and go back to http://www.dyndns.org/to enter your user name and password. Step 7: Go to Dynamic DNS from the “Account”...
- Page 43 Step 10: After the new hostname has successfully created, the following screen should appear: domain.gotdns.com 211.78.174.94 B. Connecting to the IP CAM EZ IPCAM with Your Home Computer (Using the CAM_EZ Search Tool) Step 1. Please connect the IP CAM EZ IPCAM to the HUB as shown in following chart: IP CAM LAN HUB ADSL/...
- Page 44 Step 3. Step 4. Go to My Computer > Control Panel Select “Internet Protocol (TCP/IP)”, and click > Network and Dialup Connection on the preferences (R). Click on “Ok”. > Local Connection > click on “Preferences (P)”. Step 5. Change the IP Address to 192.168.9.2. Change Subnet mask to 255.255.255.0.
- Page 45 IP CAM C. Changing the IP CAM EZ IPCAM Settings to PPPoE / Using DDNS Step 1. Select “Network” to open the network menu. Enter your account ID and password in the appropriate field in “PPPoE” (in this example, we have used Chung Hwa Telecom ADSL for your reference).
- Page 46 Step 3. At this time, you must change the IP settings of your home computer back to their original values (automatically retrieve IP address). To do this, click on “Network Neighborhood”, right click on the preferences (R). Select your local connection and right click to view the preferences (R).
- Page 47 D. Using the IP CAM EZ IPCAM with DDNS Viewer. Step 1. CAM_EZ Search V2.6 Open CAM_EZ Search, and Click on Update. Wait for 255 IP CAM IP Assignmet: STATIC about 60 seconds (actual Version: IP_Cam_V2.2_F5 time dependant on the quality of your connection), and the IP CAM EZ IPCAM should be detected automatically.
-
Page 48: Appendix B. Faq
Appendix FAQ: General questions for IP Camera What is IP Camera? IP Camera is an independent system that can connect to network or wireless network directly. It is different with general camera. It is an all-in-one system with built-in CPU and transmits high-quality video monitoring images via browser control and network. - Page 49 Why the time setting for the image is incorrect? Q10: Please confirm the setting of SNTP is correct or not, especially Gateway must be able to connect Internet. And make sure SNTP server can work normally. In addition, while initiating the system, it will connect to SNTP sever to synchronize watches. Later it will be performed again for every hour.
- Page 50 Page Error message is shown in the status bar on the left side of the web page of Q17: Internet Explorer. The ActiveX control was not downloaded and installed correctly for the IP Camera. Please check the security settings of Internet Explorer and close it. Restart Internet Explorer and try to browse and login again.
- Page 51 Please make sure IP address and communication port that you connect are correct. You can use CAM_EZ Search tool to inspect the settings of IP Camera. Please confirm the gateway settings of IP Camera matching the settings on gateway/router. It might be errors in the gateway, please refer to the description of the gateway.
Need help?
Do you have a question about the DN-16023 and is the answer not in the manual?
Questions and answers