Table of Contents
Advertisement
Quick Links
Advertisement
Table of Contents

Related Manuals for Digitus DN-16086


Summary of Contents for Digitus DN-16086
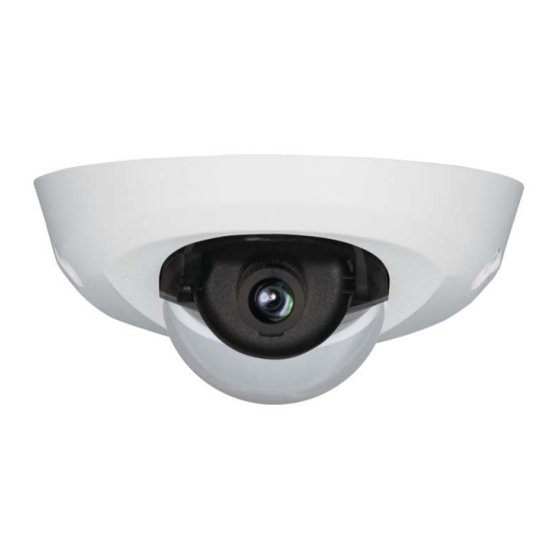
- Page 1 Full HD WDR Mini Dome IP Camera User’s Manual DN-16086 Ver. 1.0...
-
Page 2: Table Of Contents
Table of Contents Overview ..........................2 Features ........................2 Package Contents ......................3 Dimensions ........................4 Installation ........................5 Connectors ........................7 Camera Cabling ........................8 ... -
Page 3: Overview
Overview DN-16086 offers high definition resolution at full frame rate with progressive scan technology and edge enhancement for outstanding picture clarity. ONVIF (Profile S) compliance ensures hassle-free and flexible system integration. The camera is capable of serving real-time streaming and makes image quality more smoothly. -
Page 4: Package Contents
Packa age Co ontents Please c check the p package co ontaining t he followin ng items lis sted below. Full HD Multi-St treams Ultra a-WDR bber Washe er (x1, Casin Micro Dom me IP Camer Rubb er Washers s (x3, Basep late) ndoor / Outd oor (with Ca... -
Page 5: Dimensions
Dimensions The dimensions of the camera are shown below. -
Page 6: Installation
Installation Please follow the steps below to install the outdoor camera. Step 1: Loosen the two security screws of the camera and detach the dome cover. Step 2: At the two sides of the base plate, place a rubber washer on the screw hole shown in the right figure. - Page 7 Step 5: Attach the dome cover back to the camera and fasten the two security screws.
-
Page 8: Connectors
Connectors The diagram below shows the reset button, lens, microSD card slot and built-in microphone of the camera. Definition of each connector is given as follows. Designation Description Insert the microSD card into the card slot to store videos microSD Card Slot and snapshots. -
Page 9: Camera Cabling
Camera Cabling Before users connect cables, make sure that all cables and the power adaptor are placed in dry and well-waterproofed environments, e.g. waterproof boxes. The purpose is to prevent moisture accumulation inside the camera and moisture penetration into cables, which might lead to camera breakdown. Please follow the instructions below to complete camera connection. - Page 10 Step 2: Carefully remove a section of rubber coating from the end of the Ethernet cable to reveal the wires. Inset the wires to the correct pins of the connector. Plug the Ethernet cable to the connector of IP66 RJ-45 cable. Step 3: Fasten the RJ-45 IP66 plug to the connector of the IP66 RJ-45 cable.
-
Page 11: System Requirements
System Requirements To perform the IP camera via web browser, please ensure the PC is in good network connection, and meet system requirements as described below. Items System Requirement ® ® 1. Intel Pentium M, 2.16 GHz or ® Personal Computer Intel Core 2 Duo, 2.0 GHz... -
Page 12: Access Camera
Access Camera For initial access to the IP camera, users can search the camera through the installer program: DeviceSearch.exe, which can be found in “DeviceSearch” folder in the supplied CD. Accessing the Camera by Device Search Software Step 1: Double click on the program Device Search.exe. Step 2: After its window appears, click on the <Device Search>... - Page 13 Step 8: A prompt window requesting for default username and password will appear. Enter the default username and password shown below to login to the camera. Login ID Password admin admin NOTE: ID and password are case sensitive. NOTE: It is strongly advised that administrator’s password be altered for the security concerns.
- Page 14 Once the Viewer is successfully installed, the Home page of the IP camera will be able to correctly display as the figure below. NOTE: For more details about the function buttons on the Home page, please refer to the Camera’s Web UI Manual in the supplied CD.
-
Page 15: Setup Video Resolution
Setup Video Resolution Users can setup video resolution on Video Format page of the user-friendly browser-based configuration interface. Video Format can be found under this path: Streaming> Video Format. The default values of video resolution are as below. 1.3M H.264- 1280 x 720 (25/30 fps) + H.264- 1280 x 720 (25/30 fps) H.264- 1920 x 1080 (25 fps) + H.264- 720 x 480 (25 fps) H.264- 1920 x 1080 (30 fps) + H.264- 640 x 480 (30 fps) For more details about the combinations of video resolution, please refer to the... -
Page 16: Configuration Files Export / Import
Configuration Files Export / Import To export / import configuration files, users can access the Maintenance page on the user-friendly browser-based configuration interface. The Maintenance setting can be found under this path: System> Maintenance. Users can export configuration files to a specified location and retrieve data by uploading an existing configuration file to the IP camera. -
Page 17: Tech Support Information
Tech Support Information This chapter will introduce how to delete previously-installed Viewer in the PC and how to setup the Internet security. Delete the Existing Viewer For users who have installed the Viewer in the PC previously, please first remove the existing Viewer from the PC before accessing to the IP camera. Deleting the Viewer In the Windows <Start Menu>, activate <Control Panel>, and then double click on <Add or Remove Programs>. -
Page 18: Setup Internet Security
Setup Internet Security If ActiveX control installation is blocked, please either set Internet security level to default or change ActiveX controls and plug-ins settings. Internet Security Level: Default Step 1: Start the Internet Explorer (IE). Step 2: Click on the <Tools> tab on the menu bar and select <Internet Options>.
Need help?
Do you have a question about the DN-16086 and is the answer not in the manual?
Questions and answers