Table of Contents
Advertisement
Quick Links
Download this manual
See also:
User Manual
242Z
IP / CCTV
OUTDOOR SPEED DOME CAMERA
Quick Installation Guide
All lead-free products offered by the company comply with the requirements of the
European law on the Restriction of Hazardous Substances (RoHS) directive, which
means our manufacture processes and products are strictly " lead-free" and without the
hazardous substances cited in the directive.
The crossed-out wheeled bin mark symbolizes that within the European Union the
product must be collected separately at the product end-of-life. This applies to your
product and any peripherals marked with this symbol. Do not dispose of these products
as unsorted municipal waste. Contact your local dealer for procedures for recycling this
equipment.
Please read instructions thoroughly before operation and retain it for future reference.
Advertisement
Table of Contents

Related Manuals for Digitus DN-16055


Summary of Contents for Digitus DN-16055
-
Page 1: Quick Installation Guide
242Z IP / CCTV OUTDOOR SPEED DOME CAMERA Quick Installation Guide All lead-free products offered by the company comply with the requirements of the European law on the Restriction of Hazardous Substances (RoHS) directive, which means our manufacture processes and products are strictly “ lead-free” and without the hazardous substances cited in the directive. -
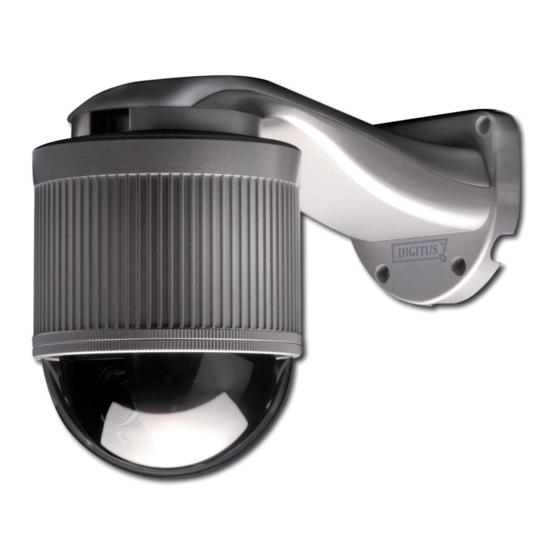
Page 2: Product Overview
OVERVIEW 1. PRODUCT OVERVIEW 1.1 Description This PTZ network camera series is a high-performance device for use in professional and demanding surveillance situation. It supports multiple network protocols for MPEG4 or MJPEG live video transmission, and you can easily view, record and operate the camera via the supplied video viewer software or the web browser. -
Page 3: Specifications
OVERVIEW 1.4 Specifications SPECIFICATIONS* DN-16055 ▓ Network LAN Port LAN Speed 10/100 Based-T Ethernet DDNS, PPPoE, DHCP, NTP, SNTP, TCP/IP, Supported Protocols ICMP, SMTP, FTP, HTTP, RTP, RTSP Frame Rate NTSC:30, PAL:25 Number of Online Users Security Multiple user access levels with password... -
Page 4: Connector Overview
CONNECTOR OVERVIEW 2. CONNECTOR OVERVIEW 2.1 CONNECTOR OVERVIEW CONNECTOR DESCRIPTION Power Connector Connect the DC 12V adapter for power supply. Video Output Connector Connect to the video input connector of your monitor with a video cable (i.e. a RCA line with the BNC connector, or a coaxial line) for video output. -
Page 5: Installation
INSTALLATION 3. INSTALLATION 3.1 Install the Hardware Before installation, you need the following items before installation: ‧ Bracket (supplied with the bracket sales package) ‧ The accessory packages supplied with the bracket sales package, including: (1) Wall mounting screws (2) Wall plugs (3) Cap (4) M6 Nylok screws (5) Spirit level... - Page 6 INSTALLATION STEP 3: Attach the PTZ network camera to the bracket. Turn the camera up side down, and put the power, video and RS485 data connectors through the hole of the bracket. Then, slightly secure the camera and the bracket with three M6 Nylok screws. STEP 4: Check the surface is horizontal or not.
- Page 7 INSTALLATION 3.3 Assign an IP address and Access the Camera Step 1. Install the Software Place the supplied Video Viewer AP software CD into your DVD- / CD-ROM drive. The installation process will automatically start. Follow the on-screen instructions to install the application programs. After installation, a “ Video Viewer”...
-
Page 8: The Live View Page
APPENDIX 1 DEFAULT VALUE 4. VIDEO VIEWER BASIC OPERATION 4.1 The Live View Page After setting up the network information, login user name and password, double-click “ ” on the PC desktop to open and log into the Video Viewer control panel. You will see a screen similar to the following with 6 major sections: ‧... -
Page 9: Address Book
APPENDIX 1 DEFAULT VALUE 4.2 Address Book This view is displayed when the Video Viewer is activated for you to login / out the network camera from the current address list, or search the available IP address as follows: Ø Ø... -
Page 10: Manual Record
APPENDIX 1 DEFAULT VALUE Ø Ø Click to search and view the available IP address(es) for the network connection. You can choose one address to add into the address book, edit the details, or update the address list. Button Function Description Select from the available IP address list, and click this button. - Page 11 APPENDIX 1 DEFAULT VALUE 4.4 Playback ” (Miscellaneous Control) → “ To play a recording, click “ ” (Status List), and select the “ Record” tab. A list of all the recordings will be shown by defaults, and you can also sort out the logs you want to speed up the search time. For details, please refer to your user manual.
Need help?
Do you have a question about the DN-16055 and is the answer not in the manual?
Questions and answers