
Related Manuals for MSSC QM2-101


Summary of Contents for MSSC QM2-101
-
Page 1: Operation Guide
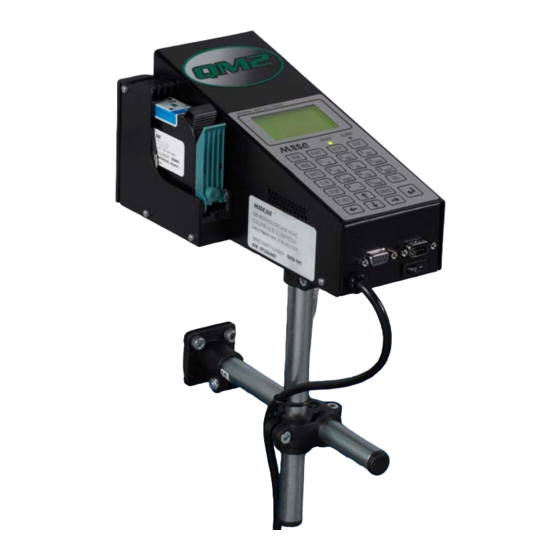
MSSC High Resolution Inkjet Printer Operation Guide QM2-101 QM2-111 (Print head bracketry sold separately) MSSC, LLC Collinsville, IL USA Tel: 618-343-1006 Fax: 618-343-1016 55899 Rev 18210 www.msscllc.com... -
Page 2: Table Of Contents
Installing Ink Cartridges ... 18 Cleaning the Print Head ... 18 Adjusting Screen Contrast ... 19 Adjusting the Photo Eye ... 19 HP Bulk Ink System Setup ...20 Troubleshooting ...25 Appendix...26 Feet/min. to meters/min Conversion Table... 26 Date and Hour Code Table ... 26 Key Assignments for Characters ... -
Page 3: Introduction
The QM2 Industrial Inkjet Printer operating manual provides the necessary information about the installation, operation, maintenance, and repair of your new inkjet printer. Dimensions and Specifications • All in one compact inkjet printer powered by HP Thermal Inkjet Technology Back-lit monochrome LCD screen • •... -
Page 4: Installation
Installation 1. Select the mounting location. Select a mounting location where there are guide bars on the conveyor. This will keep the print head at the correct distance of 1/8” (3mm) from the product preventing damage to the QM2. CAUTION: Avoid contact between the QM2 and the product as print quality may suffer. - Page 5 CAUTION: Never connect or disconnect the data cable with the QM2 powered on. Doing so may damage the printer and void the warranty. Connect the data cable to the print head and controller. Tighten the screw locks and route the cable in such a way as to avoid items that might cause damage to it.
- Page 6 This wire gives the static charge a direct path to ground preventing discharge through the controller’s or printhead’s sensitive electrical components. For the QM2-111, perform steps 1 and 2. For the QM2-101, perform step 2 only. 5a. Place large ring terminal of...
- Page 7 6. Install a QM2 print cartridge. Power must be off to install and remove the print cartridge. Please insert cartridge in horizontal direction to avoid damage to contacts. For more detailed instructions refer to pg. 15 of the QM2 Operation Guide. 7.
-
Page 8: Key Layout
Key Layout Special Information and Display Type Change Language Selection and Special Character Menu Run Key Message Selection and Editing Date Printing Setup Serial Number Setup or Consecutive Numbering QM2 setup Alarm Reset Navigation Keys MSSC, LLC Collinsville, IL USA Tel: 618-343-1006 Fax: 618-343-1016 www.msscllc.com... -
Page 9: Quick Startup
CAUTION: Never connect or disconnect the data cable with the QM2 powered on. Doing so may damage the printer and void the warranty. 2. Plug QM2 into proper power receptacle and turn the QM2 on using the on/off switch. - Page 10 (05-13), dot density (1-8), Font (2 to choose from), print direction as viewed from behind the printer, and the line speed in meters/minute must be entered by user. The width, density and speed are interrelated. If the settings are not acceptable the QM2 will not allow you to leave this window.
-
Page 11: Operation
Operation NOTE: Pressing the RUN key from any menu will return you to the main screen. However any unsaved changes will be lost. Settings Menu Language 1. From main screen press the FONT key. 2. Use the ↑ and ↓ keys to select desired language. 3. -
Page 12: Expiration Offset
Inserts the second digit of a 2 digit day format. 07-20-07 Inserts a 1 character date code. (See date and hour code table in the appendix) 07-K-07 Inserts the first digit of a 2 digit hour in 24 hour format. 14:53 Inserts the second digit of a 2 digit hour in 24 hour format. -
Page 13: Setup Menu
Setup Menu To access the setup menu press the STUP key. This sub menu allows the user to specify the ink cartridge volume as well as when the QM2 generates a low ink alarm. To set the ink volume: 1. Press STUP key 2. -
Page 14: Dt Tune
DT Tune The DT Tune sub menu is where adjustments to date code formatting are made. The settings in this menu apply to all messages printing dates. • MX SIZE: Sets the number of characters in month code. For a value of 2, a two digit number corresponding to the month is printed. -
Page 15: Serial Numbers/Consecutive Numbering
CNT DOTS: Displays the number of dots in a message and the volume of ink needed for each • printing. • SEL NOZZL: This setting controls what channels are used to print. o AUTO: (Recommended) the QM2 selects the best nozzle configuration based on operating conditions. -
Page 16: Editing And Selecting Messages
Editing and Selecting Messages The QM2 has space for 100 different messages. To access the message menu press the MSG key. Editing/Creating Messages To create or edit a message: 1. From the main screen press the MSG key. 2. Select EDIT and press ↵. 3. -
Page 17: Inputting Chinese Characters (Available In English Menus Only)
Inputting Chinese Characters (Available in English menus only) During message creation pressing the FONT key twice accesses the library of 30 simplified Chinese characters for insertion into a message. Use the arrow keys to select the desired character press ↵ to select and insert into the message. - Page 18 Creating or Editing 2 Line Text with Adjustable Spacing using 1. If the character is not already inserted in the message being edited, press the FONT key character and press ↵. and select the 2. Select icon in edit window and press MSG. 3.
-
Page 19: Maintenance
1. Always turn off the QM2 before installing or removing an ink cartridge. 2. Never connect or disconnect the print head data cable with the power on. Doing so may damage the printer and void the warranty 3. Never disassemble the QM2. There are no user serviceable parts inside. -
Page 20: Adjusting Screen Contrast
Adjusting Screen Contrast If the screen is difficult to read the contrast may need to be adjusted. 1. Remove cap plug from right side of machine. 2. Using a small flat blade screwdriver, rotate the adjustment screw clockwise to lighten or counterclockwise to darken. -
Page 21: Hp Bulk Ink System Setup
HP Bulk Ink System Setup Note: Never exceed 10 inches (254 mm) height difference between printer cartridge and reservoir. Never hold reservoir above printer cartridge. Bulk Ink restraint set-up using the flange clamp Bulk Ink restraint set-up using the base clamp... - Page 22 MSSC, LLC Collinsville, IL USA Tel: 618-343-1006 Fax: 618-343-1016 55899 Rev 18210 www.msscllc.com...
- Page 23 MSSC, LLC Collinsville, IL USA Tel: 618-343-1006 Fax: 618-343-1016 55899 Rev 18210 www.msscllc.com...
- Page 24 MSSC, LLC Collinsville, IL USA Tel: 618-343-1006 Fax: 618-343-1016 55899 Rev 18210 www.msscllc.com...
- Page 25 MSSC, LLC Collinsville, IL USA Tel: 618-343-1006 Fax: 618-343-1016 55899 Rev 18210 www.msscllc.com...
-
Page 26: Troubleshooting
No Print – FIRE on display but no print. Hot Plug Issue, customer connects or disconnects data cable of the 111-style printer with power on. Generally the driver board must be replaced at a minimum. Parameter Settings Are Not Valid – Software will not allow the user to exit the parameter screen until the settings are corrected. -
Page 27: Appendix
Appendix Feet/min. to meters/min Conversion Table ft/min Date and Hour Code Table Date Distance conversion: 1 inch = 25.4 mm MSSC, LLC Collinsville, IL USA m/min 10.7 12.2 13.7 15.2 16.8 18.3 19.8 21.3 22.9 24.4 25.9 27.4 29.0 30.5 Code Tel: 618-343-1006 www.msscllc.com... -
Page 28: Key Assignments For Characters
Key Assignments for Characters ALL LANGUAGES ENGLISH A B C 2 a b c Ä Â Æ ä å æ GERMAN A B C 2 a b c Ä ä FRENCH A B C 2 a b c  À â à FINNISH A B C 2 a b c Å... -
Page 29: Sample Message Instructions
Sample Message Instructions Follow the directions below to enter the above sample message. NOTE: to save space in the manual single key strokes are shown. It will be necessary to press a single key multiple times to arrive at the desired character. 1. -
Page 30: Accessories And Parts
Accessories and Parts Mounting Hardware 55325 55335 55345 55355 Bulk Ink System 55955 55950 Ink Cartridges 55900 55901 55902 55903 55904 55975 55350 Other 55500 MSSC, LLC Collinsville, IL USA Remote Print Head Mounting Kit Heavy Duty Mounting Clamps Heavy Duty Flange Clamp Heavy Duty Joint Clamp Bulk Ink Restraint Bulk Ink System (370 cc);... -
Page 31: Exploded Views And Saleable Parts
Exploded Views and Saleable Parts QM2 Controller MSSC, LLC Collinsville, IL USA PART NUMBER RP55420 QM2 Driver Board with Software DB Standoff RP55110 QM2 Display Board & Keypad Board 3mm Spacer x4 RP55120 QM2 Photo Sensor, 0-10CM Sensing Range (standard) RP55122 QM2 Photo Sensor, 0-30CM Sensing Range (special) - Page 32 QM2 101 Printhead MSSC, LLC Collinsville, IL USA PART NUMBER RP55470 QM2 Pen Driver Board Universal RP55165 QM2 HP Pen Stall with Latch RP55160 QM2 Printhead Guard with Hardware RP55003 QM2-101 Printhead Enclosure Tel: 618-343-1006 Fax: 618-343-1016 www.msscllc.com PARTS LIST...
- Page 33 QM2 111 Printhead MSSC, LLC Collinsville, IL USA PART NUMBER RP55160 QM2 Printhead Guard with Hardware RP55165 QM2 HP Pen Stall with latch RP55470 QM2 Pen Driver Board, Universal RP55490 QM2-111 Printhead Interface Board, Universal RP55495 QM2 Datacable, 1.5 meter with...
-
Page 34: Creating Logos For The Qm2
Creating Logos for the QM2 For logos to work with the QM2, they must: 1. be a monochrome Bitmap (.bmp) file. 2. have a height of 32 pixels. 3. be saved as grimgX.bmp, X being the logo number (0-9). 4. be transferred using the QM2 Download Kit (MSSC P/N 55500). MSSC, LLC Collinsville, IL USA Tel: 618-343-1006 Fax: 618-343-1016... -
Page 35: Mssc, Llc Collinsville, Il Usa Tel: 618-343-1006 Fax: 618-343-1016 55899 Rev
MSSC, LLC Collinsville, IL USA Tel: 618-343-1006 Fax: 618-343-1016 55899 Rev 18210 www.msscllc.com...
Need help?
Do you have a question about the QM2-101 and is the answer not in the manual?
Questions and answers