Table of Contents
Advertisement
Quick Links
Advertisement
Table of Contents

Subscribe to Our Youtube Channel
Related Manuals for MSSC Smart-Jet Plus


Summary of Contents for MSSC Smart-Jet Plus
-
Page 1: User Manual
Pro Pack Solutions, Inc. 770-554-1187 www.ProPackSolutions.com USER MANUAL... -
Page 2: Table Of Contents
MINIMUM PC REQUIREMENTS .................... 33 CONNECT SMART-JET PLUS TO PC ..................34 Install Smart-Jet Plus software on your PC- Contact: strope@msscllc.com ..........34 Install Drive for Smart-Jet Plus Printer Controller on PC ................. 36 Smart‐Jet Plus Manual v04 | 2015‐07‐30 | by MSSC, LLC... - Page 3 You should hear a beep and computer will search for driver............Uses of Smart-Jet Plus Controller Interface .................... Create new message ..........................46 Install Smart-Jet Plus Convert Logo (create logo under .hex format) (Contact: strope@msscllc.com) ..Using Smart-Jet Plus Convert Logo ......................
-
Page 4: About Smart-Jet Plus
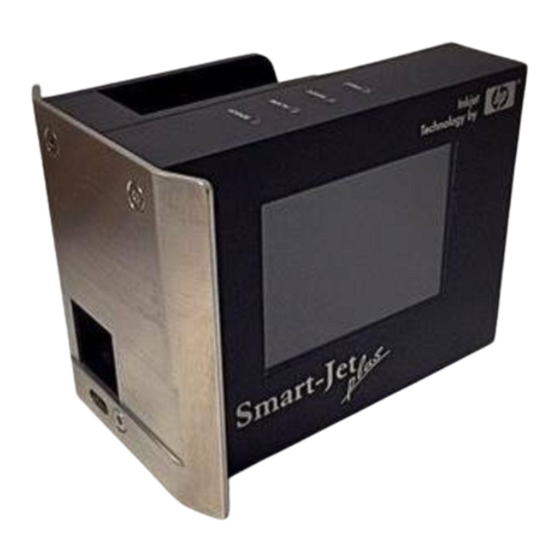
ABOUT SMART-JET PLUS Thank you for purchasing the Smart-Jet Plus Thermal Inkjet Coder, a product of MSSC, LLC. This printer is designed for packaging printing applications powered by HP Thermal Inkjet Technology. The Smart-Jet Plus is capable of being controlled via PC connection to print variable data and barcodes, Wi-Fi connection via mobile devices running on iOS operating systems, and wireless keyboards. -
Page 5: Feature Menu
Reset messages. About From the main screen of Smart-Jet Plus, use the , ,, arrow keys to move the cursor to the desired object. Press Enter to save and apply settings. Otherwise, press ESC. Message Insert Fields into your message: ... - Page 6 Operation Start: Start printing Stop: Stop printing Purge: Clean the print head Connect PC / Disconnect PC: Connect and disconnect Smart-Jet Plus with PC Settings Speed: Set print speed for the Smart-Jet Plus Resolution: Set your desired resolution ...
- Page 7 Main ports 1. USB flash port for updating firmware, fonts and logo 2. For Wireless Keyboard receiver 3. For PC Connection 4. For External sensor, Encoder, etc… 5. Power supply Smart‐Jet Plus Manual v04 | 2015‐07‐30 | by MSSC, LLC...
-
Page 8: Wireless Keyboard Definition
Time, String, Barcode, and Shift into the message Backspace Delete your message from right to left Move your cursor faster Home/End Move your cursor to Home/End INSTALLATION PROCEDURES MOUNTING THE BRACKETS Smart‐Jet Plus Manual v04 | 2015‐07‐30 | by MSSC, LLC... - Page 9 Step 1: Installing the clamps to the side of the conveyor Smart‐Jet Plus Manual v04 | 2015‐07‐30 | by MSSC, LLC...
-
Page 10: Mounting Options
Step 2: Installing the clamps to the round bar MOUNTING OPTIONS Select the suitable bar length Horizontal setup Smart‐Jet Plus Manual v04 | 2015‐07‐30 | by MSSC, LLC... - Page 11 Vertical setup Step 1: Step 2: NOTES: Make sure the brackets are mounted firmly to avoid vibration and sway of the print head. This will affect the print quality. Smart‐Jet Plus Manual v04 | 2015‐07‐30 | by MSSC, LLC...
-
Page 12: External Device Connection
EXTERNAL DEVICE CONNECTION NOTES: - Smart-Jet Plus is able to operate with External Sensor, and Encoder. Consult your supplier for further support on the settings and connections. - To connect Smart-Jet Plus with External Sensor, Encoder, etc…, an additional connector DB15 (male) will be required. -
Page 13: Encoder
Connect Dry - Contact Switch to Smart-Jet Plus using external power supply. ENCODER An encoder is recommended to ensure the best print quality regardless the inconsistent speed of conveyor. OUTPUT Output: active at 0V Output 14 is available for additional device installation with Smart-Jet Plus. -
Page 14: Rs485 Protocol
The Diagram connects some machines to RS485 network with PCL and PC to control the printer. The PC needs to use some converters to support RS485 protocol. CASE A: use the PC as MASTER with USB to RS485 converter. Smart‐Jet Plus Manual v04 | 2015‐07‐30 | by MSSC, LLC... - Page 15 Step 3 Build a PLC/PC application (NOTE: You need developer to do this) use our RS485 commands detail. Then send command to machines. Please ask us to get this commands detail. Smart‐Jet Plus Manual v04 | 2015‐07‐30 | by MSSC, LLC...
-
Page 16: Quick Startup
Wi-Fi router Smart Devices Smart-Jet Plus Application PC Connection Cable Smart-Jet Plus Software Email: strope@msscllc.com Driver Encoder (P/N: 80865) External Sensor (P/N: 80870) Smart‐Jet Plus Manual v04 | 2015‐07‐30 | by MSSC, LLC... - Page 17 On Smart-Jet Plus printer’s main menu screen, go to Settings > WI-FI > ON. The printer will then begin searching for available wireless networks to connect to. Once the preferred network appears on the screen arrow down and press enter. Then follow the next steps that include security (password) which only support WPA or WPA2 (NOT WEP), and confirming the connection between the printer and router.
- Page 18 Insert Information Connect Smart-Jet Plus to PC Be sure you have a PC plugged in connected with Smart-Jet Plus via a USB A-B cable. Install Smart-Jet Plus Printer Controller and Driver Smart-Jet Plus on your PC From the main screen of Smart-Jet Plus, go to Operation and select Connect to PC to connect Smart-Jet Plus with PC ...
-
Page 19: Smart-Jet Plus Operation
Smart-Jet Plus with wireless keyboard. From the main screen of Smart-Jet Plus, use , , , arrow keys to move the cursor to Settings and begin implementing initial setups for the machine. Press Enter to save and apply settings. - Page 20 » ¼ ½ ¾ ¿ × Ø Þ In the input section on Smart-Jet Plus, press Insert and use or arrow keys to move the cursor to Symbol and press Enter. Use the arrow keys to move your cursor to the desired object and press Enter to insert the symbols into message.
- Page 21 Printing on certain package a chain of digits, the first 3 digits are the number of the box containing the package; the last 3 digits are the order of the package within the box, let’s Smart‐Jet Plus Manual v04 | 2015‐07‐30 | by MSSC, LLC...
- Page 22 Up/Down: Up Fill zero: Enable Fill zero: Enable The two counters will be printed as below: NOTES: Press Enter to apply each setting Setup Counter 1, then Counter 2 Smart‐Jet Plus Manual v04 | 2015‐07‐30 | by MSSC, LLC...
- Page 23 Example: If your manufacture date is 03/09/2013 and your product will be expired in 1 year, you are required to input 365 at Expired. Smart-Jet Plus will automatically calculate the expired date and insert into the message. Time: Insert current time into the message Current time must be setup in System clock while in the Settings menu.
- Page 24 Press Enter after each value change to save and apply settings. Dynamic: Insert dynamic barcode into message Type: select your desired Barcode Code 39 Code 215 Code 128 Code 93 UPC-A Codabar Code 11 Smart‐Jet Plus Manual v04 | 2015‐07‐30 | by MSSC, LLC...
- Page 25 Press ESC to go back to the main screen. Confirm Yes to save message. Information Display settings and status of the printer. From the main screen of Smart-Jet Plus, select Message and use arrow keys to go to Information and press Enter.
-
Page 26: Operation
Select Start to print. Your message content along with other setting parameters will be displayed while printing. : Number of prints that have been printed - Prints : Current speed (m/min) - Speed Smart‐Jet Plus Manual v04 | 2015‐07‐30 | by MSSC, LLC... -
Page 27: Settings
Smart-Jet Plus will be synchronized with conveyor speed to ensure the best print quality. Ensure you have an encoder installed with Smart-Jet Plus via the DB15 connector in port (#4). There are 3 Speed options for the Smart-Jet Plus while utilizing the Encoder feature: ... - Page 28 Update Logo: Update logos or images from USB flash to the printer memory. Be sure your new logos are available on your USB flash. Smart‐Jet Plus Manual v04 | 2015‐07‐30 | by MSSC, LLC...
- Page 29 Logos stored on your USB flash must be processed by our Smart-Jet Plus_ConvertLogo application. Smart-Jet Plus accepts logo with .hex format only. All logos must be named in order as LOGO1, LOGO2, LOGO3, and LOGO4 as showed below. To receive this program:...
- Page 30 ON or turn OFF Wi-Fi (see Quick Startup pg.15). Update Fonts: Update different fonts and character sizes for Smart-Jet Plus. There is one font at a time on Smart-Jet Plus. Smart-Jet Plus supports the following fonts while working with wireless keyboard.
- Page 31 Select your desired font/sizes (1 to 5) and press Enter to begin updating. FONT1 on your USB will replace FONT1 on the printer memory and the same with other fonts. Smart-Jet Plus accepts font/sizes with .hex format only. All font/sizes must be named as showed below.
-
Page 32: Operation With Wi-Fi Via Mobile Devices
Control Smart-Jet Plus printer via Wi-Fi connection by using mobile devices such as iPhone and iPad. From the Settings menu on Smart-Jet Plus, use arrow keys to go to Wi-Fi and press Enter. Use and arrow keys to turn ON Wi-Fi. -
Page 33: Procedure In Detail
After connecting Smart-Jet Plus to Wi-Fi network successfully, install the application on smart devices to control the Smart-Jet Plus. With iOS devices (iPhone and iPad): Go to App Store (Key words: smart-jet, MSSC), or scan QR code. iTunes: iPhone link: https://itunes.apple.com/vn/app/smart-jet/id582523668?mt=8... -
Page 34: Connect Smart-Jet Plus To Pc
CONNECT SMART-JET PLUS TO PC Install Smart-Jet Plus software on your PC- Contact: strope@msscllc.com 1: Extract Smart-JetPlusSetup.rar 2: Install Smart-JetPlusController.msi 3: Select Next Smart‐Jet Plus Manual v04 | 2015‐07‐30 | by MSSC, LLC... - Page 35 4: Browser to allocate your source store. Select Next 5: Select Next Smart-Jet Plus Manual v04 ǀ 2015-07-30 ǀ by MSSC, LLC...
- Page 36 6: Wait for installation to complete Smart-Jet Plus Manual v04 ǀ 2015-07-30 ǀ by MSSC, LLC...
-
Page 37: Install Drive For Smart-Jet Plus Printer Controller On Pc
2. Input Startup Setting by link: Troubleshoot / Advance options / Startup settings / Restart. 3. From Startup Setting screen, press 7 to Disable driver signature enforcement. Wait for the operating system to complete. Smart-Jet Plus Manual v04 ǀ 2015-07-30 ǀ by MSSC, LLC... -
Page 38: Install Driver
3. You should hear a beep and computer will search for driver. 4. Extract Driver for Smart-Jet Plus.rar 5. Install Driver. From your desktop, right click at the bottom left corner of the screen, select Device Manager. Smart-Jet Plus Manual v04 ǀ 2015-07-30 ǀ by MSSC, LLC... - Page 39 6. Right click on Thermal Inkjet Coder devices, select Update Driver 7. From Update Driver Software window, select Browse my computer for driver software Smart-Jet Plus Manual v04 ǀ 2015-07-30 ǀ by MSSC, LLC...
- Page 40 8. Browse to driver for Smart-Jet Plus, select Next 9. Select Install this driver software anyway to install. Wait for installation to complete Smart-Jet Plus Manual v04 ǀ 2015-07-30 ǀ by MSSC, LLC...
-
Page 41: Uses Of Smart-Jet Plus Controller Interface
Plug in Smart-Jet Plus and connect it to your PC via a USB A-B cable. From the main screen of Smart-Jet Plus, use the arrow keys to move to Operation and press Enter. Then go to Connect to PC and press Enter. If Disconnect to PC is displayed, your Smart-Jet Plus and PC are connected. - Page 42 This value is adjustable from 5s to 1,000s Encoder: Encoder is recommended to optimize maximum print quality. Turn ON Encoder to operate Smart-Jet Plus with encoder. Print speed of Smart-Jet Plus will be automatically synchronized with conveyor speed. This can be controlled by selecting one of the 3 encoder options: Fast, Real, and Slow.
- Page 43 Input distance from external sensor to the print head, the set Delay Before and After print to have your message printed at the desired position. Continue: Smart-Jet Plus will print continuously when a sensor is triggered for the first time. When Continue mode is applied, distance between the messages on the same object should to be set.
- Page 44 New template: Create new message Open: Open message from PC Save template: Save message to PC Export to .tiff files: Export message in Tiff format. Delete: Delete object Cut: Cut object Copy: Copy object Smart-Jet Plus Manual v04 ǀ 2015-07-30 ǀ by MSSC, LLC...
- Page 45 Redo: Recover last actions 3. TOOLS: See operation history of Smart-Jet Plus Purge: Jet the ink and clean the print head Ink Cost: Calculate ink cost Event Log: View using firmware history Smart-Jet Plus Manual v04 ǀ 2015-07-30 ǀ by MSSC, LLC...
-
Page 46: Create New Message
Select OK to save settings and begin designing message. NOTES: Be sure the objects are completely located in the template. Any parts projected out of this section will not be printed. Smart-Jet Plus Manual v04 ǀ 2015-07-30 ǀ by MSSC, LLC... - Page 47 Position of the text can be aligned in 2 directions: Vertical Alignment and Horizontal Alignment Vertical Alignment: Top, Center, and Bottom Horizontal Alignment: Left, Center, Right Smart-Jet Plus Manual v04 ǀ 2015-07-30 ǀ by MSSC, LLC...
- Page 48 Rotate Object: Click to select the object. Then move the cursor to the blue dot on top of the object. Hold and begin rotating. You might need to move the object a bit to see the blue dot. Smart-Jet Plus Manual v04 ǀ 2015-07-30 ǀ by MSSC, LLC...
- Page 49 Gridlines: To make sure all objects in the designing section in line, click on the object and drag. A blue line will appear as you are dragging the objects. Smart-Jet Plus Manual v04 ǀ 2015-07-30 ǀ by MSSC, LLC...
- Page 50 Click to select Barcode. Then click on tab Barcode. A new window will appear, select to set the parameters on the barcode. 1. Select your desired barcode type at Barcode Type. See references at Encode Data to create your barcode. Smart-Jet Plus Manual v04 ǀ 2015-07-30 ǀ by MSSC, LLC...
- Page 51 No barcode will be generated if the data input is incorrect. Barcode : Creating a barcode by repeating the same steps from Static Text. Variable barcode can also be created from this section. Smart-Jet Plus Manual v04 ǀ 2015-07-30 ǀ by MSSC, LLC...
- Page 52 Select Barcode and click on the designing section, the window below will appear to set parameters for the barcode. To create a variable barcode, select tab Variable Barcode. Otherwise, select Data to create a static barcode. Smart-Jet Plus Manual v04 ǀ 2015-07-30 ǀ by MSSC, LLC...
- Page 53 Smart-Jet Plus Manual v04 ǀ 2015-07-30 ǀ by MSSC, LLC...
- Page 54 The firmware supports to create up to 5 shift codes. To create each shift code with any two digits: number, letter or symbol. Select font, size and then select time to display shift code. Smart-Jet Plus Manual v04 ǀ 2015-07-30 ǀ by MSSC, LLC...
-
Page 55: Install Smart-Jet Plus Convert Logo (Create Logo Under .Hex Format) (Contact: Strope@Msscllc.com)
Install Smart-Jet Plus Convert Logo (create logo under .hex format) (Contact: strope@msscllc.com) Step 1: Extract Smart-JetPlusConvertLogo.rar provided by your supplier. Double click to begin installing. Step 2: Browse to save, click Next Smart-Jet Plus Manual v04 ǀ 2015-07-30 ǀ by MSSC, LLC... - Page 56 Smart-Jet Plus Manual v04 ǀ 2015-07-30 ǀ by MSSC, LLC...
- Page 57 Step 3: Click Next and wait for installation to complete Step 4: Installation complete. Click to close Smart-Jet Plus Manual v04 ǀ 2015-07-30 ǀ by MSSC, LLC...
-
Page 58: Using Smart-Jet Plus Convert Logo
Using Smart-Jet Plus Convert Logo Double click Smart Jet Plus Convert Logo shortcut to open the application. Go to Browse to select your desired Logo Adjust logo size and release Normal Inverse Smart-Jet Plus Manual v04 ǀ 2015-07-30 ǀ by MSSC, LLC... -
Page 59: Product Warranty
Click to save your logo. Click OK to finish converting. PRODUCT WARRANTY The Product Warranty for the Smart-Jet Plus is effective for 12 months from delivery date. Brackets, keyboard, power supply, and anti-shock mechanism are excluded from the warranty. The warranty is VOID if: 1. -
Page 60: Appendix
INK CARTRIDGE MAINTENANCE Print head cleaning: While the Smart-Jet Plus is working, ( If the print quality is degraded), please check on the ink level in the cartridge: If the cartridge is out of ink, change the new cartridge. -
Page 61: Purging
Printing alone may be insufficient in removing ink plugs from the nozzles. See the description above about how to run the Purge function in the printer. Smart-Jet Plus Manual v04 ǀ 2015-07-30 ǀ by MSSC, LLC... -
Page 62: Ink Cartridge Storage Procedure
Close the container tightly. Wipe and/ or purge the printer cartridge next time it is used until getting the good print quality is achieved. Smart-Jet Plus Manual v04 ǀ 2015-07-30 ǀ by MSSC, LLC... -
Page 63: Smart-Jet Plus Faq
2. If it cannot purge, then there may a software conflict. Go to msscllc.com and download the newest software version. Then update according to proper procedures as prescribed in the owner’s manual. Smart-Jet Plus Manual v04 ǀ 2015-07-30 ǀ by MSSC, LLC... - Page 64 Turn off the printer and turn it back on. c. If using a different type of router, it is possible the Smart-Jet Plus Printer will not be able to recognize it. For best results, you must use the Linksys E1200 router.
-
Page 65: Operating The Printer
Wi-Fi. For example, if you have a “work” router with internet, and you named your Smart-Jet Plus router “Sj,” double check that your phone/tablet did not switch back to “work”, when you had it on “Sj” earlier. This happens occasionally. -
Page 66: Update Firmware Instructions
1. USB flash disk: - Prepare USB flash disk less than 4GB. - Format USB flash disk with file system FAT and allocation unit size 64 Kbytes. See photo below Smart-Jet Plus Manual v04 ǀ 2015-07-30 ǀ by MSSC, LLC... - Page 67 - Extract “FirmwareSmart-Jet Plus.rar” to USB flash disk. (Contact: strope@msscllc.com) - Insert USB flash disk into the Smart-Jet Plus printer. 2. Update firmware: - From the main menu, use the arrow keys to go to Settings About Update firmware ...
-
Page 68: Wireless Device, Apple (Ios)
Connecting the Printer to the Device After opening the MSSC app, go to the Printers tab and select Search on the bottom blue bar on the screen. A printer should appear on the screen as a blue box with a name, select this box and a menu of options should appear. - Page 69 Customer service contact information is also on this page for questions on setup difficulty on the Smart-Jet Plus. Further Difficulties with App Installation Refer to pages 27-28 for the connecting of compatible WI-FI routers and app installation information. Smart-Jet Plus Manual v04 ǀ 2015-07-30 ǀ by MSSC, LLC...
-
Page 70: Smart-Jet Plus Replacement Parts
80955 Smart-Jet Plus, Bulk Ink Restraint Ink Tray 80893 Smart-Jet Plus, Pen Driver Board Internal Cartridge Board Smart Jet Plus: Current Housing Smart Jet Plus: New Housing (S/N: SJP15261001 and Newer) Smart-Jet Plus Manual v04 ǀ 2015-07-30 ǀ by MSSC, LLC...
Need help?
Do you have a question about the Smart-Jet Plus and is the answer not in the manual?
Questions and answers