Advertisement
Quick Links
Century Optional Upgrades
CNC Machined Aluminum
Color Gelcoat FRP
Servo Arm
Canopy w/Fin Set
Pack
Century proudly introduces our
highest Quality FRP colored canopy
w/ Fins (Blue, Yellow & Green) for
all 30/46 SE
(Raven 30/50)
To completely eliminate
slop on control surfaces
(for plastic servo outputs).
CN2242AP Red, Yellow, Blue
CN2189A
(Fut) Arm set
CN2242G
Canopy w/ Fins Green
CN2185A
(JR/Air) Arm set
CN2242B
Canopy w/ Fins Blue
CN2242Y Canopy w/ Fins Yellow
CN2181A
(Hitec) Arm set
CRASH KIT
Reversible One Way &
Hex Start
our kits will save some of you hard earned
System
cash. We have crash kits available for 30 and
50.
Adapts to starter shaft push into rubber
insert. For all 30/46 SE (come with
CN2230HS Crash Kit - 30
adapter).Extension adapts to most starters.
CN2230FS Crash Kit - 50
CN0427
One way hex start
( Includes tailboom, Wood blades,
CN0427WD extension only
Flybar, Main Shaft & Head Spindle )
Hot Dog 3-D C
Neon Glow Color
arbon Fin set
Hot Dog
Paddles
3D switchless inverted pilots
must try out these lightning
quick paddles! 3& 4 mm.
CN2079Y
Neon Yellow 3mm - 30
3D Hot Dog pilot can't miss this light
CN2079R
Glow Red 3mm - 30
and durable carbon fiber tail fin set.
CN2079O
Glow Orange 3mm - 30
CN2079YA
Neon Yellow 4mm - 50
CN2079RA
Glow Red 4mm - 50
CN2240H Hawk carbon fin set
CN2079OA
Glow Orange 4mm - 50
Carbon Fiber Tail Boom
O.S. Throttle Extension
(Raven 30/50)
3D flying has high demands from
Aluminum C.N.C. machined
your helicopter, a carbon tail boom
exceeds all standards for strength and
throttle extension (purple andized)
stiffness.
CN2153
32SXH, 46FXH & TT36H
CN2126H Carbon fiber tail boom 30
CN2154 50SXH
CN2126F Carbon fiber tail boom 50
CNC Machined Finish
Tuff landing Gear Systems
Cap & Washer
(Raven & all 30 heli)
(Raven 30/50)
3 times tuffer than most 30-40
Boy! these caps and washers make
size helicopter landing gear.
you look like a " PRO" (colors:
Tuff struts act as shock absorb-
Silver, Red, Blue, Gold, Purple,
ers which help reduce jolts
Green, Black 10pcs/pack)
caused by hard landings.
CN2217
(screw cap)
CN2243 Tuff landing gear
CN2218
(nut washer)
Speed Torpedo HV II
Aluminum Turbo
Tuned Muffler
Cooling Fan
(Hawk, Falcon &
Raven)
Finally a more powerful, larger,
Increased 15% air flow, lower
quieter tuned muffler come out to
engine drag and smoother high
improve your engine performance.
speed operation.
CN3033
for R30
CN2202A Turbo cooling fan
CN3033B
for R50
2oz Header Tank w/ CNC
Millenium Tuned Pipe
Machined Mount or Die-
cut Mount
Feature the highest performance
CN2137
CN2213
and quality construction for all
the Raven 30 and 50 class.
CN2213 Machined Mount
CN3055H for R30
CN2137 Die Cut Mount
CN3055F for R50
Carbon Graphite
10mm Hot Dog Main
Shaft Thrust B.B. Kit
Tail Boom Support
Any pilot moving into 3D or
Super high quality, extremely
aerobatics should miss this item.
light weight and ready to install
Transfers all loading from the regular
dual tail boom support kit.
radial bearings to the thrust bearing.
CN2128 Carbon Tail Struts R30
CN2220A Thrust Kit 10mm
CN2128C Carbon Tail Struts R50
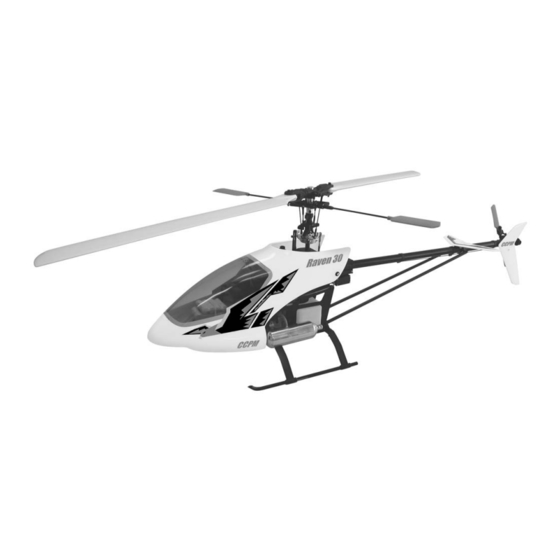
Raven
Instruction Manual
SPECIFICATIONS
MAIN ROTOR
TAIL ROTOR DIAMETER
OVERALL LENGTH
HEIGHT
BLADES
ENGINE
Century Helicopter Products
Designed and Developed in USA
3rd Edition, Copyright June 2006. All rights reserved.
30/50 V2
R30
R50
550mm
600mm
9.7 in
9.7 in
46 in
47.5 in
15 in
15 in
550mm
600mm
32 ~ 40
50
Advertisement

Related Manuals for Century Helicopter Products Raven 30 V2


Summary of Contents for Century Helicopter Products Raven 30 V2
-
Page 1: Instruction Manual
BLADES 550mm 600mm ENGINE 32 ~ 40 (Raven 30/50) Century Helicopter Products 3D flying has high demands from Aluminum C.N.C. machined Any pilot moving into 3D or Super high quality, extremely your helicopter, a carbon tail boom aerobatics should miss this item. - Page 2 Raven Replacement Parts CN2230HS Raven 30 Crash Kit -(Wooden Main Blades, Main Shaft, HI3133A Clear Windshield ( for HI3130B Canopy) Table of Contents Tail Boom, Feathering Shaft and Flybar) HI3138A Fuel Tank w/ Fittings CN2230FS Raven 50 Crash Kit -(Wooden Main Blades, Main Shaft, HI3145 Ball Links (16 L, 6 S) Tail Boom, Feathering Shaft and Flybar)
- Page 3 Use the eleva- tor stick to control the Forward & Backward. Century Helicopter Products 1740-C Junction Ave. (4) Roll (Aileron): If at hover the helicopter San Jose, CA. 95112 tends to move left, move the trim right, if the www.centuryheli.com...
- Page 4 Starting the engine for the first time. Necessary Items “Not Included” in the kit The model engine is the single most difficult part of model helicopters to the beginner, second only to learning to fly. For this reason we have taken the time to go through starting the engine the first time with you to help you to understand the basic operation and tuning of the engine.
- Page 5 Before Flying your Helicopter Raven 30/50 Construction Manual Before each flight, check that all bolts and screws are tight. Simply flying your helicopter, will loosen any screws which are not threadlocked or secured with a lock nut. This manual has been written for both the Raven 30 and 50 helicopter. CN1060 Raven 30 kit and First Flights For the beginner pilot, a training pod is strongly recommended to assist in learining to CN1061 raven 50 kit.
- Page 6 Tail Rotor Setup Step 1 Rotor Head Block Damper Rubber x 2 What separates airplane radio equipment from the [HI3181] For each flight mode setting, there will be different From parts bag 1: Press in the helicopter version is in the control of the individual Revo-mixing amounts.
- Page 7 Final Adjustments - Radio Setup STEP 3 Main Blade Grip Assembly 6x13 Ball Bearing Main Rotor [CNBB1360] From parts bag 1: R30 insert the slide Blade Grip tube into the bell mixer arm (Note: Now that the servo installation into the helicopter is finished the following pages should be reviewed. As [HI3184] the oilite bearings various types of radios can be used to setup the helicopter, some of the following information may not apply.
- Page 8 Radio Components & Balancing STEP 5 Flybar Control Arm Assembly Flybar Control Arm x 2 Flybar Control Double Studded Steel Ball x 2 Optional Equipment From parts bag 1: Using an available Arm x 2 Gyro Control Arm Stand-off x 2 PG2000 II Piezo Gyro M3x12 Button Head Screw, insert ap- Having completed all the assembly for the helicopter, all that remains...
- Page 9 Step 46 Canopy & Decals STEP 7 Washout Assembly The Canopy has a line molded into the plastic to follow when trimming the windshield part out, be Before starting, carefully apply two or three drops of CA to the seam between the top and bottom oilite bushings and the plastic washout hub.
- Page 10 Step 45B Care and installation of Hurricane Carbon Blades - Raven 50 The Main Rotor Blades included in Raven 50 the kit are pre-finished and balanced carbon rotor blades. Care Step 9 M5x10 must be taken in handling composite blades to keep them in excellent condition. Do not compress any portion Starting Shaft Bearing Blocks Collar of the blade from the trailing edge to the center spar as it is hollow.
- Page 11 Step 44 Throttle Linkage Step 11B Torque Drive Pinion Gear From Bag 4: Attach one steel ball and one 2mm nut, to both the Throttle servo horn and the Throttle From parts bag 2: Using threadlock, insert one M3x4 Extension from Step 18 using threadlock. Position the ball at 10mm from the center of the servo and in Set Screw (Tip 1) into the gear, note where the the outermost hole on the metal throttle arm.
- Page 12 Step 42 Rotor Head Linkage When attaching all pushrods, make sure same length pushrods are actually the same length from the From parts bag 2: Assemble the Constan Tail Drive Gear Assembly (R50), start by pressing the shaft Blade grips shown ‘0” beginning otherwise it will be difficult later to figure through the Counter Gear then selide two M5x7x2 spacers, then slide the two M5x13 Ball Bearings.
- Page 13 Step 13 Main Gear Assembly R30 Step 41 CCPM Swashplate Linkage There are three servos are mounted on the front and rear servo brackets. They work together to tilt the The Main Gear is pre-assembled with the Auto-Rotation Bearing installed. From parts bag 2: The swashplate producing the collective pitch, roll cyclic pitch (aileron control) and the fore-aft cyclic pitch (eleva- Main Shaft has a step in the end of the shaft that is inserted through the auto-rotation assembly.
- Page 14 Servo Setup & Adjustments Step 15 Upper Side Frames From parts bag 2: Install two 4x4mm Set Screws (do not apply locktight at this time) in the Mast Stop- In the steps 41 through 42 over the next few pages the pushrod hardware will be mounted to the servos horns per (note the raised inner diameter must face the ball bearing) and slide the mast stopper on the main shaft and ultimately the pushrods themselves.
- Page 15 Step 16 Upper Frame Assembly & Front CCPM Servo Mounts Step 40 Pushrod Setup and Adjustments Insert two long Hex Spacers at the specified locations in the diagram, note that the front hex spacer is Make up all the control pushrods according to the specified lengths shown in the table. Please note that installed into the forward-most hole.
- Page 16 Step 39 CCPM Radio Review & Setup Install both CCPM front servos at this time, with the output shaft of Servo The next section covers setting the pushrods and servos that will control the helicopter. It is important at this the servos positioned upwards and the servo flange inserted from mount tabs time that you review the instructions provided with your radio that controls the ccpm mixing for the 3...
- Page 17 Step 38 Tail Fins & Support Struts Step 18 Clutch, Fan & Engine Mounting Position two of the pushrod guides infront of the M3X12 Self Engine Horizontal Fin Set From parts bag 3, remove all parts horizontal fin and one behind. Attach the Horizontal Tapping Screw x 2 Thrust Washer [HI3067A]...
- Page 18 Step 20 Fuel Tank Assembly Grease to be used inside the tail gearbox should be a teflon or light lithium type of grease com- From parts bag 3, insert the two pieces of aluminum tubing through the large cap, rubber stopper and small monly found in a hobbyshop.
- Page 19 Step 22 Servo Frame Assembly Step 35 Tail Gearbox Assembly Servo Frame Set [HW3115C] From parts bag 5, assemble the servo tray using four M3x10 Socket M3x6 Self M3x16 Socket Cap 3x12mm Self Tapping Screws (Tip 3) into the lower Cap Screw Tapping holes of the battery tray.
- Page 20 Step 34B Torque Tube Drive Shaft Assembly & Pushrod Guides Step 24 Final Rotor Head Assembly Slide the washout assembly from Step 6 onto the main shaft. Slide the nylon sleeve over one 3x15mm Packaged with the tailboom is the carbon torque tube drive shaft assembly. The is a complete assem- Socket Cap Screw and insert through the anti-rotation bracket into the remaining open hole in the bly ready to be installed into the helicopter.
- Page 21 Step 26 Landing Gear Assembly Step 32 Tail Blades Assembly From parts bag 6, assemble the landing gear by attaching the Aluminum Skids through the Struts, securing them with four 3x5mm Set Screws. Set the distance from the rear of the skid to the strut at 35mm. Attach the Snap the ball on the tail rotor landing gear to the main mechanics using four 3x16mm(30) or 3x20mm(50) Machine Screws inserted from grip into the adjoining pitch...
- Page 22 Step 28 Tail Pitch Plate Assembly Step 30 Tail Gearbox Assembly From parts bag 7: The Tail Pitch Plate and Tail Pitch Ball Links are pre-assembled. (Note: apply Tail Pitch Plate From parts bag 7, slide some JB weld to the outside of the lock ring to avoid the assembly loosening.) Apply a drop Assembly two Ball Bearings on each of CA glue between the edge of the brass tube and the plastic pitch plage.
Need help?
Do you have a question about the Raven 30 V2 and is the answer not in the manual?
Questions and answers