Table of Contents
Advertisement
Quick Links
Download this manual
See also:
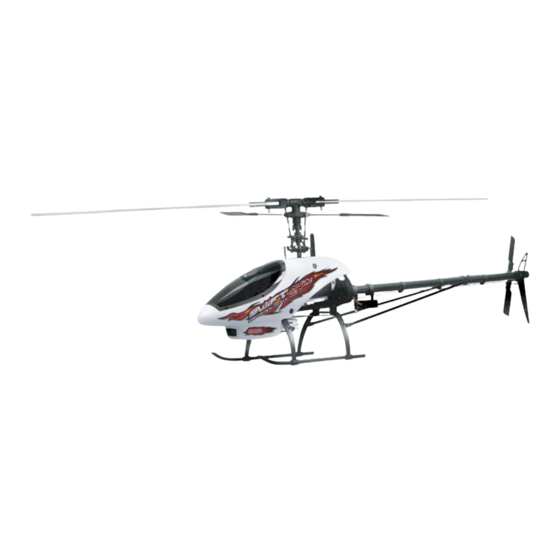
Instruction Manual
Specifications
Main Rotor Blades.............................................................................................................................520mm
Tail Rotor Diameter...............................................................................................................................21cm
Length..................................................................................................................................................105cm
Height..............................................................................................................................................34.4cm
Weight.................................................................................................................................................1.56kg
Speed Control............................................................................................................................75/95 Amp
Motor............................................................................................................................................1440kV
Battery...............................................................................................................................4S Li-Po 20C/30C
Pinion.......................................................................................................................................................10 tooth
Head Speed.....................................................................................................................1600 - 2100 RPM
Radio System........................................................................................................Elite 2.4GHz 6 Channel
Charger.........................................................................................................Standard AC Wall Charger
Century Helicopter Products
Designed and Developed in USA
1st Edition August 2008 All rights reserved.
Advertisement
Table of Contents

Subscribe to Our Youtube Channel
Related Manuals for Century Helicopter Products Swift


Summary of Contents for Century Helicopter Products Swift
-
Page 1: Specifications
Height..............................34.4cm Weight..............................1.56kg Speed Control..........................75/95 Amp Motor............................1440kV Battery..........................4S Li-Po 20C/30C Pinion...............................10 tooth Head Speed........................1600 - 2100 RPM Radio System......................Elite 2.4GHz 6 Channel Charger......................Standard AC Wall Charger Century Helicopter Products Designed and Developed in USA 1st Edition August 2008 All rights reserved. -
Page 2: Warranty Period
• Sub trim The Elite 6 is not only perfectly suited for the Swift 100% RTF it can also be used to fly just about any size and type of model due to its full-range and programming capabilities. And although the Swift 100% RTF is nearly ready-to-fly right from the box, please take the time to read through this manual for tips on battery safety and charging, control checks, adjustments and more before attempting your first flight. -
Page 3: Flight Checklist
FLIGHT CHECKLIST CENTURY SWIFT 100% RTF Please note this checklist is not intended to be a replacement for the content included in this instruction manual. Although it can be used as a quick start guide, we strongly suggest reading through this manual completely before proceeding. - Page 4 CENTURY SWIFT 100% RTF CONTENTS Box Contents • Swift 100% Ready To Fly Helicopter • Elite 6 2.4GHz Spread Spectrum Technology Receiver • 4S1P 3300mAH Li-Po Battery • 4 Cell Li-Po Charger • Elite 6 2.4GHz Radio • Blade holder •...
-
Page 5: Battery Guidelines
BATTERY GUIDELINES CENTURY SWIFT 100% RTF While the 4S 3300mAh Lithium Polymer Battery included with your Swift 100% RTF features Charge Protection Circuitry, you MUST read the following safety instructions and warnings before handling, charging or using the Li-Po battery. - Page 6 This will prolong the life of the Li-Po battery. The 75-amp brushless ESC installed in your Swift 100% RTF model features a “soft” low voltage cutoff (LVC) that occurs when the battery reaches 14.4V under load.
-
Page 7: Lithium Polymer Battery Safety
DO NOT store fully charged or discharged batteries in your helicopter. When cutting wires, always cut ONLY ONE WIRE AT A TIME. ** Century Helicopter Products will not be liable for any damages that may occur to your helicopter due to any misuse or mishandling as explained above. - Page 8 Your Electron ESC The Electron ESC provided with your Swift 100% RTF is a full featured ESC. It is a revolutionary electric speed controller dedicated full size R/C applications. The Electron is the result of years of research and development. The Electron has multiple, complex, yet easy to program built-in functions, gentle to the gears and pilots can program the Electron in the field with ease and comfort.
- Page 9 ESC GUIDELINES CENTURY SWIFT 100% RTF Reversing the motor The motor turning direction can be reversed at any time by revering the two red/black power wires connected to the motor. (DO NOT REVERSE POLARITY FROM THE BATTERY CONNECTOR AT ANY TIME) How it works 1.) Turn on your transmitter.
- Page 10 If you start moving the rudder servo before the gyro has a chance to initialize, the gyro will not be able to find where “center” is on the rudder servo thus providing improper rudder control. This will make the Swift 100% RTF appear to be out of control in flight. If...
- Page 11 3.) Confirm that all connections are still intact. Check the wire going from the ESC to the receiver. If the ESC will not arm after confirming the details listed above, contact Century Helicopter Products Support staff at 408-451-1155 before proceeding.
-
Page 12: Transmitter Diagram
TRANSMITTER DIAGRAM CENTURY SWIFT 100% RTF From the box, the transmitter is set up as shown. All knobs and toggle switches can be programmed in the optional transmitter pro- gramming software and cable. Make sure to install the an- tenna when using the trans- This knob controls the gyro sensitvity. - Page 13 Once the battery has been properly positioned, fasten the hook and look strap around the battery for added security. Although each Century Swift 100% RTF model is control tested at the factory, it is a good idea to test the controls prior to the first flight to ensure none of the servos, linkages or other parts were damaged during shipping and handling.
- Page 14 CENTURY SWIFT 100% RTF CONTROLS Position the helicopter to view it from the left or right side. Move the left-hand stick up and down to check the collective pitch control. Front of Helicopter When the stick is pushed up, the swashplate should rise, increasing the pitch of the main blades.
- Page 15 CONTROLS CENTURY SWIFT 100% RTF While viewing the helicopter from the rear (tail boom toward you), move the right-hand stick left and right to check aileron roll control. When the right-hand stick is pushed to the left, the swashplate should also tilt left.
- Page 16 CENTURY SWIFT 100% RTF BINDING When powering on and you find that you do not have control of the helicopter, it may be possible that you need to bind your transmitter to the receiver in your heli. To do this, you must follow these steps: 1) Plug the binding jumper into the receiver on the helicopter 2) Connect the Li-Po batter to the ESC on the helicopter.
- Page 17 CENTURY SWIFT 100% RTF If you are not familiar with the primary flight controls of your Swift 100% RTF, please take a few minutes to familiarize yourself with them before proceeding and before attempting your first flight. The left-hand stick on the transmitter controls both throttle/collective pitch (climb/descend) and rudder or tail (yaw left/right).
-
Page 18: Flight Controls
FLIGHT CONTROLS CENTURY SWIFT 100% RTF Moving the left-hand stick to the left will turn (yaw) the nose of the helicopter to the left about the axis of the main shaft. This is accom- plished by changing the pitch of the tail rotor blades. - Page 19 FLIGHT CONTROLS CENTURY SWIFT 100% RTF The elevator trim can be used to help keep the helicopter from drifting forward or backward when in hover with no elevator stick input. For example, if the helicopter drifts forward when in hover, click the elevator trim lever downward until the helicopter hovers as level as possible with no forward drifting.
- Page 20 FLIGHT CONTROLS CENTURY SWIFT 100% RTF The right-hand stick controls both elevator (pitch fore/aft) and aileron (roll). Pushing the stick forward will pitch the nose of the helicopter downward, allowing the helicopter to be flown forward. P.19...
-
Page 21: Preflight Checklist
CENTURY SWIFT 100% RTF Although each Swift 100% RTF model is factory assembled and tested, you should check the following before making your first flight: Check the security of all screws and control/linkage balls on your model. Tighten any screws and control/linkage balls that may be loose and replace any screws, control/linkage balls or other parts that may be stripped. - Page 22 Swift 100% RTF, we suggest that your first and subsequent test flights be made outdoors in low-wind conditions only. While it is possible for the Swift 100% RTF to be flown windy conditions, we strongly suggest that it only be flown in windy conditions once you become accustomed to your Swift’s flight characteristics.
-
Page 23: Maintenance
CENTURY SWIFT 100% RTF MAINTENANCE To keep your Swift 100% RTF in optimal and safe flying condition, routine maintenance is highly recommended. Some of the most important things to check are as follows: • Ball Links: Before each flying session, check to see that the plastic ball link ends are secure, but not tight (binding), on the linkage/ control balls. -
Page 24: First Flight
Always fly your Swift in an open area and at least 25 ft away from yourself or any person or animal. During a hover, you should be able to establish if the helicopter is drifting forward or backwards or left or right. -
Page 25: Radio Control
CENTURY SWIFT 100% RTF AMA RULES & REGULATIONS General 1) I will not fly my model aircraft in sanctioned events, air shows or model flying demonstrations until it has been proven to be airwor- thy by having been previously, successfully flight tested. -
Page 26: Exploded View Diagrams
EXPLODED VIEW DIAGRAMS The following diagrams are shown to indicate reassembly of your Swift 100% RTF in the event of a crash or rebuild. Due to the con- stant changes and improvements in manufacturing, some illustrations may not look exactly like their counterparts that are currently in production. - Page 27 CENTURY SWIFT 100% RTF EXPLODED VIEW DIAGRAMS Head Block Brass Spacer M8x7x3 (CNE522) Rubber Dampener (CNE520) Feathering Shaft (CNE521) Button Head M3x6 Linkage Ball (CNM3x6BH) (CNLR1014) Head Block (CNE517) Tie Bar (CNE519) Bearing 3x10x4 Seesaw Offset Plate (CNBB1030) (CNE519) Seesaw Shaft...
- Page 28 CENTURY SWIFT 100% RTF EXPLODED VIEW DIAGRAMS Adjusting the Flybar Equal flybar length on Flybar outer flat spot each side Flybar control arms must Flybar outer flat spots align with be level with Seesaw. Set flybar control arms when arms screws face upward.
-
Page 29: Main Frame Assembly
CENTURY SWIFT 100% RTF EXPLODED VIEW DIAGRAMS Main Frame Assembly Set Screw M4x4 (CNM4x4SS) Upper Shaft Collar (CNE511) Upper Bearing (CNBB1019) Anti Rotation Bracket (CNE506) Anti-Rotation Bracket (CNE506) Cap Screw M3x10 (CNM3x10CS) Upper Bearing Block (CNE507) Cap Screw M3x25 Cap Screw M3x20... - Page 30 CENTURY SWIFT 100% RTF EXPLODED VIEW DIAGRAMS Tail Gear Box Assembly Button Head Screw M3x14 (CNM3x14BHCS) M3 Locknut Tail Blade Grip (CN540) Linkage Ball (CNLR1014) Bearing M3x8x3 Bearing 3x8x3 (CNBB038) (CNBB038) Set Screw M3x4 Cap Screw M3x16 (CNM3x4SS) (CNM3x16CS) Rotor Hub...
-
Page 31: Tail Transmission Assembly
CENTURY SWIFT 100% RTF EXPLODED VIEW DIAGRAMS Tail Transmission Assembly M4x30 Pin (CNE533) M3x10 Cap Screw (CNM3x10CS) Upper Transmission Case (CNE542) Do not over tighten M3x4 Set Screw Brass Spacer M4x6x.25 (CNLR1006) Transmission Gear (CNE533) Bearing 4x10x4 (CNBB4102) Tailboom (CNE532) Tail Belt Drive Brass Spacer M4x6x.25... - Page 32 CENTURY SWIFT 100% RTF EXPLODED VIEW DIAGRAMS Tail Component Assembly M3 Locknut (R) Gear Box (CNE528) Lock Pin M2x13 Self Tapping Screw M3x8 (CNE529) (CNM3x8ST) Tail Gear (CNE529) Horizontal Fin Tail Shaft (CNE535) (CNE530) M3 Locknut (L) Gear Box Fine Thread Screw M2x10...
- Page 33 CENTURY SWIFT 100% RTF EXPLODED VIEW DIAGRAMS Landing Gear Assembly Cap Screw M3x18 Cap Screw M3x25 (CNM3x18CS) (CNM3x25CS) (L/R) Main Frames (CNE503) Set Screw M3x4 Landing Gear Spacers (CNM3x4SS) Hint: Place strut into a cup of (CNE512) warm water, if skid does not slide through the hole of the strut.
-
Page 34: Replacement Parts
HI3179 CNE528 Flybar Control Arms Bell Mixer Set Flybar Flybar Paddles Tail Gear Box CNE533 CNE529 CNE530 CNE531 CNE532 Transmission Gear With Tail Gear Box Gear Tail Rotor Shaft Swift 16 Tail Drive Belt Swift Tail Boom With Pin P.33... - Page 35 CENTURY SWIFT 100% RTF REPLACEMENT PARTS CNE534 CNE535 CNE536B CNE537 CNE538 Rudder Control Rod Fin Mounts Aluminum Fin Set Tail Pitch Slider Tail Pitch Lever CNE543 CNE539 CNE540 CNE541 CNE542 Tail Boom Support Tail Rotor Hub Tail Blade Grips Tail Rotor Blades...
- Page 36 CENTURY SWIFT 100% RTF UPGRADES/ACCESSORIES CNE557-2 CNE557 CNE557-1 CNE556-1 CNE566-2 Main Blade Grip Arm CNC Blade Grip Main Blade Grip Only CNC Main Rotor Hub Only CNC Washout Guide (1pc) Only CNE567S CNE564S CNE558S CNE559S CNE560S CNC Tail Boom Clamp...
- Page 37 CENTURY SWIFT 100% RTF UPGRADES/ACCESSORIES CN260762 CN25080 CN265666 CN265501 CN265166C Rotortech Carbon Carbon 80mm Tail Rotortech Carbon Rotortech Carbon Rotortech Carbon 515mm 75mm Tail Blades Blades 550mm Main Blades 560mm SG 3D Blades Main Blades CNMG512 CNMG511 CNMG510 CNMG509 CN25510...
- Page 38 CENTURY SWIFT 100% RTF NOTES P.37...
- Page 39 CENTURY SWIFT 100% RTF NOTES P.38...
Need help?
Do you have a question about the Swift and is the answer not in the manual?
Questions and answers