Table of Contents
Advertisement
Quick Links
Advertisement
Table of Contents

Related Manuals for Gefen EXT-GSCALER-PRON


Summary of Contents for Gefen EXT-GSCALER-PRON
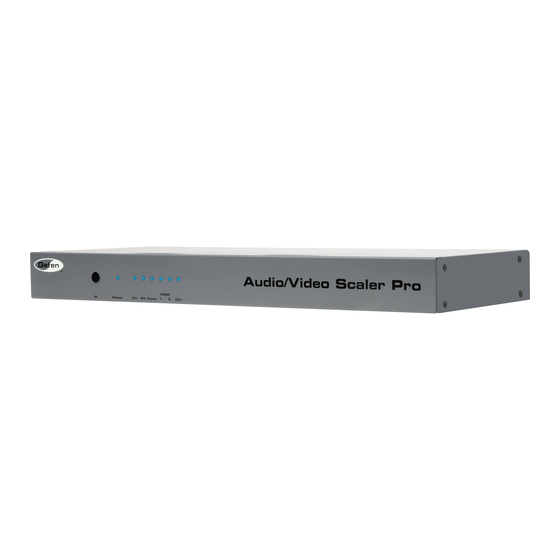
- Page 1 Audio / Video Scaler Pro EXT-GSCALER-PRON User Manual www.gefen.com...
- Page 2 Notice Gefen LLC reserves the right to make changes in the hard ware, packaging and any accompanying doc u men ta tion without prior written notice. A/V Scaler Pro is a trademark of Gefen LLC. © 2010 Gefen LLC., All Rights Reserved...
-
Page 3: Table Of Contents
CONTENTS Introduction Operation Notes Features Panel Layout Connecting The A/V Scaler Pro RMT-SR-IR Remote Description RMT-SR-IR Remote Installation RMT-SR-IR Remote Confi guration Operating The A/V Scaler Pro 15 RS-232 Serial Control Interface 16 RS-232 Commands 18 Rack Mount Installation 19 Specifi cations 20 Warranty... -
Page 4: Introduction
Scale analog and digital video up to 1080p / 1920x1200, and output as digital HDMI with digital audio. Easily adjust key video aspects such as color, aspect ratio, and noise reduction with the Gefen Audio/Video Scaler Pro. Digitize and scale audio and video in different formats into outgoing HDMI together with external digital audio (S/PDIF and TOSLINK). -
Page 5: Operation Notes
Frame-rate conversion is possible between 24, 50 and 60 fps. • Discrete input switching is available through the RS-232 port or by using a remote that will accept hex commands. These hex commands are available at www.gefen.com • HDMI/HDCP compliant When used with a DVI to HDMI adapter... -
Page 6: Features
FEATURES Features • Both digital and analog inputs are format converted and pixel re-scaled through the A/V Scaler Pro. It outputs a large range of formats and resolutions that will easily match the native resolution/format of your display to ensure highest picture quality. •... -
Page 7: Panel Layout
PANEL LAYOUT... -
Page 8: Connecting The A/V Scaler Pro
CONNECTING THE A/V SCALER PRO Connect the HDMI output on the A/V Scaler Pro to the display using the supplied HDMI cable. Connect either the digital SPDIF or digital Optical audio output to the display or an external audio processor using user supplied digital audio cables. Connect the sources to the A/V Scaler Pro using user supplied cables. -
Page 9: Rmt-Sr-Ir Remote Description
RMT-SR-IR REMOTE DESCRIPTION Output - Cycles through the available output resolutions. Please see the section A/V Scaler Pro CONFIGURATION / Output on page 9 for the output resolution table. Input - Cycles though all of input sources. The selectable inputs are Composite, S-Video, Component, HDMI 1, and HDMI 2. -
Page 10: Rmt-Sr-Ir Remote Installation
RMT-SR-IR REMOTE INSTALLATION Remove battery cover from the back of the RMT-SR-IR remote. Verify that DIP switches 1 & 2 are in the down (OFF) position. (See page 8) Insert the battery, hold the battery so that you can see the positive side facing up. -
Page 11: Rmt-Sr-Ir Remote Confi Guration
RMT-SR-IR REMOTE CONFIGURATION How to Resolve IR Code Confl icts In the event that IR commands from other remote controls confl ict with the supplied RMT-SR-IR remote control, changing the remote channel will alleviate this issue. The RMT-SR-IR remote control has DIP SWITCHES for confi... -
Page 12: Operating The A/V Scaler Pro
OPERATING THE A/V SCALER PRO The A/V Scaler Pro has a built in GUI for navigating the various functions. The GUI is navigated by the included IR remote control. Please see the RMT-SR- IR Remote Description on page 6 for functional information. Control of certain functions are also available using the RS-232 serial communications port located on the back panel. - Page 13 OPERATING THE A/V SCALER PRO MAIN MENU The following are the main menu options. Use the UP and DOWN buttons to choose your desired subcategory and press OK to enter it. VIDEO COLOR OUTPUT AUDIO INFORMATION VIDEO Picture Mode Preset and user confi gurable settings for different viewing scenarios. Preset settings will not allow user adjustment.
- Page 14 OPERATING THE A/V SCALER PRO 4:3 Source 16:9 Source Example Example Full - Stretches the image to fi ll the screen Overscan - Stretches the image to fullscreen and just beyond the border of the display Underscan - Stretches the image to fullscreen and just within the border of the screen Letterbox Underscan - Stretches the image to 16:9 aspect ratio with underscan Pan Scan Underscan - Stretches the image to 4:3 aspect ratio with underscan Letterbox Full - Stretches the image to 16:9 aspect ratio without underscan...
- Page 15 OPERATING THE A/V SCALER PRO OUTPUT This menu sets the output resolution for all video sources. Use the directional buttons to choose your desired output resolution and press the OK button to set it. These outputs can be cycled through in the numbered order below when not in the menu system by pressing the OUTPUT button on the RMT-SR-IR remote control.
- Page 16 OPERATING THE A/V SCALER PRO COLOR Press OK to begin adjusting settings. Use the LEFT and RIGHT buttons to change settings. Press the OK button once the desired settings are made. Color Tone Sets the color for the appearance of white. Only the USER option will allow customized settings.
- Page 17 OPERATING THE A/V SCALER PRO OSD (ON SCREEN DISPLAY) CONTINUED Remote Channel Sets the remote channel for use with the RMT-SR-IR remote control. If the selected channel in this menu and does not match the channel set in the RMT-SR-IR remote, the unit will cease to respond to IR commands from the remote.
-
Page 18: Rs-232 Serial Control Interface
RS-232 SERIAL CONTROL INTERFACE 1 2 3 4 5 1 2 3 4 5 6 7 8 9 6 7 8 9 Only Pins 2 (RX), 3 (TX), and 5 (Ground) are used on the RS-232 serial interface RS232 Settings Bits per second .................... -
Page 19: Rs-232 Commands
RS-232 COMMANDS Command Code Response Description S OUTPUT 11 > OUTPUT 576I 576I 60HZ RESOLUTION OUTPUT S OUTPUT 12 > OUTPUT 576P 576P 60HZ RESOLUTION OUTPUT S OUTPUT 13 > OUTPUT 720P 720P 50HZ RESOLUTION OUTPUT S OUTPUT 14 > OUTPUT 1080I50 1080I 50HZ RESOLUTION OUTPUT S OUTPUT 15 >... -
Page 20: Status Commands
RS-232 COMMANDS Status Commands Command Code Response Description R POWER > POWER ON SHOW POWER STATUS R SOURCE > SOURCE CV~HDMI SHOW SOURCE STATUS > OUTPUT R OUTPUT SHOW OUTPUT STATUS NATIVE~WUXGA R SIZE > SIZE FULL~PANSCAN SHOW SIZE STATUS >... -
Page 21: Rack Mount Installation
RACK MOUNT INSTALLATION Rack mount ears are provided for installation of this unit into a 1U rack mount space. Locate the side screws on the unit. Remove the front 2 screws that are located closest to the front of the unit. Using the removed screws, screw the rack mounting bracket into the unit. -
Page 22: Specifi Cations
SPECIFICATIONS Digital Video Amplifi er Bandwidth ............165 MHz Component Video Bandwidth ..............350 MHz Input DDC Signal ................. 5 Volts p-p (TTL) Input Video Signal ................1.2 Volts p-p Single Link Range ..............1080p/2048x1080p Analog Video In Connector 1 ........... 3 RCA Component Analog Video In Connector 2 .............
Need help?
Do you have a question about the EXT-GSCALER-PRON and is the answer not in the manual?
Questions and answers