Advertisement
Advertisement

Related Manuals for Innovative Technology ITRS-600BRN


Summary of Contents for Innovative Technology ITRS-600BRN
- Page 1 Operating Manual Model: ITRS‐600BRN USB Turntable Suitcase ...
- Page 2 PART 1: USB TURNTABLE IMPORTANT SAFETY INSTRUCTIONS FOR AUDIO PRODUCTS ‐ READ THOROUGHLY When using electrical products, basic precautions should always be followed including: 1. Read Instructions ‐ All the safety and operating instructions should be read before the product is operated. 2. Retain Instructions ‐ The safety and operating instructions should be retained for future reference. 3. Heed Instructions ‐ All warnings on the product and in the operating instructions should be adhered to. 4. Follow Instructions ‐ All operating and user instructions should be followed. ...
- Page 3 14. Lightning ‐ For added protection for this product during a lightning storm, or when it is left unattended and unused for long periods of time, unplug it from the wall outlet and disconnect the antenna or cable system. This will prevent damage to the product due to lightning and power‐line surges. 15. Power Lines ‐ An outside antenna system should not be located in the vicinity of overhead power lines or other electric light or power circuits, or where it can fall into such power lines or circuits. When installing an outside antenna system, extreme care should be taken to keep from touching such power lines or circuits as contact with them might be fatal. 16. Overloading ‐ Do not overload wall outlets, extension cords, or integral convenience receptacles as this can result in a risk of fire or electric shock. ...
- Page 4 Precautions ...
- Page 5 Before Use 1. Choose unit installation location carefully. Avoid placing it in direct sunlight or close to a source ...
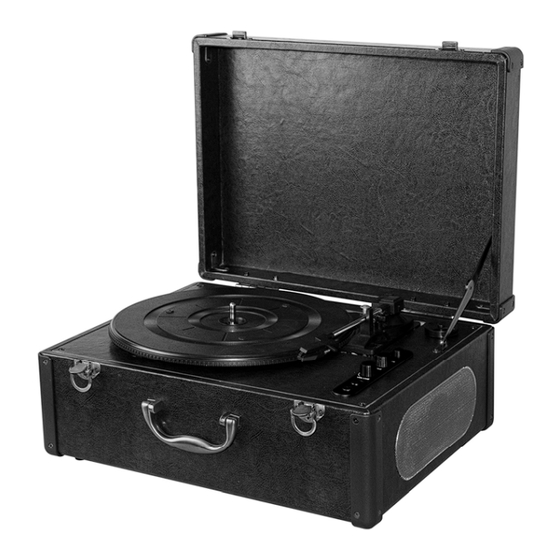
- Page 6 Location of Parts 1. 45 RPM ADAPTOR ...
-
Page 7: Preparation For Use
Preparation for Use 1. Connect the AC adaptor to AC 120V~60Hz supply wall outlet and the other end to the DC IN ... - Page 8 Listening to a Record 1. Press the POWER button to switch on the unit. Remove the white plastic ...
- Page 9 3. Once the aux cable plugs in, it will cut the sound from phonograph though the turntable is still turning. Return the tone arm to the tone arm rest when listening to AUX IN music. You should remove the cable to resume normal operation of the unit. PART II: Audacity Software Audio from the PHONO or AUX can be recorded to your PC, remember to switch the convertor switch to the AUX or PHONO position. The provided CD disc contains the following software: (1)audacity‐src‐1.2.6‐‐‐‐‐‐‐‐‐ For source codes (2)Audacity_for_MAC‐‐‐‐‐‐‐‐‐For Macintosh (3)Audacity_for_WIN‐‐‐‐‐‐‐‐‐For Windows (4)AUTORUN.INF (5)The GNU General Public License.html The software is compatible with Window 98, 2000, ME, XP, VISTA,7 and Macintosh. Audacity Installation and USB Connection ...
- Page 10 3. Double click the “Audacity_for_WIN” folder. Then double click the “audacity‐win‐1.2.6” to install the audacity software. 4. The Audacity Setup Wizard will appear. Click Next to install the software. ...
- Page 11 6. Continue to click on the Next buttons. ...
- Page 12 7. Click on the Install button to start installation. ...
- Page 13 8. Click on Finish to complete installation. 9. If you do not click the “Launch Audacity” on step 8, you can open the Audacity software by double clicking Audacity icon on desktop. NOTE: Once the software is installed, you do not need to re‐set it with each use. (For additional information, visit the Audacity website at http://audacity.sourceforge.net) For MAC system 1. Please insert the Audacity software disk that comes with your unit. Then click on the AUDACITY icon. 2. Double click the “Audacity_for_MAC” folder. There are three subfolders under the folder. If your computer is Mac OS X system (Intel CPU), please enter the Intel folder to install the ...
- Page 14 the audacity software. 3. Click into your chosen subfolder. Take Intel folder for example. Double click “audacity‐macosx‐ub‐1.3.7.dmg”. ...
- Page 15 4. Within a minute, the software is installed and a window will be popped up. Double click the Audacity icon to enter its interface. NOTE: Once the software is installed, you do not need to re‐set it with each use. (For additional information, visit the Audacity website at http://audacity.sourceforge.net) ...
- Page 16 Configuring Audacity for Microsoft Windows Audacity Interface ...
- Page 17 1. Click the ( ) button to skip to start; 2. Adjust the output volume. 3. Click the ( ) button to play; 4. Click the ( ) button to record; 5. Click the ( ) button to pause the recording; 6. Click the ( ) button to stop the recording; ...
- Page 18 2. The screen will open up Audacity Preferences. You can see the Audio I/O, Quality, File Formats, Spectrograms, Directories, Interface, Keyboard and Mouse in the Audacity preference interface. 3. Select the recording device: microphone (USB Audio CODEC) Click the “Audio I/O” at the Audacity Preferences interface. Click the “Device” and select “microphone (USB Audio CODEC)”. Click the “Channels” and select 2 (stereo). Click the “OK”. Note: If you couldn't find the "microphone (USB Audio CODEC)" from the Device list, close the Audacity Software and re‐open then try again. 4. Adjust the output and input volume. NOTE: Because of the variation of different operation systems, the input volume control may not work on some individual Windows versions. Windows Vista is recommended to ensure the input volume control works properly. ...
- Page 19 Preparing to Export and Save for MP3 Formats Prepare for MP3 Export‐‐‐ (Additional software “lame_enc.dll” needs to be installed.) 1. Please make sure that the Audacity disc is still inserted in your computer. 2. Click the “Edit” Tab on the Audacity interface, select “Preferences”. 3. Select the File Formats Tab and click on the Find Library Button. 4. A dialog box will appear. Click “Yes”. ...
- Page 20 5. Another box appears to locate the “CD ROM”. Double click on Audacity_for_WIN and you will find the “lame_enc.dll”. Click it then click Open. 6. Click on the OK Button. Now the MP3 software set up is complete and you may proceed with the recording and exporting to MP3 format. ...
- Page 21 Recording Operation To download music into computer: ...
- Page 22 General problem for all Windows versions 1. When the turntable is connected and you cannot hear any sound being played, it is because the default playback device has been changed to USB Audio CODEC once the turntable connects to the PC. Solution1: Remove the USB cable from the PC.
-
Page 23: Adjustment For Windows 7 And Some Vista System Only
Adjustment for Windows 7 and some Vista system only If do not have the fluctuant wave on the Audacity interface or the sound is distorted when recording, adjust the recording level as follows: Click “Start” at the lower left corner, go to the Control Panel. In Classic View, double click the Sound icon. ... - Page 24 Or in Control Panel Home view, click “Hardware and Sound”. Then click “sound”. ...
- Page 25 In the Sound interface, select “Recording” tab. Then, choose a recording device. Herein we recommend you to select Microphone of USB Audio CODEC which is highlighted in the picture and click “Properties”. ...
- Page 26 Select “Levels” and adjust the Volume Reading. The reading is from 0 to 100. Normally it should be 3‐8. However, you may refer to the Input Level Indicator from the Audacity panel that doesn’t excess 0. Then click “OK” on the Microphone properties interface and sound interface. Close the Control Panel. (Please note that there is no “Levels” tab in “Sound” panel in some operating system, such as Windows 98, Windows 2000. For Windows 7 users ...
- Page 27 Dividing Tracks ...
-
Page 28: To Title Additional Songs (For Mp3 Format Only)
Complete box below: Second song to be divided and saved: 1. Move cursor to the wave graphic area beginning of 2nd song. Left click mouse and hold then drag from left to right until you reach the end of 2nd song. 2. Click “file” tab then select “EXPORT SELECTION AS MP3”. 3. Follow steps above to divide songs, one‐by‐one. TO TITLE ADDITIONAL SONGS (for MP3 format only) During “EXPORT SELECTION AS MP3 “, the software only provides one time to title the song being saved. All subsequent songs being divided from the same track are with the same title. To change the titles, follow steps below: 1. Right click on the Music file and select “Properties” 2. Click on “Details”. You will see “Property” and “Value”, select a property you want to change ... - Page 29 Export and Save For WAV, Ogg Formats (After Recording is Complete) When the song is finished, click the Stop button ( ) on the screen. Then press the PLAY/PAUSE or EJECT button on the turntable. You have a music download on your computer now. But the music needs to be converted to WAV, Ogg, or MP3 formats before exporting. You may play back the song through your computer. Simply click the ( ) to play. NOTE: You may visit the Audacity website at http://audacity.source forge.net. For more detailed information and operation, etc. 1. Click the file tab on the audacity interface. 2. Select “Export as WAV” or “Export as Ogg” to save the entire song. Export As WAV ...
- Page 30 Configuring Audacity for Mac Audacity Interface for Mac ...
- Page 31 Audacity Control Buttons Using the attribute controls button at the top of the screen to go to beginning, Play, Record, Pause, Stop and End. Use the File, Edit, View, Project, Generate, Effect and Analyze menus to Save, Export, and edit the music. 1. Click the ( ) button to skip to start; ...
- Page 32 Audacity Preferences 1. Click the “Audacity” on the Audacity interface, select “Preferences”. ...
- Page 33 Note2: If you couldn't find the "Core Audio (USB Audio CODEC)" from the Device list, close the Audacity Software and re‐open then try again or insure the turntable is connected to the computer. 4. Under the Quality tab, set the Default Sample Format to 16 bit. Select OK to save your setting and close the preferences window. ...
- Page 34 To set the Smart Recording 1. ...
- Page 35 Recording Operation ...
- Page 36 Dividing Tracks When your downloading is complete: ...
- Page 37 Export and Save Files (After Recording is Complete) When the song is finished, click the Stop button ( ) on the screen. Then press the PLAY/PAUSE or EJECT button on the turntable. ...
- Page 38 Troubleshooting Guide In case of trouble with the unit, please look through below and see if you can solve the problem ...
- Page 39 Problem Cause Solution Power does not come on when the Connect the unit to Unit is unplugged. power switch is the AC power supply. pressed. The volume is turned down (to MIN). Adjust the volume. No sound comes out The input selector does Re‐select the desired of the speakers. not match the playback input source. source. The unit is too close to a Turn off the TV or The sound is getting TV set or another similar other appliance, and noisy feedback. appliance. relocate the unit. Specifications AMPLIFIER section ...
-
Page 40: California Prop 65 Warning
CALIFORNIA PROP 65 WARNING "WARNING"... - Page 41 ...
- Page 42 ...
Need help?
Do you have a question about the ITRS-600BRN and is the answer not in the manual?
Questions and answers