Table of Contents
Advertisement
Advertisement
Table of Contents

Related Manuals for Innovative Technology ITUT-400


Summary of Contents for Innovative Technology ITUT-400
- Page 1 OPERATING MANUAL USB Turntable MODEL: ITUT-400...
-
Page 2: Table Of Contents
CONTENT IMPORTANT SAFETY INSTRUCTIONS FOR AUDIO PRODUCTS ........ 2 PRECAUTIONS ...................... 4 BEFORE USE ...................... 5 HOW TO REPLACE THE TURNTABLE STYLUS (NEEDLE) .......... 5 PRODUCT OVERVIEW .................... 6 PART I: PHONOGRAPH .................... 7 PART II: AUDACITY SOFTWARE .................. 8 AUDACITY INSTALLATION AND USB CONNECTION ............ 8 AUDACITY FOR WINDOWS .................. 8 CONFIGURING AUDACITY FOR MICROSOFT WINDOWS ...... 1 2 RECORDING OPERATION ................ ... -
Page 3: Important Safety Instructions For Audio Products
Important Safety Instructions for Audio Products ‐ Read Throughly When using electrical products, basic precautions should always be followed including: 1. Read Instructions ‐ All the safety and operating instructions should be read before the product is operated. 2. Retain Instructions ‐ The safety and operating instructions should be retained for future reference. 3. Heed Instructions ‐ All warnings on the product and in the operating instructions should be adhered to 4. Follow Instructions ‐ All operating and user instructions should be followed. 5. Cleaning ‐ Unplug this product from the wall outlet before cleaning. Do not use liquid cleaners or aerosol cleaners. Use a damp cloth for cleaning. 6. Attachments ‐ Do not use attachments not recommended by the product manufacturer as they ... - Page 4 from touching such power lines or circuits as contact with them might be fatal. 16. Overloading ‐ Do not overload wall outlets, extension cords, or integral convenience receptacles as this can result in a risk of fire or electric shock. 17. Object and Liquid Entry ‐ Never push objects of any kind into this product through openings as they may touch dangerous voltage points or short‐out parts that could result in a fire or electric shock. The apparatus should not be exposed to dripping or splashing, and on object filled with liquids such as a vase of flower, should be placed on the apparatus. ...
-
Page 5: Precautions
Precautions Safety Information‐caution: 1. In order to shut off the power of this product completely, unplug the power cord from the wall outlet. Be sure to unplug the unit if you do not intend to use it for an extended period of time, such as on a vacation. 2. Use of controls, adjustments and performance of procedures other than those specified herein may result in hazardous radiation exposure. 3. To prevent electric shock, match wide blade of plug to wide slot, fully insert. 4. If this product develops trouble, contact qualified service centers, and do not use the product in defective states. Safety Precautions WARNING: To reduce the risk of fire or electric shock, do not expose this appliance to rain or moisture. CAUTION RISK OF ELECTRIC SHOCKS ‐ DO NOT OPEN! To reduce the risk of electric shock, do not remove cover or back. No user serviceable parts inside. Refer servicing to qualified service personnel. The light flash with arrowhead symbol, within an equilateral triangle, is intended to alert user to the presence of non‐insulated “dangerous voltage” within the product’s enclosure that may be of sufficient magnitude to constitute risk of electric shock to persons. ... -
Page 6: Before Use
Before Use 1. Choose unit installation location carefully. Avoid placing it in direct sunlight or close to a source of heat. Also avoid locations subject to vibrations and excessive dust, cold or moisture. Keep away from sources that hum, such as transformers or motors. 2. Do not open the cabinet as this might result in damage to the circuitry or electrical shock. If a foreign object should get into the set, contact your dealer. 3. When removing the power plug from the wall outlet, always pull directly on the plug, never pull the cord. 4. Do not attempt to clean the unit with chemical solvents as this might damage the finish. Use a clean, dry cloth. 5. Keep this manual in a safe place for future reference. How to Replace the Turntable Stylus (Needle) Removing old stylus 1. Set a screwdriver at the tip of the stylus and push down in the direction “A”. 2. Remove the stylus by pulling it forward and down. Installing a new stylus 1. Hold the tip of the stylus and insert the other edge by pressing in the direction “B”. 2. Push up in the direction “C” until it locks at the tip. ... -
Page 7: Product Overview
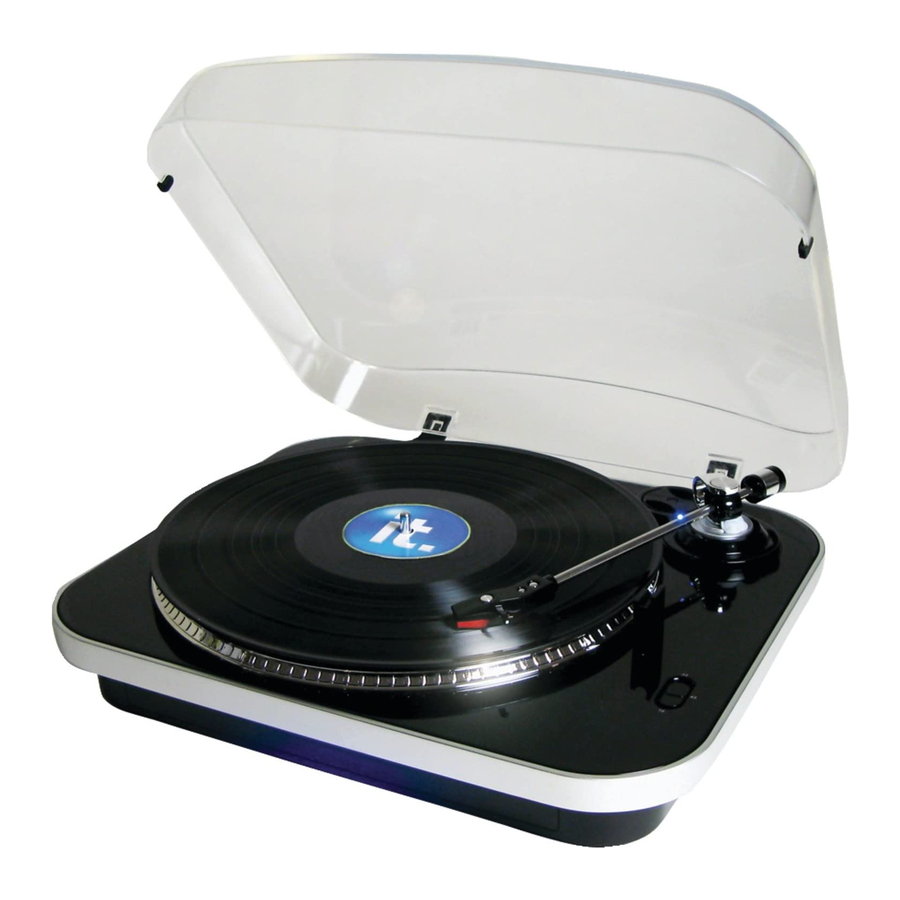
Product Overview 1. 45 RPM ADAPTOR 2. TONE ARM CONTROL INDICATOR 3. DECORATION (NOT FOR ADJUSTMENT TO TONE ARM) 4. TONE ARM 5. TONE ARM REST 6. SPEED CONTROL SWITCH 7. STYLUS 8. NEEDLE GUARD 9. TURNTABLE 10. ATMOSPHERE LIGHT 11. RCA LINE OUT CABLE 12. USB SLOT 13. AC POWER CORD 14. DUST COVER 6 ... -
Page 8: Part I: Phonograph
PART I: Phonograph 1. Remove all the packing from the unit. 2. Connect the RCA line out jacks to auxiliary input sockets of your home amplifier device. Make sure to match the socket colors with the jack colors. 3. Connect the AC power cord to the household outlet. Then the atmosphere light will light blue all the time. 4. Put a record onto the turntable. Remember to use the 45 RPM adaptor located on the right top corner when playing a 45 RPM record. 5. Select the speed according to the record you are playing. 6. Lift and move tone arm to turntable, TONE ARM CONTROL INDICATOR will light up. Place tone arm on the edge of the record and the record starts playing. NOTE: You’re strongly recommended to play records with closing transparent dust cover to prevent dusts. Also, please don’t place anything on top of dust cover especially playing a record. 7. To pause or stop playing, you need to lift and move the tone arm back to the tone arm rest manually. 8. When the record reaches to its end, tone arm and rotation stop. Lift the tone arm and place it to tone arm rest manually. 9. Remember to cover the white plastic needle guard to protect the stylus and unplug the unit. 7 ... -
Page 9: Part Ii: Audacity Software
PART II: Audacity So ware The provided CD disc contains the following so ware: (1)audacity-src-2.0.2--------- For source codes (2)Audacity_for_MAC---------For Macintosh (3)Audacity_for_WIN---------For Windows (4)Manual The so ware is compa ble with Window 98, 2000, ME, XP, VISTA, 7 and Macintosh. Audacity Installa n and USB Conn Connect one end of USB cable to the turntable and the other end into your computer. - Page 10 3. Double click the Audacity_for_WIN for Windows system, and double click the audacity-win-2.0.2 to install the audacity ware. Installing the Audacity So ware the Audacity Setup Wizard will appear. Click on Next to install the so ware. 2. Click on “I accept the agreement” and click on Next.
- Page 11 3. Con nue to click on the Next bu ons.
- Page 12 4. Click on the Install bu on to start installa Click on Next and then click on Finish to complete installa 6. You can now open the Audacity so re and start recording your files. NOTE: Once you set up Audacity, you do not need to re-set it with each use. (For a l informa on, visit the Audacity website at h p://audacity.sourceforge.net)
-
Page 13: Configuring Audacity For Microsoft Windows
Configuring Audacity for Microsoft Windows Audacity Interface Audacity Control Buttons the attribute controls button at the top of the screen to go to beginning, Play, Record, Pause, Stop and End. Use the File, Edit, View, Project, Generate, Effect and Analyze menus to Save, Export, and edit the music. - Page 14 Audacity Preferences 1. Click the “Edit” on the Audacity interface, select “Preferences”. In the pop-up window of the Audacity Preferences, tabs of Devices, Playback, Recording, Quality, Interface, Tracks, Import / Export, Extended Import, Projects, Libraries, Spectrograms, Directories, Warnings, Effects, Keyboard,Mouse and Modules are listed on the left side of the window as in the picture below.
- Page 15 Click ‘Devices’ on the left side and detailed contents of the Devices will show on the right hand side of the interface. Click the arrow on “Device” below Playback and choose “Realtak AC 97 audio” or “”Microphone Sound Mapper” or primary sound driver). Click the arrow on ‘Device’...
- Page 16 Before exporting a MP3 file, you need to find ‘lame’ first. If the program does not show the MP3 Library, make sure the Audacity driver disc is inside your computer. Click ‘Libraries’ on the left side, then in ‘MP3 Export Library’ interface, click ‘Locate…’ button to find ‘lame_enc.dll’.
- Page 17 If the ‘lame_enc.dll’ software does not open from the disc, you must download the ‘lame’ software from the website. Click ‘Download’ and a website will be opened automatically. Open the website to download ‘lame_enc.dll’ : click on download page.
- Page 18 ‘Jump straight to LAME for Windows download’ in the top line. Left click ‘LAME for Windows’ and it will jump to the download chapter for Windows. Audacity LAME is free, so you can click ‘libmp3lame-win-3.98.2.zip’ under ZIP OPTION to download. Click Save, select the Folder you want to save it in, then click Save again to save it.
- Page 19 Close the Webpage, then click OK to close the Audacity preference. Minimize Audacity interface, then open the Folder where you saved the libmp3lame-win-3.98.2. Double click on it, then double click on it again to open. Now left click on lame_enc.dll. Hold and drag it to your Desktop. NOTES: Once you move it to the Desktop you do not need to do this again.
-
Page 20: Recording Operation
NOTE: Because of the variation of different operation systems, the input volume control may not work on some individual Windows versions. Windows Vista is recommended to ensure the input volume control works properly. For any queries in regard to ‘Mixer Toolbar’ please visit: http://wiki.audacityteam.org/index.php?title=Mixer_Toolbar_Issues RECORDING OPERATION To download music and save into computer:... - Page 21 Remember to click pause button in between your desired songs. Press stop button on the computer only when all your desired songs have been downloaded. After your have finished downloading, you may play back the songs through your computer. In stop mode, simply click ( ) SKIP TO START button and then the ( ) PLAY button.
- Page 22 You now have a music download on your computer but the music needs to be saved and converted to WAV, Ogg, or MP3 formats before exporting. GENERAL PROBLEMS FOR WINDOWS VERSION If you do not have the fluctuating wave on the interface during recording, or the recording sounds unsatisfactory, adjust the recording volume as follows: •...
- Page 23 • In Sounds and Audio Devices Properties interface Volume window will display, select the Audio tab to reveal the settings. In Sound recording, select USB Audio Controller and click the Volume button to set the recording input level. The WAVE IN window will appear. •...
- Page 24 show on the interface when recording. 2. If you do not hear any sound when the turntable is connected and you wish to listen to the music and /or video, it is possible that the default playback device has been changed to USB Audio Controller when the turntable connects to the PC. Recommended: Remove the USB cable from the PC. Alternative: This solution requires you to change the setting manually every time you connect the USB cable to the PC. Change the setting as follows: • For Vista and Windows 7 users: Click “Start” and go to the Control Panel. Find and click “Sound” icon. Sound window will be opened and ...
- Page 25 • For Other Windows versions users (e.g.: Windows XP): Click “Start” and find “Settings”, “Control Panel”. In the Control Panel window, find and double click into “Sounds and Audio Devices”. In the Sounds and Audio Devices Properties window, Volume window will be seen. Click the “Audio” tab to reveal the settings. In the Sound playback section, you will see that the USB ...
- Page 26 DIVIDING INTO INDIVIDUAL TRACKS After you have finished downloading, you may play back the songs through your computer before exporting. In stop mode, simply click ( ) SKIP TO START button and click then the ( PLAY button. Press ( ) button to return to the beginning of the first song.
- Page 27 In the next window, select a location as well as the format (most people prefer to save audios in MP3 format (MP3 format is most common) in My Music and put the title in the file name. Click “Save”. NOTE: The most common formats are: MP3, WAV (WAV uses a lot of space), and MYA/AAC (most iPod devices can play audios with this format).
-
Page 28: Mp3, Wav And Ogg Format
Second song to be divided and saved: Move cursor to the wave graphic at the beginning of the second song. Left click mouse and hold then drag from left to right until you reach and highlight the end of the second song. Click "file"... - Page 29 To export and save individually: 1. Highlight the song that you want to save then click the file tab on the audacity interface. 2. Select “Export Selection...”, a window will appear as below: Select the folder, put title in the file name and click the pull‐down arrow to select a save type, such as WAV or OGG format. 28 ...
- Page 30 To Export Selection AS WAV………… To Export Selection As Ogg 3. Choose the file format of the recording that should be exported and put in the title in the file name and the folder of the location where it will be saved, i.e. desktop. Then click “Save”. 29 ...
-
Page 31: Setting The Language
Edit Metadata window may appear, complete the information then press the OK button. Wait for a few seconds until the export & saving is completed. Setting the language 1. Double click the Audacity icon to open the software. Then a window will open as per illustration A below. - Page 32 2. Click Edit and select Preferences. (Illustration B) 3. Another window titled with Audacity Preferences will appear. Click the Interface tab and click the pull down arrow () to select Francais. (Please refer to the illustration C & D on the next page.)
- Page 33 4. Then click OK to close the window. The new setting will only be active in the next start - that means you need to close the Audacity and re-open the software again. Then the Audacity will be seen in French.
-
Page 34: Audacity For Mac Users
AUDACITY FOR MAC USERS System Requirements Audacity runs best with at least 1 GB RAM and a 1 GHz processor (2 GB RAM/2 GHz on OS X 10.7 or later). Where Audacity is to be used for lengthy -track projects, we recommend a minimum of 2 GB RAM and 2 GHz processor (4 GB RAM on OS X 10.7 or later). - Page 35 If your computer is Mac OS X system (Intel CPU), please enter the Intel folder to install the Audacity so ware; If your computer is Mac OS 9 system, please enter the Mac OS 9 folder to install the Audacity ware;...
- Page 36 Then another window will appear. Select all the files in the folder and drag them into a suitable location on the hard drive (Applications, etc.). Double click the Audacity folder and in the Audacity window, 8 files will be displayed in the folder.
-
Page 37: Configuring Audacity For Mac
CONFIGURING AUDACITY FOR MAC Audacity Interface for Mac Audacity Interface---Settings and controls At the top of the main Audacity window, to the right of the play control buttons, you will see the input and output level meters (labeled L and R). Under the output level meter, is an icon that looks like a microphone. -
Page 38: Audacity Controls And Buttons
AUDACITY CONTROLS AND BUTTONS Use the attribute control button at the top of the screen to go to Beginning, Play, Record, Pause, Stop and End. Use the File, Edit, View, Transport, Tracks, Generate, Effect and Analyze menus to Save, Export, and Edit the music. Click the ( ) button to skip to start;... -
Page 39: Audacity Preference Settings
AUDACITY PREFERENCES SETTINGS A few settings will be required before you download the music. Click “Audacity” on the Audacity interface, select “Preferences” and another window will appear on the screen. In the window of Audacity Preferences click “Devices” on the left hand side. Then on the right side within the Recording Device column, set Device to “USB Audio Controller”, Channels to “2 (Stereo)”. - Page 41 Click “Recording” on the left. Then on the right side in Playthrough column, click the checkbox beside “Software Playthrough: Listen while recording or monitoring new track”. In the Sound Activated Recording column, click the checkbox beside “Sound Activated Recording”, then slide the meter to -36 db. NOTE: Once the ‘Sound Activated Recording’...
- Page 42 Click “Libraries” on the left then on the right side in MP3 Export Library column, check if the program has detected and shown the MP3 Library Version there. If shown, skip and forward to step 6. If “MP3 export library not found” is displayed, you must find the “LAME”. Click “Locate…” button then a window named “Locate Lame”...
- Page 43 If you cannot find it or the LAME file you found is not compatible, click the “Download” button and a website will show automatically. Scroll down the webpage to find a title named “MAC OS X”. Click the “LAME download page” and another website will show automatically. Scroll down the webpage. You will notice a form showing the LAME for all version systems. Find a title named “For Audacity 1.3.3 or later on Mac OS X 10.4 and greater (Intel or PPC), and audacity 1.2.5 on OS X 10.4 and later (Intel)” and then click “Lame Library v3.98.2 for Audacity on OSX.dmg” to download the file. Then locate LAME and click OK. 6. Click OK to close the Preferences interface. 42 ...
-
Page 44: Setting The Recording Input Level
SETTING THE RECORDING INPUT LEVEL It is recommended that the recording input level is adjusted prior to starting to record. Slide the output level to about 0.5, slide the input level to 0.3, then get your record ready. 43 ... -
Page 45: Recording Operation
RECORDING OPERATION To download music and save into computer: 1. Place the record on the turntable. 2. Move the tone‐arm over to the record to start playing. 3. Click the Record ( ) button to start recording. The waves (left and right tracks) will show on the interface. 4. At end of the song, click “pause” ( ) button on computer and press Stop button on turntable, move cursor to the wave area and left click at the end of the song. For the next song, replace the album or move tone‐arm to another desired song. Press Play button on the turntable to start playing the next song. Immediately press “pause” ( ) button on computer and downloading will continue and another R/L track will appear on the interface. NOTE: Pause button will not work during recording process if the ‘Sound Activated Recording’ in the Preferences Recording is selected. Clear the checkbox next to the ‘Sound Activated Recording’ if you want to pause recording manually. 5. Repeat steps 3 and 4 until you have finished downloading. NOTE: Do not click stop button on computer while continuously downloading songs. Remember to click pause button in between your desired songs. Press stop button on the computer only when ... -
Page 46: Dividing Tracks
DIVIDING TRACKS Press ( ) button to return to the beginning of the first song. Move cursor to the wave graphic area, left click the mouse and hold then drag from left to right. Release the mouse when the highlighter has reached the end of the first song. Click "File"... - Page 47 Edit Metadata window will appear. Complete the informa on then click OK. Wait for a few minutes un l the saving is complete.
- Page 48 EXPORT AND SAVE FILES (AFTER RECORDING IS COMPLETED) When the recording is finished, click the ( ) on the screen and stop the cassette playback. You have a music download on your computer now. You may play back the song through your computer. Simply click the ( ) to play. NOTE: You may visit the Audacity website at http://audacity.source forge.net for more detailed information and operation, etc. ...
- Page 49 A window will pop up after clicking Export. It will default to the MP3 format, but you also can select other formats by clicking the arrow located at the right of the MP3 Files.
-
Page 50: Troubleshooting Guide
Complete the “Save As” and Save-in location, click the Save button and the Edit Metadata window will display. Complete the information if necessary then click OK and wait a few minutes until it is finished saving. TROUBLESHOOTING GUIDE If you experience any problems with your unit, kindly consult the following guide prior to calling your dealer. - Page 51 Cable, turn on the turntable and reopen Audacity. • If you are not able to hear any audio as you play the record, please click on the microphone drop-down arrow and select Start Monitoring. This will enable you to hear the audio from the turntable, even if you have not record-enabled the Audacity application.
-
Page 52: Specification
Specification PHONOGRAPH section Motor……………………………………………………….…… DC servo motor Drive system…………………………………………………. Belt drive Speeds………………………………………………………….. 33‐1/3 rpm, 45 rpm and 78 rpm Wow & Flutter………………………………………………. Less than 0.25% (WTD) S/N ratio……………………………………………………….. More than 35 dB Cartridge type……………………………………………….. Ceramic stereo cartridge Stylus……………………………………………………………. 402‐M208‐165 Output level………………………………………………….. 160‐380 mV (5 cm/sec at 1 KHz) GENERAL Power requirements……………………………………… AC 120 V ~ 60 Hz Power consumption……………………………………… 5 W Dimensions (WxHxD) …………………………………… 390 x 117 x 330 mm Weight………………………………………………………….. 2.715 kg (approx.) Standard accessories…………………………………….. Instruction Manual A Disc for Audacity Software Driver USB Cable ... - Page 53 FCC Statement Warning: Changes or modifications to this unit not expressly approved by the party responsible for compliance could void the user authority to operate the equipment. NOTE: This equipment has been tested and found to comply with the limits for Class B digital device, pursuant to part 15 of the FCC Rules. These limits are designed to provide reasonable protection against harmful interference in a residential installation. This equipment generates, uses and can radiate radio frequency energy and, if not installed and used in accordance with the ...
- Page 54 Innovative Technology Electronics Corp. Limited Warranty: 90 Days Labor, One Year Parts Innovative Technology Electronics Corp. (IT) warrants the product to be free from “Defects” in materials under normal use for a period of “One Year” from the date of the original purchase. The Warranty is “Not” transferable. IT agrees, within the initial “90 Day” period, to repair or replace the product if it is determined to be defective at “No Charge”. It is further agreed that IT will cover the cost to repair or replace damaged “Parts” only for a total period of “One Year” from the date of the original purchase. The warranty does not cover cosmetic damage, antennas, AC cords, cabinets, headbands, ear‐pads, or damage due to line power surges, connection to improper voltage supply or settings, misuse, mishandling, accident, acts of God or attempted repair by an unauthorized service agent. To obtain service, the purchaser MUST present an original sales receipt / proof of purchase. Please contact us at www.ithomeproducts.com to request an RMA (Return Material Authorization) number to return products for service or replacement. Returns without an RMA number on the package will be refused and returned to sender. Upon receipt of the returning item and our full inspection (IT) may issue a replacement to customer for the same item or of one that has equivalent value and features. To return an item, supply full name, return address, phone number, item purchased, receipt of purchase and reason for return to obtain RMA number. All returns must be in the original packaging or reasonable substitute to prevent damage. Customer “Must” include full name, shipping address and telephone number inside of package. No return will be shipped back to a PO Box or APO address. Please include your check or money order in the amount of • USD$5.00 for items $10.00 to $39.99 (Price Paid Per Unit) • USD$10.00 for items $40.00 to $99.99. (Price Paid Per Unit) • USD$16.00, for items $100.00 and up. (Price Paid Per Unit) • Shipping fees are non‐refundable to be payable to Innovative Technology Electronics Corp.(for handling and return shipping charges) (IT) will not be responsible for delays or unprocessed claims resulting from a purchaser’s failure to provide any / all of the necessary information. Send all inquiries or RMA request via our website www.ithomeproducts.com/support. Innovative Technology Electronics Corp. ...
- Page 55 REMEDY OF THE CUSTOMER, (IT) SHALL NOT BE LIABLE FOR ANY INCIDENTAL OR CONSEQUENTIAL DAMAGES FOR BREACH OF ANY EXPRESS OR IMPLIED WARRANTY ON THIS PRODUCT EXCEPT TO THE EXTENT PROHIBITED BY APPLICABLE LAW. ANY IMPLIED WARRANTY OF MERCHANTABILITY OR FITNESS FOR A PARTICULAR PURPOSE ON THIS PRODUCT IS LIMITED IN DURATION TO THE DURATION OF THIS WARRANTY. Some states do not allow the exclusion or limitation of incidental or consequential damages, or limitations on how long an implied warranty lasts, so the above exclusions or limitations may not apply to you. This warranty gives you specific legal rights and you may also have other rights, which vary from state to state. 54 ...
- Page 56 400130204E ...
Need help?
Do you have a question about the ITUT-400 and is the answer not in the manual?
Questions and answers