Table of Contents
Advertisement
Advertisement
Table of Contents

Related Manuals for Innovative Technology ITUT-300


Summary of Contents for Innovative Technology ITUT-300
-
Page 1: User Manual
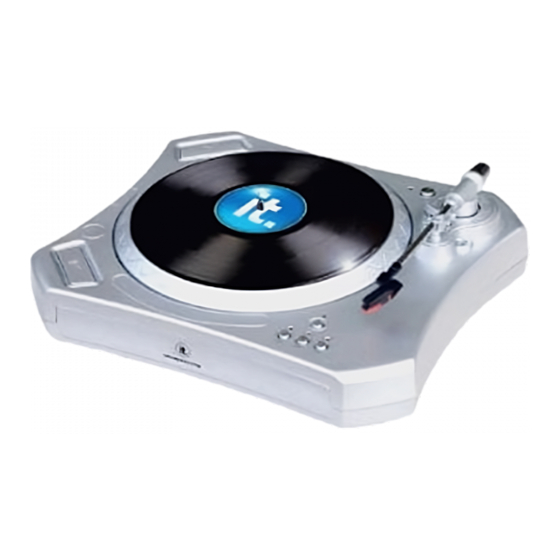
USER MANUAL ITUT-300 USB TURNTABLE... -
Page 2: Table Of Contents
Table of Contents Important Safety Instructions---------- Page 2 Preparing to Export and Save Files-Page 20 Precautions---------------------------------Page 4 Export and Save Files------------------Page 23 Before Use----------------------------------Page 5 Recording Operation Steps-----------Page 25 Location of Parts--------------------------Page 6 Dividing Tracks--------------------------Page 26 Preparation for Use----------------------Page 6 Configuring Audacity for Mac--------Page 30 How to Replace the Stylus-------------Page 7 Audacity Control Buttons--------------Page 31... -
Page 3: Important Safety Instructions
PART I: USB TURNTABLE IMPORTANT SAFETY INSTRUCTIONS FOR AUDIO PRODUCTS-READ THOROUGHLY When using electrical products, basic precautions should always be followed including: Read Instructions-All the safety and operating instructions should be read before the product is operated. Retain Instructions-The safety and operating instructions should be retained for future reference. - Page 4 13. Lightning-For added protection for this product during a lightning storm, or when it is left unattended and unused for long periods of time, unplug it from the wall outlet and disconnect the antenna or cable system. This will prevent damage to the product due to lightning and power-line surges.
-
Page 5: Precautions
Precautions Safety Information CAUTION: 1. In order to shut off the power of this product completely, unplug the power cord from the wall outlet. Be sure to unplug the unit if you do not intend to use it for an extended period of time, such as a vacation. -
Page 6: Before Use
Instructions shall caution users that modifications not approved by the party responsible for compliance could void user’s authority to operate the equipment. The following or equivalent as appropriate: “NOTE: This equipment has been tested and found to comply with the limits for a Class B digital device, pursuant to Part 15 of the FCC Rules. -
Page 7: Location Of Parts
Location of parts 1. RCA Line 2. USB Socket 3. AC Line 4. PLAY/PAUSE Button 5. POWER Button 6. Balance Weight 7. Tone Arm 8. Security Tie 9. Tone Arm Holder 10. Stylus 11. Eject Button 12. Speed Control Button 13. -
Page 8: How To Replace The Stylus
3. Screwed the balance weight on the tone arm through the center, please refer to below instruction. If the sound is distortion, please turning the balance weight clockwise or counterclockwise. 4. Put the rubber mat on the turntable. 5. Release TONE ARM REST by gently pushing hold-down clip to the right. This will unlock tone arm from its arm rest. -
Page 9: Listening To A Record
**Note: For information regarding stores that carry replacement needles for your ITUT-300 unit, please contact us by sending an email to: support@ithomeproducts.com or call toll-free 1-877-483-2497. Listening to a Record 1. Connect the AC power cord to AC outlet. 2. Plug the 2 ends of the LINE OUT Cable into the auxiliary input (Aux) on your TV, home entertainment receiver or other music systems. -
Page 10: Audacity Software Introduction
PART II: Audacity Software The provided CD disc contains the following software: (1)audacity-src-1.2.6--------- For source codes (2)Audacity_for_MAC---------For Macintosh (3)Audacity_for_WIN---------For Windows (4)AUTORUN.INF (5)The GNU General Public License.html The software is compatible with Window 98, 2000, ME, XP, VISTA and Macintosh. Audacity Installation and USB Connection Connect the USB cable to the turntable and into your computer. - Page 11 2. There are five folder in the Audacity disk. Select Audacity_for_WIN for Windows system, and select Audacity_for_MAC for Macintosh system. 3. Double click the Audacity_for_WIN for Windows system, and double click the audacity-win-1.2.6 to install the audacity software.
- Page 12 4. Double click the Audacity_for_MAC for Macintosh system. There are three folders will appear as below. If your computer is Mac OS X system (Intel CPU), please enter the Intel folder to install the audacity software; If your computer is Mac OS 9 system, please enter the Mac OS 9 folder to install the audacity software;...
-
Page 13: Installing The Audacity Software
Installing the Audacity Software 1. The Audacity Setup Wizard will appear. Click on Next to install the software. 2. Click on “I accept the agreement” and click on Next. - Page 14 3. Continue to click on the Next buttons.
- Page 15 4. Click on the Install button to start installation.
- Page 16 5. Click on Finish to complete installation. 6. You can now open the Audacity software and start recording your files. (For additional information, visit the Audacity website at http://audacity.sourceforge.net)
-
Page 17: Configuring Audacity For Windows
Configuring Audacity for Microsoft Windows Audacity Interface Audacity Interface---Settings and controls. -
Page 18: Audacity Control Buttons
Audacity Control Buttons Using the attribute controls button at the top of the screen to go to beginning, Play, Record, Pause, Stop and End. Use the File, Edit, View, Project, Generate, Effect and Analyze menus to Save, Export, and edit the music. 1. -
Page 19: Audacity Preferences
Audacity Preferences Click the “Edit” on the Audacity interface, select “Preferences”. The screen will open up Audacity Preferences. You can see the AudioI/O, Quality, File Formats, Spectrograms, Directories, Interface, Keyboard and Mouse in the Audacity preference interface. - Page 20 Select the recording device: microphone (USB Audio CODEC) Click the “Audio I/O” at the Audacity Preferences interface. Click the “Device” and select “microphone (USB Audio CODEC)”. Click the “Channels” and select 2 (stereo). Click the “OK”. Note: If you couldn't find the " microphone (USB Audio CODEC) " from the Device list, close the Audacity Software and re-open then try again.
-
Page 21: Preparing To Export And Save Files
Preparing to Export and Save For MP3 Formats Prepare for MP3 Export--- (Additional software “lame_enc.dll” needs to be installed.) 1. Please make sure that the Audacity disc is still inserted in your computer. 2. Click the “Edit” Tab on the Audacity interface, select “Preferences”. 3. - Page 22 4. A dialog box will appear. Click “Yes”. 5. Another box appears to locate the “CD ROM”. You will find the “lame_enc.dll” software. Click the software then click Open.
- Page 23 6. Click on the OK Button. Now the MP3 software set up is complete and you may proceed with the recording and exporting to MP3 format.
-
Page 24: Export And Save Files
Export and Save For WAV, Ogg, or MP3 Formats (After Recording is Completed) When the song is finished, click the ( ) ) on the screen. Then press the “STOP” button on the turntable. You have a music download on your computer now. But the music needs to be converted to WAV, Ogg, or MP3 formats before exporting. - Page 25 2. Once you have chosen to which file format recording should be exported, the interface below appears. Here you may provide the file name and the location where it will be saved, ie. desktop. Then click “Save”. Save as WAV Save as Ogg Follow the same steps as above for “Save as MP3”.
-
Page 26: Recording Operation Steps
Recording Operation To download music into computer: 1. Place the record on the turntable. 2. Move the tone-arm over to the record to start playing.. )button to start recording. 3. Click the Record( The waves (top and bottom) will show on the interface. 4. -
Page 27: Dividing Tracks
Dividing Tracks Note: Follow the previous instructions to download the songs but DO NOT click the “Stop“ button when the first song is finished. Click the “Pause “button on computer. For the next song, replace the album or move tone-arm to another desired song. Click the “Pause” button to continue the download. Only click the “Stop”... - Page 28 2. Move cursor to the wave graphic area, left click mouse and hold then drag from left to right. You can see the time bar color changing to gray (highlighted). Release the mouse when the highlighted time bar has reached 1:45 (end of first song). 3.
- Page 29 See interface example below, saved as WAV format: Second song to be divided and saved: 1. Move cursor to the wave graphic area at 1:45 (beginning of 2 song). Left click mouse and hold then drag from left to right until you reach 4:00 (end of 2 song).
- Page 30 2. Click “file” tab then select “EXPORT SELECTION AS WAV, Ogg, OR MP3”. 3. Follow Steps 2, 3 and 4 (above) to divide songs, one-by-one. TO TITLE ADDITIONAL SONGS (for MP3 format only) During “EXPORT SELECTION AS MP3 “, the software only provides one time to title the song being saved.
-
Page 31: Configuring Audacity For Mac
Configuring Audacity for Mac Audacity Interface for Mac Audacity Interface---Settings and controls. At the top of the main Audacity window, to the right of the play control buttons, you will see the input and output level meters (labeled L and R). Under the output level meter, is an icon that looks like a microphone. -
Page 32: Audacity Control Buttons
Audacity Control Buttons Using the attribute controls button at the top of the screen to go to beginning, Play, Record, Pause, Stop and End. Use the File, Edit, View, Project, Generate, Effect and Analyze menus to Save, Export, and edit the music. 1. -
Page 33: Audacity Preferences
Audacity Preferences Click the “Audacity” on the Audacity interface, select “Preferences”. The screen will open up Audacity Preferences. You can see the AudioI/O, Quality, Import/Export, Interface , Spectrograms , Directories, Smart Recording, Theme, Keyboard and Mouse. -
Page 34: Select The Recording Device
Select the recording device: Core Audio (USB Audio CODEC) Click the “Audio I/O” at the Audacity Preferences interface. Click the “Device” and select “Core Audio (USB Audio CODEC)”. Click the “Channels” and select 2 (stereo). Click the “OK”. Note: If you couldn't find the " Core Audio (USB Audio CODEC) " from the Device list, close the Audacity Software and re-open then try again or insure the turntable is connect to the computer. -
Page 35: To Set The Smart Recording
To set the Smart Recording To select the Smart Recording in the Audacity Preferences interface, and set the Sound Activation Level(dB) to -36, and then click OK. At the top of the main Audacity window, to the right of the input and output level meters (labeled L and R), you will see the input and output volume. -
Page 36: Export And Save Files
Export and Save Files (After Recording is Completed) When the song is finished, click the ( ) on the screen. Then press the “STOP” button on the turntable. You have a music download on your computer now. You may play back the song through your computer. Simply click the ( ) to play. -
Page 37: Troubleshooting
Troubleshooting Guide In case of trouble with the unit, please look through below and see if you can solve the problem by yourself before calling your dealer. NO SOUND: • If you are not getting any sound into the software application, go back to the preferences as shown above and make sure you have selected the USB input for the recording device. -
Page 38: Specifications
POOR SOUND Quality: • Check your cartridge connection to make sure it is secured to the tone arm. The cartridge must be connected to the tone arm whenever using the turntable. • Make sure that your RCA plugs are plugged into a source or not touching bare metal. If you are experiencing noise through the USB, you may have interference from the RCA plugs. -
Page 39: Limited Warranty
No return will be shipped back to a PO Box. Please include your check or money order in the amount of $12.00, payable to Innovative Technology Electronics Corp. to cover handling and return shipping charges. (IT) will not be responsible for delays or unprocessed claims resulting from a purchaser’s failure to provide any or all of the necessary...
Need help?
Do you have a question about the ITUT-300 and is the answer not in the manual?
Questions and answers