
Related Manuals for Innovative Technology ITUT-5000


Summary of Contents for Innovative Technology ITUT-5000
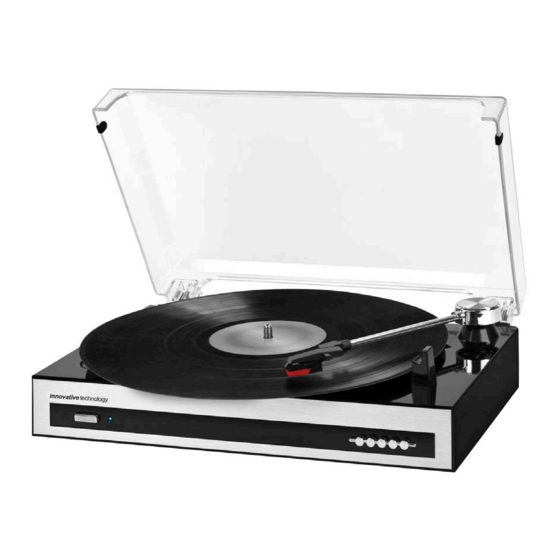
- Page 1 USB T urntable Model: I TUT-‐5000 Instruction M anual PLEASE R EAD T HIS I NSTRUCTION M ANUAL C AREFULLY B EFORE U SE AND ...
-
Page 2: Important Safety Instructions
IMPORTANT S AFETY I NSTRUCTIONS 1. Read these instructions – All the safety and operating instructions should be read before this product i s o perated. 2. Keep these instructions-‐ The safety and operating instructions should be retained for future reference. ... - Page 3 -‐The exclamation point within and equilateral triangle is intended to alert the user to the presence of important operating and maintenance instructions in the literature accompanying the ...
-
Page 4: Safety I Nformation--Caution
Precautions Safety I nformation-‐caution: 1. In order to shut off power to this product completely, unplug the power cord from the wall outlet. ... -
Page 5: Before Use
Before U se 1. Choose unit installation location carefully. Avoid placing it in direct sunlight or close to a source of heat. Also avoid locations subject to vibrations and excessive dust, cold or moisture. Keep ... -
Page 6: Power Indicator
Layouts 1. T URNTABLE 9. P OWER I NDICATOR 2. 4 5 R PM A DAPTOR 10. P OWER B UTTON 3. T ONE A RM R EST 1 11. ... - Page 7 PART I : M ain F unction Line O ut 1. D isconnect t he A C p ower c ord f rom t he h ousehold o utlet t o t urn t he u nit O FF. 2. ...
-
Page 8: Audacity I Nstallation A Nd U Sb C Onnection
PART I I: A udacity S oftware The p rovided C D d isc c ontains t he f ollowing s oftware: (1)audacity-‐src-‐2.0.5-‐-‐-‐-‐-‐-‐-‐-‐-‐ F or s ource c odes (2)Audacity_for_MAC-‐-‐-‐-‐-‐-‐-‐-‐-‐For ... -
Page 9: Installing T He A Udacity S Oftware
3. Double click the Audacity_for_WIN for Windows system, and double click the audacity-‐win-‐2.0.5 t o i nstall t he a udacity s oftware. ... - Page 10 3. C ontinue t o c lick o n t he N ext b uttons. 9 ...
- Page 11 10 ...
- Page 12 4. C lick o n t he I nstall b utton t o s tart i nstallation. 5. C lick o n N ext t o c ontinue. ...
- Page 13 7. Y ou c an n ow o pen t he A udacity s oftware a nd s tart r ecording y our f iles. ...
-
Page 14: Configuring A Udacity F Or M Icrosoft W Indows
Configuring A udacity f or M icrosoft W indows Audacity I nterface Audacity C ontrol B uttons Use the attribute controls button at the top of the screen to go to beginning, Pause, Play, Stop, Record ... -
Page 15: Audacity P References
Audacity P references 1. C lick t he “ Edit” o n t he A udacity i nterface, s elect “ Preferences”. In t he p op-‐up w indow o f t he A udacity P references, t abs o f D evices, P layback, R ecording, Q uality, Interface, ... - Page 16 Click t he a rrow o n ‘ Device’ b elow ‘ Recording’ a nd c hoose ‘ ‘USB A udio C ontroller’. Click the arrow on ‘Channels’ to select ‘2 (Stereo)’. Do not click OK until you finish all of the ...
- Page 17 4. Before exporting a MP3 file, you need to find ‘lame’ first. If the program does not show the MP3 L ibrary, m ake s ure t he A udacity d river d isc i s i nside y our c omputer. Click ‘Libraries’ on the left side, then in ‘MP3 Export Library’ interface, click ‘Locate…’ button to ...
- Page 18 Open t he w ebsite t o d ownload ‘ lame_enc.dll’ : c lick o n L AME d ownload p age. ‘Jump s traight t o L AME f or W indows d ownload’ i n t he t op l ine. L eft c lick ‘ LAME f or W indows’ a nd it ...
- Page 19 Audacity LAME is free, so you can click ‘libmp3lame-‐win-‐3.98.2.zip’ under ZIP OPTION to download. C lick S ave, s elect t he F older y ou w ant t o s ave i t i n, t hen c lick S ave a gain t o s ave i t. ...
-
Page 20: Recording Operation
6. For detailed information about how to run this program, please click ‘Help’ and click ‘Manual ( in w eb b rowser)’. ... - Page 21 4. At end of a song, click the “pause” ( ) button on the computer and press the Stop button on t he t urntable, m ove t he c ursor t o t he w ave a rea a nd l eft c lick a t t he e nd o f t he s ong. For ...
- Page 22 For example, if the “stop” button has been pressed by accident at the end of the first song, do not click anything in Audacity. Prepare another song, click “Transport” tab and select “Append Record” (refer to the picture above). The second song will continue to record on the same track ...
- Page 23 • Click S tart i n t he l eft c orner o f t he c omputer, s elect S ettings, C ontrol P anel. ...
- Page 24 • In W AVE I N i nterface Adjust the recording volume to about 50% as per illustrated below. The fluctuating wave will show ...
- Page 25 the U SB c able t o t he P C. Change t he s etting a s f ollows: • For Vista and Windows 7 users: ...
- Page 26 DIVIDING I NTO I NDIVIDUAL T RACKS After you have finished downloading, you may play back the songs through your computer before exporting. In stop mode, simply click ( ...
- Page 27 4. I n t he n ext w indow, s elect a l ocation a s w ell a s t he f ormat ( most p eople p refer t o s ave a udios in ...
-
Page 28: Export A Nd S Ave F Or W Av A Nd O Gg F Ormats
Wait a f ew s econds b efore e xporting t he s elected a udio. Second s ong t o b e d ivided a nd s aved: 1. ... - Page 29 To e xport a nd s ave i ndividually: 1. Highlight t he s ong t hat y ou w ant t o s ave t hen c lick t he f ile t ab o n t he a udacity i nterface. ...
- Page 30 To E xport S election a s W AV………… To E xport S election A s O GG 3. Choose the file format of the recording that should be exported and put in the title in the file name ...
-
Page 31: Setting The Language
4. E dit M etadata w indow m ay a ppear, c omplete t he i nformation t hen p ress t he O K b utton. ... - Page 32 (Illustration B ) 3. Another window titled with Audacity Preferences will appear. Click the Interface tab and click the pull down arrow () to select Francais. (Please refer to the illustration C & D on the next ...
- Page 33 4. Then c lick O K t o c lose t he w indow. T he n ew s etting w ill o nly b e a ctive i n t he n ext s tart -‐ t hat means ...
-
Page 34: Audacity F Or M Ac U Sers
AUDACITY F OR M AC U SERS System R equirements Audacity r uns b est w ith a t l east 1 G B R AM a nd a 1 G Hz p rocessor ( 2 G B R AM/2 G Hz o n O S X 1 0.7 or ... - Page 35 3. Double click on the setup file according to your system supported, for instance, “audacity-‐macosx-‐ub-‐2.0.5.dmg”. The s oftware f iles w ill n ow o pen i n a f older. ...
- Page 36 Select all the files in the folder and drag them into a suitable location on the hard drive (Applications, e tc.). ...
-
Page 37: Configuring A Udacity F Or M Ac
CONFIGURING A UDACITY F OR M AC Audacity I nterface f or M ac Audacity I nterface-‐-‐-‐Settings a nd c ontrols At t he t op o f t he m ain A udacity w indow, t o t he r ight o f t he p lay c ontrol b uttons, y ou w ill s ee t he input ... - Page 38 AUDACITY C ONTROLS A ND B UTTONS Use t he a ttribute c ontrol b utton a t t he t op o f t he s creen t o g o t o B eginning, P lay, R ecord, P ause, Stop and End. Use the File, Edit, View, Transport, Tracks, Generate, Effect and Analyze menus to ...
- Page 39 AUDACITY P REFERENCES S ETTINGS A f ew s ettings w ill b e r equired b efore y ou d ownload t he m usic. 1. ...
- Page 40 39 ...
- Page 41 3. Click “Recording” on the left. Then on the right side in Playthrough column, click the checkbox b eside “ Software P laythrough: L isten w hile r ecording o r m onitoring n ew t rack”. In ...
- Page 42 5. Click “ Libraries” o n t he l eft t hen o n t he r ight s ide i n M P3 E xport L ibrary c olumn, c heck i f t he program has detected and shown the MP3 Library Version there. If shown, skip and forward to ...
- Page 43 If you cannot find it or the LAME file you found is not compatible, click the “Download” button and a website will show automatically. Scroll down the webpage to find a title named “MAC OS X”. C lick t he “ LAME d ownload p age” a nd a nother w ebsite w ill s how a utomatically. ...
- Page 44 6. Click O K t o c lose t he P references i nterface. SETTING T HE R ECORDING I NPUT L EVEL It i s r ecommended t hat t he r ecording i nput l evel i s a djusted p rior t o s tarting t o r ecord. Slide ...
- Page 45 RECORDING O PERATION To d ownload m usic a nd s ave i nto c omputer: 1. P lace t he r ecord o n t he t urntable. 2. ...
-
Page 46: Dividing T Racks
DIVIDING T RACKS 1. Press ( ) b utton t o r eturn t o t he b eginning o f t he f irst s ong. 2. ... - Page 47 6. Edit Metadata window will appear. Complete the information then click OK. Wait for a few minutes u ntil t he s aving i s c omplete. ...
-
Page 48: Export A Nd S Ave F Iles
EXPORT A ND S AVE F ILES ( AFTER R ECORDING I S COMPLETED) When the recording is finished, click the ( ) on the screen and stop the cassette ... - Page 49 2. A window will pop up after clicking Export. It will default to the MP3 format, but you also can s elect o ther f ormats b y c licking t he a rrow l ocated a t t he r ight o f t he M P3 F iles. ...
-
Page 50: Troubleshooting Guide
3. Complete the “Save As” and Save-‐in location, click the Save button and the Edit Metadata window w ill d isplay. C omplete t he i nformation i f n ecessary t hen c lick O K a nd w ait a f ew m inutes until ... - Page 51 • P ower C ycle: C lose A udacity, t urn o ff t he t urntable, u nplug t he U SB C able. T hen p lug i n t he U SB Cable, ...
- Page 52 Problem Cause Solution Power d oes n ot c ome Connect t he u nit t o t he on w hen t he u nit i s Unit ...
-
Page 53: Specification
Specification PHONOGRAPH s ection Motor……………………………………………………….…… DC s ervo m otor Drive s ystem…………………………………………………. Belt d rive Speeds………………………………………………………….. 33-‐1/3 r pm, 4 5 r pm a nd 7 8 r pm Wow ... -
Page 54: Fcc Statement
FCC S tatement This equipment has been tested and found to comply with the limits for a Class B digital device, pursuant t o P art 1 5 o f t he F CC R ules. T hese l imits a re d esigned t o p rovide r easonable p rotection against harmful interference in a residential installation. This equipment generates uses and can ... -
Page 55: Industry Canada
INDUSTRY C ANADA This device complies with Industry Canada licence-‐exempt RSS standard(s). Operation is subject to the following two conditions: (1) this device may not cause interference, and (2) this device must accept any interference, including interference that may cause undesired operation of the device. ... - Page 56 55 ...
- Page 57 ...
Need help?
Do you have a question about the ITUT-5000 and is the answer not in the manual?
Questions and answers