
Related Manuals for Innovative Technology ITUT-201SVR


Summary of Contents for Innovative Technology ITUT-201SVR
- Page 1 MODEL: ITUT-201SVR (ITUT-201) USB Turntable PLEASE NOTE OUR NEW CUSTOMER SUPPORT TOLL FREE PHONE NUMBER (ONLY FROM USA) # 1-877-ITECH-97 (1-877-483-2497)
-
Page 2: Table Of Contents
Table of Contents Important Safety Instructions---------- Page 2 General Problems for All Windows Precautions---------------------------------Page 4 Versions-----------------------------------Page 21 Before Use----------------------------------Page 5 Adjustment for Win7 and Some Vista Location of Parts--------------------------Page 6 Systems Only----------------------------Page 24 Preparation for Use----------------------Page 6 Dividing Tracks--------------------------Page 28 How to Replace the Stylus-------------Page 6 Export and Save Files------------------Page 30 Listening to a Record-------------------Page 7... -
Page 3: Important Safety Instructions
PART I: USB TURNTABLE IMPORTANT SAFETY INSTRUCTIONS FOR AUDIO PRODUCTS-READ THOROUGHLY When using electrical products, basic precautions should always be followed including: Read Instructions-All the safety and operating instructions should be read before the product is operated. Retain Instructions-The safety and operating instructions should be retained for future reference. - Page 4 13. Power-Cord Protection- Power-supply cords should be routed so that they are not likely to be trapped in any way. 14. Lightning-For added protection for this product during a lightning storm, or when it is left unattended and unused for long periods of time, unplug it from the wall outlet and disconnect the antenna or cable system.
-
Page 5: Precautions
Precautions Safety Information CAUTION: 1. In order to shut off the power of this product completely, unplug the power cord from the wall outlet. Be sure to unplug the unit if you do not intend to use it for an extended period of time, such as a vacation. -
Page 6: Before Use
Before Use 1. Choose unit installation location carefully. Avoid placing it in direct sunlight or close to a source of heat. Also avoid locations subject to vibrations and excessive dust, cold or moisture. Keep away from sources that hum, such as transformers or motors. 2. -
Page 7: Location Of Parts
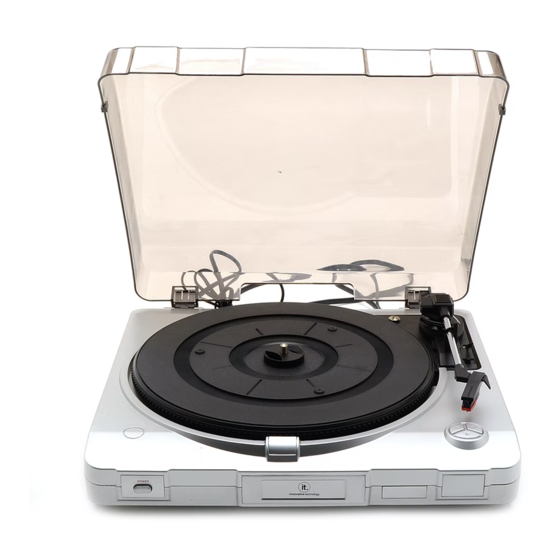
Location of parts 1. POWER SWITCH 8. EJECT BUTTON 2. TRANSIT SCREW 9. PLAY BUTTON 3. TONE ARM 10. TURNTABLE 4. SECURITY HOOK 11. USB SLOT 5. TONE ARM REST 12. LINE OUT CABLE 6. SPEED CONTROL SWITCH 13. AC POWER CORD 7. -
Page 8: Listening To A Record
Listening to a Record 1. Connect the AC power cord to household outlet. 2. Plug the 2 ends of the LINE OUT Cable into the auxiliary input (Aux) on your TV, home entertainment receiver or other music system. Be sure that the red RCA Cable is inserted into the red jack and the white RCA Cable is inserted into the white jack. -
Page 9: Audacity Software Introduction
PART II: Audacity Software The provided CD disc contains the following software: (1)audacity-src-1.2.6--------- For Windows (2)Audacity_for_MAC---------For Macintosh (3)Audacity_for_WIN---------For Windows (4)AUTORUN.INF (5)The GNU General Public License.html The software is compatible with Window 98, 2000, ME, XP, VISTA, 7 and Macintosh. Audacity Installation and USB Connection Connect the USB cable to the turntable and into your computer. - Page 10 Installing the Audacity Software 1. The Audacity Setup Wizard will appear. Click on Next to install the software. 2. Click on “I accept the agreement” and click on Next.
- Page 11 3. Continue to click on the Next buttons.
- Page 12 4. Click on the Install button to start installation.
- Page 13 5. Click on Finish to complete installation. 6. You can now open the Audacity software and start recording your files. NOTE: Once you set up Audacity, you do not need to re-set it with each use. (For additional information, visit the Audacity website at http://audacity.sourceforge.net)
-
Page 14: Configuring Audacity For Windows
Configuring Audacity for Microsoft Windows Audacity Interface Audacity Interface---Settings and controls. -
Page 15: Audacity Control Buttons
Audacity Control Buttons Using the attribute controls button at the top of the screen to go to beginning, Play, Record, Pause, Stop and End. Use the File, Edit, View, Project, Generate, Effect and Analyze menus to Save, Export, and edit the music. 1. -
Page 16: Audacity Preferences
Audacity Preferences 1. Click the “Edit” on the Audacity interface, select “Preferences”. The screen will open up Audacity Preferences. You can see the Audio I/O, Quality, File Formats, Spectrograms, Directories, Interface, Keyboard and Mouse in the Audacity preference interface. - Page 17 2. Select the recording device: microphone (USB Audio CODEC) Click the “Audio I/O” at the Audacity Preferences interface. Click the “Device” and select “microphone (USB Audio CODEC)”. Click the “Channels” and select 2 (stereo). Click the “OK”. Note: If you couldn't find the "microphone (USB Audio CODEC)" from the Device list, close the Audacity Software and re-open then try again.
-
Page 18: Preparing To Export And Save Files
Preparing to Export and Save For MP3 Formats Prepare for MP3 Export--- (Additional software “lame_enc.dll” needs to be installed.) 1. Please make sure that the Audacity disc is still inserted in your computer. 2. Click the “Edit” Tab on the Audacity interface, select “Preferences”. 3. - Page 19 4. A dialog box will appear. Click “Yes”. 5. Another box appears to locate the “CD ROM”. You will find the “lame_enc.dll” software. Click the software then click Open.
- Page 20 6. Click on the OK Button. Now the MP3 software set up is complete and you may proceed with the recording and exporting to MP3 format.
-
Page 21: Recording Operation Steps
Recording Operation To download music onto computer: 1. Place a record on the turntable. 2. Move the tone arm over to the record to start playing. )button to start recording. 3. Click the Record( The waves (top and bottom) will show on the interface. 4. -
Page 22: Versions
General problems for all Windows versions 1. When the turntable is connected and you cannot hear any sound being played, it is because the default playback device has been changed to USB Audio CODEC once the turntable connects to the Preferred Solution: Remove the USB cable from the PC. - Page 23 Other versions (e.g.: Windows XP): You may click “Start” and find “Programs”, “Accessories”, “Entertainment” and click into “Sound Recorder”. Then in the Sound Recorder, click “Edit” tab and select “Audio Properties”. Or, find and click into Control Panel. Find and select “Sound and audio device” and choose “Audio”...
- Page 24 2. If you want to hear the music while downloading to the computer, go to the Audacity interface. Click Edit and select “Preference”. Then click “Audio I/O” tab. And follow the following setting. Click “OK” to confirm. Deselect the check box to disable its function.
-
Page 25: Systems Only
Adjustment for Windows 7 and some Vista systems only If do not have the fluctuant wave on the Audacity interface or the sound is distorted when recording, adjust the recording level as follows: Click “Start” at the lower left corner, go to the Control Panel. In Classic View, double click the Sound icon. - Page 26 Or in Control Panel Home view, click “Hardware and Sound”. Then click “sound”.
- Page 27 In the Sound interface, select “Recording” tab. Then, choose a recording device. Herein we recommend you to select Microphone of USB Audio CODEC which is highlighted in the picture and click “Properties”.
- Page 28 Select “Levels” and adjust the Volume Reading. The reading is from 0 to 100. Normally it should be 3-8. However, you may refer to the Input Level Indicator from the Audacity panel that doesn’t excess 0. Then click “OK” on the Microphone properties interface and sound interface. Close the Control Panel.
-
Page 29: Dividing Tracks
Dividing Tracks When you complete downloading: 1. Press ( ) button to the beginning of the first song. For example: There are 2 songs downloaded. The first song ranges from 0:00 to 1:45 and the second song is from 1:45 to 4:00. 2. - Page 30 Take “Export as WAV format” for example: Divide and export 2 song: 1. Move cursor to your highlight your 2 song. 2. Follow Steps 3, 4 and 5 (above) to divide songs, one-by-one.
-
Page 31: Export And Save Files
Export and Save For WAV, Ogg, or MP3 Formats (After Recording is Complete) When the song is finished, click the ( ) on the software. Then press the “STOP” button on the turntable. You have a music download on your computer now. But the music needs to be converted to WAV, Ogg, or MP3 formats before exporting. - Page 32 name and select an export location, normally most users prefer to select desktop. Then click “Save”. Save as WAV Save as Ogg Follow the same steps as above for “Save as MP3”.
- Page 33 TO TITLE ADDITIONAL SONGS (for MP3 format only) During “EXPORT SELECTION AS MP3 “, the software only provides one time to title the song being saved. All subsequent songs being divided from the same track are with the same title. To change the titles, follow steps below: 1.
-
Page 34: Configuring Audacity For Mac
Configuring Audacity for Mac Attention MAC Users! If you have any issues with your software not working correctly, please visit our website to download the latest software. http://ithomeproducts.com/support Audacity Interface for Mac Audacity Interface---Settings and controls. At the top of the main Audacity window, to the right of the play control buttons, you will see the input and output level meters (labeled L and R). -
Page 35: Audacity Control Buttons
Audacity Control Buttons Using the attribute controls button at the top of the screen to go to beginning, Play, Record, Pause, Stop and End. Use the File, Edit, View, Project, Generate, Effect and Analyze menus to Save, Export, and edit the music. 1. -
Page 36: Audacity Preferences
Audacity Preferences Click the “Audacity” on the Audacity interface, select “Preferences”. The screen will open up Audacity Preferences. You can see the Audio I/O, Quality, Import/Export, Interface, Spectrograms, Directories, Smart Recording, Theme, Keyboard and Mouse. -
Page 37: Select The Recording Device
Select the recording device: Core Audio (USB Audio CODEC) Click the “Audio I/O” at the Audacity Preferences interface. Click the “Device” and select “Core Audio (USB Audio CODEC)”. Click the “Channels” and select 2 (stereo). Click the “OK”. Note: If you couldn't find the "Core Audio (USB Audio CODEC)" from the Device list, close the Audacity Software and re-open then try again or insure the turntable is connect to the computer. -
Page 38: To Set The Smart Recording
To set the Smart Recording To select the Smart Recording in the Audacity Preferences interface, and set the Sound Activation Level(dB) to -36, and then click OK. At the top of the main Audacity window, to the right of the input and output level meters (labeled L and R), you will see the input and output volume. -
Page 39: Export And Save Files
Export and Save Files (After Recording is Complete) When the song is finished, click the ( ) on the software. Then press the “STOP” button on the turntable. You have a music download on your computer now. You may play back the song through your computer. Simply click the ( ) to play. -
Page 40: Troubleshooting
Troubleshooting Guide In case of trouble with the unit, please look through below and see if you can solve the problem by yourself before calling your dealer. NO SOUND: • If you are not getting any sound into the software application, go back to the preferences as shown above and make sure you have selected the USB input for the recording device. -
Page 41: Specifications
POOR SOUND Quality: • Check your stylus connection to make sure it is secured to the tone arm. The stylus must be connected to the tone arm whenever using the turntable. • Make sure that your RCA plugs are plugged into a source or not touching bare metal. If you are experiencing noise through the USB, you may have interference from the RCA plugs. - Page 42 CALIFORNIA PROP 65 WARNING "WARNING" This product contains a chemicals known to the State of California to cause birth defects or other reproductive harm. For more information on these regulations and a list of chemicals, log on the following website address : http://www.oehha.ca.gov/prop65.html...
- Page 43 No return will be shipped back to a PO Box. Please include your check or money order in the amount of $12.00, payable to Innovative Technology Electronics Corp. to cover handling and return shipping charges. (IT) will not be responsible for delays or unprocessed claims resulting from a purchaser’s failure to provide any or all of the...
- Page 44 201100802EO...
Need help?
Do you have a question about the ITUT-201SVR and is the answer not in the manual?
Questions and answers