Montigo C34-DV Installation Operation & Maintenance
Gas fireplace
Hide thumbs
Also See for C34-DV:
- Installation & maintenance manual (28 pages) ,
- Installation operation & maintenance (22 pages) ,
- Instructions manual (6 pages)
Table of Contents
Advertisement
Quick Links
Warning:
Improper installation, adjustment,
alteration, service or maintenance can
cause injury or property damage. Refer to
this manual. For assistance or additional
information consult a qualified installer,
service agency or the gas supplier.
What To Do If You Smell Gas:
• Do not try to light any appliance.
• Do not touch any electrical switch; do not use any phone in your building.
• Immediately call your gas supplier from a neighbor's phone. Follow the gas
supplier's instructions.
• If you cannot reach your gas supplier, call the fire department.
For Your Safety:
Do not store or use gasoline
or other flammable vapors
and liquids in the vicinity of
this or any other appliance.
Installation
Operation &
Maintenance
C34-DV
Gas Fireplace
Check local codes
and
read
instructions prior to
installation.
Leave this manual
with the owner.
all
Advertisement
Table of Contents

Subscribe to Our Youtube Channel
Related Manuals for Montigo C34-DV


Summary of Contents for Montigo C34-DV
- Page 1 Installation Operation & Maintenance C34-DV Gas Fireplace Warning: For Your Safety: Check local codes Improper installation, adjustment, Do not store or use gasoline read alteration, service or maintenance can or other flammable vapors instructions prior to cause injury or property damage. Refer to and liquids in the vicinity of this manual.
-
Page 2: Table Of Contents
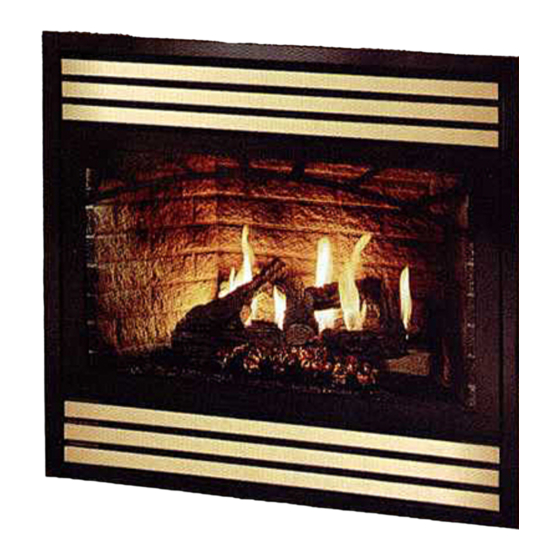
Thank You for choosing a Montigo C-Series Fireplace. About the C34 Fireplace: Introduction ................2 The C34-DV includes a 20,000 BTU dual burner with embers and a Installation five piece ceramic fibre logset. This model is available in four versions. -
Page 3: Installation
These clearances apply to all dimensions except the framed opening, minimum clearance from the top of the fireplace to a shelf is 7". For Top where the clearance to combustibles is 0". The C34-DV clearances to Vent models (C34-DT), the minimum clearance is 15". (Minimum 1"... -
Page 4: Installing The Gasline
C34-DV fireplaces are certified for use with Montigo Premium Series minimum inlet gas supply pressure of 11" W.C. & a manifold pressure of (5" / 8") venting components. The C34-DV Top Vent may be used 10" W.C. Provision must also be made for a 1/8" N.P.T. plugged tapping with Standard Series (4"/7") components on vertical vent runs only. - Page 5 C34-DV Gas Fireplace Installation Installing Terminations with Built-In Frames Installing Heat Guards over Terminations PTO-3F PTKOG Frame the termination opening to 11" x 11". Ensure that the two long mounting brackets are facing the bottom of the termination. (See inset). This will provide more heat protection Fasten the termination to the studs using a minimum of 4 screws.
-
Page 6: Top Vent Models With Horizontal Venting
C34-DV Gas Fireplace Installation Top Vent Venting Runs Heat Shields For the C34-DV Top Vent, there are two types of installations: A) Through-The-Wall Installations and B) Vertical (Through-The-Roof) Due to high flue temperatures, heat shields are required on all C34-DV Installations. -
Page 7: Terminations
C34-DV Gas Fireplace Installation Example 1: 150" max. For our shortest venting configuration use components A and F (see 30" max. Figure 9a). Termination Rigid Section Solid Sections Exterior PEL-90F/F Elbow Wall Flex Section Hearth Figure 9a. Typical Top Vent installation. If the 90° elbow is Figure 10. -
Page 8: Top Vent Models With Vertical Venting
C34-DV Gas Fireplace Installation B. Vertical (Through-The-Roof) Installations 5/8" with option for 4/7" Vertical rise >12' can be reduced Vertical Terminations must be installed: • minimum 2' (two feet) above the highest point where vent passes through the roof. •... -
Page 9: Rear Vent Models
Flue Collar Figure 17. Flex installation. Heat Shields Due to high flue temperatures, heat shields are required on all C34-DV installations (except those with vertical terminations) at the point where the venting connects to the termination. With the heat shield, vent clearances can be maintained at 1". - Page 10 B. Multi-Elbow Installations Installation Of Rear Vent DV For more diffiicult installation situations, the C34-DV Rear Vent may be C34-DV Rear Vent versions are supplied with an PXT-20 (female/ installed with two — 90° elbows and up to 15' of horizontal run. If using female) section.
-
Page 11: Facing
T.V. and radio components. Limit Wall Switch Switch Painting: Special care is recommended by the Master Painters and Decorators Figure 20. Wiring for the C34-DV-I with Honeywell gas control and pilot. Part No. XG0117C Page 11... -
Page 12: Removing And Installing The Door
Installation Removing and Installing Wiring for the optional Fan Kit the Door All C34-DV fireplaces may be equipped with optional fan kits (Part no. RFK1001, RFK1003, RFK1006 or RFK1007)for circulating heat into the Removing the Door: living space. Remove the trim (as described on the next page) to access the door Installations in Canada which employ the fans must be electrically latches. -
Page 13: Installing The Logset
This is a normal occurance. Installing the Logs: Installing the Trim & Baffle The C34-DV is supplied with five ceramic fibre logs. Unpack the logs and handle them very carefully. The fireplace is shipped with 6 horizontal trim pieces (3 upper and 3 lower), which must be field-installed. -
Page 14: Lighting Instructions
C34-DV Gas Fireplace Operation - Model C34-DV C34-DV with Continuous Pilot For Your Safety - READ BEFORE LIGHTING: WARNING: If you do not follow these instructions exactly, a fire or explosion may result causing property damage, personal injury or loss of life. - Page 15 C34-DV Gas Fireplace Operation - Model C34-DV-I C34-DV-I with Honeywell Electronic Ignition For Your Safety - READ BEFORE LIGHTING: WARNING: If you do not follow these instructions exactly, a fire or explosion may result causing property damage, personal injury or loss of life.
-
Page 16: Operation
Doors and logs can get very hot. Handle only when cool. The C34-DV is equipped with an adjustable burner, allowing you to raise or lower the flames. To adjust the flames, locate the black knob General marked 'Hi-Lo', in the centre of the gas control valve (See Figure 26). -
Page 17: Gas Control Valve
C34-DV Gas Fireplace Maintenance Troubleshooting Gas Control Valve C34-DV-I O n/O ff S w itch HONEYWELL SV 9500 /SV9600 Troubleshooting Sequence NOTE: Before Troubleshooting, Familiarize Yourself With P o w er G en erator The Startup And Checkout Procedure. START... -
Page 18: Warranty
The Warranty The Companies warrants the Montigo Gas Appliance to be free from defects in materials and workmanship at the time of manufacture. On the Montigo, there is a ten- year warranty on the firebox and its components, a five-year warranty on the main burner and pilot burner, and a one-year warranty on the gas control valve and fibre logs. -
Page 19: Termination Locations
C34-DV Gas Fireplace Appendix A - Termination Locations A = clearance to the termination frame above grade, veranda, porch, deck, or M = clearance to mechanical air supply inlet balcony [16 inches (41 cm) minimum] [*6 feet (1.8 m) minimum] N = †... - Page 20 XG0117C Rev. 00 - 04/03 Canadian Heating Products Inc. Montigo Del Ray Corp. Langley, BC V4W 4A1 Ferndale, WA 98248...
Need help?
Do you have a question about the C34-DV and is the answer not in the manual?
Questions and answers