Table of Contents
Advertisement
Quick Links
Advertisement
Table of Contents

Related Manuals for StarTech.com SV1107IPEXT


Summary of Contents for StarTech.com SV1107IPEXT
- Page 1 KVM over IP with Virtual Media SV1107IPEXT...
- Page 2 StarTech.com, or an endorsement of the product(s) to which this manual applies by the third-party company in question. Regardless of any direct acknowl- edgement elsewhere in the body of this document, StarTech.com hereby acknowledges that all...
-
Page 3: Table Of Contents
Features ..................1 Package Contents ...............1 Hardware Requirements ..............2 Hardware Guide ................3 Computer Preliminary Setup ............5 SV1107IPEXT Preliminary Setup ..........6 Windows XP and 2000 ..............7 Windows Vista™ ................7 SV1107IPEXT Initial Configuration ..........8 Hardware Setup ................11 Installation ...................11 (Optional) Mounting to a Cabinet/Rack ........13... - Page 4 User Station Filtering – MAC Addresses ........21 Custom SSL Certificates .............21 User Management ...............22 Customization ................24 Firmware ..................24 Using the SV1107IPEXT ..............26 Required Equipment ..............26 Connecting from your Local Network ..........26 Using The Windows Client ............27 The Windows Client Control Panel ..........29 Hotkey Setup ................30...
-
Page 5: Introduction
Instruction Manual Introduction The SV1107IPEXT Server Remote Control KVM over IP with Virtual Me- dia capability enables simple management of remote servers from any- where in the world, through remote administrative control, while providing a convenient way to monitor computers and servers over a network, or over the Internet. -
Page 6: Hardware Requirements
Instruction Manual Hardware Requirements For best results, we recommend that the computers used to access the SV1107IPEXT control unit have at minimum a Pentium III 1 GHz proces- sor, with the screen resolution set to 1024 x 768. • Browsers must support 128-bit SSL data encryption •... -
Page 7: Hardware Guide
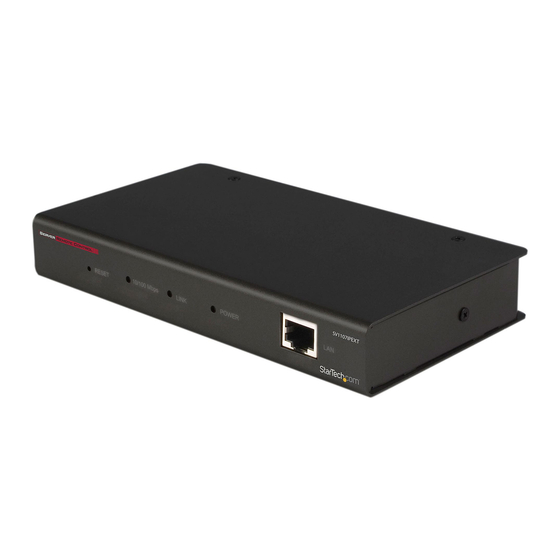
Restore Factory Default Settings: Power off the Reset Switch SV1107IPEXT, then press and hold the reset switch for at least 3 seconds while reconnecting power Please Note: This will not reset users or passwords... - Page 8 The connection for the virtual media cable that Virtual Media connects the SV1107IPEXT to a USB port on your Port computer - allowing file transfers to occur LAN Port...
-
Page 9: Computer Preliminary Setup
Write down the IP Address and Default Gateway. If the first three groups of numbers of your IP Address happens to be 192.168.0, proceed to Hardware Set Up. Exit the command line by clicking on the “X” on the top right corner of the Command line window SV1107IPEXT preliminary setup... -
Page 10: Sv1107Ipext Preliminary Setup
The instructions on the following pages will explain how to put your com- puter and SV1107IPEXT on the same network; the first set of instructions cover Windows XP and 2000, the second set explains Windows Vista™. -
Page 11: Windows Xp And 2000
Instruction Manual Windows XP and 2000 Network Locate, and double-click on the Connections icon, within the Windows Control Panel. Local Area Connection Right-click on (or Wireless network connection) Select Properties. Under the General tab highlight Internet Protocol TCP/IP Properties button. Click on the Use the Click on the Radio button titled... -
Page 12: Sv1107Ipext Initial Configuration
Open your web browser. You will get a Page cannot be displayed error message, this is normal. In the Address line, type: http:// 192.168.0.60, then press Enter. When the certificate windows pop up, accept them. When the below screen appears, log into the SV1107IPEXT: User name: administrator (lowercase) Password: password (lowercase). - Page 13 Instruction Manual After logging in, click on the Network icon (shown below) along the top of the window. Select Set IP Address manually (A static IP Address is preferred). The actual address you use is dependent on your network’s address range: As an example: In the preliminary set up, the IP Address noted is 192.168.1.16, so the IP Address you would enter would be...
- Page 14 For now leave the rest of the settings at their default values (they will be covered later). Click on Apply, then Logout. The SV1107IPEXT will reset. (It is important to log out so the SV1107IPEXT will close the connection). Log out...
-
Page 15: Hardware Setup
You must unplug the power cords of any computers that support Keyboard Power On function. Installation To install the SV1107IPEXT, refer to the installation diagram on the follow- ing page: Use the Console cable provided to connect the SV1107IPEXT’s Console port, to the local keyboard, monitor and mouse, they are color coded for identification. - Page 16 Instruction Manual Installation - Cont’d...
-
Page 17: (Optional) Mounting To A Cabinet/Rack
Instruction Manual (Optional) Mounting to a Cabinet/Rack If you wish to mount the SV1107IPEXT in a server/storage rack/cabinet, using the included bracket: 1. Figure 1) Remove the two screws closest to the rear panel of the SV1107IPEXT, on the base of the unit. -
Page 18: Normal Logon
Instruction Manual Normal Logon To operate the SV1107IPEXT from an Internet browser, begin by logging in. Open your browser and specify the IP address (assigned in the pre- liminary set up) of the SV1107IPEXT in the browser’s Address bar. A Security Alert dialog box, similar to the one below, appears. -
Page 19: Utility Icons
Note: See the next page for an explanation of the Log utility. Logout: Click this icon to log out and end your session Note: It is important to end your session, so the SV1107IPEXT can terminate the session. If you get a “System in use” error message... -
Page 20: Administration
Explanation To make it easier to manage installations that have more than Device one SV1107IPEXT, each one can be given a unique name. Name: Assign a name (up to 16 characters) by entering it here. Displays the SV1107IPEXT’s MAC Address. -
Page 21: Network
Instruction Manual Network The Network dialog is used to specify the SV1107IPEXT’s network envi- ronment. Access Ports If a firewall is being used, the Administrator can specify (in the firewall set up) the port numbers that it will allow. When connecting to the SV1107IPEXT, users must specify the port number as part of the IP Address. -
Page 22: Ip Address
Please note: If you wish to access the SV1107IPEXT from the Internet, assign a static IP address as you will need to configure your router to forward the port to the SV1107IPEXT, and an IP address is the most reli- able way to connect. -
Page 23: Security
An e-mail should be sent to the e-mail address specified in the To: field Please Note: This will only notify you if the SV1107IPEXT changes its address on your local network, it will not notify you if your external ad- dress changes. -
Page 24: Filtering
• If the range are allowed access to the SV1107IPEXT. Addresses not specified within the filter will be denied access. exclude button is checked, all the addresses within the filter •... -
Page 25: User Station Filtering - Mac Addresses
Custom SSL Certificates To authenticate a secured connection to the SV1107IPEXT, a custom SSL certificate is recommended. The custom certificate should be created as a PEM file, using the RSA algorithm, and at least 1024 bits. -
Page 26: User Management
Instruction Manual Enter the following command: openssl req -x509 -nodes -days 365 -newkey rsa: 1024 -keyout mycert.pem -out mycert.pem In order to use a custom SSL certificate, the created PEM file must then be uploaded through the web interface. Click on the Browse button, and locate the generated certificate file, then click on the Open button. - Page 27 Instruction Manual To delete a user profile, select it from the names displayed in the User List panel, and click Remove. The user’s name is removed from the User List panel. To modify a user profile, first select it from the list in the upper panel, then change the information that appears in the User Info dialog box.
-
Page 28: Customization
A check mark grants permission, no check mark denies permission to the profile being created or modified. Configure: Administrator privileges, which allows the user to set up and modify the SV1107IPEXT’s operating environment. Windows Client: allows access the SV1107IPEXT via the Windows Client software. -
Page 29: Firmware
To upgrade the firmware, do the following: After downloading the new firmware file to your computer, open your browser and login to the SV1107IPEXT. Click the Firmware icon, to bring up the Firmware File dialog box: Browse, then navigate to location of the new firmware and click Click on the new firmware file. -
Page 30: Using The Sv1107Ipext
For the browser-based Java Applet, you must have Sun’s Java Runtime Environment Version 6 Update 3 or higher Connecting from your Local Network Ensure the remote computer is connected to your network. Ensure the SV1107IPEXT is connected to your local network. -
Page 31: Using The Windows Client
Instruction Manual Open a web browser on the remote computer. Type in the IP Address you wrote down in step 6 of SV1107IPEXT Initial configuration for example http://192.168.1.60, then hit the enter You will be taken to the SV1107IPEXT Logon screen Enter your user name and password in the spaces provided and click on Logon. - Page 32 Instruction Manual When a connection to the SV1107IPEXT has been established, a screen similar to the one shown here will appear: After you click on the Switch button, the remote system appears on your monitor. You can work on the remote system via the screen displayed on your monitor, as if it were your local system.
-
Page 33: The Windows Client Control Panel
Instruction Manual Please Note: • Due to network lag, there might be a delay before your keystrokes appear on the screen. You may also have to wait a bit for the remote mouse to catch up to your local mouse before you click. •... -
Page 34: Hotkey Setup
Instruction Manual Icon Function Exit from the Windows Client From left to right, these icons indicate the current Num Lock, Caps Lock and Scroll Lock state, respectively. When the corresponding icon is illuminated, the function is active. When connected, toggle the LEDs to set the correct state Please Note: You can move the control panel to any convenient location on the remote window’s screen, by clicking on the title bar, and dragging... - Page 35 Although all other keyboard input is captured and sent to the SV1107IPEXT, [Alt + Tab] and [Ctrl + Alt + Del] key combinations work on your local computer.
-
Page 36: Video Adjustment
Instruction Manual Action Explanation If your local computer captures Ctrl key combinations, preventing them from being sent to the remote system, you can implement their effects on the remote system by specifying a function key to Substitute Ctrl key substitute for the Ctrl key. If you substitute the F11 key, for example, pressing [F11 + 5] would appear to the remote system as [Ctrl + 5]. - Page 37 Instruction Manual Option Usage Adjust the horizontal and vertical position of the Screen Position remote computer window by clicking the Arrow buttons. Click Auto-Sync to detect the vertical and horizontal offset values of the remote screen and automatically synchronize it with the local screen. If the local and remote mouse pointers are not in sync, in most cases, performing this function will bring them back Auto-Sync...
-
Page 38: The Message Board
Instruction Manual The Message Board The SV1107IPEXT supports two user logins, (only one user has control at a given time), which can possibly create access conflicts. To alleviate this problem, a message board feature has been provided, allowing users to communicate with one other. - Page 39 List panel when Chat has been disabled. Occupy / Release (Keyboard / Video / Mouse): When you Occupy the SV1107IPEXT, other users cannot see the video, nor can they input keyboard or mouse data. The button is shadowed when the unit is occupied.
-
Page 40: Virtual Media
Board - it is not visible on the local monitor. Virtual Media The SV1107IPEXT’s Virtual Media feature allows a USB 2.0 device (Floppy drive, or Flash Drive), on a remote system, to act as if it were installed on the local server. -
Page 41: The Java Applet
Java 2 installed. Java 2 is available for free download from Sun’s Java web site (http://java.sun.com). Note: To verify your configuration and to become familiar with using the applet, the first step is to access the SV1107IPEXT from your local net-... -
Page 42: Navigation
Start the browser of your choice on the remote computer. http://192.168.1.60, and hit the enter key. Type in You will be taken to the SV1107IPEXT Logon screen. Enter your user name and password in the spaces provided, then click on Logon. This brings you to the SV1107IPEXT main screen. -
Page 43: The Java Applet Toolbar
Instruction Manual The Java Applet Toolbar The Java Applet’s toolbar provides utilities to help you control remote KVM operations. Please Note: The tool bar is hidden in the blank area at the bottom cen- ter of the screen, and appears when you move the mouse pointer over the area. - Page 44 Please Note: We recommend that you perform Auto sync immediately following connection, to ensure proper mouse synchronization. Keypad Since some local input keyboard combinations cannot be captured and sent to the SV1107IPEXT, the Keypad provides a one-click implementa- tion of their actions on the remote system.
-
Page 45: Mouse Synchronization
To clear the login information (and return all settings to their defaults), do the following: Disconnect the power adapter and all cables. Remove the housing from the SV1107IPEXT. Short jumper J9 on the circuit board. Reconnect the SV1107IPEXT power... - Page 46 Internet: • A method to find the current IP address of the SV1107IPEXT (on your network) if no static IP Address is assigned. Some routers can use the name of the network device to locate it on your network. The network...
- Page 47 (that will periodically report the current external IP address to that service). Login to your router’s setup and look for a page called Port Forwarding. it should look similar to this: If a static IP address was assigned to the SV1107IPEXT, enter it in the space provided.
- Page 48 Instruction Manual If you are using Automatic addressing, click on the drop down arrow labeled Computer Name and select the SV1107IPEXT by name. Ports to Open [TCP] space, enter 9000, 9002 (or the port In the numbers you chose) and set the schedule. Activate Port Forwarding by placing an X in the box on the extreme left.
-
Page 49: Troubleshooting
Virtual Media device. Under Windows 2000/2003/XP you have the option to make the Virtual Media device read only or read / write The Java Applet Java Applet will not connect to the SV1107IPEXT Java Runtime Environment Version 6 Update 3 or higher must be installed... -
Page 50: The Windows Client
For mouse problems, see Additional Mouse Synchronization Proce- dures The Windows Client Windows Client will not connect to the SV1107IPEXT DirectX 7.0 or higher must be installed on your computer Remote mouse pointer is out of Sync Use the Auto Sync feature to sync the local and remote monitors. See Ad- ditional Mouse Synchronization Procedures for further mouse settings. -
Page 51: Mouse Synchronization Procedures
Note: These procedures are to be performed on the computers attached to the SV1107IPEXT ports (local) - not on the computer you are using to access the SV1107IPEXT (remote). In order for the local and remote mice to synchronize, you must use the generic mouse driver supplied with the Windows operating system. - Page 52 Instruction Manual Windows XP / Windows Server 2003 / Vista™ Set the mouse speed to the middle position, then disable Enhance Pointer Precision (Control Panel −> Printers and Other Hardware −> Mouse −> Pointer Options). Apply −> OK...
-
Page 53: Technical Support
Limitation of Liability In no event shall the liability of StarTech.com Ltd. and StarTech.com USA LLP (or their officers, directors, employees or agents) for any damages (whether direct or indirect, special, punitive, incidental, consequential, or... - Page 54 StarTech.com has been making “hard-to-find easy” since 1985, providing high quality solutions to a diverse IT and A/V customer base that spans many channels, including government, education and industrial facilities to name just a few. We offer an unmatched selection of computer parts, cables, A/V products, KVM and Serv-...
Need help?
Do you have a question about the SV1107IPEXT and is the answer not in the manual?
Questions and answers