
Related Manuals for StarTech.com SV1654DX4I


Summary of Contents for StarTech.com SV1654DX4I
- Page 1 SV1654DX4I SV3254DX4I Instruction Manual Matrix IP KVM Switch 4 Digital User 16/32 Port Cat 5 Matrix IP KVM Switch...
- Page 2 StarTech.com. Where they occur these references are for illustrative purposes only and do not represent an endorsement of a product or service by StarTech.com, or an en- dorsement of the product(s) to which this manual applies by the third-party company in question.
-
Page 3: Table Of Contents
Table of Contents Installation ............... 1 Package Contents ...............1 Required Cables and Hardware ..........1 Hardware Installation ..............1 Configuration ..............3 Using the On-Screen Display .............3 Using DHCP ................5 Web Configuration Using Static IP ..........6 Connecting the Host Computer to the Unit .........8 Disabling Mouse Acceleration on the Host Computer ....8 Connecting the SV5CONS Remote User Station (Optional) ..9 Using the Web Interface .......... - Page 4 Compatibility ................24 SNMP ..................25 RADIUS ...................25 Modem ..................26 Time/Date ................26 Firmware .................26 Info Functions ................28 Status ..................28 Port Numbers ................28 Help Menu ................30 Copyright Menu ...............30 The VNC Interface ............30 Native VNC Client ................31 Bribar Feature ................32 VirtKeys Menu ................38 Video Tuning Menu ..............39 Disk Control Menu ...............44 Accessing KVM Features ..........
- Page 5 Modem Troubleshooting Guide ...........53 About Security Certificate Warnings ...........53 Installing the new certificate ............54 Built-in Terminal Emulation ..........56 How to find the Built-in Terminal Emulator ........56 Navigating the Menus ..............56 How to create a New Connection (Using the Wizard) ....57 Troubleshooting .............
-
Page 6: Installation
1 x Instruction Manual Required Cables and Hardware Depending on your needs, you may need one or more of the following cables. Please note that the corresponding StarTech.com part numbers are listed in brackets: All applications: For connection to a LAN: 1 x Straight-through Ethernet patch cable... - Page 7 the rear panel of the SVxx54DX4I. Connect an XGA-compliant (or higher) monitor to the Video Out port on the front panel of SVxx54DX4I. Connect the power cord (provided) to an available electrical outlet. Plug the opposite end of the power cord into the AC power connector on the rear of the unit.
-
Page 8: Configuration
Configuration SVxx54DX4I offers four distinct methods for configuring the unit for your network. Which method will work best will depend on your level of experience and your specific network configuration. Using the On-Screen Display Upon initial boot, you will require an administrative username and password. - Page 9 DHCP connection is present, press the Setup button on the rear panel of SVxx54DX4I to display the Main Menu screen, where you will be given several basic setup options: If static IP addresses are assigned, you will likely need to change the Net Mask, IP Address and other details, prior to connecting via your Web browser.
-
Page 10: Using Dhcp
Using DHCP This method requires that your network implement DHCP (Dynamic Host Configuration Protocol), usually on a server or network access device such as a router, that dynamically allows devices to join the network without pre-configuration. Please note: The OSD will report the IP address as assigned by the DHCP server. -
Page 11: Web Configuration Using Static Ip
please write this number down and keep it for future reference. Once you locate the MAC address of your unit in the DHCP log, you can match it to its leased IP address and proceed with the Web configuration. Please note: •... - Page 12 The following are the factory default values for the WAN port: IP Address: 192.168.1.123 Subnet Mask: 255.255.255.0 Default Gateway: 192.168.1.254 Broadcast: 192.168.1.255 To access the Web configuration for this product, you will need to configure the workstation you are using to the same subnet (255.255.255.0) and also assign it a valid IP address (i.e.
-
Page 13: Connecting The Host Computer To The Unit
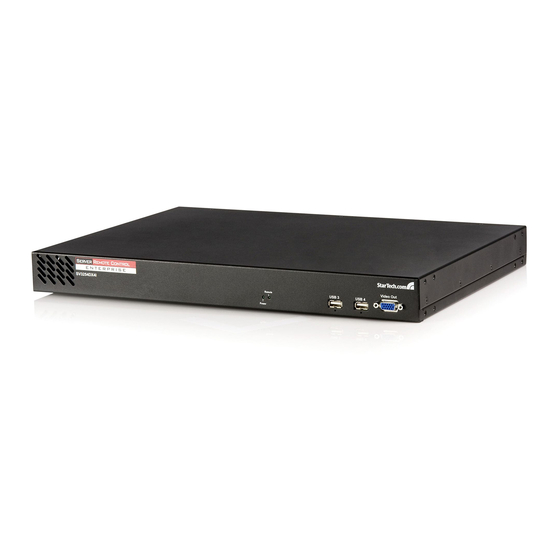
Connecting the Host Computer to the Unit Please note: It is strongly recommended that all systems supporting USB use the USB server interface modules (see StarTech.com part # SV5USBM). PS/2 modules (SV5PS2M) are available for legacy systems. If present, disconnect the existing monitor and PS/2 or USB keyboard/ mouse from the host computer. -
Page 14: Connecting The Sv5Cons Remote User Station (Optional)
Windows 2000 From the Control Panel, click on Mouse. From Mouse properties, click on the Motion tab. Make sure that the Pointer speed bar is centered and Acceleration is set to None. Windows XP and Windows Server 2003 Go to Pointer Options and turn off Enhance Pointer Precision. Ensure that the pointer speed bar is centered. -
Page 15: Using The Web Interface
<CTRL> <CTRL> <C> Cause auto calibration to restart <CTRL><CTRL> <A> Go to A port <CTRL> <CTRL> <B> Go to B port To switch A/B connections at any time (even <CTRL> + <Space> if no KVM OSD is shown, or if current KVM is powered down). -
Page 16: The Login Screen
Because Java is considered a “safe” programming language, the Java VNC client has some limitations. Certain special keystrokes cannot be sent, such as “Scroll Lock” on the keyboard. This client software requires the use of Java 2 (JRE 1.4) to enable features like wheel mouse support. -
Page 17: Web Interface Introduction
Web Interface Introduction Home After the initial login screen, the Home screen will appear, offering a Screen Thumbnail view of the controlled computer, as well as basic file transfer functions, Monitoring Information, System Identification and VNC Client options. - Page 18 Name: At the top of the screen, the name of the machine being controlled is displayed Tip line: The area directly below the Name indicates what function each selection from the Main Menu performs. “Hover” the mouse pointer over each individual listing in the Main Menu to update this message according to the function performed by each listing.
- Page 19 The ways of connecting the six different sources to the 4 output of the 16:4 matrix are: Local VGA is connected to all 4 outputs of the 16:4 matrix and will automatically switch between them according to the output resources. Each of the four VNC-(A, B, C and D)channels are connected to one of the 4 outputs of the 16:4 matrix.
-
Page 20: Thumbnails
Thumbnails The Thumbnails screen provides a thumbnail view of connected computers, and allows you to click through for direct monitoring of any of the displayed devices. The thumbnails will update periodically. User Preferences The User Preferences screen offers several configuration options, pertaining to the functionality of SVxx54DX4I on a per-user basis. - Page 21 SVxx54DX4I will wait until the host is not using the disk, and add or remove the files. When the host computer next looks at the drive, it will notice the changes. You can read files from the virtual disk at any time, as long as the host is not actively writing to the disk.
- Page 22 called Put files here...TXT. SVxx54DX4I is able to read most MS-DOS/Windows formatted disks and presents the files via the Web interface. However, disk emulation occurs at the lowest level, so other disk formats can be used if you have the tools needed to create and read the disk images. At the bottom of the page are the upload and download options for the entire disk image.
-
Page 23: Vnc
Booting from USB Disk: If the host computer’s BIOS supports USB boot devices, it is possible to boot from the emulated CD-ROM or floppy - allowing complete operating system replacement without any on-site intervention.) The first step is getting a bootable disk image onto the emulated floppy Please note that each BIOS manufacturer offers varying levels of support for USB boot devices and may require configuration methods that are unique (to the manufacturer) in order to utilize this feature. -
Page 24: Network Config
Admin Functions ‘ The Admin functions allow you to access all of the features you will need to perform an initial configuration of the SVxx54DX4I. Network Config DHCP (Dynamic Host Configuration Protocol) Automatic network configuration using DHCP is: Enabled/Disabled. This feature applies only to the LAN port on the rear panel and is enabled by default. - Page 25 IP Addresses and Routing This table allows you to assign IP information for the LAN and WAN ports separately. If you are using DHCP, the values for the LAN port will be filled in automatically and any changes made will not affect the setup. If Ethernet Bridging is enabled, the WAN port will use the same settings as the LAN port, and any changes will not affect the setup for that port.
-
Page 26: User Accounts
time, because the 802.1d (STP) algorithm must finish before the DHCP broadcast can go out. To change this setting, select either Enabled or Disabled from the drop-down menu, then click Commit and Apply. User Accounts Edit Details The Edit Details section allows you to modify one user account at a time, by clicking on the desired account in the User List section. -
Page 27: System Ident
User List • Select which user to change, by clicking on their name. • Table has summary values: Three stars if there is a password defined for the user, or else blank. English summary of access rights (incomplete vs. actual details). Click the Del button to delete the user. - Page 28 Other identification details These values are for information purposes only. They are visible from the VNC client and via SNMP (if enabled). Location This string is sent as the system.sysLocation value over SNMP. It should describe the location of this system. Contact Name This string is sent as the system.sysContact value over SNMP.
-
Page 29: Security
Description A user-defined description for the controlled machine. Security This menu allows you to configure number settings, including changing the default password (admin) (recommended). Read consider the comments and instructions this menu before making any changes, as changing these features could make the unit inaccessible through Web configuration (i.e. -
Page 30: Snmp
SNMP The SNMP menu allows you to configure the SVxx54DX4I so it can be recognized and managed using industry-standard Simple Network Management Protocol software. RADIUS The RADIUS server requires the IP address, the UDP port number (1812 by default, or 1645) and the shared secret. -
Page 31: Modem
SVxx54DX4I unit will not be used, except for the SSH login. However, if a user name in the form name.local is given at the RADIUS prompt, the system will use name, check the password locally and skip RADIUS authentication. Delete all local accounts to avoid this behavior. When connecting via VNC, a login screen is generated that asks for a RADIUS username and password. - Page 32 installation, please click on Get latest version. If it cannot access the Internet directly (perhaps due to a web proxy, or other firewalls), a page will be shown that causes your browser to download the required file. Save this file to disk and then upload it as described in the next section, Manual Upload.
-
Page 33: Info Functions
features opened by the code will be enabled immediately, but you may need to reboot the unit to begin using certain features. Info Functions Status The Status screen displays a system security log, various system settings, and enables you to generate a copy of the system configuration in plain text format. - Page 34 set to common Internet values. You may wish to enhance security by disabling services that you will not use with the unit. To disable a service, change its port number to 0. For flexibility, both the LAN and WAN ports can be configured separately.
-
Page 35: Help Menu
Help Menu Provides (Frequently Asked Questions) listing assist you with the features and operation of the SVxx54DX4I. Site map Menu This menu provides a hyperlinked directory of each setting available on the Web configurator. Copyright Menu Provides the Terms of Use and other information related to the firmware and software on the SVxx54DX4I. -
Page 36: Native Vnc Client
Native VNC Client This system implements the VNC protocol, so any off-the-shelf VNC client can be used. There are several different VNC clients available and they should all work with this system. This system automatically detects and makes use of certain extensions to the basic RFB protocol that is provided by some of the the better VNC clients. -
Page 37: Bribar Feature
you want to tunnel two or more systems, you will need to use a unique number for each instance on the same SSH client machine. • Some Unix versions of the VNC client have integrated SSH tunneling support. Some clients require your local user id to be the same as the userid on the system. - Page 38 ShiftLock and ScrollLock respectively. <<: Shrinks the Bribar into a small floating window. Drag the floater using the StarTech.com logo, or click << to return it to the Bribar. Other items: If the server’s screen is larger than 1280 x 1024, additional buttons will be shown to the right of the above listed items.
- Page 39 By hovering the mouse over any entry, you can see details pertaining to that entry. Select one of the listed systems by clicking on the listing or corresponding number as appropriate. Or, directly select any system by pressing 1 through 9, A (for 10) through W (for 32). Similarly, click on the Up and Down arrows to select the previous or next available system.
-
Page 40: Main Menu
Main Menu To access the main menu, quickly press the F7 key twice quickly. You must press the key twice within one second. If you press it once or too slowly, then the F7 key(s) are sent to the host, just like any other key. This is the only way to get into the menu system, if the Bribar is disabled. - Page 41 Status Current status of the attached system and the status of the unit. B/W Min/Avg/Max/Auto Bandwidth control. Current operation will be indicated with white highlighting. If you choose Min/Avg/Max then you will override the default, Auto. As the automatic mode measures actual network performance, you may see the current mode switch from Min up to Avg or Max.
- Page 42 Thumbnails Switch to smaller thumbnail size screen images (click anywhere on thumbnail to restore it). Each button corresponds to a different sized image, from half size to one-sixteenth. Logout End the VNC login session and disconnect. Video Tuning Sub-menu with video adjustments, to be used when automatic picture adjustment does not provide a good quality picture.
-
Page 43: Virtkeys Menu
VirtKeys Menu Clicking any button in the top half of the window simulates pressing and releasing the indicated key. In the bottom area of the screen, clicking will simulate the indicated Meta key being pressed. You may then click in the top part to send another key and release the Meta key at the same time. -
Page 44: Video Tuning Menu
Video Tuning Menu Use the Auto Everything button to automatically fine-tune all three adjustments. If the test pattern for Color Offset calibration is not present on the screen, then the Color Offset adjustment is skipped. Changes/frame Indicates the number of 16x16 blocks of video that are being sent, on average, for every frame of video. - Page 45 Color Offset Color Offset is a fine tuning adjustment that requires the use of a test pattern. There is a copy of the test pattern available on the Help! menu of the integrated web server. You must arrange for that image to be shown on the host computer.
-
Page 46: Network Performance
dropping when moving windows horizontally. You may use the Redraw button to correct these, or use a lower filter number. At minimum, these values must be greater than two. Flatness Filter To improve compression ratios, the SVxx54DX4I will group adjacent pixels that are nearly the same colour and treat them as equal. - Page 47 network. If the whole screen is changing, then the unit will send as much data as your network connection and VNC client allow. • Network latency, which is the total time it takes for a packet to get to the SVxx54DX4I and come back, has the biggest impact on perceived performance and usability.
- Page 48 buttons decrease or increase the parameter by a large amount. In the case of phase, this is four units and for all others, ten units. The - and + buttons decrease or increase the parameter by one unit. The middle button sets the parameter to the middle value.
-
Page 49: Disk Control Menu
Disk Control Menu Status: Shows the current disk type. This can be changed through the web interface. Access: Shows the number of completed read and write operations. Disk Owner: Which PC port has control of the disk. Only one port may access it a time. -
Page 50: Accessing Kvm Features
Accessing KVM Features OSD Operations Start the OSD (On-Screen Display) by pressing the left <CTRL> or <ScrLk> key twice within one second. • The entry for the currently selected computer is highlighted in green in the OSD • Use the <UP> and <DOWN> arrow keys to highlight a computer and the <ENTER>... -
Page 51: Osd Function Keys
OSD Function Keys OSD Keys Function 1 - 9 (0 = 10) Selects a channel from the list View a channel from the list. ( Does not close F1 – F10 OSD) Activate terminal emulator Logout immediately Show help screen Reset server interface module (May be used to recover from stuck keyboard or mouse emulation) Show TCP/IP status/settings. -
Page 52: Using The Modem Feature
Using the Modem feature NOTE: Requires an RJ45 to DB9 adapter. Please see StarTech.com part number(s): GC98FF (DB9 Female to RJ45 Female Adapter) or GC98MF (DB9 Male to RJ45 Female) as applicable. Background The modem feature allows the SVxx54DX4I to act as an Internet connection server for increased security and flexibility in connecting with the host computer. -
Page 53: Connecting A Modem
Connecting a Modem The SVxx54DX4I will work with virtually any Hayes-compatible modem that recognizes the standard AT command set. Some modem manufacturers offer “enterprise” grade modem products that include technology to improve the stability of connections; whether this type of product would be beneficial to your application depends on whether you consider the modem connection to be mission-critical, the quality of your telecom infrastructure, and your budget for implementing this solution. -
Page 54: Modem Configuration
reflect the line conditions at the time the connection is made. The serial port can be used for serial port configuration when the modem is connected. It requires the use of a null modem serial cable. Place the modem near the SVxx54DX4I and an available telephone jack. -
Page 55: Configuring The Remote Connection
to activate it. The string included should work with the majority of modems and configures the following connection properties: answer incoming calls on the first ring, enable hardware flow control, and lock the connection speed. Your modem’s documentation will describe other potential init strings that you can use to alter the connection properties. -
Page 56: Accessing The Web Interface
Click Create a new connection under Network Tasks. New Connection Wizard window will open. Click Next. Select Connect to the Internet, then click Next. Select Set up my connection manually, then click Next. Select Connect using a dial-up modem and click Next. In the space provided under ISP Name, type an appropriate name of your choosing for the connection, then click Next. - Page 57 This, and the IP address of the SVxx54DX4I, cannot be modified. The following TCP/IP port numbers are assigned for a PPP connection, regardless of the settings configured in the Web interface for the LAN or WAN ports: HTTPS: 443 VNC (clear-text): 5900 VNC (SSL secured): 15900 SSH: 22 Performance Notes...
-
Page 58: Modem Troubleshooting Guide
Modem Troubleshooting Guide The following messages will appear in the system log on the Status screen in the Web interface and may help to diagnose problems with the modem configuration. Starting PPP (for auth) on port… Modem is connecting and the PPP login process is starting. Modem hang up. -
Page 59: Installing The New Certificate
Web browser or the VNC Java client for two different reasons. First, the CA that has issued the certificate on StarTech.com’s behalf may not yet be recognized as a trusted source by the computer you are using to access the SVxx54DX4I. Second, since the unit could be configured in a number different ways, it is impossible to supply a generic certificate that will match your exact network settings. - Page 60 the Update security certificate link. When prompted, choose Open. A Window will appear that offers information about the certificate. Click Install Certificate. Certificate Import Wizard will appear. Select Automatically select the certificate store… (default) and click Next. When the next window appears, click Finish.
-
Page 61: Built-In Terminal Emulation
Built-in Terminal Emulation The built in Terminal Emulator is an ANSI terminal that allows local users (Directly connected or via the User station) the ability to initialize a command prompt shell to connect to remote and local devices via SSH, Telnet and directly connected serial ports. -
Page 62: How To Create A New Connection (Using The Wizard)
How to create a New Connection (Using the Wizard) Use the arrow keys or underlined letter to select “Create new connection (using wizard) Select your connections method or protocol (example: SSH, Telnet, Direct) - Page 63 If you are choosing “Direct”, use the screens that follow to choose the appropriate setting for your serially attached device. If you choose SSH or Telnet, the following screen will ask you for the Host Name or IP address of your remote connection: Enter the specific port number used by the device to which you are attempting to connect.
- Page 64 Next you will be asked to declare any alternative SSH options. Last, you will be asked to provide a meaningful name for this newly created connection. Then save the configurations. Once you have created your new connection you will see it listed above the other commands in the main menu.
- Page 65 Highlight the connection you wish to remove and press enter. Please Note: Anyone can create a connection, but only the Admin has the right to remove them. Other Commands: Directly enter a command Allows the user to enter a command shell and connect to a remote system etc.
-
Page 66: Troubleshooting
Troubleshooting Forgotten master password You can reset the master password using the serial interface on the unit. Use the S command, and type a new password. The old password is not required for this procedure. Similarly, you can press (and hold) the reset button (located to the immediate left of the USB ports on the rear panel) for thirty seconds to clear all settings and return the unit to factory defaults. - Page 67 public key of this host and doesn’t re-issue this warning. Certificate warning shown when connecting via HTTPS. It is normal for a warning dialog to be shown when connecting via HTTPS. The SSL certificate SVxx54DX4I uses is created when the unit is first produced. It does not contain the correct hostname (subject name) because you can change the hostname as required.
-
Page 68: Serial Interface Pinout
Serial Interface Pinout RJ45 DB9 (male) Signal DSR (input) DCD (input) DTR (output) RxD (input) TxD (output) CTS (input) RTS (output) RI (not used) The DB9 side is wired as DCE (same as a computer). -
Page 69: Technical Specifications
Technical Specifications Maximum Recommended 1280 x 1024@ 60Hz Resolution Maximum Supported 1600 x 1200 @ 60 Hz Resolution SV1654DX4I: 16 x RJ45 Host Connectors SV3254DX4I: 32 x RJ45 Console Connectors 2 x HDDB15 Female 2 x USB A Female (Front Panel) 2 x USB A Female (Rear Panel) 2 x DIN6 Female Other Connectors... -
Page 70: Caution
Operation Temperature 0°C to 40°C (32°F to 104°F) Humidity 80% rh, nc Dimensions 310 x 440 x 44 mm Weight 2200 grams (4.5 Lbs) Electrical 100-240 V AC, 0.5 A, IEC320 socket Frequency 50-60 Hz • Source code for the unit operating system is available upon request. -
Page 71: Technical Support
Technical Support StarTech.com’s lifetime technical support is an integral part of our com- mit-ment to provide industry-leading solutions. If you ever need help with your product, visit www.startech.com/support and access our com- prehensive selection of online tools, documentation, and downloads. - Page 72 StarTech.com has been making “hard-to-find easy” since 1985, providing high quality solutions to a diverse IT and A/V customer base that spans many channels, including government, education and industrial facilities to name just a few. We offer an unmatched selection of computer parts, cables, A/V products, KVM and Serv-...
Need help?
Do you have a question about the SV1654DX4I and is the answer not in the manual?
Questions and answers