
Related Manuals for StarTech.com SV441HDIE


Summary of Contents for StarTech.com SV441HDIE
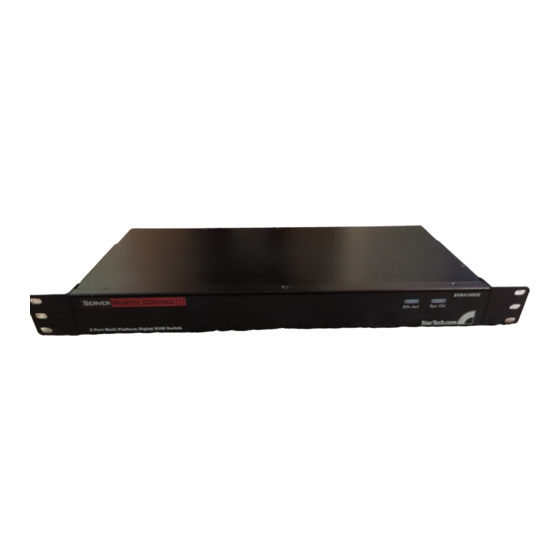
- Page 1 Server Remote Control Multi-port Enhanced KVM Switch over IP SV441HDIE Instruction Manual SV841HDIE SV1641HDIE Actual product may vary from p...
- Page 2 StarTech.com. Where they occur these references are for illustrative purposes only and do not represent an endorsement of a product or service by StarTech.com, or an endorsement of the product(s) to which this manual applies by the third-party company in question.
-
Page 3: Table Of Contents
Instruction Manual T T a a b b l l e e o o f f C C o o n n t t e e n n t t s s Introduction ........... . .1 Features . - Page 4 Instruction Manual Main Menu ........... .21 VirtKeys .
-
Page 5: Features
I I n n t t r r o o d d u u c c t t i i o o n n Thank you for purchasing a StarTech.com Server Remote Control. Using the Internet or your TCP/IP enabled network, you can now remotely monitor and control critical PC servers and workstations, using an industry-standard Web browser or VNC client. -
Page 6: Installing The Kvm Remote Control
NOTE: If you are using cables other than those provided in the KVM Remote Control package or branded by StarTech.com, ensure that the cables are of high quality and use the minimum possible distance necessary. Low quality or excessively long (particularly video) cables between the host computer and the Remote Control could degrade performance. -
Page 7: Connecting A Local Keyboard, Mouse And Monitor
Instruction Manual Connecting a Local Keyboard, Mouse, and Monitor *SV841HDIE rear panel shown IP Setup button: Pressing this button (using a DC In paperclip, etc.) will automatically load the On- Link Screen Display. Serial Port VGA Out Reset button: This button serves two purposes: R-Port IP Setup button 1)Power reset - reboots power to the SVxx41HDIE... -
Page 8: Disabling Mouse Acceleration On Host Computer
Instruction Manual Disabling Mouse Acceleration on the Host Computer Many operating systems offer a feature called mouse acceleration, allowing the user to adjust the responsiveness of the cursor on the screen in relation to physical movements of the mouse. While this is usually a beneficial interface enhancement, it can interfere with the operation of the KVM Remote Control and should be disabled on the host computer before a remote session is attempted. -
Page 9: Configuring Svxx41Hdie
Instruction Manual Configuring SVxx41HDIE SVxx41HDIE offers four distinct methods for configuring the unit for your network. Which method will work best will depend on your level of experience and your specific network configuration. Please note: Connecting the remote computers prior to following the steps outlined below can result in system instability. -
Page 10: Web Configuration Using Dhcp
Instruction Manual At any time, you can return to the previous menu by pressing the Page Up key. Please note: Although it is not a required step, changing the Admin Password adds security to your configuration settings. By default, the Admin Password is set to Admin. -
Page 11: Web Configuration Using A Static Ip Address
Instruction Manual The easiest way to identify your SVxx41HDIE on the network is by its MAC address, a unique hardware identifier that is specific to your unit. The MAC address of the unit can be found on a white sticker on the bottom of the SVxx41HDIE. Retain this number for future reference. -
Page 12: Terminal Configuration Using A Serial Cable
Instruction Manual Terminal Configuration Using a Serial Cable Configuring the SVxx41HDIE using a serial cable is the best choice if you need to pre- configure the unit before attaching it to a network, i.e. when sending to a branch office, customer site, etc. -
Page 13: The Login Screen
Instruction Manual The Login Screen Before you can access the Web configuration interface, you must enter a user name and password. The default username and password as shipped from the factory is username admin, with a password of admin. NOTE: Before the login screen appears, your Web browser may display a warning about an invalid security certificate. -
Page 14: Main Menu Selections
Instruction Manual Name: At the top of the screen, the name of the machine being controlled is displayed Main Menu: At the left-most side of each page, the Main Menu is displayed, allowing users to choose functions offered by the Web Interface. Help area: The right-most column offers an optional help summary for each page. -
Page 15: Network Config
Instruction Manual Snapshots : The Snapshots screen allows you to view and save a screenshot of the controlled computer in its current state. This screenshot will update periodically (automatically). Saved image files are stored in .PNG format. Logout : Clicking on Logout will terminate your Web Interface section. To re-initiate the Web Interface, you will be required to re-enter your username and password. -
Page 16: User Accounts
Instruction Manual Clicking the Commit button applies any changes made on this page, but leaves the old settings active until the next time the unit restarts. Clicking Make changes effective now applies the changes and restarts SVxx41HDIE so the new settings take effect immediately. -
Page 17: Security
Compatibility: The Compatibility menu offers features that may offer enhanced functionality with certain KVM and power products, such as StarTech.com’s Remote Power Switch (PCM8155HNA). These can be left at their default values if you are not connecting the unit to a KVM or power management device. -
Page 18: Radius
Instruction Manual RADIUS: The RADIUS server requires the IP address, the UDP port number (1812 - default or 1645) and the shared secret. The shared secret is used to encrypt communications and corresponds to a shared password for the RADIUS server and the client machine. -
Page 19: Firmware
Manual Upload: Enter the name of the firmware file that you downloaded from StarTech.com into the field provided (or use the Browse... button). Press Start Upload and wait until a successful upload message is shown. -
Page 20: Port Numbers
Instruction Manual Status: The Status screen displays a system security log, various system settings, and the ability to generate a copy of the system configuration in plain text format. Port Numbers: Port Numbers provides a table allowing you to change TCP port values for services available on the SVxx41HDIE. -
Page 21: Using The Terminal Interface Via Serial Port
Instruction Manual Using the Terminal Interface via Serial Port The terminal interface can be accessed via the serial port for configuration of the basic settings of the SVxx41HDIE. While not intended to be a substitute for the Web interface, it does allow you to configure some of the same functions. The menu list below describes the options that can be modified through the terminal interface. -
Page 22: Native Vnc Client
Instruction Manual Native VNC Client This system implements the VNC protocol, so any off-the-shelf VNC client can be used. There are over 17 different VNC clients available and they should all work with this system. This system automatically detects and makes use of certain extensions to the basic RFB protocol that is provided by the better VNC clients. -
Page 23: Using The Vnc Menu
Instruction Manual Using the VNC Menu One of the unique features of this product is the VNC menu system. Whenever you see a window with a dark blue background and grey edges, this window has been inserted into the VNC data stream so that it is effectively laid over the existing video. These menus allow you to control the many features of the SVxx41HDIE without using the web interface or a custom client. - Page 24 Instruction Manual Resync: Re-aligns the remote and local mouse points so they are on top of each other. Redraw: Redraws the entire screen contents; occurs immediately. PS/2: Resets the PS/2 keyboard and mouse emulation. Useful to recover failed mouse and/or keyboard connections in PS/2 mode. ÷4, ÷8: Switches to thumbnail mode, at indicated size (i.e.
-
Page 25: Main Menu
Instruction Manual Main Menu To access the main menu, quickly press F7 twice. You must press the key twice within one second. If you press it once or too slowly, then the F7 key(s) are sent to the host, just like any other key. This is the only way to get into the menu system, if the Bribar is disabled. - Page 26 Instruction Manual working. • Take Control: When multiple users are connected to the same system, use this button to take control away from another user. Only one user may control the keyboard and mouse at any time. All users see the same picture. •...
-
Page 27: Virtkeys
Instruction Manual VirtKeys Menu Clicking any button in the top half of the window simulates pressing and releasing the indicated key. In the bottom area of the screen, clicking will simulate the indicated Meta key being pressed. You may then click in the top part to send another key and release the Meta key at the same time. -
Page 28: Accessing Kvm Features
Instruction Manual Changes/frame indicates the number of 16x16 blocks of video that are being sent, on average, for every frame of video. With a static image being displayed by the server, this number will be zero (shown as -nil-). Moving the mouse, for example, will cause the number to jump to about 2 or 3. -
Page 29: Cascade Configurations
Instruction Manual Cascade Configuration Please note:When turning on your cascaded switches, turn on the Slave switches prior to turning on the Master switch. You can connect a second level of KVMs to one or more of your Master Server Remote Control’s PC x ports. -
Page 30: Osd Function Keys
Instruction Manual activated. • Use the <UP> and <DOWN> arrow keys to highlight a computer and the <ENTER> key to select it. • Press <ESCAPE> to exit the OSD menu and remove the OSD menu from the screen. • A triangle mark on the right side of the screen indicates the port is cascaded to a Slave KVM;... - Page 31 Instruction Manual Function key <F4> More functions are available by hitting <F4>. A new screen pops up displaying the functions described below. Most of them are marked with a triangle indicating there are options to choose from. Using the <UP> and <DOWN> arrow keys, select the function and press <ENTER>.
-
Page 32: Hot Key Commands
Instruction Manual BIOS and Windows operating system. Available speed options are Low, Middle, Fast and Faster as 10, 15, 20 and 30 characters/sec respectively. The Keyboard Speed setting is retained in non-volatile memory. Hotkey Menu When you hit the left <CTRL> key twice within two seconds, the Hotkey Menu appears displaying a list of hot-key commands if the option is On. - Page 33 Instruction Manual Slave.) For example, to access the computer plugged into port C of a Slave KVM Switch that is plugged into Port 6 of the Master switch, type: left Ctrl + left Ctrl + 6 + C Auto Scan Auto Scan automatically scans through powered computers at a fixed interval: left Ctrl + left Ctrl + F1.
-
Page 34: Changing Your Configuration
Instruction Manual master switch.) Changing Your Configuration After the initial power up, any device (either a KVM or a PC) can be added or removed from any PC x port on the KVM without having to power down the Master KVM Switch. Make sure that devices are turned offer before connecting them to the Master KVM switch. -
Page 35: Optimizing Video Performance
Instruction Manual Optimizing video performance Choose the best video mode • We recommend using 60Hz refresh rate and 1024x768 resolution. Using a smaller resolution like this allows you to fit multiple windows on your remote desktop. Higher refresh rates stress the video card's quality and do not provide any additional information or benefit. -
Page 36: Using The Advanced Video Tuning Feature
Instruction Manual Using the Advanced Video Tuning feature The Advanced Video Tuning menu allows you to adjust the qualities of the video in your VNC sessions, and can be accessed by clicking the Advanced button on the Video Tuning VNC menu. While many users will probably allow the SVxx41HDIE to automatically configure the video properties, you can use this menu to exercise a great deal of control over the settings if you wish. -
Page 37: Using The Modem Feature
If you wish to use this feature through a PBX system, it may require some experimentation and additional support from your telecom services provider, and is not supported by StarTech.com. Connecting a Modem... -
Page 38: Modem Configuration
Instruction Manual in its documentation. The opposite end of the modem’s data cable should be a DB9 female serial connection. Connect that end of the cable to the Serial connection on the rear panel of the SVxx41HDIE. Modem configuration Although most connections will work appropriately with the default settings on SVxx41HDIE, manual changes can be made. -
Page 39: Accessing The Web Interface
Instruction Manual Select Connect to the Internet and click Next. Select Set up my connection manually and click Next. Select Connect using a dial-up modem and click Next. In the space provided under ISP Name, type an appropriate name of your choosing for the connection. -
Page 40: Modem Troubleshooting Guide
Instruction Manual users are connected while a PPP session is active, their screens will be in grayscale as well. When PPP is inactive, color is automatically re-enabled. • Some areas of the screen may not be updated as frequently as others, and animations or other auto-updating areas of the screen may appear out-of-focus or “blocky”... -
Page 41: Serial Remote Control Operation
Instruction Manual Modem answers: xxxxxxxxx The connection speed and protocol used for a connection, as reported by the modem. The exact contents of the message will vary depending on the modem make and model. Using Optional Serial Remote Control (R-Port) Modules Serial Remote Control operation Background The SVxx41HDIE offers a unique way to expand the functionality of the base product. - Page 42 Instruction Manual #: You can assign a value (1 ~ 99) to each attached serial remote control module. This does not affect the configuration or operation of the device in any way, but is simply a means to sort this list for ease of management. Name/Description: An identifier for the R-Port module.
-
Page 43: Advanced Configuration Using The Integrated Ssh Shell
Instruction Manual Advanced Configuration Using the Integrated SSH Shell In most cases, configuring the SVxx41HDIE to the same settings as the R-Port devices you are connecting should allow the devices to work with a minimum amount of configuration. However, you can also change the default settings on each R-Port device to fit your preferences and the needs of your application. -
Page 44: About Security Certificate Warnings
Web browser or the VNC Java client for two different reasons. First, the CA that has issued the certificate on StarTech.com’s behalf may not yet be recognized as a trusted source by the computer you are using to access the SVxx41HDIE. - Page 45 Instruction Manual Can I prevent the warning from occurring? Yes. You have two options that may prevent the warning from occurring. First, if the Web browser you are using offers the option to ignore the warning for future visits, the browser will no longer generate a warning if that option is selected.
-
Page 46: Troubleshooting
Instruction Manual Troubleshooting Forgotten master password. You can reset the master password using the serial interface on the unit. Use the S command, and type a new password. The old password is not required for this procedure. Remote mouse and local mouse don't line up. Use the Mouse resync command in the main menu or press the Resync button on the Bribar. -
Page 47: Specifications
Instruction Manual S S p p e e c c i i f f i i c c a a t t i i o o n n s s General Specifications Maximum supported video mode 1600 x 1200 @85Hz 640x400 @ 85Hz 720x400 @ 85Hz 640x480 @ 60Hz, 72Hz, 75Hz, 85Hz... -
Page 48: Supported Protocols
Instruction Manual S S p p e e c c i i f f i i c c a a t t i i o o n n s s Supported Protocols Service Description Benefit May be used to securely “tunnel” VNC and HTTP Secure Shell protocols. - Page 49 Visit www.startech.com for complete information about all our products and to access exclusive interactive tools such as the Parts Finder and the KVM Reference Guide. StarTech.com makes it easy to complete almost any IT solution. Find out for yourself why our products lead the industry in performance, support, and value.
Need help?
Do you have a question about the SV441HDIE and is the answer not in the manual?
Questions and answers