
Related Manuals for Electrolux EKI6762AOX


Summary of Contents for Electrolux EKI6762AOX
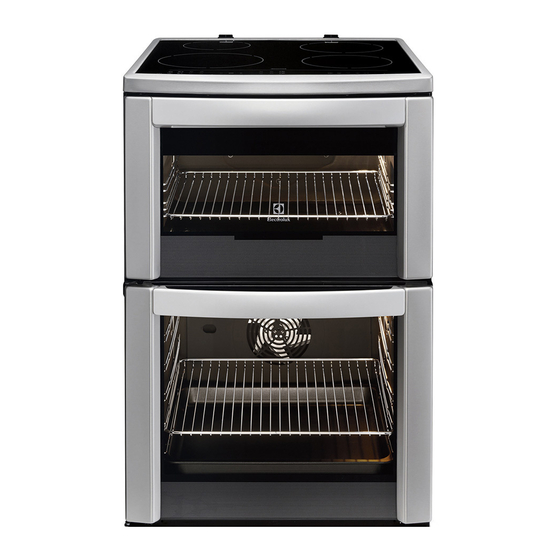
- Page 1 ..................... EKI6762AOX EN COOKER USER MANUAL...
-
Page 2: Table Of Contents
15. EUROPEAN GUARANTEE ..........38 WE’RE THINKING OF YOU Thank you for purchasing an Electrolux appliance. You’ve chosen a product that brings with it decades of professional experience and innovation. Ingenious and stylish, it has been designed with you in mind. -
Page 3: Safety Information
ENGLISH 1. SAFETY INFORMATION Before the installation and use of the appliance, carefully read the supplied instructions. The manufacturer is not responsible if an incorrect installation and use causes in- juries and damages. Always keep the instructions with the appliance for future reference. 1.1 Children and vulnerable people safety WARNING! Risk of suffocation, injury or permanent disability. -
Page 4: Safety Instructions
• Never try to extinguish a fire with water, but switch off the appliance and then cover flame e.g. with a lid or a fire blanket. • Do not store items on the cooking surfaces. • Do not use a steam cleaner to clean the appliance. -
Page 5: Electrical Connection
ENGLISH WARNING! 2.2 Use Make sure to install a stabilizing WARNING! means in order to prevent tipping Risk of injury, burns or electric of the appliance. Refer to Installa- shock. tion chapter. • Use this appliance in a household envi- Electrical connection ronment. -
Page 6: Care And Cleaning
• Cookware made of cast iron, aluminium when you cook with them. or with a damaged bottom can cause scratches on the glass ceramic. Always • The vapours that very hot oil releases lift these objects up when you have to can cause spontaneous combustion. -
Page 7: Product Description
ENGLISH • Disconnect the appliance from the • Remove the door catch to prevent chil- mains supply. dren and pets to get closed in the ap- pliance. • Cut off the mains cable and discard it. 3. PRODUCT DESCRIPTION 3.1 General overview Air vents for cooling fan Heating element Oven lamp... -
Page 8: Before First Use
4. BEFORE FIRST USE WARNING! the Time function indicator flashes auto- Refer to the Safety chapters. matically. To set the current time use but- ton. 4.1 Initial Cleaning After approximately 5 seconds, the flash- • Remove all parts from the appliance. -
Page 9: Control Panel Layout
ENGLISH 5.1 Control panel layout Use the sensor fields to operate the appliance. sensor field function locks / unlocks the control panel with an indicator a heat setting display shows the heat setting cooking zone's indicators of shows for which zone you set the time timer the timer display shows the time in minutes... -
Page 10: Power Management
10 www.electrolux.com The Power function is activated for 10 mi- On and Off nutes at most. After that, the induction cooking zone automatically changes back Touch for 2 seconds to start the appli- to the highest heat setting. To activate, ance. -
Page 11: Hob - Helpful Hints And Tips
ENGLISH Switching off the child safety device Starting the STOP+GO • Start the hob with . Do not set the function sets all cooking zones heat settings. Touch for 4 sec- that operate to a keep warm setting. onds. Acoustic signal appears. The •... -
Page 12: Cooking Zones
12 www.electrolux.com 6.1 Cookware for induction Cooking zone Minimum cook- cooking zones ware diameter [mm] In induction cooking, a powerful electromagnetic field almost in- Left rear — stantly generates heat inside the 145 mm cookware. Left front — 210 mm Cookware material •... -
Page 13: Hob - Care And Cleaning
ENGLISH Heat Use to: Time Hints set- ting Simmer rice and milkbased 25-50 Add the minimum twice as dishes, heating up ready-cooked much liquid as rice, mix milk meals dishes part procedure through Steam vegetables, fish, meat 20-45 Add some tablespoons of liq- Steam potatoes 20-60 Use max. -
Page 14: Control Panel
14 www.electrolux.com 8.1 Control panel Num- Button Function Description Display Shows current settings of the oven. – Setting buttons To set the value for the temperature and time. Selection/ To move between the oven functions and Clock function clock functions. -
Page 15: Switching The Appliance On
ENGLISH Number Name Description Temperature/Clock Shows the temperature and the time in mi- indicator nutes. Core temperature Core temperature sensor is in the core temper- sensor indicator ature sensor socket. Keep warm indicator Shows that keep warm function is active. Cooking time/End Shows the time setting for clock functions. -
Page 16: Switching Off The Oven
16 www.electrolux.com Oven function Application Low Temperature To prepare very lean, tender roasted food. Cooking Thermal Grill To roast larger joints of meat or poultry on one shelf position. To brown. Dual Circuit Grill To grill flat food in large quantities. To toast bread. -
Page 17: Cooling Fan
ENGLISH 8.10 Cooling fan When the appliance operates, the cooling fan switches on automatically to keep the surfaces of the appliance cool. If you switch off the appliance, the cooling fan continues to operate until the appliance cools down. If there is a fault in the cooling fan, contact the customer service. - Page 18 18 www.electrolux.com Remove the core temperature sensor Deactivate the appliance plug from the socket and remove the meat from the oven. WARNING! The core temperature sensor is hot! There is a risk of burns! Be careful when you remove the tip and the plug of the core tempera- ture sensor.
- Page 19 ENGLISH To grill flat dishes in large quantities and to toast: Put the roasting pan grid in the deep roasting pan. The supports of the roasting pan grid must point down. Put the deep roasting pan in the ap- pliance and on the necessary shelf level.
-
Page 20: Oven - Clock Functions
20 www.electrolux.com 9. OVEN - CLOCK FUNCTIONS SYM- FUNCTION DESCRIPTION Minute Minder To set a countdown (max. 99 minutes). This func- tion has no effect on the operation of the appli- ance. Duration To set how long the appliance has to be in oper- ation. -
Page 21: Top Oven
ENGLISH The temperature and baking times ature, cooking times) and shelf levels to in the tables are guidelines only. the values in the tables. They depend on the recipes, qual- • With longer baking times, the oven can ity and quantity of the ingredients be switched off about 10 minutes be- used. - Page 22 22 www.electrolux.com Baking results Possible cause Remedy Oven temperature too Set a lower oven temperature and Cake does not high and baking time a longer baking time brown equally too short Cake does not No equal mixture Put the mixture equally on the bak-...
- Page 23 ENGLISH Approx Cook Temperature Food Shelf Position Time [°C] (mins) Fruit Pies, Crum- 190 - 200 30 - 50 bles Milk Puddings 150 - 170 90 -120 Pasta Lasagne 170 - 180 40 -50 etc. Pastry: Choux 180 - 190 30 - 40 Pastry: Eclairs, 180 - 190...
- Page 24 24 www.electrolux.com Approx Cook Temperature Food Shelf Position Time [°C] (mins) Cakes: Sponges 170 - 180 20 - 25 Cakes: Madeira 150 - 160 60 - 80 Cakes: Rich Fruit 140 - 150 120 - 150 Cakes: Christmas 140 - 150...
- Page 25 ENGLISH Approx Cook Temperature Food Shelf Position Time [°C] (mins) Cakes: Apple Pie 160 - 170 50 - 60 - Shortbread 1 – 3 130 - 150 45 - 60 Fish 160 - 180 30 - 40 Fruit Pies, Crum- 170 - 180 30 - 50 bles...
- Page 26 26 www.electrolux.com 10.12 Thermaflow or Conventional Cooking (if available) Roasting Meat Temperature [°C] Cooking Time Beef/Beef boned 20-35 minutes per 0.5 kb (1 170 - 190 lb) and 20-30 minutes over Mutton/Lamb 20-35 minutes per 0.5 kb (1 170 - 190...
- Page 27 ENGLISH Food Grill Time (min) Chops - Lamb 15 - 25 Chops - Pork 20 - 25 Fish - Whole/Trout/Makarel 10 - 12 Fillets - Plaice/Cod 4 - 6 Kebabs 12 -18 Kidneys - Lamb/Pig 6 - 10 Sausages 20 - 30 Steaks: Rare 4 - 6 Steaks: Medium...
- Page 28 28 www.electrolux.com Food Shelf Posi- Temperature Quantity [kg] Time (min) tion [°C] Veal: Knuckle 1.5-2 160 -180 120 - 150 of veal Lamb: Roast lamb, leg of 1-1.5 150 -170 75 - 120 lamb Lamb: Saddle 1-1.5 160 -180 60 - 90...
- Page 29 ENGLISH Temperature at centre Type of meat Shelf of meat Neck fillets 75-80 70-75 Poultry Temperature at centre Type of meat Shelf of meat Turkey breast 75-80 Put the meat in a roasting dish or di- 10.19 Low temperature cooking rectly on the oven shelf.
-
Page 30: Oven - Care And Cleaning
30 www.electrolux.com Preparation time total (mins) Type of Pink (me- Weight g Setting Shelf Red (rare) meat dium) Tenderloin of pork, 500-700 120°C 65-75 whole Tenderloin of pork, 2,5 cm high 120°C 35-45 sliced • Do not cover with a plate or bowl. This 10.21 Defrosting... -
Page 31: Removing The Shelf Supports
ENGLISH Stainless steel or aluminium • Set the Conventional Cooking function. appliances: • Set the oven temperature to 250 °C Clean the oven door with a wet and let oven operate for 1 hour. sponge only. Dry it with a soft •... -
Page 32: Oven Lamp
32 www.electrolux.com 11.3 Cleaning the top oven glass panels The door glass on your product can be different in type and shape from what you see in diagrams. The number of glasses can be dif- ferent. Removing the glass: Open the door. -
Page 33: What To Do If
ENGLISH 12. WHAT TO DO IF… WARNING! Refer to the Safety chapters. Problem Possible cause Remedy The appliance does not The fuse in the fuse box Control the fuse. If the operate is released fuse is released more than one time, refer to a qualified electrician. -
Page 34: Installation
34 www.electrolux.com Problem Possible cause Remedy The display shows an er- There is an electronic • Deactivate the appli- ror code that is not in this fault ance with the house list fuse or the safety switch in the fuse box and activate it again •... -
Page 35: Technical Data
ENGLISH 13.1 Technical Data Minimum distances Dimensions Dimen- sion Height 894 – 912 mm Width 599 mm Depth 600 mm Top oven capaci- 40 l 13.3 Levelling Main oven ca- 74 l Use small feet on the bottom of appliance pacity to set the appliance top surface level with other surfaces. -
Page 36: Electrical Installation
36 www.electrolux.com 13.4 The anti-tilt protection WARNING! You must install the anti-tilt pro- tection (A+B). If you do not install it, the appliance can tilt. Before you install the anti-tilt pro- tection, adjust the appliance to the correct height. The anti-tilt protection has two compo- nents (A+B). -
Page 37: Great Britain & Ireland - Guarantee/Customer Service
United Kingdom. • Appliances found to be in use within a commercial environment, plus those We, Electrolux, undertake that if within 12 which are subject to rental agreements. months of the date of the purchase this Electrolux appliance or any part thereof is •... -
Page 38: European Guarantee
Depart- poses) ment, below: Electrolux 08445 613 613 Electrolux Group (Irl) Ltd, Long Mile Road, Dublin 12, Republic of Ireland AEG- 08445 611 611 Tel: +353 (0)1 4090751, Email: serv- Electrolux ice.eid@electrolux.ie... - Page 39 Mägenwil Slovenija +38 61 24 25 731 Gerbičeva ulica 110, 1000 Ljubljana Slovensko +421 2 32 14 13 34-5 Electrolux Slovakia s.r.o., Electrolux Domáce spotrebiče SK, Galvaniho 17/ B, 821 04 Bratislava Suomi 030 600 5200 Lankapuhelinverkosta 0,0828€/puhelu+0,032€/min Matkapuhelinver- kosta 0,192€/min...
-
Page 40: Environment Concerns
40 www.electrolux.com Россия 8-800-200-3589 129090 Москва, Олимпийский проспект, 16, БЦ "Олимпик" Україна +380 44 586 20 60 04074 Київ, вул.Автозаводська, 2а, БЦ "Алкон" 17. ENVIRONMENT CONCERNS Recycle the materials with the symbol and electronic appliances. Do not dispose . Put the packaging in applicable appliances marked with the symbol containers to recycle it. - Page 41 ENGLISH...
- Page 42 42 www.electrolux.com...
- Page 43 ENGLISH...
- Page 44 www.electrolux.com/shop...
Need help?
Do you have a question about the EKI6762AOX and is the answer not in the manual?
Questions and answers
How do you remove the top oven door of the EKI6762AOX Model ID 948904049-02 to replace the hinge?
What does E7 mean