Table of Contents
Advertisement
Advertisement
Table of Contents

Related Manuals for Avermedia A825 MediaCenter


Summary of Contents for Avermedia A825 MediaCenter
- Page 1 AVer MediaCenter User Manual...
- Page 2 COPYRIGHT © 2008 by AVerMedia TECHNOLOGIES, Inc. All rights reserved. No part of this publication may be reproduced, transmitted, transcribed, stored in a retrieval system, or translated into any language in any form by any means without the written permission of AVerMedia TECHNOLOGIES, Inc.
-
Page 3: Table Of Contents
Table of Contents Chapter 1 Introduction ................. 1 Device Introduction......................2 System Requirements..................... 3 Activating AVer MediaCenter ..................3 Overview of AVer MediaCenter ..................4 The Main Screen ........................4 The Main Control Buttons ......................5 Navigation Tree......................... 6 ... - Page 4 Deleting a Channel........................29 Changing the Radio Channel Order ..................30 Recording a Radio Program Directly..................30 Playing a Recorded Radio Program ..................31 Setting the Audio Mode (Only Available for FM Radio) ............31 Video ..........................
- Page 5 Configure FM Radio Recording / Configure Digital Radio Recordings......... 58 Video Settings ....................... 59 Picture Settings ......................60 About ..........................61 Appendix ..................... 62 Hot Keys ..........................63 Glossary ..........................64 Satellite Internet Access ......................66 Universal DVB Plug-in......................
-
Page 6: Introduction
Chapter 1 Introduction Thanks for purchasing AVer MediaCenter. This powerful application allows you to watch TV, listen to the radio, create slide shows, record favorite programs and enjoy other features on your PC. With our easy-to-use remote control, you can enhance your PC experience. -
Page 7: Device Introduction
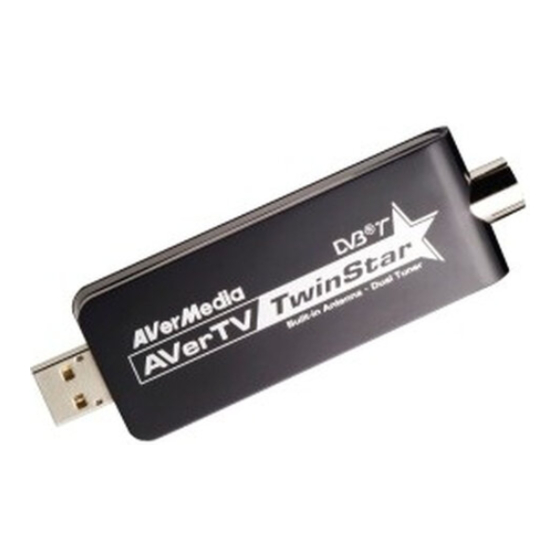
Device Introduction Thanks for purchasing AVerMedia’s product. Please be noted that the functions or the remote control mentioned in this manual may vary depending on the product you purchase and the area you live. AVerTV TwinStar Product Name A825 Model No. -
Page 8: System Requirements
Intel® Core™2 Duo E6600 1G RAM or above Activating AVer MediaCenter To run the application, click Start, point to Programs, choose AVerMedia, select AVer MediaCenter and then click AVer MediaCenter. Another way is to double-click the AVer MediaCenter program icon “ ”on the desktop. -
Page 9: Overview Of Aver Mediacenter
Overview of AVer MediaCenter After running the software, the main screen of AVer MediaCenter appears, which includes “TV”, “Radio”, “Video”, “Music”, “Pictures” and “Settings”. This section briefly introduces main menu, sub menus and setting items. For more details, please refer to Chapter 2. The Main Screen Description Title bar... -
Page 10: The Main Control Buttons
The Main Control Buttons Description Go back the main menu Go back one level Open user manual Minimize the application Restore the previous size Exit the application Description Switch from real-time TV or Radio to TimeShift mode. / Freeze the playback temporarily. Stop the playback, recording, TimeShift, etc. -
Page 11: Navigation Tree
Navigation Tree Note: The items may vary depending on the product you use and the area you live. Remote Control The remote control supports all the features of AVer MediaCenter. To use, just point the remote control at the receiver, and press button. Introduction... -
Page 12: Overview Of The Remote Control (Model 1)
◎ MCE Remote Function: The remote control is compatible with Microsoft Media Center Edition. To use the function, please go to our website to download the support software. Overview of the Remote Control (model 1) Button Description Turn on/off the application. Set the time to put your computer into Standby/Hibernate mode, exit the application or turn off the computer. -
Page 13: Overview Of The Remote Control (Continued)
Overview of the Remote Control (continued) Button Description Switch to different aspect ratios (4:3, 16:9, (18) Full Screen, Keep Aspect Ratio). Switch to live TV source in full screen. (19) PIP Mode: Turn on/off the PIP-sizing (20) function. When enabled, you can enlarge or shrink the selected screen using the arrow buttons. -
Page 14: Overview Of The Remote Control (Model 2)
Overview of the Remote Control (model 2) Button Description Turn on/off the application. Turn off/on the sound. Use numeric buttons to select a channel. Display TV in full screen. Change between available audio modes. Main Screen: Use the arrow button to navigate all on-screen items. -
Page 15: Overview Of The Remote Control (Continued)
Overview of the Remote Control (continued) Button Description Skip forward in intervals. (16) - Go to the next item in the playlist. (17) - Set the time to put your computer into Stand By / Hibernate mode, exit the application or turn off the computer. (This function is only available for AVerTV 6) Stop the playback, recording, TimeShift,... -
Page 16: Overview Of The Remote Control (Model 3)
Overview of the Remote Control (model 3) Button Description 1. SOURCE Switch between available signal sources. 2. FULL SCREEN Display TV in full screen. 3. ● (Record) Switch to PVR mode and record the current program or video into your hard drive. -
Page 17: Running Aver Mediacenter For The First Time
Running AVer MediaCenter for the First Time When you run the AVer MediaCenter for the first time, a set up wizard will automatically appear and take you through all the necessary settings step by step. When a dialog box appears, click Yes. Choose the primary device or tuner for watching TV or listening to the radio and then select Next (as shown on the right). - Page 18 After finishing all settings, select Finish. Select Next to continuously set up other device if any. If you want to re-configure all the settings again, go the main page and select “Select” “General” “Run Wizard Again.” Introduction...
-
Page 19: Getting Started
Chapter 2 Getting Started This Chapter will start with the basic usage of AVer MediaCenter, including scanning programs, playing music, recording a TV/ Radio program, and so on. Before using the application, it is necessary to understand all the basic operations in this chapter. -
Page 20: Scanning Tv Channels
Under the TV main menu, you can enjoy watching TV, record your favorite program and so on. Scanning TV Channels If you didn’t run the setting up wizard, a dialog box will appear to prompt you to scan for channels when selecting the main menu “TV”. -
Page 21: Watching Live Tv
Watching Live TV You can enjoy analog TV, digital TV or both of them depending on what your product is. After scanning, go to the TV page and you can see a preview TV window in the right-hand section of the screen. To switch the preview mode to the full-screen mode, select Live. -
Page 22: Adjusting Volume
Adjusting Volume To increase or decrease volume when watching TV, press on the remote control or click on the control panel. To disable the sound of the program, press on the remote control or click on the control panel. Press the same button again to turn on the sound. -
Page 23: Fine Tuning Color And Quality Of The Display
Fine Tuning Color and Quality of the Display If the color and quality of a particular channel needs to be adjusted, please do the following. Select “Settings” “TV” “Configure Analog TV” or “Configure Digital TV” “Manage Programs” Select the desired channel. Select in the bottom-right of the screen to go to the second page. -
Page 24: Deleting A Channel
Deleting a Channel If you want to exclude undesirable channels from your channel list, do the following: Select “Settings” “TV” “Configure Analog TV” or “Configure Digital TV” “Manage Programs”. Select the unwanted channel. Choose . This channel will be removed and that means you won’t be able to access these programs anymore. -
Page 25: Editing The Channel Group Table
Editing the Channel Group Table To add or remove channels from the channel group, do the following: Select “Settings” “TV” “Configure Analog TV” or “Configure “Manage Programs” Digital TV” “Group Setting”. The default and the first channel Note group* are listed in the Group Setting table. -
Page 26: Managing The Channel Groups
Managing the Channel Groups Channel groups are used to organize and group channels that suit your needs. To manage your channel groups, do the following: Select “Settings” “TV” “Configure Analog TV” or “Configure “Manage Programs” Digital TV” “Group Setting” “Modify”. If you want to create a new channel group, select Add. - Page 27 The first channel group will be shown in the Group Setting table. Getting Started...
-
Page 28: Using Overscan Function
Using OverScan Function On some broadcast channels, you might see distorted lines or black spaces on the top, sides, or bottom of the screen. These video artifacts derive from the source signal, and can be masked using the OverScan feature. Select “Settings”... -
Page 29: Capturing Images
Capturing Images While you watch TV or recorded video from your PC monitor, you can use the application to capture images for your document, presentation or web page. Select “TV”. Press on the remote control or select on the control panel to capture a still image. To capture another image, press that button again. -
Page 30: Viewing Teletext Information (Available For Pal / Secam Or Dvb-T System)
Viewing Teletext Information (Available for PAL / SECAM or DVB-T System) Teletext makes TV viewing a unique experience. It allows you to view teletext broadcasts from your television programs to get the most updated information on TV Schedules, News, Stock Market Prices, Concert & Theatre information and so on. - Page 31 Select the desired program. To record the program for future viewing, use Scheduling. To tune into the program for some time in the future, use Activate Live TV. to go back the EPG page. Select Search Programs to have the advance searching function.
-
Page 32: Radio
Radio If the product you purchase with radio function, then you can read this chapter to learn more knowledge about this. Scanning FM Radio Frequencies (Only available for FM Radio) If this is your first time running the application, a dialog box will appear to prompt you to scan for channels when selecting the main menu “Radio”. -
Page 33: Listening To The Radio
Listening to the Radio You can enjoy listening to the FM Radio, digital radio or both of them depending on what product you purchase. After scanning, go to the Radio page and you can see all available channels listed in the right-hand section of the screen. -
Page 34: Selecting A Radio Channel
Selecting a Radio Channel There are three ways of switching between radio channels: Use the numeric keys on the remote control to get your desired channel. Press the Channel Up/Down buttons ( on the remote control or on the Control Panel) repeatedly until reaching your desired channel. -
Page 35: Changing The Radio Channel Order
If you just want to skip a particular channel, do the following: Select “Settings” “Radio” “Configure FM Radio” or “Configure Digital Radio” “Manage Programs”. Choose the unwanted channel and clear the check box. Changing the Radio Channel Order You may change the sequence of channels as you prefer. Select “Settings”... -
Page 36: Playing A Recorded Radio Program
Playing a Recorded Radio Program Select “Radio” “Recorded Files”. All the recorded files are listed here. You can view those files by date, title or status. Choose the desired file. Select Play. To temporarily pause the playback, select To stop the playback, select Setting the Audio Mode (Only Available for FM Radio) The application will automatically set each FM radio channel to Mono or Stereo based on the audio mode of the FM radio signals received. -
Page 37: Video
Video With this function, you can view recorded programs or other video files. Playing Video Files Select “Video”. You may see some recorded video files are listed on the right hand section of the screen. Or you can select More Videos to choose other folders. -
Page 38: Music
Music You can create your music library and enjoy music with our AVer MediaCenter. Adding Music to your Playlist Add your favorite music to AVer MediaCenter music playlist and then you can playback music from the playlist next time. Select “Music” “Add Music”... -
Page 39: Playing Music
Playing Music To playback music: Select “Music”. Enable Sequential to play tracks in order or Random to shuffle the order. To continue playing all the tracks, select Loop check box. to determine the order of the tracks in your playlist. Then select to start to listen to the music. -
Page 40: Pictures
Pictures In this section, we introduce methods to view your pictures and play a slide show. Viewing the Captured Images Select “Pictures”. The captured thumbnails are displayed in the right-hand section. By clicking on the thumbnails, you can view images in a full-screen window. Select More Pictures to find the folder that contains the desired pictures if your images are not saved in the default folder. -
Page 41: Chapter 3 Advanced Operations
Chapter 3 Advanced Operations Beyond basic usage, what else you can do with AVer MediaCenter? In this chapter, we take you to the next level and explain the advanced features of this application. TV............38 Radio ............41 Video ............44... -
Page 42: Using Schedule Recording
Using Schedule Recording You may need to record a program for some time in the future, first go to the TV page, select Schedule Recording and then select New Schedule. Choose the appropriate device. For instance, if you want to record digital TV program, you should choose the device that can receive digital signals. - Page 43 Next, determine the signal source and channel. In the Task Period, you can set the schedule once or on a daily/weekly basis. Determine the file format and recording duration. This application lets you to divide the recording files into parts for burning onto removable optical media, such as CD (650 MB) and DVD (4096 MB) discs.
-
Page 44: Using Timeshift
Using TimeShift The TimeShift function performs background recording of a program, and lets you return to any part of the recorded program. At the same time, the live program continues to be recorded and played back so you won’t miss any part of the show. You can also advance forward to skip commercials or rewind to replay scenes again. -
Page 45: Multi-Channel Display (Only Available For Multi-Card/Dual Tuner Series Users)
Multi-Channel Display (Only Available for Multi-Card/Dual Tuner Series Users) When you install two or more TV tuner cards or devices in the computer, this function allows you to watch many channels at the same time. Select “TV”. On this page, press on the remote control or use on the control panel. -
Page 46: Multi-Program Display (Only Available For Digital Tv)
(PBP Mode) Under PIP mode, to change size of the PIP screen, first press on the remote control. Then use to shrink the image or use to enlarge the image. To exit the PIP-sizing mode, press again. Multi-Program Display (Only Available for Digital TV) In the digital terrestrial field, a single channel (frequency) is able to carry more than one TV program at the same time. - Page 47 To display all available TV signals simultaneously, select Live. Select repeatedly to switch between Full screen mode, PIP mode and PBP mode (as shown on the right). (Full Screen Mode) To switch and listen to the sound of another TV signal, simply use the arrow button to select the PIP/PBP screen.
-
Page 48: Radio
Radio Using Schedule Recording You may need to record a program for some time in the future, first go to the Radio page, select Schedule Recording and then select New Schedule. Choose the appropriate device. For instance, if you want to record digital radio program, you should choose the device that can receive digital signals. - Page 49 Next, determine the signal source and channel. In the Task Period, you can set the schedule once or on a daily/weekly basis. Determine the file format and recording duration. This application lets you to divide the recording files into parts for burning onto removable optical media, such as CD (650 MB) and DVD (4096 MB) discs.
-
Page 50: Using Timeshift
Using TimeShift You can use the TimeShift function to perform background recording of a radio program and even replay. To start the TimeShift Function: Select “Radio”. Choose the desired channel to go to the next page. On this page, you can select Radio TimeShift , press on the remote control or select on the control panel. -
Page 51: Picture-In-Picture(Pip) / Picture-By-Picture(Pbp) Display
Video Picture-in-Picture(PIP) / Picture-by-Picture(PBP) Display With the PIP/PBP feature, you are able to playback recorded video files, and at the same time, watch live TV. Select “Video”. On this page, choose the desired file. Or select More Videos to find other video files. -
Page 52: Chapter 4 More Settings
Chapter 4 More Settings Before scanning channels, recording programs, or capturing images, check the settings page to see if they meet your needs. With our explanation in this chapter, you can easily customize all the settings of AVer MediaCenter. General Settings ........46 TV Settings .......... -
Page 53: General Settings
General Settings Here you can select the destination folder for saving recorded files, determine recording time and file size, assign the number of image you want to capture, setting the Windows power options, etc. Configure Storage Select “Settings” “General” “Configure Storage”... -
Page 54: Configure Snapshot
Configure Snapshot Select “Settings” “General” “Configure Snapshot”. In the Number of Pictures box, assign the number of images that you want to capture. In the Interval Time box, specify the interval between captures. For instance, if you specify 10 seconds, an image will be captured every 10 seconds. -
Page 55: Video Device (Only Available For Multi-Card / Dual Tuner Series Users)
“Multi-Channel Display” in chapter 3) Select Save to save the settings or select Cancel to abort without saving. To find out if your AVerMedia product supports multi-card feature, please refer to AVerMedia’s website. More Settings... -
Page 56: More Options
More Options This page allows you to set the power mode. Then you can put your computer in Stand By, Hibernate or other modes while you are away from the computer. Select “Settings” “General” “More Options”. You can select the UI language you want from the Language drop-down list. -
Page 57: Tv Settings
TV Settings All TV setting tips are included within this section. Configure Analog TV / Configure Digital TV Configure TV Signal Select “Settings” “TV” “Configure Analog TV” or “Configure Digital TV” “Configure TV Signal”. If you choose “Configure Analog TV” in steps 1, you need to determine the signal type: Antenna or Cable. - Page 58 to select the desired Input. From the Satellite drop down list, select the corresponding satellite or select None to create satellite information. If you select None in step 5, you need to click Edit to enter the setting page. There are two options on the next page: Import : You can import any satellite channel data (*.sdx) downloaded from the...
-
Page 59: Manage Programs
Next, go back to the satellite page and select Edit to configure the LNB information. (For details about the LNB, please refer to the documentation that comes with your LNB device.) On this page, you need to determine the frequency type, input range, local oscillator frequency and polarization. -
Page 60: Configure Recording
Chapter 2. Configure Analog TV / Configure Digital TV Configure Recording Select “Settings” “TV” “Configure Analog TV” or “Configure Digital TV” “Configure Recording”. Choose the default file format from the Record Format drop-down list. Some formats allow you to select Edit to create your own file format. -
Page 61: Configure Color Adjustment
Configure Analog TV / Configure Digital TV Configure Color Adjustment Select “Settings” “TV” “Configure Analog TV” or “Configure Digital TV” “Configure Color Adjustment”. Then use to adjust the Brightness, Contrast, Hue, Saturation and Sharpness until the image color is accurate. To adjust the color of all channels at a time, select Apply All check box. -
Page 62: Radio Settings
Radio Settings This section gives you more setting properties when you listening to the radio. Manage FM Radio Programs / Manage Digital Radio Programs Select “Settings” “Radio” “Configure FM Radio” or “Configure “Manage Programs”. Digital Radio” Select All Frequency Scan when there are channels missing from the channel memory. -
Page 63: Configure Fm Radio Recording / Configure Digital Radio Recordings
Configure FM Radio Recording / Configure Digital Radio Recordings Select “Settings” “Radio” “Configure FM Radio” or “Configure “Configure Digital Radio” Recording”. Choose the record format from the drop down list. If you choose the WMA record format in step 2, you can click the Edit icon to choose the preferred type of Window Media formation. -
Page 64: Video Settings
Video Settings Select “Settings” “Video”. Use the default folder for saving the recorded video file. Or select to look for your desired folder. On the next page, you can use to go up one level to find other folders or select Change Disk to choose other hard drives. -
Page 65: Picture Settings
Picture Settings Before you start playing slide show, first check its settings to see if they fit your needs. Select “Settings” “Picture”. From the Play Settings drop-down list, select Sequential to play a slide show in order or select Random to shuffle the order. -
Page 66: About
About The AVerTV application provides a convenient tool, which allows users to ask questions via AVerMedia’s website easily. Select “Settings” “About”. Make sure you have accessed to the Internet and then click Product Information to access the product information webpage. Or you can click Technical Support to connect to our technical support webpage. -
Page 67: Appendix
Appendix More tips and explanations are included in this chapter. Hot Keys ............63 Glossary............64 Satellite Internet Access ......66 Universal DVB Plug-in........69 Video Gaming Plug-in .........70 Video Quality Enhancement Plug-in..71 Common Interface for Conditional Access 73... -
Page 68: Hot Keys
Hot Keys Hot Keys Description Up/Down/Left/Right Move up, down, left or right to select the desired item. arrow Move to next item. Numeric keys Use NUMERIC KEYS to directly enter the TV/Radio channel number. Space Confirm the selected tracks or folders when under the main menu -Music. Page Up/Down Channel Up / Channel Down Open the user manual. -
Page 69: Glossary
Glossary Hibernate AVI is the most common video file format for Hibernation is a state in which your computer shuts playback on the computer. It can be saved in down to save power but first saves everything in uncompressed form if you want high quality video, memory on your hard disk. - Page 70 disks turn off, so that your computer uses less power. SVCD When you choose this format, the recorded video file will be saved in MPEG-2 format that is compliant with SVCD standards. Standard SVCD frame size and frame rate are 480 x 480 pixels at 29.97 fps for NTSC and 480 x 576 at 25 fps for PAL.
-
Page 71: Satellite Internet Access
Satellite Internet Access Satellite Internet Access allows users to get faster connection to the internet via satellite. Simply follow the steps below: If you are using one specific satellite service to watch satellite TV and access to the internet, click Insert > Import to apply the existing satellite data from AVerTV 6.0 or AVer MediaCenter and you may skip step 1 to 4. - Page 72 Different lamp indicates different status: ․Dark Red indicates your satellite configuration is at wrong setting. ․Dark Green indicates the satellite signal is available but no Internet data transmission occuring that time. ․Light Green indicates you have connected to the Internet successfully. Click Advance to customize the Satellite Internet Access.
- Page 73 Q : Should I pay for Satellite Internet Access? A : The charge for the service will be mainly determined by your Internet Service Provider (ISP). For details about the fee rate, please contact your ISP. Q : Why can’t I activate Satellite Internet Access? A : You cannot activate AVerTV 6.0/AVer MediaCenter and Satellite Internet Service at the same time so please make sure you have already exited the AVerTV 6.0/ AVer MediaCenter.
-
Page 74: Universal Dvb Plug-In
Universal DVB Plug-in Some devices (such as ) are shipped with a AVerTV Satellite PCI / AVerTV Satellite Hybrid + FM “Universal DVB” plug-in program for Windows XP or Vista Media Center Edition (MCE), providing you to watch or record DVB-S programs directly under MCE UI. Appendix... -
Page 75: Video Gaming Plug-In (For Microsoft Vista Mce Only)
Video Gaming Plug-in (for Microsoft Vista MCE only) MCE “Video Gaming Plug In” support is for Vista MCE only. After installing the driver, you can access it through the program library in Online Media. This function enables you to watch composite/S-Video signal source or play games in Vista MCE platform. -
Page 76: Video Quality Enhancement Plug-In (For Microsoft Vista Mce Only)
Video Quality Enhancement Plug-in (for Microsoft Vista MCE only) MCE “Video Quality Enhancement Plug-in” support is for Vista MCE only. After installing the driver, you can access it through the program library in Online Media. This function enables you to adjust the Brightness, Contrast, Hue, Saturation and Sharpness until the image color is accurate. - Page 77 Use the following buttons to adjust the value of the item. • • Decrease Brightness and Hue values by 32. • • Decrease Contrast and Saturation values by 16. • • Decrease Sharpness value by 8. • • Decrease Brightness and Hue values by 16. •...
-
Page 78: Common Interface For Conditional Access
Common Interface for Conditional Access The AVerTV device with CI/CA enables you to watch DVB-S scrambled pay channels when you have a subscription SmartCard and an appropriate CAM (Conditional Access Module). How many scrambled channels you can watch will vary depending on the SmartCard you purchase. Install the AVerTV device, SmartCard and CAM. - Page 79 2. The messages in the Common Interface dialog will vary depending on the smartcard you purchase. 3. If you insert CAM and SmartCard into the CI Card Reader after you go to the TV page, you may need to restart the application to enable the CI/CA function. www.avermedia.com Appendix...
Need help?
Do you have a question about the A825 MediaCenter and is the answer not in the manual?
Questions and answers